Inhaltsverzeichnis
Werbung
Verfügbare Sprachen
Verfügbare Sprachen
Notice de montage
FR
Illustrations
Pièces de rechanges
Instrucciones de montaje
ES
Ilustraciónes
Erhältliche Varianten | Available versions
Version disponible | Varianti disponibili
Variantes disponibles
© Copyright by MULTIPLEX Modellsport GmbH & Co. KG 2018
www.modellmarkt24.ch;
www.modellmarkt24.ch;
6 - 8
Assembly instructions
EN
26 - 29
Illustrations
30 - 31
Replacement parts
22 - 24
Istruzioni di montaggio
IT
26 - 29
Illustrazioni
30 - 31
Parti di ricambio
44 - 46
26 - 29
30 - 31
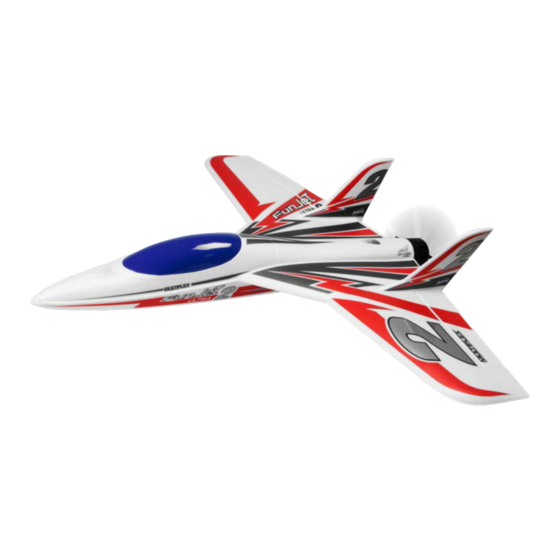
FunJet 2
# 1-00980
# 1-01029
www.modellmarkt24.de
www.modellmarkt24.de
FunJet ULTRA 2
FunJet ULTRA 2
# 1-00981
# 1-01030
14 - 16
26 - 29
30 - 31
36 - 38
26 - 29
30 - 31
Werbung
Inhaltsverzeichnis

Verwandte Anleitungen für Multiplex FunJet 2


Inhaltszusammenfassung für Multiplex FunJet 2
-
Seite 1: Inhaltsverzeichnis
Erhältliche Varianten | Available versions FunJet 2 FunJet 2 FunJet ULTRA 2 FunJet ULTRA 2 Version disponible | Varianti disponibili # 1-00980 # 1-01029 # 1-00981 # 1-01030 Variantes disponibles © Copyright by MULTIPLEX Modellsport GmbH & Co. KG 2018 www.modellmarkt24.ch; www.modellmarkt24.ch; www.modellmarkt24.de www.modellmarkt24.de... -
Seite 2: Sicherheitshinweise Für Multiplex-Flugmodelle
Auch wenn das Modell vorschriftsmäßig und unter Beachtung aller Sicherheitsaspekte betrieben wird, besteht immer ein Restrisiko. Die Multiplex Modellsport GmbH & Co. KG ist nicht haftungsplichtig für Verluste, Beschädigungen und Folgeschäden jeder Art, die aufgrund Eine Haftplichtversicherung (Modelllugzeug mit Antrieb) ist daher falschen Betriebs, nicht bestimmungsgemäßer Verwendung oder... -
Seite 3: Sicherheitshinweise Für Multiplex-Bausätze
Die Anleitungen unserer Produkte dürfen nicht ohne aus- terialversagen und Abstürzen führen. drückliche Erlaubnis der Multiplex Modellsport GmbH & Co. KG (in schriftlicher Form) - auch nicht auszugsweise in Print- oder • Feuergefahr durch Fehlfunktion der Elektronik: Akkus sind sicher elektronischen Medien reproduziert und / oder veröffentlicht... -
Seite 4: Zubehör Und Werkzeug
• Dorn Ø 4-5 mm oder eine kleine Rundfeile • Propeller-Wuchtgerät # 33 2355 • 10er Gabelschlüssel • eventuell Aktivatorspray für CA-Kleber • Heißklebepistole Antriebsempfehlung • Antriebssatz FunJet 2 • Antriebssatz FunJet ULTRA 2 # 1-00961 # 1-00962 Inhalt: Inhalt: Motor:... - Seite 5 Befestigungsgurt für Akku Kunststoff 20 x 200 mm Kabelsicherung Kunststoff Fertigteil Die Versionen beinhalten folgendes zusätzliches Zubehör: FunJet 2 KIT + #1-01029 FunJet ULTRA 2 KIT + #1-01030 Stück Bezeichnung Antriebssatz # 1-00961 # 1-00962 Servos HS-65 HB # 11 2065 # 11 2065 Verlängerungskabel 15cm...
-
Seite 6: Bauanleitung
Bauanleitung Vor dem Bau 6. Außenflügel mit Innenteil verkleben Prüfen Sie den Inhalt Ihres Baukastens. Dazu ist die Abb. 01 + 02 Außenteile anpassen und mit Zacki ELAPOR verkleben. Das Servokabel ® und die Stückliste hilfreich. verlegen. Die Kabelkänäle mit klarem Klebeband verschließen. Auch im Rumpf die Servokabel festlegen, damit sie später beim Akkuwechsel nicht stören. - Seite 7 Bauanleitung 12. Motoreinbau und Befestigung Fixierung des Antriebsakkus: Den Akku zunächt auf der Unterseite an der richtigen Position ixieren. Den Motorspanthalter probehalber auf den Rumpf stecken Skala Eine Seite des Befestigungsgurtes auf der Akkuoberseite am Velour nach unten), wenn alles passt, mit Zacki ELAPOR auf dem Rumpf „einhängen“, den Gurt strammziehen und endgültig ankletten.
- Seite 8 Bauanleitung 19. Auswiegen-Schwerpunkt Um stabile Flugeigenschaften zu erzielen, muss Ihr FunJet ULTRA, wie jedes andere Flugzeug auch, an einer bestimmten Stelle im Gleichgewicht sein. Montieren Sie Ihr Modell lugfertig und setzen den Antriebsakku ein. Auf der Unterseite der Tragläche sind halbkugelförmige Markierungen angebracht.
-
Seite 9: Kleinteilsatz
Teile Abb. 01 Kleinteilsatz Abb. 02 ⓴ www.modellmarkt24.ch; www.modellmarkt24.ch; www.modellmarkt24.de www.modellmarkt24.de... - Seite 10 Third-party liability insurance (powered model airplane) is therefore mandatory. If you are a member of a group or association, you might be Multiplex Modellsport GmbH & Co. KG is not liable for loss, damage able to take out the appropriate insurance there.
- Seite 11 Familiarize yourself with the construction kit! white glue, polyurethane or epoxy are not possible. These glues only stick MULTIPLEX model kits are subjected to constant material inspection supericially and may peel off in severe cases. Only use cyanoacrylate/ during production. We hope that you are satisied with the contents of the...
- Seite 12 • Propeller balancer # 33 2355 • 10 mm open-ended wrench • Possibly accelerator spray for CA adhesive • Hot glue gun Power recommendation • Power kit FunJet 2 • Power kit FunJet ULTRA 2 # 1-00961 # 1-00962 Contents: Contents:...
- Seite 13 Fastening strap for battery Plastic 20 x 200 mm Cable protection Plastic Finished component The versions contain the following additional accessories: FunJet 2 KIT + #1-01029 FunJet ULTRA 2 KIT + #1-01030 Qty. Name Power kit # 1-00961 # 1-00962 Servos HS-65 HB...
- Seite 14 Assembly instructions Before assembly 6. Gluing the outer wings to the inner section Check the contents of the kit. The Fig. 01 + 02 and the parts list are Adjust the external parts and glue into position with Zacki ELAPOR ®...
- Seite 15 Assembly instructions 12. Installing and fastening the motor Fixing the drive battery: Initially ix the battery at the correct position on the underside. Hook one Place the bulkhead holder on the fuselage for test purposes (scale side of the fastening strap on the top of the battery to the velour, tighten facing downward);...
- Seite 16 Assembly instructions 19. Determining the center of gravity In order to achieve stable light characteristics, your FunJet ULTRA, just like any other aircraft, must be in equilibrium at a certain position. Assemble your model, making sure it is ready to ly, and insert the drive battery.
- Seite 17 Components Fig. 01 Set of small parts Fig. 02 ⓴ www.modellmarkt24.ch; www.modellmarkt24.ch; www.modellmarkt24.de www.modellmarkt24.de...
- Seite 18 Un risque résiduel persiste même en cas d’utilisation conforme et de respect de toutes les consignes de sécurité. Multiplex Modellsport GmbH & Co. KG décline toute responsabilité en cas de perte, dommages et dommages consécutifs de toute nature, dus à une Raison pour laquelle vous devez obligatoirement souscrire une assurance utilisation erronée, à...
- Seite 19 Protégez l’électronique de l’eau. Laissez bien refroidir le Multiplex Modellsport GmbH & Co. KG. variateur et les batteries. Conseils de sécurité pour les kits de construction MULTIPLEX Familiarisez-vous avec le kit d’assemblage ! Les kits d’assemblages MULTIPLEX sont soumis pendant la production Ce modèle n’est pas réalisé...
-
Seite 20: Caractéristiques Techniques
# 33 2355 • Clé plate de 10 • Éventuellement activateur en aérosol pour colle instantanée • Pistolet à colle Motorisation recommandée • Kit de motorisation FunJet 2 • Kit de motorisation FunJet ULTRA 2 # 1-00961 # 1-00962 Contenu : Contenu :... - Seite 21 Plastique 20 x 200 mm Bride de câble Plastique Complet Les versions incluent les accessoires supplémentaires suivants : FunJet 2 KIT + Réf. 1-01029 FunJet ULTRA 2 KIT + Réf. 1-01030 Qté Désignation Kit de motorisation Réf. 1-00961 Réf. 1-00962 Servos HS-65 HB Réf.
-
Seite 22: Autres Préparatifs
Notice de montage Avant le montage 6. Collage des extrémités d’aile à la partie centrale Vériiez le contenu du kit. Aidez-vous pour cela des Fig. 01 + 02 Ajustez les extrémités d’aile avant de les coller à la colle Zacki ELAPOR ®... - Seite 23 Notice de montage 12. Pose et fixation du moteur Fixation de l’accu : Positionnez d’abord correctement l’accu sur sa face inférieure. Présentez pour essai la ixation du support moteur sur le fuselage et, « Accrochez » une face de la sangle sur la partie velours du haut de si elle s’engage correctement, collez-la sur le fuselage avec de la Zacki l’accu, serrez la sangle et mettez-la dans sa position déinitive.
- Seite 24 Notice de montage 19. Réglage du centre de gravité Comme sur tous les avions, la stabilité en vol de votre FunJet ULTRA dépend de son bon équilibrage. Assemblez complètement votre modèle et mettez l’accu en place. Sous l’aile, vous trouverez des marquages en forme de demi- sphère.
- Seite 25 Pièces Fig. 01 Jeu de fournitures Fig. 02 ⓴ www.modellmarkt24.ch; www.modellmarkt24.ch; www.modellmarkt24.de www.modellmarkt24.de...
-
Seite 26: Abbildungen
Abbildungen · Illustrations · Illustrazioni · Ilustraciónes Abb. / Fig. 03 Abb. / Fig. 04 Abb. / Fig. 05 Abb. / Fig. 06 Abb. / Fig. 07 Abb. / Fig. 08 Abb. / Fig. 09 Abb. / Fig. 10 www.modellmarkt24.ch; www.modellmarkt24.ch;... - Seite 27 Abbildungen · Illustrations · Illustrazioni · Ilustraciónes Abb. / Fig. 11 Abb. / Fig. 12 Abb. / Fig. 12a Abb. / Fig. 13 Abb. / Fig. 14 Abb. / Fig. 15 Abb. / Fig. 16 Abb. / Fig. 17 Controller Accu Rx www.modellmarkt24.ch;...
- Seite 28 Dekorplatzierung Decal positioning Placement des autocollants • • • Posizionamento decalcabili Colocación de la decoración • www.modellmarkt24.ch; www.modellmarkt24.ch; www.modellmarkt24.de www.modellmarkt24.de...
- Seite 29 Dekorplatzierung Decal positioning Placement des autocollants • • • Posizionamento decalcabili Colocación de la decoración • www.modellmarkt24.ch; www.modellmarkt24.ch; www.modellmarkt24.de www.modellmarkt24.de...
-
Seite 30: Ersatzteile
1-01023 Planche de décoration (FunJet ULTRA 2) A/B/C/D 1-01023 Decals (FunJet ULTRA 2) 1-01013 Fuselage avec des couvertures (FunJet 2) 1-01013 Fusoliera con la copertura (FunJet 2) 1-01019 Fuselage avec des couvertures (FunJet ULTRA 2) 1-01019 Fusoliera con la copertura... -
Seite 31: Repuestos
• A/B/C/D A/B/C/D FunJet 2: #1-01017 FunJet ULTRA 2: #1-01023 FunJet 2: #1-01013 FunJet 2: # 1-01016 FunJet 2: # 1-01014 FunJet ULTRA 2: #1-01019 FunJet ULTRA 2: # 1-01022 FunJet ULTRA 2: # 1-01020 ⓲ FunJet 2: # 1-01015... - Seite 32 AI 3 ANNI. PERICOLO DI ASFISSIA! rischio residuo. Multiplex Modellsport GmbH & Co. KG non è responsabile per perdite Quindi è obbligatorio stipulare un’assicurazione di responsabilità civile e danni di qualunque tipo che si vengono a creare come conseguenza (aeromodello con motorizzazione).
- Seite 33 GmbH & Co. KG. Istruzioni di sicurezza per i kit di montaggio MULTIPLEX Familiarizzare con il contenuto della scatola di montaggio! Questo modello non è in Styropor ™! Pertanto non è possibile Le scatole di montaggio per modelli MULTIPLEX vengono sottoposte incollare con colla vinilica, poliuretano o colla epossidica.
-
Seite 34: Dati Tecnici
# 33 2355 • Chiave piatta da 10 • event. spray attivatore per colla CA • Pistola per colla a caldo Motore consigliato • Set motorizzazione FunJet 2 • Set motorizzazione FunJet ULTRA 2 # 1-00961 # 1-00962 Contenuto: Contenuto:... - Seite 35 20 x 200 mm Morsetto cavo materiale plastico pezzo finito Le versioni contengono i seguenti accessori aggiuntivi: KIT FunJet 2 + 1-01029 KIT FunJet ULTRA 2 + 1-01030 Descrizione Kit motorizzazione 1-00961 1 -00962 Servo HS-65 HB 11 2065...
-
Seite 36: Istruzioni Di Montaggio
Istruzioni di montaggio Prima del montaggio 6. Incollaggio delle ali esterne alla parte interna della fusoliera Controllare il contenuto della scatola. A tale scopo, fare riferimento a Adattare le parti esterne ed incollarle con Zacki ELAPOR . Posare i cavi ®... - Seite 37 Istruzioni di montaggio “Agganciare” alla parte in velcro un lato della cinghia di issaggio sul 12. Montaggio del motore e fissaggio lato superiore della batteria, tirare e fare aderire deinitivamente. Fig. 17 Provare a inserire il supporto ordinata motore nella fusoliera (con L’esatta posizione deinitiva della batteria di volo viene determinata tramite la scala verso il basso) e, se tutto combacia, incollare sulla fusoliera con bilanciamento.
- Seite 38 Istruzioni di montaggio 19. Bilanciamento del punto centrale Per ottenere caratteristiche di volo stabili, il vostro FunJet ULTRA, come ogni altro aereo, deve essere bilanciato su un punto prestabilito. Montare il modello pronto per il volo ed inserire il pacco batteria. Sulla parte inferiore della supericie alare, ci sono delle marcature semisferiche.
- Seite 39 Pezzi Fig. 01 Kit minuteria Fig. 02 ⓴ www.modellmarkt24.ch; www.modellmarkt24.ch; www.modellmarkt24.de www.modellmarkt24.de...
- Seite 40 LOS NIÑOS MENORES DE 3 AÑOS DE EDAD. ¡PELIGRO DE ASFIXIA! seguridad, siempre existe un riesgo residual. Multiplex Modellsport GmbH & Co. KG no se responsabiliza por pérdidas, Un seguro de responsabilidad civil (modelo de aeroplano con propulsión) daños y perjuicios consecuentes de cualquier tipo resultantes de un es por lo tanto obligatorio.
- Seite 41 ¡Familiarícese con el kit de montaje! enlazar con pegamento, poliuretano o epoxi. Esos adhesivos son Los kits de modelo MULTIPLEX están supeditados a un control de material supericiales y pueden soltarse en caso grave. Utilice sólo pegamento de constante durante la producción. Esperamos que esté satisfecho con el cianocrilato/rápido de viscosidad media, preferiblemente Zacki- ELAPOR...
-
Seite 42: Datos Técnicos
• Dispositivo de hélice de equilibrado # 33 2355 • Llave plana no. 10 • Eventualmente spray activador para pegamento CA • Pistola termoselladora Accionamiento recomendado • Kit de propulsión FunJet 2 • Kit de propulsión FunJet ULTRA 2 # 1-00961 # 1-00962 Incluye: Incluye:... - Seite 43 Plástico 20 x 200 mm Fijación de cables Plástico Pieza prefabricada Las versiones incluyen las piezas siguientes: KIT FunJet 2 + #1-01029 FunJet ULTRA 2 KIT + #1-01030 Pieza Descripción Kit de propulsión # 1-00961 # 1-00962 Servos HS-65 HB...
- Seite 44 Instrucciones de montaje Antes del montaje 6. Pegar las alas a la parte interior Compruebe el contenido de su kit. Para ello, puede utilizar la Fig. 01 + 02 Coloque las alas en el lugar previsto y péguelas con Zacki ELAPOR ®...
- Seite 45 Instrucciones de montaje lado de la correa de ijación sobre la parte superior de la batería, en la cara 12. Montaje y fijación del motor suave de la cinta de velcro, apriete la correa y fíjela deinitivamente. Fig. 17 Coloque el soporte parallamas del motor para comprobar que encaja La posición deinitiva de la batería se determinará...
- Seite 46 Instrucciones de montaje 19. Equilibre el centro de gravedad Para conseguir un vuelo estable, es imprescindible que su FunJet ULTRA, al igual que en cualquier otro avión, esté en equilibrio en un punto determinado. Termine de montar su modelo y coloque la batería. En la parte inferior de las alas encontrará...
- Seite 47 Piezas Fig. 01 Kit de piezas pequeñas Fig. 02 ⓴ www.modellmarkt24.ch; www.modellmarkt24.ch; www.modellmarkt24.de www.modellmarkt24.de...
- Seite 48 MULTIPLEX Modellsport GmbH & Co.KG · Westliche Gewerbestrasse 1 · D-75015 Bretten-Gölshausen www.multiplex-rc.de www.modellmarkt24.ch; www.modellmarkt24.ch; www.modellmarkt24.de www.modellmarkt24.de...