Bosch DCU 220 Instandsetzungsanleitung
Diagnostic control unit
Vorschau ausblenden
Andere Handbücher für DCU 220:
- Betriebsanleitung (280 Seiten) ,
- Originalbetriebsanleitung (258 Seiten) ,
- Benutzerhandbuch (48 Seiten)

Verwandte Anleitungen für Bosch DCU 220


Inhaltszusammenfassung für Bosch DCU 220
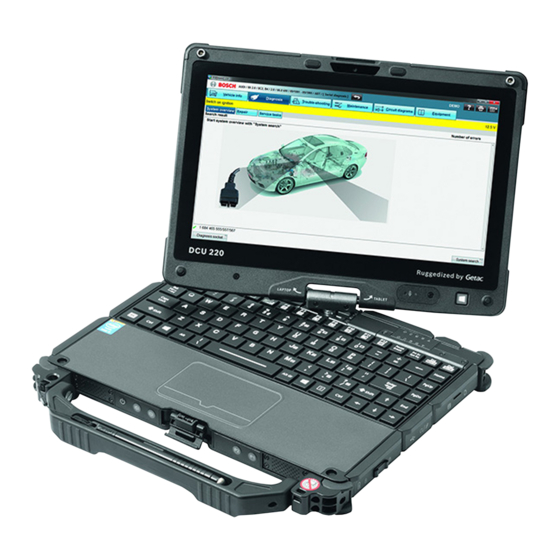
- Seite 1 DCU 220 de Instandsetzungsanleitung en Repair instructions Diagnostic Control Unit Diagnostic Control Unit...
-
Seite 2: Inhaltsverzeichnis Deutsch
2 | DCU 220 | Inhaltsverzeichnis Deutsch Verwendete Symbolik DCU 220 prüfen In der Dokumentation Bedienung konfigurieren 1.1.1 Warnhinweise – Aufbau und Bedeutung 3 Prüfen Hardwarefehler oder Softwarefehler 1.1.2 Symbole – Benennung und Bedeutung 3 Fehlersuchbaum Auf dem Produkt 6.3.1 Fehlersuche DCU 220 6.3.2... -
Seite 3: Verwendete Symbolik
Mögliche gefährliche Leichte eingewiesenen Kundendienstmitarbeitern der Robert Situation Körperverletzung Bosch GmbH oder den durch die Robert Bosch GmbH beauftragten Organisationen durchgeführt werden. 1.1.2 Symbole – Benennung und Bedeutung Werden die Geräte von nicht berechtigten Personen geöffnet oder verändert, so entfallen sämtliche Gewähr-... -
Seite 4: Übersicht Aufbau
4 | DCU 220 | Übersicht Aufbau Anschlüsse 3.2.1 Linke Seite Bedienelemente Abb. 3: Linke Seite 1 Festplatte (wechselbar) 2 Akkuschacht (Batterie 1) 3.2.2 Rechte Seite Abb. 4: Rechte Seite 1 Akkuschacht (Batterie 2) 2 USB 2.0 - Anschluss 3 Kombi-Audioanschluss Lautsprecher oder Mikrofon 4 Smart Card-Steckplatz (Funktion nicht verfügbar) -
Seite 5: Werkzeug Und Hilfsmittel
Per Energieanzeige: Außen am Akku befindet sich eine Energieanzeige, 4.1.2 Hilfsmittel an welcher der Ladezustand abgelesen werden kann, wenn der Akku nicht in DCU 220 installiert ist. Hilfsmittel Anwendung Schutz des Display. Wir empfehlen ei- Unterlage nen harten Schaumstoff oder eine ESD- Unterlage. - Seite 6 Die Abdeckklappen sind mit jeweils zwei bis vier 6. Neue Festplatte mit der silbernen Seite nach oben Schrauben an der Unterseite von DCU 220 befestigt. vollständig in das Fach schieben, bis sie einrastet. 7. Abdeckung schließen und danach von oben nach 1.
-
Seite 7: Recovery-Partition Aktualisieren
Recovery-Partition aktualisieren 5. Unter STEP1 den entsprechenden USB-Stick aus- Das System und die Recovery-Partition (HDI) der wählen. DCU 220 kann manuell aktualisiert werden, um auf- 6. Unter STEP2 den Pfad zum "BootableSource-Ordner" tretende Fehler beheben zu können. Zu diesem Zweck angeben. - Seite 8 Die Spannungsversorgung während der Installation 1. Aktuelles Image über darf nicht unterbrochen werden. http://upm.bosch.com/DCU220/DCU220-1687008108-Win7Prof-64Bit-actual.wim herunterladen. 1. USB-Stick an DCU 220 anschließen. 2. USB-Stick anschließen. 2. DCU 220 einschalten. 3. WIM-Datei auf den USB-Stick in den Ordner Recove- 3. Wenn während des Systemstarts folgender Bild- ry kopieren.
- Seite 9 Recovery-Prozess gelöscht! Die Spannungsversorgung während des Recovery- Prozesses darf nicht unterbrochen werden. 1. DCU 220 mit Netzteil verbinden. 2. DCU 220 einschalten. 3. Wenn während des Systemstarts folgender Bild- schirm erscheint, die Tasten Strg + Alt + F2 gleichzei- tig vier Sekunden lang gedrückt halten.
-
Seite 10: Arbeitsspeicher Erweitern
10 | DCU 220 | Arbeitsspeicher erweitern 4. Speichermodul in einem 30° Winkel in die Steckvor- richtung einlegen. Lieferumfang Abb. 13: Lieferumfang Nachrüstsatz 1 688 400 550 1 Speichermodulpeicher 2 Sicherungsbügel 5. Speichermodul am hervorstehenden Ende herunter- 3 Befestigungsschraube (2x) drücken, bis dieser an den Metallklammern einrastet. -
Seite 11: Prüfen Hardwarefehler Oder Softwarefehler
| DCU 220 | 11 DCU 220 prüfen Bedienung konfigurieren Die Bedienung des DCU 220 kann auch durch den End- kunden konfiguriert werden. Die Funktionen der nach- stehenden Programme sind in der Betriebsanleitung DCU 220 (1 689 989 221) und in dem Benutzerhand-... - Seite 12 12 | DCU 220 | Fehlersuchbaum 6.3.1 Fehlersuche DCU 220 Es gibt 2 prinzipielle Vorgehensweisen: a) GH geht zum Kunden mit Leihgerät und HD b) GH sendet nur Leihgerät und HD an Kunde HW Kunde HD Kunde Festplatte Windows Probleme mit...
- Seite 13 | DCU 220 | 13 HW Leihgerät HD Kunde Akku und HD des Kunden in Schnelltest ohne Leihgerät Verlust von einbauen Daten HW Leihgerät HD Kunde Leihgerät mit HD Leihgerät des Kunden läuft? (HW defekt) (Keine SW-Instal- lation erforderlich) Kunde schickt...
- Seite 14 BSCR prüft Anmerkung! defekte DCU 220 (Garantie Prüfung Leihgerät: und Inhalt) GH prüft eigene DCU 220 oder sendet geliehene DCU 220 zurück an BSCR BSCR fragt bei GH sendet defekte Garantie- GH nach wegen Kosten Nein Nein DCU 220 zurück...
-
Seite 15: Dcu 220 Tauschen
DCU 220 tauschen Inbetriebnahme reparierter DCU 220 Verfügbarkeit 1. Am Leihgerät DCU 220 beide Akkus entnehmen. Die Abwicklung über das Service Center Repair in Mün- 2. Am Leihgerät DCU 220 die Festplatte entnehmen. chen funktioniert für Europa und den Mittleren Osten. - Seite 16 16 | DCU 220 | BIOS-Einstellungen Advanced Nachfolgend aufgeführt sind die BIOS-Einstellungen Name Setting ab Werk. Wake Up Capability: Any-key Wake Up from S3 Information USB Wake Up From S3: AC Initiation: Name Setting SATA Mode: [AHCI] Model No: DCU220...
- Seite 17 | DCU 220 | 17 Boot Menu Name Setting 1.USB ODD: 2.SATA HDD1: 3.SATA HDD2: 4.USB HDD: 5.PCI LAN: 6.USB FDD: 7.Other HDD: USB ODD: SATA HDD1: SATA HDD2: USB HDD: USB FDD: PCI LAN: Other HDD Exit Menu Name...
-
Seite 18: Contents English
On the product 6.3.2 Repair process DCU 220 User instructions DCU 220 replacement Safety Instructions Dispatch of the defective DCU 220 Target group Commissioning of DCU 220 rental device Configuring operation Commissioning of repaired DCU 220 Cross-references Comment concerning material defect liability 31... -
Seite 19: Symbols Used
Multi-step Instruction consisting of several steps. operating manual DCU 220 (1 689 989 221) and in the operation User Handbook (1 689 989 235): One-step Instruction consisting of one step. -
Seite 20: Operating Elements
20 | DCU 220 | Structure overview Connections 3.2.1 Left side Operating elements Abb. 3: Left side 1 Hard drive (exchangeable) 2 Storage battery compartment (storage battery 1) 3.2.2 Right side Abb. 4: Right side 1 Storage battery compartment (storage Storage battery 2) 2 USB 2.0 port... - Seite 21 Display segments light up to indicate the battery charge level. Power supply cable 1. Disconnect the power supply unit from DCU 220 and Each segment represents a battery charge level of from the power supply. 20%. The storage battery is fully discharged when 2.
- Seite 22 7. Close the cover and push it downward until it locks 1. Switch off the DCU 220. in place. 2. Disconnect the DCU 220 from the power supply. 8. Then push the lock into 'locked' position ( ). 3. Push cover lock into 'unlocked' position ( ) ().
- Seite 23 Updating Recovery Partition 5. In STEP1, select the appropriate USB stick. The system and the recovery partition (HDI) of DCU 220 6. In STEP2, specify the path to the "Bootable Source can be updated manually to rectify errors that occur.
- Seite 24 F10 key to open the boot manager. installation. So long as there is no new version of the Bosch- HDIDiskBootMaker software available, a new image can be run by replacing the old WIM file on the USB stick.
- Seite 25 Make sure the voltage supply must not be interrupt- ed during the recovery process. 1. Connect the DCU 220 to the power supply unit. 2. Switch on the DCU 220. 3. If the following screen appears while the system is starting, hold down the keys Ctrl + Alt + F2 for 4 seconds.
- Seite 26 26 | DCU 220 | Expand the Memory 4. Place the Memory Module into the plug-in connector at an angle of 30°. Scope of delivery Abb. 13: Scope of delivery, retrofit kit 1 688 400 550 1 Memory Module 2 Safety bracket 5. Press the protruding end of the Memory Module till 3 Fastening screw (2x) it engages with the metal clamps.
- Seite 27 6.2.1 2. Install a loaded and tested hard disk. R Windows damaged or system cannot be 6.2.2 3. Install hard disk of defective DCU 220 into test- R Display defective booted or show no ed DCU 220. R Mainboard defective display 4.
-
Seite 28: Troubleshooting Chart
28 | DCU 220 | Troubleshooting chart 6.3.1 Troubleshooting DCU 220 There are two possible procedures: a) WS goes to customer with loaner and HD b) WS sends loaner and HD to customer HW Customer HD Customer Windows problems with... - Seite 29 | DCU 220 | 29 HW loaner HD customer insert battery and HD of customer in Fastcheck the loaner without dataloss HW loaner HD customer Install customer HD in loaner loaner works? (HW defect) (no SW-Instal- lation requiered) Customer send...
- Seite 30 SW defect Customer DCU has some software problems BSRC checks Additional note! defect DCU 220 (warranty yes/no Loaner check: and content) WS check their own DCU 220 unit send BSRC unit loaner back to BSRC BSRC ask WS WS send DCU about Accepted? 220 back to...
- Seite 31 1. Install both storage batteries on the DCU 220 stor- ing operating system recovery. age equipment. 2. Install the hard disk in the DCU 220 rental device. 3. Install the stylus in the DCU 220 rental device. 4. Switch on DCU 220 rental device and installations and licenses.
- Seite 32 32 | DCU 220 | BIOS-settings Advanced Listed below you will find the BIOS settings ex Name Setting factory. Wake Up Capability: Any-key Wake Up from S3 Information USB Wake Up From S3: AC Initiation: Name Setting SATA Mode: [AHCI]...
- Seite 33 | DCU 220 | 33 Boot Menu Name Setting 1.USB ODD: 2.SATA HDD1: 3.SATA HDD2: 4.USB HDD: 5.PCI LAN: 6.USB FDD: 7.Other HDD: USB ODD: SATA HDD1: SATA HDD2: USB HDD: USB FDD: PCI LAN: Other HDD Exit Menu Name...
- Seite 34 Robert Bosch GmbH Diagnostics Franz-Oechsle-Straße 4 73207 Plochingen DEUTSCHLAND www.bosch.com bosch.prueftechnik@bosch.com 1 689 975 264 | 2015-06-02...