Inhaltsverzeichnis
Werbung
Quicklinks
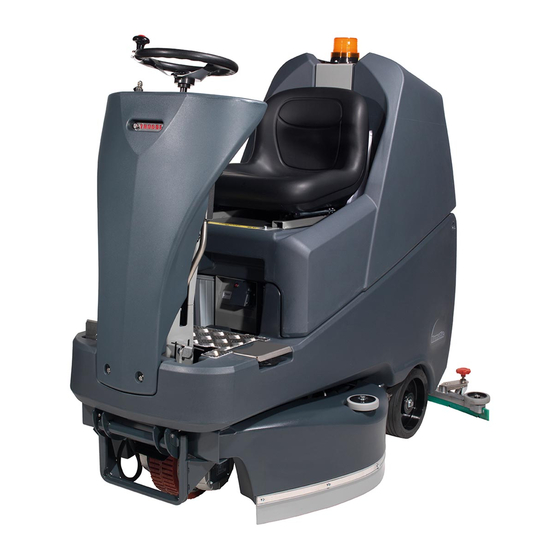
TRO650
TRO 650G / 200T
Aufsitz-Scheuersaugmaschine
Warning! Read instructions before using the machine
Achtung! Vor Verwendung der Maschine bitte die Anleitung lesen
Attention ! Lisez la notice avant d'utiliser la machine
Waarschuwing! Lees deze instructies voor u de machine gebruikt
Ride On Scrubber Dryer
Autolaveuse autoportée
Opzit schrobzuigmachine
Original Instructions
Originele instructies
www.numatic.co.uk
Originalanleitung
Notice originale
Werbung
Inhaltsverzeichnis

Verwandte Anleitungen für Numatic TRO 650G/200T


Inhaltszusammenfassung für Numatic TRO 650G/200T
- Seite 1 Warning! Read instructions before using the machine TRO650 Originalanleitung Achtung! Vor Verwendung der Maschine bitte die Anleitung lesen Notice originale Attention ! Lisez la notice avant d’utiliser la machine Originele instructies Waarschuwing! Lees deze instructies voor u de machine gebruikt www.numatic.co.uk...
-
Seite 2: Inhaltsverzeichnis
R I D E O N S C R U B B E R D RY E R TRO 650G / 200T Index Machine Overview Überblick über die Maschine ....... Pages 4-5 ........ Pages 4-5 Control Panel Overview ........ Page 6 Übersicht über das Bedienfeld ..... - Seite 3 R I D E O N S C R U B B E R D RY E R TRO 650G / 200T Index Description de la machine ......Page 4-5 Overzicht machine ........ Pages 4-5 Description du panneau de commande ..Page 7 Overzicht bedieningspaneel ......
-
Seite 4: Machine Overview
Machine Overview / Überblick über die Maschine / Description de la machine / Overzicht machine... - Seite 5 Machine Overview / Überblick über die Maschine / Description de la machine / Overzicht machine (UK) After the removal of all the packaging, (DE) Nach Entfernung der Verpackung das Starterpaket carefully open and check the contents vorsichtig öffnen und seinen Inhalt kontrollieren ●...
-
Seite 6: Control Panel Overview
R I D E O N S C R U B B E R D RY E R TRO 650 / 200T Control Panel Overview... -
Seite 7: Übersicht Über Das Bedienfeld
Commutateur avant/arrière Vacuum Hi / Lo Button Aanduiding accuspanning Noodstop knop Aanduiding borsteldruk/-belasting Claxon Aanduiding watertoevoer Variabele snelheid Aanduiding afvalwater ‘VOL’ Opladen LED Knop extern schoonmaaksysteem LED status lamp Aan/uit schakelaar Tijdsinstellingsknop Schakelaar vooruit / achteruit Afzuiging hoog/laag knop www.numatic.co.uk... -
Seite 8: Machine Set Up Guide
(Fig.5). Note: The seat is fitted with a pressure sensor that disables the machine until an operator is seated. When the machine is removed and in a safe position, turn key back to the position (0) ‘OFF’ (Fig.6). www.numatic.co.uk... -
Seite 9: Snelstartgids
Opmerking: De bestuurdersstoel is uitgerust met een druksensor die de machine uitschakelt tot er een bediener op de stoel plaatsneemt. Draai de sleutel terug naar de ‘UIT’-stand (0) (OFF) (Fig. 6) zodra de machine van de pallet is gereden en in een veilige positie is geplaatst. www.numatic.co.uk... -
Seite 10: Fitting The Floor Tool
Lower the floor-tool arm by moving the release lever to the upper position (Fig.9). Push floor-tool onto the holder and secure with the easy-fit securing pin (Fig.10). Push waste collection pipe onto the floor-tool; ensure a tight fit (Fig.11). Note: Raise floor-tool again before driving to the cleaning area. www.numatic.co.uk... -
Seite 11: Anbringen Des Abstreifers
Duw de zuigmond op de houder en zet vast met de snelsluitpen (Fig. 10). Duw de afvalopvangslang op de zuigmond en zorg dat deze goed aansluit (Fig. 11) Opmerking: Zet de zuigmond weer omhoog alvorens naar de schoon te maken zone te rijden (Fig. 12) www.numatic.co.uk... -
Seite 12: Hose U Bend Clip
Allowing it to safely disengage from its mounting should it become caught on an obstruction, during forward machine movement. To re-attach the floor-tool blade to its holder. First loosen the retaining knobs on the floor-tool body and slide onto the holding bracket. Tighten retaining knobs to finger tight. (See Fig.13). www.numatic.co.uk... -
Seite 13: U-Bogen-Klemme Für Schlauch
Om de zuigmond aan de houder te bevestigen, draait u eerst de vastzetknoppen op het mondstuk los en schuift u de zuigmond op de houder. Draai de knoppen daarna weer met de hand vast. (zie Fig. 13). www.numatic.co.uk... -
Seite 14: Fitting The Brush
Fill-level indicator The water level in the clean-water tank can be measured using the scale on the rear of the machine (Fig.20). Always ensure that the waste-water tank is empty before lifting. www.numatic.co.uk... -
Seite 15: Anbringen Der Bürste
Aanduiding waterpeil Het waterpeil in de schoonwatertank kan worden afgelezen via de schaal op de achterkant van de machine (Fig. 20). Opmerking: zorg er altijd voor dat de vuilwatertank leeg is alvorens u deze optilt. www.numatic.co.uk... -
Seite 16: Maximum Speed Control
The machine is now ready to be driven to the cleaning site. Before performing the cleaning operation, place out appropriate warning signs and sweep or dust-mop the floor. www.numatic.co.uk... -
Seite 17: Höchstgeschwindigkeitsbegrenzung
Opmerking: De bestuurdersstoel is uitgerust met een druksensor die de machine uitschakelt tot er een bediener op de stoel plaatsneemt. La machine est maintenant prête à être conduite au site de nettoyage (voir la section 3 du guide d’installation rapide si nécessaire). Avant d’effectuer l’opération de nettoyage, placez les panneaux d’avertissement appropriés et balayez ou dépoussiérez le sol. www.numatic.co.uk... -
Seite 18: Lowering The Brush Deck
While depressing left-hand foot pedal (see Fig.24), press down the release lever (see Fig.25) and gently release the foot pedal to lower the brush deck (see Fig.26). Lowering the Floor-tool Note: DO NOT push the vacuum hose onto the Floor-tool with the Floor-tool in the raised position. www.numatic.co.uk... -
Seite 19: Anheben/Absenken Des Bürstendecks
Fig. 26). De zuigmond laten zakken Laat het mondstuk zakken door de ontgrendelingshendel in de bovenste stand te zetten (Fig. 27). OPMERKING: De machine zal niet achteruitrijden als het mondstuk omlaag staat - ‘Het waarschuwingslampje van de accu gaat knipperen’. www.numatic.co.uk... -
Seite 20: Machine Operation
Turn it anti-clockwise to decrease load on the brushes and clockwise to increase load/pressure on the brushes (see Fig.28). Note: The run-time of the machine may decrease if the load on the brushes is increased. www.numatic.co.uk... -
Seite 21: Bedienung Der Maschine
Draai linksom om de belasting op de borstels te verlagen en rechtsom om de belasting/druk op de borstels te verhogen. (zie Fig. 28). OPMERKING: De looptijd van de machine kan afnemen als de belasting op de borstels toeneemt. www.numatic.co.uk... -
Seite 22: Machine In Use
This means the Vacuum motor is running at 100%. With the machine running press the Hi - Lo button once the Vacuum motor will reduce its speed to 75% of capacity and the Hi - Lo light will NOT illuminate Blue. www.numatic.co.uk... -
Seite 23: Einrichten Der Maschine
Als de machine normaal draait zal het ‘hi-lo’ lampje branden. Dit betekent dat de zuigmotor 100% capaciteit heeft.Terwijl de machine aanstaat, druk één keer op de ‘hi-lo’ knop. De zuigmotor zal de zuigkracht reduceren tot 75% en het ‘hi-lo’ lampje zal niet meer branden. www.numatic.co.uk... -
Seite 24: Machine Cleaning
Lift white plug and remove the filter, rinse and refit. Ensure tank has been emptied and care is taken when working in the vicinity of batteries. NOTE: ANY SPILLS SHOULD BE WIPED-UP BEFORE TANK IS LOWERED. www.numatic.co.uk... -
Seite 25: Reinigung Der Maschine
Zorg ervoor dat de tank werd leeggemaakt en dat de nodige voorzorgsmaatregelen wer den genomen om in de buurt van de accu’s te werken. OPMERKING: ALS ER VLOEISTOF IS GEMORST, MOET DIT EERST WORDEN OPGERUIMD VOORDAT DE TANK WORDT TERUGGEZET. www.numatic.co.uk... -
Seite 26: Changing The Floor Tool Blades
1. Floor-tool main body 2. Rear blade 3. Blade carrier 4. Front blade (slotted) 5. Retaining pins x 4 Note: Floor Tool adjusters are factory set for optimal performance. The blades are designed to be reversible, thus extending their useful working life. www.numatic.co.uk... -
Seite 27: Auswechseln Der Abstreiferblätter
U vervangt de wissers door de stappen hierboven in omgekeerde volgorde uit te voeren. 1. Hoofdlichaam vloerelement 2. Achterste wisser 3. Wisserhouder 4. Voorste wisser (met gleuven) 5. Borgpennen x 4 Opmerking: Voor een langere levensduur zijn de wisserbladen zo ontworpen dat ze kunnen worden omgekeerd. www.numatic.co.uk... -
Seite 28: Machine Charging
The machine will not operate. To ensure a full charge, the machine should be left for a period of 8 hrs. Once fully charged, disconnect the charging lead from both the power supply and the machine. www.numatic.co.uk... -
Seite 29: Aufladen Der Maschine
Zodra de machine is aangesloten op het stopcontact, gaat het rode laadlampje branden (zie Fig. 36). Om de machine weer helemaal op te laden, moet deze 8 uur aangesloten blijven. Als de machine volledig is opgeladen, haalt u het laadsnoer uit het stopcontact en het laadpunt van de machine. www.numatic.co.uk... -
Seite 30: Battery Care
Maxi fuse-puller provided, prior to this period. Batteries should be recharged every three months. Charge fully the day before you start using the machine again. Periodicly inspect the battery connectioins for tightness and corrosion www.numatic.co.uk... -
Seite 31: Batteriepflege
Als de machine 30 dagen of langer niet gebruikt wordt, moeten de accu’s vooraf volledig worden geladen en moeten de accuzekeringen worden verwijderd met de meegeleverde Maxi-zekeringtrekker. De accu’s moeten om de drie maanden worden opgeladen. Laad de accu’s volledig op op de dag voordat u de machine weer in gebruik neemt. www.numatic.co.uk... -
Seite 32: Free-Wheel Function
WHEN THE BRAKE IS DISENGAGED AND POWER PLUG IS DISCONNECTED THE MACHINE IS IN FREE-WHEEL MODE AND HAS NO BRAKE FACILITY, WHEN TOWING THE MACHINE ENSURE THAT A SUITABLE TOW BAR IS USED. Remember to remove the brake disengage key when you reach your final destination / before using the machine. NOT FOLLOWING DESCRIBED METHOD COULD DAMAGE MAIN CONTROL UNIT AND VOID THE WARRANTY www.numatic.co.uk... -
Seite 33: Freilauffunktion
UTILISER UNE BARRE DE REMORQUAGEAPPROPRIEE. Lorsque le remorquage est terminé, ne pas oublier de retirer la clé de débrayage avant de réutiliser la machine. LE NON RESPECT DECES INSTRUCTIONS PEUT ENDOMMAGER LA CARTE DE CONTRÔL ET EXCLUT LA GARANTIE Onderhoud accu Dutch www.numatic.co.uk... -
Seite 34: Off-Aisle Cleaning Kit (Optional)
Druk nog een keer op deze knop om de zuigmotor uit te zetten. De machine moet gereset worden voor normaal gebruik, als de ‘off aisle’ knop ingeschakeld is geweest. Plaats de slang terug op de zuigmond als u klaar bent met de losse zuigkit (Fig. 42). Externe Schoonmaakkit(Optioneel Accessoire) (606182) www.numatic.co.uk... -
Seite 35: Specifications
RTU Weight + 75Kg Operator NET Weight NET Weight Less Batteries Battery Weight Battery Dimensions H - 210mm 490 Kg 565 Kg 370 Kg 242.8 Kg 31.8 Kg L - 330mm W - 170mm *RTU = Ready To Use www.numatic.co.uk... -
Seite 36: Trouble Shooting
Entfernen und reinigen (Seite 37) Falsche Einstellung für den Wasserdurchfluss Nach Wunsch einstellen (Seite 33) Bürstendeck angehoben Bürstendeck absenken (Seite 31) Maschine stoppt mittendrin einfach Zu hohe Last auf dem Bürstensystem Maschine mit Schlüsselschalter zurücksetzen und Bürstenlast entsprechend dem Fußbodentyp verringern (Seite 33) www.numatic.co.uk... -
Seite 37: Probleemoplossing
Borstelplaat omhoog Laat borstelplaat zakken (pag. 31) De machine “stopt” gewoon Te zware belasting op het borstelsysteem Reset de machine met de sleutel en verlaag de belasting tijdens het werken zodat die afgestemd is op de betrokken ondergrond (pag. 33) www.numatic.co.uk... -
Seite 38: Fault Codes
Contact Service Agent www.numatic.co.uk... - Seite 39 Contact Service Agent. www.numatic.co.uk...
-
Seite 40: Fehlercodes
Neem contact op met servicedienst www.numatic.co.uk... - Seite 41 Contact Service Agent. www.numatic.co.uk...
-
Seite 42: Codes De Défaillance
Contactez un agent du service technique www.numatic.co.uk... - Seite 43 Contact Service Agent. www.numatic.co.uk...
-
Seite 44: Foutcodes
Neem contact op met servicedienst www.numatic.co.uk... - Seite 45 Neem contact op met de Service dienst www.numatic.co.uk...
-
Seite 46: Recommended Spare Parts
Top Tank Hose 208151 Pinion 213025 Bottom Tank Dump Hose 208152 Steering Chain 304439 Hose Closure (Bottom Tank) 208153 Steering Chain Master Link 900903 Hose Closure (Top Tank) 237718 Hose Guide Schematic Diagram / Funktionsschema / Schéma / Schakelschema www.numatic.co.uk... -
Seite 47: Rating Label / Personal Protective Equipment / Recycling
Note: A risk assessment should be conducted to determine which PPE should be worn. CAUTION Safety Critical Component No HOT drinks Charging Lead: H05VV-F x 1.0 mm2 x 3 core Battery Charger: 220V / 240V (50-60Hz) when operating DC Output: 24VDC, 20A this machine. Motor Wheel & modified brake lead assembly. www.numatic.co.uk... -
Seite 48: Safety Precautions
Children should be supervised to ensure that they do not play with the appliance. If this product does not have a factory installed Numatic battery charger and batteries then it is the responsibility of the owner and user of the product to ensure that the charging system and battery combination are compatible, fit for purpose and safe to use. -
Seite 49: Typenschild / Persönliche Schutzausrüstung / Recycling
Warnjacke Allergieschutz Hinweis: Eine Risikobeurteilung sollte durchgeführt werden, um zu bestimmen, welche PSA zu tragen ist. VORSICHT Sicherheitsrelevante Komponenten: Keine heißen Ladekabel: Ho5VV-F x 1.0 mm x 3 Core Getränketrinken beim Getriebe 205190 Akku-Ladegerät: (230V), (115V) Einsatz der Maschine! www.numatic.co.uk... -
Seite 50: Informationen Zur Scheuersaugmaschine
Achtung Bei Verwendung von Reinigungsmitteln oder anderen Flüssigkeiten, lesen Sie die Anweisungen des Herstellers. Falls die Maschine nicht mit dem von Numatic gelieferten Ladegerät und Batterien ausgestattet ist, dann liegt es in der Verantwortung des Eigentümers und Nutzers zu gewährleisten, dass die Ladegerät-, Batterie-Kombination kompatibel und für den Zweck geeignet und sicher zu bedienen ist. -
Seite 51: Plaque Signalétique / Équipement De Protection Individuelle / Recyclage
Remarque: Il est nécessaire de mener une évaluation des risques pour décider de l’EPI à porter. AVERTISSEMENT Composants critiques pour la sécurité: Pas de boisson chaude Câble de charge: Ho5VV-F x 1.0 mm x 3 Core pendant l’utilisation Boîte-pont 205190 Chargeur de batteries: (230V), (115V) de la machine. www.numatic.co.uk... -
Seite 52: Précautions À Prendre
Dans le cas d’équipements livrés par Numatic avec les batteries ou le chargeur non installés, il revient à l’acquéreur, l’entière responsabilité de s’assurer que le chargeur et les batteries sont compatibles, correctement installés, adaptés à l’utilisation et remplissent totalement les conditions de sécurités. -
Seite 53: Kenplaatje / Persoonlijke Beschermingsmiddelen / Recycling
Opmerking: Voer een risicobeoordeling uit en bepaal welke PBM moeten worden gedragen. WAARSCHUWING Veiligheidskritische onderdelen: Gebruik geen warme dranken Laadsnoer: Ho5VV-F x 1.0 mm x 3 Core Transas 205190 tijdens het werken Acculader (230V), (115V) met de machine. www.numatic.co.uk... -
Seite 54: Informatie M.b.t. Schrobzuigmachine
• controleer het laadsnoer geregeld op beschadiging, zoals scheuren of slijtage. • Vervang het snoer wanneer het is beschadigd, voordat u de machine opnieuw gaat gebruiken. • Vervang het laadsnoer uitsluitend door een geschikt en door Numatic goedgekeurd reserveonderdeel. DOEN •... - Seite 55 Spoel het systeem met schoon water en reinig de filters Gebruik geen stoom- of hogedrukreiniger Accu’s Laad de accu’s na elk gebruik op Laad de accu’s minstens 4 uur nadat het groene licht is gaan branden. Dat verlengt de levensduur www.numatic.co.uk...
-
Seite 56: Eu Declaration Document
EU Declaration of Conformity - EU Conformiteitsverklaring www.numatic.co.uk... -
Seite 57: Document De Déclaration
EU Konformitätserkärung - Declaration de Confromite CE www.numatic.co.uk... - Seite 58 Notes www.numatic.co.uk...
- Seite 59 Notes www.numatic.co.uk...
-
Seite 60: Company Address
Numatic International GmbH. Fränkische Straße 15–19 D-30455 Hannover, DEUTSCHLAND Tel.: 05 11 98 42 16 0 www.numatic.de Numatic International SAS. 13 / 17 rue du Valengelier 77500 CHELLES, FRANCE Tel: 01 64 72 61 61 www.numatic.fr BeNeLux Distribution, Numatic International BV Postbus 101, 2400 AC Alphen aan den Rijn, NEDERLAND Tel: 0172 467 999 www.numatic.nl...