Brother HL-2070N Installationsanleitung
Laserdrucker
Vorschau ausblenden
Andere Handbücher für HL-2070N:
- Installationsanleitung (156 Seiten) ,
- Installationsanleitung (29 Seiten) ,
- Bedienungsanleitung (2 Seiten)
Inhaltsverzeichnis
Werbung
Lesen Sie diese Installationsanleitung vor der Inbetriebnahme des Druckers.
Vor der Inbetriebnahme des Druckers muss die Hardware eingerichtet
und der Treiber installiert werden.
Schritt 1
Schritt 2
USB
Parallel
®
(für Windows
(für HL-2040/
98/Me/2000/XP)
2070N)
Seite 12
Seite 14
Peer-to-
Peer-to-
Peer-to-
Peer-to-
Peer (LPR)
Peer (LPR)
Peer
Peer
Seite 15
Seite 15
(NetBIOS)
(NetBIOS)
Seite 15
Seite 15
Die Installation ist abgeschlossen!
Informationen zum Verwenden des Druckers finden Sie im
Benutzerhandbuch auf CD-ROM.
Die neuesten Treiber und Dienstprogramme für Ihre Brother-Geräte sowie Tipps zur
Problemlösung erhalten Sie über den Link zur Brother Solutions Site auf der CD und auf den
Brother-Webseiten
(Deutschland: http://www.brother.de, Schweiz: http://www.brother.ch, Österreich: http://www.brother.at).
Bewahren Sie diese Installationsanleitung und die beiliegende CD-ROM stets gut zugänglich auf.
Drucker aufstellen
Druckertreiber installieren
Netzwerk
(für HL-2070N)
®
Netzwerkdr
Netzwerk-
Mac OS
drucker
ucker
10.2.4 oder
Seite 17
Seite 17
höher
Seite 18
USB
Netzwerk
(für HL-2070N)
®
X
Mac OS
Mac OS
9.1 – 9.2
10.2.4 oder
Seite 20
höher
Seite 21
®
®
X
Mac OS
9.1 – 9.2
Seite 23
Werbung
Kapitel
Inhaltsverzeichnis
Fehlerbehebung

Verwandte Anleitungen für Brother HL-2070N


Inhaltszusammenfassung für Brother HL-2070N
- Seite 1 Informationen zum Verwenden des Druckers finden Sie im Benutzerhandbuch auf CD-ROM. Die neuesten Treiber und Dienstprogramme für Ihre Brother-Geräte sowie Tipps zur Problemlösung erhalten Sie über den Link zur Brother Solutions Site auf der CD und auf den Brother-Webseiten (Deutschland: http://www.brother.de, Schweiz: http://www.brother.ch, Österreich: http://www.brother.at).
-
Seite 2: Vorsichtsmaßnahmen
Vorsichtsmaßnahmen Sicherer Druckerbetrieb Heisse Warnung: Stromschlag Geräteteile Achtung Dieser Warnhinweis Dieses Symbol warnt Sie Mit diesem Symbol werden Hinweise müssen für muss beachtet werden, vor möglichen Sie vor heißen Geräteteilen einen fehler- und generell ansonsten besteht Stromschlägen. gewarnt, die beim schadenfreien Betrieb Verletzungsgefahr. -
Seite 3: Inhaltsverzeichnis
Schritt 2 ® USB-Anschluss (Windows 98/Me/2000/XP) ................12 Parallelanschluss (HL-2040/2070N) ..................14 Netzwerkanschluss (HL-2070N) ....................15 ■ Brother Peer-to-Peer Netzwerkdrucker (LPR / NetBIOS) ..........15 ■ Über das Netzwerk gemeinsam benutzte Drucker ............17 USB-Anschluss ........................18 ® ■ Für Mac OS X 10.2.4 oder höher .................18 ®... -
Seite 4: Vorschriften
Steckdose angeschlossen werden. Im Notfall müssen Sie das Netzkabel aus Longgang, Shenzhen, China der Steckdose ziehen, um die Stromversorgung komplett zu unterbrechen. erklärt hiermit, dass: Warnhinweis für LAN-Anschluss (Nur für Modell HL-2070N) Schließen Sie dieses Gerät nur an einen LAN-Anschluss an, der keinen Produktbeschreibung: Laserdrucker Überspannungen ausgesetzt ist. -
Seite 6: Übersicht
USB wird unter Windows 95 und Windows NT 4.0 nicht unterstützt. ■ Parallelschnittstelle (für HL-2040 und HL-2070N) Das verwendete Parallelkabel darf höchstens 2 Meter lang sein. Verwenden Sie für den Anschluss ein abgeschirmtes IEEE 1284 Kabel. ■ Netzwerkkabel (für HL-2070N) Verwenden Sie ein durchgehendes verdrilltes Kabel (Kategorie 5 oder höher) für 10BASE-T oder... -
Seite 7: Funktionstastenfeld
Funktionstastenfeld Die Toner-LED zeigt an, dass der Toner zur Neige geht oder ausgegangen ist. Die Drum-LED zeigt an, dass sich die Trommel dem Ende ihrer Lebensdauer nähert. Die Paper-LED zeigt einen Papierstau oder eine offene Abdeckung an. Die Ready-LED zeigt an, dass der Drucker betriebsbereit ist oder sich noch Daten im Speicher befinden. -
Seite 8: Beiliegende Cd
Das Benutzerhandbuch im PDF-Format wird automatisch mit dem Druckertreiber installiert. (Nur für Windows Klicken Sie auf Start, wählen Sie Programme, Ihren Drucker (z. B. Brother HL-2070N) und dann auf das Benutzerhandbuch. Wenn Sie das Benutzerhandbuch nicht installieren möchten, wählen Sie im Installationsprogramm die „Benutzerdefinierte Einrichtung“... -
Seite 9: Schritt 1 Drucker Aufstellen
Drucker aufstellen Schritt 1 CD in das CD-ROM-Laufwerk einlegen ® ® Für Macintosh Für Windows Schließen Sie das Druckerkabel zu Schließen Sie das Druckerkabel zu diesem Zeitpunkt noch NICHT an! diesem Zeitpunkt noch NICHT an! Sie werden während der Sie werden während der Treiberinstallation dazu aufgefordert, Treiberinstallation dazu aufgefordert, das Druckerkabel anzuschließen. -
Seite 10: Trommeleinheit Installieren
Drucker aufstellen Schritt 1 Trommeleinheit installieren Setzen Sie die Trommeleinheit in den Schließen Sie das Druckerkabel zu Drucker ein. diesem Zeitpunkt noch NICHT an! Sie werden während der Treiberinstallation dazu aufgefordert, das Druckerkabel anzuschließen. Öffnen Sie die vordere Abdeckung des Druckers. -
Seite 11: Papier In Die Papierkassette Einlegen
Papier in die Papierkassette einlegen Ziehen Sie die Papierkassette ganz aus Fächern Sie den Papierstapel vor dem dem Drucker. Einlegen gut auf, um Papierstaus und Fehleinzug zu vermeiden. Legen Sie Papier in die Papierkassette ein. Das Papier muss flach in der Kassette liegen und darf die Markierung für die Halten Sie den Riegel der Seitenführung Stapelhöhe nicht überschreiten. -
Seite 12: Drucker Einrichten
Drucker einrichten Schritt 1 Testseite drucken Drücken Sie die Go-Taste. Der Drucker Schließen Sie das Druckerkabel zu druckt nun eine Testseite aus. diesem Zeitpunkt noch NICHT an! Prüfen Sie, ob die Testseite korrekt Sie werden während der gedruckt wurde. Treiberinstallation dazu aufgefordert, das Druckerkabel anzuschließen. -
Seite 13: Schritt 2 Druckertreiber Installieren
..............Siehe Seite 12 Parallelanschluss .............. Siehe Seite 14 Netzwerkanschluss ■ Brother Peer-to-Peer Netzwerkdrucker (LPR)....Siehe Seite 15 ■ Brother Peer-to-Peer Netzwerkdrucker (NetBIOS) ....Siehe Seite 15 ■ Über das Netzwerk gemeinsam benutzte Drucker ..Siehe Seite 17 USB-Anschluss ® ■ Mac OS X 10.2.4 oder höher .......... -
Seite 14: Usb-Anschluss
Treiber installieren Schritt 2 ® USB-Anschluss (Windows 98/Me/2000/XP) Treiber installieren und Drucker an den PC anschließen Wählen Sie USB-Benutzer. Klicken Sie auf Abbrechen, wenn der Assistent für das Suchen neuer Hardware erscheint. Lesen Sie vor der Installation den Lizenzvertrag sorgfältig durch. Befolgen Sie die auf dem Bildschirm erscheinenden Anweisungen. -
Seite 15: Drucker Als Standarddrucker Einrichten (Nur Für Benutzer Von Windows ® 2000/Xp)
Drucker als Standarddrucker einrichten Klicken Sie auf Beenden. (Nur für Benutzer von ® Windows 2000/XP) Klicken Sie auf Start und Drucker und Faxgeräte. Wenn Sie Ihr Produkt online registrieren lassen wollen, aktivieren Sie Online- Registrierung durchführen. ® Für Benutzer von Windows 98 / Me: Die Einrichtung ist nun abgeschlossen. -
Seite 16: Parallelanschluss (Hl-2040/2070N)
Treiber installieren Schritt 2 Parallelanschluss (HL-2040/2070N) Anschluss des Druckers am PC und Treiberinstallation Klicken Sie auf Druckertreiber Lesen Sie vor der Installation den installieren. Lizenzvertrag sorgfältig durch. Befolgen Sie die auf dem Bildschirm erscheinenden Anweisungen. Wählen Sie die Option Parallelanschluss- Benutzer. -
Seite 17: Netzwerkanschluss (Hl-2070N)
Lesen Sie vor der Installation den Lizenzvertrag sorgfältig durch. Befolgen Sie die auf dem Bildschirm erscheinenden Anweisungen. Wählen Sie Netzwerkanschluss-Benutzer. Wählen Sie Brother Peer-to-Peer Netzwerkdrucker und klicken Sie dann auf Schalten Sie den Drucker aus. Weiter. Schließen Sie das Netzwerkkabel an Ihren Drucker und dann an einen freien Anschluss Ihres Hubs an. -
Seite 18: Für Den Netzwerkanschluss (Hl-2070N)
Treiber installieren Schritt 2 Für den Netzwerkanschluss (HL-2070N) Benutzer von LPR: Klicken Sie auf Beenden. Wählen Sie Im Netzwerk nach Geräten suchen und Gerät aus der Liste der gefundenen Geräte auswählen (empfohlen). Sie können auch die IP-Adresse oder den Knotennamen Ihres Druckers eingeben. -
Seite 19: Über Das Netzwerk Gemeinsam Benutzte Drucker
Über das Netzwerk gemeinsam benutzte Drucker Wenn Sie ein am Netzwerk gemeinsam genutzten Drucker anschließen möchten, empfehlen wir Ihnen, Ihren Systemadministrator vor der Installation des Druckers über folgende Themen zu Rate zu ziehen: Warteschlangen und gemeinsam genutzte Informationen. Treiber installieren, Warteschlange oder Freigabenamen wählen Klicken Sie auf Druckertreiber Wählen Sie Über das Netzwerk gemeinsam benutzter Drucker und... -
Seite 20: Usb-Anschluss
Bildschirm und starten Sie Ihren Der Drucker muss eingeschaltet sein. ® Macintosh erneut. Wählen Sie im Menü Gehe zu die Option Programme. Für HL-2070N: Klicken Sie auf USB-Benutzer. Befolgen Sie die Anweisungen auf dem Bildschirm und starten Sie Ihren ® Macintosh erneut. - Seite 21 Öffnen Sie das Symbol Drucker- Wählen Sie Druckerdienstprogramm Dienstprogramm. beenden vom Menü Drucker- Dienstprogramm. Wählen Sie Hinzufügen. Die Einrichtung ist nun abgeschlossen. Wählen Sie USB. Wählen Sie den entsprechenden Drucker, und klicken Sie auf Hinzufügen.
-
Seite 22: Bis
Doppelklicken Sie auf Printer Driver Installer, um den Druckertreiber zu installieren. Befolgen Sie die Anweisungen auf dem Bildschirm und starten Sie Ihren Macintosh erneut. Klicken Sie auf Brother Laser und wählen Sie den entsprechenden Drucker. Schließen Sie die Auswahl. Die Einrichtung ist nun abgeschlossen. -
Seite 23: Netzwerkanschluss (Hl-2070N)
Netzwerkanschluss (HL-2070N) ® Für Mac OS X 10.2.4 oder höher Anschluss des Druckers an den Macintosh und Treiberinstallation Klicken Sie im Menü auf Druckertreiber Schalten Sie den Drucker am Netzschalter installieren. ein. Wählen Sie im Menü Gehe zu die Option Programme. - Seite 24 Treiber installieren Schritt 2 Netzwerkanschluss Doppelklicken Sie auf das Symbol Drucker- Wählen Sie Brother HL-2070N series und Dienstprogramm. klicken Sie auf Hinzufügen. Wählen Sie Hinzufügen. Sind mehrere Drucker des gleichen Modells (HL-2070N) an ihr Netzwerk angeschlossen, wird die Ethernet-Adresse (MAC-Adresse) nach dem Modellnamen angezeigt.
-
Seite 25: Bis
Anschluss Ihres Hubs an. Wählen Sie im Apple-Menü die Option Auswahl. Schalten Sie den Drucker am Netzschalter ein. Klicken Sie auf Brother Laser (IP) und wählen Sie BRN_xxxxxx . Klicken Sie auf Setup..Legen Sie die CD in das CD-ROM-Laufwerk ein. -
Seite 26: Für Administratoren (Hl-2070N)
Das Konfigurationsprogramm BRAdmin Professional ® installieren (nur für Windows -Benutzer) Das Programm BRAdmin Professional dient zur Verwaltung von Brother-Geräten, die an ein Netzwerk angeschlossen sind. Weitere Informationen zu BRAdmin Professional erhalten Sie unter http://solutions.brother.com Legen Sie die CD in das CD-ROM-Laufwerk ein. -
Seite 27: Web-Browser
Web-Browser Zum Brother PrintServer gehört ein Webserver, der mit HTTP (Hyper Text Transfer Protocol) ein Überwachen des Status oder das Ändern von Konfigurationseinstellungen ermöglicht. Der standardmäßige Benutzername ist admin und das Kennwort ist access. Mit dem Web-Browser können Sie das Passwort ändern. -
Seite 28: Weitere Informationen
Der Inhalt des Handbuches und die technischen Daten des Produkts können ohne vorherige Ankündigung geändert werden. Das Unternehmen Brother behält sich das Recht vor, die technischen Daten und den Inhalt dieses Handbuchs ohne vorherige Bekanntgabe zu ändern und übernimmt keine Haftung für etwaige Fehler in diesem Handbuch oder daraus möglicherweise resultierende Schäden. -
Seite 29: Verbrauchsmaterialien
Verbrauchsmaterialien Wenn Verbrauchsmaterialien ersetzt werden müssen, wird von den LEDs des Funktionstastenfelds ein Fehler angezeigt. Zwecks weiterer Informationen zu den Verbrauchsmaterialien Ihres Druckers besuchen Sie unsere Website http://solutions.brother.com oder wenden Sie sich an Ihre Brother-Niederlassung. Benutzerhandbuch, Kapitel 5 Tonerkassette Trommel... - Seite 30 LM44210014 Gedruckt in China ©2004 Brother Industries, Ltd. ©1998-2004 TROY Group, Inc. ©1983-2004 PACIFIC SOFTWORKS INC. ALLE RECHTE VORBEHALTEN...
-
Seite 31: Für Sehbehinderte
Bitte lesen Sie dieses Handbuch vor der Inbetriebnahme des Druckers sorgfältig durch. Bewahren Sie die CD-ROM für den späteren Gebrauch gut zugänglich auf. Besuchen Sie die Brother Webseiten, wo Sie die neuesten Treiber und Dienstprogramme für Ihre Brother-Geräte herunterladen können sowie Antworten auf häufig gestellte Fragen und Tipps zur Problemlösung finden... - Seite 32 Laserdrucker Serie HL-2000 Benutzerhandbuch Vorsichtsmaßnahmen In diesem Benutzerhandbuch werden folgende Symbole verwendet: Dieser Warnhinweis muss beachtet werden, da Verletzungsgefahr besteht. Dieses Symbol warnt Sie vor möglichen Stromschlägen. Mit diesem Symbol werden Sie vor heißen Geräteteilen gewarnt, die beim Berühren Verbrennungen verursachen können.
-
Seite 33: Der Sichere Betrieb Des Druckers
Der sichere Betrieb des Druckers In diesem Drucker befinden sich Hochspannungselektroden. Schalten Sie den Drucker vor dem Reinigen des Druckerinneren stets ab, und ziehen Sie das Netzkabel aus der Steckdose. Fassen Sie den Stecker nicht mit feuchten Händen an, sonst können Sie einen elektrischen Schlag erhalten. - Seite 34 Der Inhalt des Handbuches und die technischen Daten des Produkts können ohne vorherige Ankündigung geändert werden. Das Unternehmen Brother behält sich das Recht vor, die technischen Daten und den Inhalt dieses Handbuchs ohne vorherige Bekanntgabe zu ändern und übernimmt keine Haftung für etwaige Fehler in diesem Handbuch oder daraus möglicherweise resultierende Schäden.
- Seite 35 Für Macintosh -Computer ......................2-12 Druckertreiber deinstallieren...................... 2-14 ® Druckertreiber für Windows ....................2-14 ® Brother-Lasertreiber für Macintosh ..................2-15 Software ............................2-16 Software für Netzwerke ......................2-16 BRAdmin Professional......................2-16 Driver Deployment Wizard..................... 2-16 Software für den Netzwerkdruck ................... 2-16 Web BRAdmin ........................
- Seite 36 Schriften drucken (Für HL-2070N) .................... 3-10 Druck über Funktionsfeldtaste auslösen ................3-10 Testdruck über Druckertreiber auslösen ................3-10 PrintServer-Standardeinstellungen (Für HL-2070N) ..............3-11 PrintServer-Standardeinstellungen mit deaktiviertem APIPA-Protokoll (Für HL-2070N) ..3-11 Sonderzubehör ......................4-1 Wireless PrintServer (NC-2200w)...................... 4-1 PrintServer (NC-2100p) (Für HL-2040) ..................... 4-2 Routinewartung ......................5-1...
- Seite 37 HP LaserJet Modus ....................... A-10 IBM-Emulationsmodus ......................A-11 Epson-Emulationsmodus....................... A-11 Anhang (Für Europa und andere Länder) .............. B-1 Brother kontaktieren .......................... B-1 Wichtige Informationen: Vorschriften....................B-3 Funkentstörung (Nur 220 - 240 Volt-Modell) ................B-3 IEC 60825-1 Spezifikation (Nur 220 - 240 Volt-Modell)............... B-4 WICHTIG: Ihrer Sicherheit zuliebe ....................
-
Seite 38: Allgemeine Beschreibung Des Druckers
USB wird unter Windows 95 und Windows NT 4.0 nicht unterstützt. ■ Parallelschnittstelle (für HL-2040 und HL-2070N) Das verwendete Parallelkabel darf höchstens 2 Meter lang sein. Verwenden Sie für den Anschluss ein abgeschirmtes IEEE 1284 Kabel. Netzwerkkabel (für HL-2070N) ■... -
Seite 39: Vorderansicht
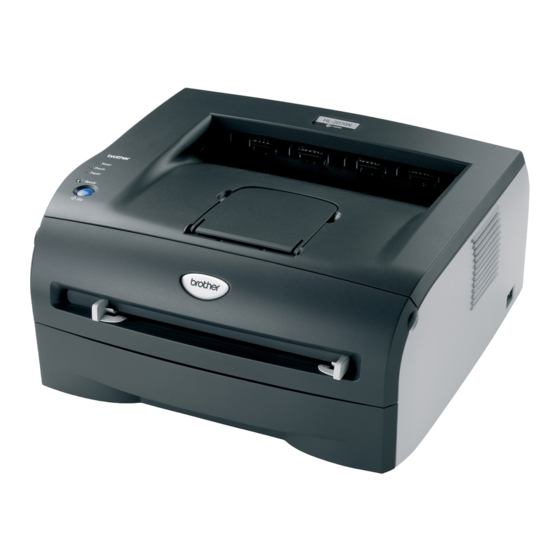
Einzug Papierzuführung Netzschalter Vordere Abdeckung Standard-Papierausgabe (Druckseite nach unten) Rückansicht Hintere Abdeckung Anschluss für das Netzkabel 10/100BASE-TX Port (HL-2070N) Paralleler Kabelanschluss (für HL-2040 und HL-2070N) Seitenabdeckung LED (Leuchtdiode) (HL-2070N) USB-Anschluss Die Druckerabbildung basiert auf dem Modell HL-2070N. 1 - 2... -
Seite 40: Drucker Aufstellen
Allgemeine Beschreibung des Druckers Drucker aufstellen Bitte beachten Sie vor Inbetriebnahme des Druckers die folgenden Hinweise. Stromversorgung Schließen Sie das Gerät nur an ein Stromnetz an, das den folgenden Anforderungen entspricht: Stromversorgung: USA und Kanada: AC 110 bis 120 V, 50/60 Hz Europa und Australien: AC 220 bis 240 V, 50/60 Hz Das Netzkabel darf einschließlich Verlängerungen höchstens 5 Meter lang sein. -
Seite 41: Geeignete Papierarten
Allgemeine Beschreibung des Druckers Geeignete Papierarten Papiergröße und -art Der Drucker zieht das Papier aus der installierten Papierzuführung oder über die manuelle Papierzuführung ein. Die Papierzuführungen werden im Druckertreiber und diesem Handbuch wie folgt bezeichnet: Papierzuführung Zuführung 1 Manueller Einzug Manuell Wenn Sie diese Seite von der CD-ROM lesen, können Sie in der Tabelle auf das Symbol klicken, um zur... -
Seite 42: Empfohlenes Papier
Allgemeine Beschreibung des Druckers Empfohlenes Papier Europa Normalpapier Xerox Premier 80 g/m Xerox 4200DP 9,07 kg Xerox Business 80 g/m Hammermill Laser Paper 10,89 kg Modo DATACOPY 80 g/m IGEPA X-Press 80 g/m Recyclingpapier Xerox Recycled Supreme 80 g/m Ohne Funktion OHP-Folie 3M CG3300 3M CG3300... -
Seite 43: Bedruckbarer Bereich
Allgemeine Beschreibung des Druckers Bedruckbarer Bereich Die vom Drucker nicht bedruckbaren Ränder werden nachstehend aufgezeigt. Hochformat Letter Legal B5 (ISO) Executive 4,23 mm 4,23 mm 4,23 mm 4,23 mm 4,23 mm 4,23 mm 4,23 mm 4,23 mm 6,01 mm 6,35 mm 6,35 mm 6,01 mm 6,35 mm... -
Seite 44: Druckmethoden
Allgemeine Beschreibung des Druckers Druckmethoden Drucken auf Normalpapier, Briefpapier und Folien Sie können Normalpapier, Briefpapier oder Folien über die Papierzuführung oder die manuelle Zuführung bedrucken. Für die Eignung des gewünschten Papiers siehe Geeignete Papierarten auf Seite 1-4. Zufuhr von Normalpapier, Briefpapier und Folien aus der Papierzuführung Hinweis Für den Foliendruck dürfen Sie höchstens 10 Folien in die Zuführung einlegen. - Seite 45 Allgemeine Beschreibung des Druckers Halten Sie den blauen Riegel der Seitenführung gedrückt und passen Sie die Papierführungen an das Papierformat an. Achten Sie darauf, dass die Papierführungen in den entsprechenden Aussparungen einrasten. Legen Sie Papier in die Papierzuführung ein. Der eingelegte Papierstapel darf die Markierung (▼) nicht überschreiten.
- Seite 46 Allgemeine Beschreibung des Druckers Stellen Sie die Stütze der Papierausgabe auf, damit das Papier nicht aus der Ausgabe rutscht. Hinweis Es wird empfohlen, die gedruckten Seiten unmittelbar nach der Ausgabe aus dem Drucker zu entnehmen, wenn die Stütze an der Papierausgabe nicht aufgestellt ist. Senden Sie die Druckdaten zum Drucker.
-
Seite 47: Normalpapier, Briefpapier Oder Folien Über Die Manuelle Papierzuführung Bedrucken
Allgemeine Beschreibung des Druckers Normalpapier, Briefpapier oder Folien über die manuelle Papierzuführung bedrucken Hinweis Der Drucker schaltet die manuelle Zuführung automatisch ein, wenn Papier in die manuelle Zuführung eingelegt wird. Stellen Sie Papiergröße, Druckmedium, Papierquelle und weitere Optionen im Druckertreiber ein. Wählen Sie Normalpapier, Briefpapier oder Folien. - Seite 48 Allgemeine Beschreibung des Druckers Stellen Sie die Stütze der Papierausgabe auf, damit das Papier nicht aus der Ausgabe rutscht. Hinweis Es wird empfohlen, die gedruckten Seiten unmittelbar nach der Ausgabe aus dem Drucker zu entnehmen, wenn die Stütze an der Papierausgabe nicht aufgestellt ist. Stellen Sie die Papierführungen des manuellen Einzugs mit beiden Händen auf die Breite des verwendeten Papiers ein.
- Seite 49 Allgemeine Beschreibung des Druckers Nachdem der Drucker die gedruckte Seite ausgeworfen hat, führen Sie das nächste Blatt oder die nächste Folie wie in Schritt 5 beschrieben ein. Wiederholen Sie diesen Vorgang für jede zu druckende Seite. Hinweis Entnehmen Sie jede Folie sofort nach dem Druck. Wenn sich die Folien stapeln, können sie sich wellen oder ein Papierstau verursacht werden.
-
Seite 50: Dickes Papier, Etiketten Und Umschläge Bedrucken
Allgemeine Beschreibung des Druckers Dickes Papier, Etiketten und Umschläge bedrucken Hinweis Der Drucker schaltet die manuelle Zuführung automatisch ein, wenn Papier in die manuelle Zuführung eingelegt wird. Zur Auswahl des gewünschten Papiers siehe Geeignete Papierarten auf Seite 1-4. Für den Druck von Umschlägen siehe Zu vermeidende Umschlagssorten auf Seite 1-16. Dickes Papier, Etiketten und Umschläge über die manuelle Zuführung bedrucken Stellen Sie Papiergröße, Druckmedium, Papierquelle und weitere Optionen im Druckertreiber ein. - Seite 51 Allgemeine Beschreibung des Druckers Senden Sie die Druckdaten zum Drucker. Hinweis Die Drucker-LEDs weisen den Status Kein Papier im manuellen Einzug aus, bis ein Blatt Papier oder ein Umschlag in die manuelle Zuführung eingelegt wurde. Stellen Sie die Stütze der Papierausgabe auf, damit das Papier nicht aus der Ausgabe rutscht.
- Seite 52 Allgemeine Beschreibung des Druckers Führen Sie ein Blatt Papier oder Umschlag mit beiden Händen in die manuelle Zuführung ein, bis die Vorderkante die Transportrolle berührt. Lassen Sie das Papier los, wenn der Drucker das Papier einzieht. Hinweis • Legen Sie das Papier mit der zu bedruckenden Seite nach oben in die manuelle Zuführung ein. •...
-
Seite 53: Zu Vermeidende Umschlagssorten
Bedrucken einer großen Anzahl einen Testdruck auf einem Umschlag durch. Hinweis Brother kann keine bestimmten Umschläge für den Druck empfehlen, da Umschlaghersteller ihre Spezifikationen plötzlich ändern können. Daher liegt die Auswahl der Umschläge ganz in der Verantwortlichkeit des Benutzers. -
Seite 54: Duplexdruck
Allgemeine Beschreibung des Druckers Duplexdruck ® ® ® Alle mitgelieferten Druckertreiber für Windows 95/98/Me, Windows NT 4.0 und Windows 2000/XP ermöglichen den manuellen Duplexdruck. Detaillierte Informationen zu den Einstellungen können Sie der Hilfe des Druckertreibers entnehmen. Richtlinien für den doppelseitigen Druck ■... -
Seite 55: Manueller Duplexdruck Über Manuelle Zuführung
Allgemeine Beschreibung des Druckers Nun werden automatisch auf der Rückseite des Papiers alle Seiten mit ungeraden Seitennummern gedruckt. Hinweis Entnehmen Sie zuerst das in der Zuführung verbliebene Papier und legen Sie dann die bedruckten Seiten mit der Druckseite nach oben ein. (Legen Sie das zu bedruckende Papier nicht auf unbedrucktes.) Manueller Duplexdruck über manuelle Zuführung Hinweis Sehr dünnes oder sehr dickes Papier ist nicht geeignet. -
Seite 56: Richtlinien Für Den Manuellen Duplexdruck
Allgemeine Beschreibung des Druckers Richtlinien für den manuellen Duplexdruck Der Drucker druckt zuerst die Rückseite des Blatts bzw. die zweite Seite. Wenn Sie also 10 Seiten auf 5 Blätter drucken wollen, wird auf dem ersten Blatt zuerst Seite 2 und dann Seite 1 gedruckt. -
Seite 57: Treiber Und Software
Die Druckertreiber für die folgenden Versionen von Windows und Macintosh befinden sich auf der beiliegenden CD-ROM. Außerdem stehen die neuesten Druckertreiber für alle folgenden Betriebssysteme im Brother Solutions Center unter http://solutions.brother.com zum Download zur Verfügung. ® ® Eine Anleitung zum Installieren des Druckertreibers für Windows bzw. - Seite 58 ■ *1*3 True Type Modus ■ Gedruckte Fehlermeldungen ■ ® Diese Einstellungen sind mit dem Brother-Treiber für Macintosh nicht verfügbar. ® ® Diese Einstellungen sind unter Windows NT 4.0 und Windows 2000/XP nicht verfügbar. Diese Einstellungen sind für HL-2030 und HL-2040 nicht verfügbar.
-
Seite 59: Für Windows
® Für Windows Eigenschaften des Druckertreibers Die neuesten Treiber sowie weitere Produktinformationen können Sie im Brother Solutions Center unter http://solutions.brother.com abrufen. Sie können zum Ändern der Einstellungen auch auf die Abbildung links neben der Registerkarte Grundeinstellungen im Dialogfeld Eigenschaften klicken. -
Seite 60: Registerkarte Erweitert
Treiber und Software Registerkarte Erweitert Hinweis ® Unter Windows 2000 oder XP gelangen Sie zur Registerkarte Erweitert, indem Sie auf Druckeinstellungen... auf der Registerkarte Allgemein im Fenster Eigenschaften klicken. ® Unter Windows NT 4.0 gelangen Sie zur Registerkarte Erweitert, indem Sie auf Standardeinstellungen für Dokumente im Menü... - Seite 61 Treiber und Software Tonersparmodus Mit Hilfe des Tonersparmodus, durch den die Druckdichte verringert wird, können Sie Betriebskosten sparen. Einstellungen zur Druckoptimierung Die Druckeinstellungen können manuell geändert werden. • Auto Ist die Option Auto aktiviert, werden automatisch die für Ihren Druckauftrag besten Druckeinstellungen verwendet.
- Seite 62 Stromsparintervall • Status Monitor • Makro (Für HL-2070N) ® • Administrator (Nur für Windows 95/98/Me) ® • Befehl/Datei einfügen (Für HL-2070N: Nur für Windows 95/98/Me) • Ganzseitendruck • Datum und Uhrzeit drucken • Einstellung Druckdichte • Gedruckte Fehlermeldungen Hinweis Die Liste der Druckerfunktionen kann je nach Druckermodell variieren.
- Seite 63 Treiber und Software Auftrag spoolen Die Daten für die Druckwiederholung werden im Drucker gespeichert. Sie können das Dokument dann nochmals drucken, ohne die Druckdaten erneut vom PC senden zu müssen. Zur Druckwiederholung halten Sie die Go-Taste für ca. 4 Sekunden gedrückt, bis alle LEDs der Reihe nach aufleuchten (Toner, Drum, Paper, Ready).
- Seite 64 SKALIERSPERRE Sie können die Skalierungseinstellung wie nachstehend gezeigt sperren. 1 auf 1 100% ® Befehl/Datei einfügen (Für HL-2070N: Nur für Windows 95/98/Me) Mit dieser Option können in einen Druckauftrag Daten eingefügt werden. Diese Funktion bietet die folgenden Möglichkeiten: • Druckdatei oder Datei im TIFF-Format in einen Druckauftrag einfügen.
- Seite 65 Treiber und Software Einstellung Druckdichte Druckdichte erhöhen bzw. verringern. Gedruckte Fehlermeldungen Der Drucker kann Ihnen beim Auftreten von Problemen auf Wunsch eine Fehlermeldung ausdrucken. Weitere Information hierzu siehe Gedruckte Fehlermeldung auf Seite 6-3. Folgende Auswahl ist möglich: Standardeinstellung (AN), AN oder AUS. 2 - 9...
- Seite 66 Treiber und Software Registerkarte Einstellungen für Papierzuführung Papierquelle einstellen Hier wird die Papiergröße in jeder Papierzuführung erfasst. 2 - 10...
- Seite 67 4.0 gelangen Sie zur Registerkarte Support, indem Sie auf Standardeinstellungen für Dokumente im Menü Datei des Ordners Drucker klicken. ■ Die neuesten Treiber sowie zusätzliche Produktinformationen können Sie vom Brother Solutions Center unter http://solutions.brother.com herunterladen. ■ Hier können Sie die Treiberversion überprüfen.
-
Seite 68: Für Macintosh ® -Computer
® Dieser Drucker unterstützt Mac OS 9.1 bis 9.2 sowie Mac OS X 10.2.4 oder höher. Die neuesten Druckertreiber stehen über das Brother Solutions Center unter http://solutions.brother.com zum Download zur Verfügung. Hinweis ® Die in diesem Abschnitt enthaltenen Abbildungen beruhen auf Mac OS X 10.3. - Seite 69 Treiber und Software Einstellung für Druckoptimierung Hier können Sie u.a. die Einstellungen für Auflösung, Druckmedium und Toner sparen vornehmen. Durch Auswahl des entsprechenden Eintrags in der Liste der Druckermerkmale können die folgenden Optionen eingestellt werden: Qualität ■ ■ Druckmedium ■ Tonersparmodus Qualität Die folgenden Auflösungen stehen zur Auswahl:...
-
Seite 70: Druckertreiber Deinstallieren
Treiber und Software Druckertreiber deinstallieren Der installierte Druckertreiber kann wie folgt deinstalliert werden. Hinweis • Wenn Sie den Druckertreiber mit Hilfe des Windows Assistenten zur Druckerinstallation installiert haben, gilt diese Anleitung nicht. • Um alle während des Deinstallierens verwendeten Dateien von Ihrem Computer zu entfernen, starten Sie den Computer bitte nach dem Deinstallieren neu. -
Seite 71: Brother-Lasertreiber Für Macintosh
Sie auf Löschen, um ihn zu entfernen. Markieren Sie Ihren Drucker in der Druckerliste. Löschen Sie den Drucker aus dem Menü Finder. Ziehen Sie den Order HL-MFLPro (aus Mac OS X 10.X > Library > Drucker > Brother) in den Papierkorb und leeren Sie diesen. -
Seite 72: Software
Web BRAdmin Das Web BRAdmin-Programm dient zur Verwaltung aller an ein LAN/WAN angeschlossenen Brother-Geräte. Nach der Installation der Web BRAdmin Server-Software auf einem Computer mit IIS*, können Administratoren mit einem Web-Browser eine Verbindung zum Web BRAdmin Server herstellen, der dann wiederum mit dem Zielgerät kommuniziert. Im Unterschied zum Programm BRAdmin Professional, das ®... -
Seite 73: Automatische Emulationsauswahl
Treiber und Software Automatische Emulationsauswahl Hinweis Dieser Abschnitt betrifft das Modell HL-2070N. Dieser Drucker verfügt über eine automatische Emulationsauswahl. Wenn er Daten vom Computer empfängt, analysiert er diese und stellt dann den passenden Emulationsmodus ein. Diese Funktion wurde werkseitig aktiviert. -
Seite 74: Funktionstastenfeld
Funktionstastenfeld Dieses Kapitel behandelt die vier Druckerleuchtdioden (LEDs) (Toner, Drum, Paper, Ready) sowie die Taste (Go) auf dem Funktionstastenfeld. Die nachstehende Tabelle zeigt die in diesem Kapitel für den Zustand der LED-Anzeigen verwendeten Symbole. LED ist aus. oder oder LED ist an. LED-Anzeige blinkt oder oder... - Seite 75 Funktionstastenfeld Druckerstatus Stromsparmodus Der Netzschalter ist ausgeschaltet oder der Drucker ist im Stromsparmodus. Das Drücken der Go-Taste unterbricht den Stromsparmodus und bringt den Drucker wieder in den Bereitschaftszustand. Betriebsbereit Der Drucker ist druckbereit. Aufwärmphase Der Drucker wird auf Betriebstemperatur gebracht. Empfängt Daten Der Drucker empfängt Daten vom Computer, verarbeitet Daten in seinem Speicher oder druckt gerade.
- Seite 76 Funktionstastenfeld Druckerstatus Toner leer Tauschen Sie die betreffende Tonerkassette aus. Siehe Tonerkassetten ersetzen auf Seite 5-3. Tonerkassette falsch positioniert Die Tonerkassette ist nicht richtig eingesetzt. Nehmen Sie die Tonerkassette aus dem Drucker und setzen Sie sie erneut ein. Trommel bestellen Die Trommeleinheit nähert sich dem Ende ihrer Lebensdauer.
- Seite 77 Funktionstastenfeld Druckerstatus Vordere Abdeckung ist offen Schließen Sie die vordere Abdeckung des Druckers. Hintere Abdeckung ist offen Schließen Sie die hintere Abdeckung des Druckers. Papierstau Beseitigen Sie den Papierstau. Siehe Papierstaus und deren Beseitigung auf Seite 6-5. Setzt der Drucker den Druck nicht automatisch fort, so drücken Sie die Go-Taste.
-
Seite 78: Störungsmeldungen
Funktionstastenfeld Störungsmeldungen Ein nicht behebbarer Fehler wird durch eine Störungsmeldung ausgewiesen. Dabei leuchten alle LEDs gleichzeitig (siehe nachstehende Abbildung). Erhalten Sie eine derartige Servicemeldung, so wird empfohlen, den Drucker am Netzschalter auszuschalten, nach einigen Minuten wieder einzuschalten und den Druck erneut zu versuchen. Können Sie den Fehler nicht beheben und erscheint die gleiche Störungsmeldung nach dem erneuten Einschalten des Druckers, wenden Sie sich an Ihren Fachhändler. - Seite 79 Paper Ready Notieren Sie sich, welche LEDs an Ihrem Drucker leuchten und ermitteln Sie die wahrscheinliche Ursache der Störung anhand der vorstehenden Tabelle. Ihr Brother-Fachhändler braucht diese Informationen, um Ihnen weiterhelfen zu können. Hinweis Vergewissern Sie sich vor dem Melden einer Störung, dass die vordere Abdeckung vollständig geschlossen ist.
-
Seite 80: Funktionstaste (Go-Taste)
Funktionstastenfeld Funktionstaste (Go-Taste) Die Funktionstaste hat die folgenden Funktionen: Drucker aktivieren Sie können den Drucker im Stromsparmodus durch Drücken der Go-Taste wieder in den Bereitschaftszustand versetzen. Fehler beheben Manche der auftretenden Fehler werden vom Drucker automatisch beseitigt. Behebt der Drucker einen Fehler nicht selbst, so drücken Sie die Go-Taste, um ihn zu beseitigen. -
Seite 81: Testseite Drucken
Drücken Sie die Go-Taste nochmals. Der Drucker druckt nun eine Musterseite aus. Testdruck über Druckertreiber auslösen ® Wenn Sie den Brother-Druckertreiber für Windows benutzen, klicken Sie auf die Option Testseite drucken. ® Sie finden diese auf der Registerkarte Allgemein im Windows -Druckertreiber. -
Seite 82: Ausdruck Der Druckereinstellungen
Drücken Sie die Go-Taste innerhalb von 2 Sekunden dreimal. Der Drucker druckt nun die Druckereinstellungen. Testdruck über Druckertreiber auslösen ® Wenn Sie den Brother-Treiber für Windows benutzen, können Sie die aktuellen Druckereinstellungen über die Option Einstellungen drucken auf der Registerkarte Support auslösen. 3 - 9... -
Seite 83: Schriften Drucken (Für Hl-2070N)
Drücken Sie die Go-Taste zweimal. Nun wird eine Liste der internen Druckerschriften ausgedruckt. Testdruck über Druckertreiber auslösen ® Wenn Sie den Brother-Treiber für Windows benutzen, können Sie die Liste der internen Schriften über die Option Schriften drucken auf der Registerkarte Support auslösen. -
Seite 84: Printserver-Standardeinstellungen (Für Hl-2070N)
Funktionstastenfeld PrintServer-Standardeinstellungen (Für HL-2070N) Sie können den PrintServer folgendermaßen zu den werkseitigen Standardeinstellungen (d.h. sämtliche Informationen wie Kennwort und IP-Adresse) zurücksetzen: Schalten Sie den Drucker aus. Die vordere Abdeckung muss geschlossen und der Netzstecker eingesteckt sein. Halten Sie die Go-Taste gedrückt und schalten Sie gleichzeitig den Drucker am Netzschalter ein. Halten Sie die Go-Taste gedrückt, bis die folgenden LEDs aufleuchten: Toner, Drum und Paper. -
Seite 85: Sonderzubehör
4.0 und Windows 2000/XP kompatibel. Der Brother NC-2200w Wireless PrintServer unterstützt die Standards IEEE 802.11b für den drahtlosen Netzwerkbetrieb und kann im Infrastruktur- oder Ad-hoc-Modus mit den üblichen Sicherheitsvorkehrungen für den drahtlosen Netzwerkbetrieb benutzt werden. Weitere Informationen finden Sie auf unserer Website unter http://solutions.brother.com. -
Seite 86: Printserver (Nc-2100P) (Für Hl-2040)
Ein zusätzlich erhältlicher PrintServer (NC-2100p) ermöglicht den Netzwerkanschluss über die Parallelschnittstelle. Netzwerkschnittstelle 10/100Base-TX-Ethernet Druckerschnittstelle Parallel Protokollunterstützung TCP/IP, NetBEUI Management-Funktionen Eingebettete Webserver-Unterstützung SNMP- / MIB-Support TELNET-Fernkonsole BRAdmin Professional kompatibel Flash-Speicher erleichtert Update der Firmware Hinweis HL-2070N verfügt bereits über einen eingebauten 10/100BASE-TX-Ethernet PrintServer. 4 - 2... -
Seite 87: Routinewartung
Routinewartung Von Zeit zu Zeit müssen bestimmte Materialien und Teile ersetzt sowie der Drucker gereinigt werden. WARNUNG Achten Sie beim Ersetzen bestimmter Materialien bzw. Teile sowie beim Reinigen des Druckerinneren auf Folgendes: ■ Wenn Toner auf Ihre Kleidung kommt, wischen Sie den Toner mit einem trockenen Tuch ab. -
Seite 88: Tonerkassette
Standard-Tonerkassette handeln. Die Starterkassette druckt bis zu 1.500 Seiten im Format A4 oder Letter mit ca. 5 % Deckung. Die Standard- und Original-Brother-Tonerkassette drucken bis zu 2.500 Seiten im Format A4 oder Letter mit ca. 5 % Deckung. Hinweis •... -
Seite 89: Meldung „Toner Leer
Kassette verteilt. Tonerkassetten ersetzen Hinweis • Die beste Druckqualität erhalten Sie, wenn Sie qualitativ hochwertige Brother-Tonerkassetten verwenden. Tonerkassetten erhalten Sie vom Fachhändler, von dem Sie den Drucker bezogen haben, oder vom Brother-Kundendienst. • Beim Wechseln der Tonerkassette sollte der Drucker immer gereinigt werden. Siehe Reinigung auf Seite 5-11. - Seite 90 Routinewartung ACHTUNG • Es wird empfohlen, die Trommeleinheit und die Tonerkassette für den Fall, dass Toner verschüttet wird, auf Papier oder ein Tuch zu legen. • Berühren Sie nicht die in der folgenden Abbildung gezeigten Elektroden, um den Drucker nicht durch statische Elektrizität zu beschädigen.
- Seite 91 Wird eine unverpackte Trommeleinheit direktem Sonnen- oder elektrischem Licht ausgesetzt, so kann sie beschädigt werden. • Brother empfiehlt dringend, gebrauchte Tonerkassetten nicht erneut aufzufüllen. Nur Original-Verbrauchsmaterial ist exakt auf den Betrieb des Produkts abgestimmt. Die Verwendung von nicht kompatiblem Toner bzw.
- Seite 92 Routinewartung Schieben Sie die neue Tonerkassette in die Trommeleinheit, bis sie hörbar einrastet. Wenn Sie die Tonerkassette korrekt eingesetzt haben, hebt sich der Riegel automatisch. ACHTUNG Vergewissern Sie sich, dass die Tonerkassette richtig eingesetzt worden ist, da sie sich sonst aus der Trommeleinheit lösen kann.
-
Seite 93: Trommeleinheit
Faktoren, welche die tatsächliche Lebensdauer der Trommel beeinflussen, unserer Kontrolle entziehen, können wir keine Mindestanzahl an Druckseiten für Ihre Trommel garantieren. • Die beste Leistung erhalten Sie mit Original-Brother-Toner. Der Drucker sollte nur in einem sauberen, staubfreien Raum mit ausreichender Belüftung verwendet werden. •... -
Seite 94: Trommeleinheit Ersetzen
Routinewartung Trommeleinheit ersetzen Hinweis Beim Wechseln der Trommeleinheit sollte der Drucker immer gereinigt werden. Siehe Reinigung auf Seite 5-11. Zum Wechseln der Trommeleinheit gehen Sie wie folgt vor. Vergewissern Sie sich, dass der Drucker eingeschaltet und die Drum-LED blinkt. Öffnen Sie die vordere Abdeckung des Druckers. - Seite 95 Routinewartung ACHTUNG • Es wird empfohlen, die Trommeleinheit und die Tonerkassette für den Fall, dass Toner verschüttet wird, auf Papier oder ein Tuch zu legen. • Berühren Sie nicht die in der folgenden Abbildung gezeigten Elektroden, um den Drucker nicht durch statische Elektrizität zu beschädigen.
- Seite 96 Routinewartung Schieben Sie die Tonerkassette in die neue Trommeleinheit, bis sie hörbar einrastet. Wenn Sie die Tonerkassette korrekt eingesetzt haben, hebt sich der blaue Hebel automatisch. ACHTUNG Vergewissern Sie sich, dass die Tonerkassette richtig eingesetzt worden ist, da sie sich sonst aus der Trommeleinheit lösen kann.
-
Seite 97: Reinigung
Routinewartung Reinigung Reinigen Sie den Drucker innen und außen regelmäßig mit einem trockenen, fusselfreien Tuch. Beim Wechseln der Tonerkassette oder Trommeleinheit sollte das Innere des Druckers gereinigt werden. Werden Ausdrucke mit Toner verschmutzt, so muss das Innere des Druckers mit einem trockenen, fusselfreien Tuch gereinigt werden. Außenreinigung des Druckers ACHTUNG •... -
Seite 98: Innenreinigung Des Druckers
Routinewartung Reinigen Sie das Innere der Papierkassette mit einem weichen Tuch, um den Staub zu entfernen. Setzen Sie die Papierkassette wieder in den Drucker ein. Schließen Sie das Netzkabel des Druckers wieder an und schalten Sie den Netzschalter ein. Innenreinigung des Druckers Reinigen Sie das Druckerinnere wie folgt: Schalten Sie das Gerät aus und ziehen Sie den Netzstecker des Druckers. -
Seite 99: Koronadraht Reinigen
Routinewartung HEISSE GERÄTETEILE Wenn Sie den Drucker gerade benutzt haben, können einige der Innenteile äußerst heiß sein! Warten Sie mit dem Berühren von Teilen im Inneren des Druckers, bis sich der Drucker abgekühlt hat. Wischen Sie das Scannerfenster mit einem trockenen, fusselfreien Tuch ab. - Seite 100 Routinewartung Ziehen Sie die Trommeleinheit heraus. ACHTUNG • Es wird empfohlen, die Trommeleinheit und die Tonerkassette für den Fall, dass Toner verschüttet wird, auf Papier oder ein Tuch zu legen. • Berühren Sie nicht die in der folgenden Abbildung gezeigten Elektroden, um den Drucker nicht durch statische Elektrizität zu beschädigen.
-
Seite 101: Problemlösung
Problemlösung Die meisten Probleme können Sie alleine lösen. Tipps und Hinweise zur Problemlösung finden Sie im Brother Solutions Center. Unsere Website finden Sie unter http://solutions.brother.com. Problem identifizieren Überprüfen Sie zuerst Folgendes: ■ Der Netzstecker muss korrekt angeschlossen und der Drucker eingeschaltet sein. -
Seite 102: Fehlermeldungen Auf Dem Bildschirm
Problemlösung Fehlermeldungen auf dem Bildschirm Das Statusüberwachungsprogramm zeigt beim Drucker aufgetretene Probleme an. Sie können die Störung dann mittels der entsprechenden in der folgenden Tabelle aufgelisteten Abhilfemaßnahmen beheben. Standardmäßig ist der Status Monitor deaktiviert. Wenn Sie den Statusmonitor einschalten möchten, ändern Sie die Geräteeinstellungen auf der Registerkarte Erweitert. -
Seite 103: Gedruckte Fehlermeldung
Problemlösung Fehlermeldung Abhilfe Trommel bestellen ■ Die Trommeleinheit nähert sich dem Ende ihrer Lebensdauer. Besorgen Sie sich eine neue Trommeleinheit, um sie austauschen zu können. Siehe Trommeleinheit ersetzen auf Seite 5-8. Trommelfehler ■ Siehe Koronadraht reinigen auf Seite 5-13. LED-Anzeigen Um den Fehler zu identifizieren, prüfen Sie die LED-Anzeigen. -
Seite 104: Papiermanagement
Problemlösung Papiermanagement Vergewissern Sie sich zuerst, dass Sie Papier verwenden, das den von Brother empfohlenen Spezifikationen entspricht. Siehe Geeignete Papierarten auf Seite 1-4. Problem Abhilfe Das Gerät zieht kein Papier ■ Richten Sie das Papier in der Papierkassette gerade aus. Ist das Papier ein. -
Seite 105: Papierstaus Und Deren Beseitigung
Problemlösung Papierstaus und deren Beseitigung Tritt ein Papierstau auf, blinkt die Paper-LED am Drucker auf (siehe nachstehende Abbildung). HEISSE GERÄTETEILE Wenn Sie den Drucker gerade benutzt haben, können einige der Innenteile extrem heiß sein! Berühren Sie daher nach dem Öffnen der Vorderseite oder Rückseite des Druckers niemals die in den Abbildungen schattiert markierten Teile. - Seite 106 Problemlösung Ziehen Sie das gestaute Papier nach oben aus dem Drucker. Öffnen Sie die vordere Abdeckung. Ziehen Sie die Trommeleinheit langsam heraus. Das gestaute Papier wird mit der Trommeleinheit und der Tonerkassette herausgezogen. ACHTUNG Berühren Sie nicht die in der folgenden Abbildung gezeigten Elektroden, um den Drucker nicht durch statische Elektrizität zu beschädigen.
- Seite 107 Problemlösung Öffnen Sie die hintere Abdeckung. Ziehen Sie den Griff auf sich zu, um die Abdeckung der rückwärtigen Papierausgabe zu öffnen. Rückwärtige Papierausgabe Ziehen Sie das gestaute Papier aus der Fixiereinheit. Kann das gestaute Papier nicht leicht herausgezogen werden, drücken Sie den Riegel mit einer Hand nach unten und ziehen Sie das Papier vorsichtig mit der anderen Hand heraus.
- Seite 108 Problemlösung HEISSE GERÄTETEILE Wenn Sie den Drucker gerade benutzt haben, können einige der Innenteile äußerst heiß sein! Warten Sie mit dem Berühren von Teilen im Inneren des Druckers, bis sich der Drucker abgekühlt hat. Schließen Sie die hintere Abdeckung. Drücken Sie den Riegel nach unten und nehmen Sie die Tonerkassette aus der Trommeleinheit.
- Seite 109 Problemlösung Installieren Sie die Trommeleinheit wieder im Drucker. Setzen Sie die Papierkassette wieder in den Drucker ein. Schließen Sie die vordere Abdeckung. Stellen Sie sicher, dass die Paper-LED nicht mehr leuchtet und der Drucker druckbereit ist. 6 - 9...
-
Seite 110: Sonstige Probleme
Problemlösung Sonstige Probleme Problem Abhilfe Der Drucker druckt nicht. Auf Prüfen Sie, ob das Druckerkabel beschädigt ist. ■ dem PC erscheint die ■ Wenn Sie eine Schnittstellenweiche haben, vergewissern Sie sich, dass der Fehlermeldung Fehler beim korrekte Drucker ausgewählt ist. Schreibzugriff auf den Anschluss LPT1: (oder BRUSB) des Druckers. - Seite 111 Problemlösung Beispiele für schlechte Abhilfe Druckqualität Verwenden Sie Papier, das den empfohlenen Spezifikationen entspricht. Siehe ■ Geeignete Papierarten auf Seite 1-4 ■ Prüfen Sie die Betriebsbedingungen. Dieses Problem kann durch Feuchtigkeit, ABCDEFGH Hitze usw. hervorgerufen werden. Siehe Drucker aufstellen auf Seite 1-3. abcdefghijk A B C D ■...
- Seite 112 Problemlösung Beispiele für schlechte Abhilfe Druckqualität Gibt sich das Problem nach dem Drucken von ein paar Seiten nicht, so ist die ■ Oberfläche der OPC-Trommel möglicherweise durch Etikettenkleber verschmutzt. Reinigen Sie die Trommeleinheit wie folgt: 75 mm (3.0 in.) 75 mm Richten Sie den Ausdruck vor der Trommeleinheit aus und ermitteln Sie (3.0 in.) die genaue Stelle, an die der Fehler auftritt.
- Seite 113 Tonerkassette. Siehe Tonerkassetten ersetzen auf Seite 5-3. Vergewissern Sie sich, dass das Scannerfenster nicht durch ein Stück Papier verdeckt wird. Möglicherweise ist die Fixiereinheit verschmutzt. Wenden Sie sich an Ihren Vertikale schwarze Linien ■ Brother-Händler oder -Kundenservice. Auf den Druckseiten ziehen sich Tonerlinien nach unten. 6 - 13...
- Seite 114 Problemlösung Beispiele für schlechte Abhilfe Druckqualität Wischen Sie das Scannerfenster mit einem weichen Tuch ab. Siehe ■ Innenreinigung des Druckers auf Seite 5-12. ■ Möglicherweise ist die Tonerkassette beschädigt. Installieren Sie eine neue ABCDEFGH Tonerkassette. Siehe Tonerkassetten ersetzen auf Seite 5-3. abcdefghijk ABCD abcde...
-
Seite 115: Abhilfe Bei Druckproblemen
Problemlösung Abhilfe bei Druckproblemen Problem Abhilfe Der Drucker druckt nicht wie Prüfen Sie, ob das Druckerkabel zu lang ist. Es wird ein Parallel- oder ■ erwartet oder er druckt Unsinn USB-Kabel von höchstens 2 Metern Länge empfohlen. aus. Prüfen Sie, ob das Druckerkabel beschädigt ist. ■... -
Seite 116: Anhang
Anhang Technische Daten Druckwerk Modell HL-2030 HL-2040 HL-2070N Technologie Elektrofotografie Druckgeschwindigkeit Bis zu 17 Seiten pro Bis zu 20 Seiten pro Minute (Letter) Minute (Letter) Bis zu 20 Seiten pro Minute (A4) Bis zu 16 Seiten pro Minute (A4) Zeit bis Druckbeginn Höchstens 10 Sek. - Seite 117 *2 Windows 95 oder Windows NT 4.0 unterstützt kein USB. ® *3 Von Brother entwickeltes Windows -Dienstprogramm. *4 Verwendet einen Standard-Browser zur Steuerung des Geräts. *5 Code 39, Interleaved 2 von 5, EAN-8, EAN-13, UPC-A, UPC-E, EAN-128, Codabar, FIM (US-PostNet), ISBN,...
- Seite 118 Ohne Funktion Generischer PCL-Treiber für ® ® Windows NT 4.0, Windows 2000/XP ® ® Brother-Lasertreiber für Mac OS 9.1 bis 9.2 und Mac OS X 10.2.4 oder höher GDI-Druckertreiber für Linux Programme Interaktive Hilfe Interaktive Hilfe Driver Deployment Wizard Funktionstastenfeld...
-
Seite 119: Spezifikation Der Druckmedien
Anhang Spezifikation der Druckmedien Modell HL-2030 HL-2040 HL-2070N Druckmedien Manueller Einzug Normalpapier, Briefpapier, Recyclingpapier, Briefumschläge, Etiketten und Folien Papierzuführung Normalpapier, Briefpapier, Recyclingpapier und Folien Papiergewicht Manueller Einzug 60 bis 161 g/m Papierzuführung 60 bis 105 g/m Papiergrößen Manueller Einzug Breite: 69,9 bis 215,9 mm Länge: 116 bis 406,4 mm... -
Seite 120: Systemanforderungen
Anhang Sonstiges Modell HL-2030 HL-2040 HL-2070N Stromverbrauch Druck Durchschnittlich 450 W bei 25 °C Standby Durchschnittlich 70 W bei 25 °C Stromspar-modus Durchschnittlich 5 W Durchschnittlich Geräuschpegel Schalldruck Druck Höchstens 51 dB (A) Standby Höchstens 30 dB (A) Schallleistung Druck LWA=6.2 Bell (A) , LWAd=6.5 Bell (A) -
Seite 121: Wichtige Hinweise Zu Verwendbaren Papierarten
Anhang Wichtige Hinweise zu verwendbaren Papierarten Dieser Abschnitt behandelt die Papierarten, die Sie mit diesem Drucker verwenden können. Hinweis Papierarten, die von unserer Empfehlung abweichen, können einen Fehleinzug oder Papierstau im Drucker verursachen. Siehe Empfohlenes Papier auf Seite 1-5. Vor dem Kauf größerer Mengen Papier Vergewissern Sie sich, dass das Papier für den Drucker geeignet ist. - Seite 122 Anhang Druckoberfläche Der Druck kann auf Vorder- und Rückseite eines Blatt Papiers geringfügig unterschiedlich ausfallen. Im Allgemeinen ist die Vorderseite in einem Stapel Papier als Druckseite gekennzeichnet. Beachten Sie den Hinweis auf die Druckseite auf der Papierverpackung. Typischerweise wird sie mit einem Pfeil gekennzeichnet.
- Seite 123 Anhang Papierformat Papierformat Zoll Letter 8,5 × 11 Zoll Legal 8,5 × 14 Zoll Executive 7,25 × 10,5 Zoll 210 × 297 mm 148 × 210 mm 105 × 148 mm Umschläge Monarch 3,875 × 7,5 Zoll Umschläge #9 3,875 × 8,9 Zoll Umschläge #10 4,12 ×...
-
Seite 124: Zeichensätze (Für Hl-2070N)
Anhang Zeichensätze (Für HL-2070N) In den Emulationsmodus HP LaserJet, IBM Proprinter XL und EPSON FX-850 können die Zeichensätze über einen Web-Browser oder eine Remote Printer Console-Software (Remote Printer Console, Druckerfernsteuerung) gewählt werden. Web-Browser verwenden Gehen Sie zum Verwenden des Web-Browsers folgendermaßen vor: Geben Sie im Browser http://IP-Adresse des Druckers/ ein. -
Seite 125: Hp Laserjet Modus
Anhang HP LaserJet Modus ABICOMP Brasilien / Portugal (13P) ABICOMP International (14P) Desktop (7J) Griechisch8 (8G) HP Deutsch (0G) HP Spanisch (1S) ISO Latein1 (0N) ISO Latein2 (2N) ISO Latein5 (5N) ISO Latein6 (6N) ISO2 IRV (2U) ISO4 UK (1E) ISO5 ASCII (0U) ISO10 Schwedisch (3S) ISO11 Schwedisch (0S) -
Seite 126: Ibm-Emulationsmodus
Anhang Windows Baltic (19L) Windows Kyrillisch (9R) Windows Griechenland (9G) Windows Latein1 (19U) Windows Latein2 (9E) Windows Latein5 (5T) Wingdings (579L) IBM-Emulationsmodus PC8 D/N PC8 Türkisch PC850 Multilingual PC852 Osteuropa PC860 Portugal PC863 Französisch Kanada PC865 Nordic Epson-Emulationsmodus Dänisch I Dänisch II Niederländisch Französisch I... -
Seite 127: Anhang (Für Europa Und Andere Länder)
Häufig gestellte Fragen (FAQs) Alles, was Sie für Ihren Drucker benötigen, finden Sie im Brother Solutions Center. Sie können dort die neuesten Treiber und Dienstprogramme für Ihre Drucker herunterladen, Antworten auf häufig gestellte Fragen und Tipps zur Problemlösung finden: http://solutions.brother.com... - Seite 128 Anhang (Für Europa und andere Länder) Internet-Adressen Globale Brother Website: http://www.brother.com Für Antworten auf häufig gestellte Fragen, Produktsupport, technische Fragen und Abrufen von Treibern und Dienstprogrammen: http://solutions.brother.com Deutschland: http://www.brother.de Schweiz: http://www.brother.ch Österreich: http://www.brother.at B - 2...
-
Seite 129: Wichtige Informationen: Vorschriften
Anhang (Für Europa und andere Länder) Wichtige Informationen: Vorschriften Funkentstörung (Nur 220 - 240 Volt-Modell) Dieses Gerät ist gemäß EN55022 (CISPR Veröffentlichung 22)/Klasse B funkentstört. Vor Verwendung des Produktes sollten Sie sicherstellen, dass Sie eines der folgenden Schnittstellenkabel verwenden. 1. Ein abgeschirmtes Parallelkabel mit verdrillter Doppelleitung, das der Norm IEEE1284 entspricht. 2. -
Seite 130: Wichtig: Ihrer Sicherheit Zuliebe
Im Notfall müssen Sie das Netzkabel aus der Steckdose ziehen, um die Stromversorgung komplett zu unterbrechen. Warnhinweis für LAN-Anschluss (Nur für Modell HL-2070N) Schließen Sie dieses Gerät nur an einen LAN-Anschluss an, der keinen Überspannungen ausgesetzt ist. B - 4... - Seite 131 Anhang (Für Europa und andere Länder) B - 5...
-
Seite 132: Eu-Konformitätserklärung
Brother Technology (ShenZhen) Ltd., NO6 Gold Garden Ind. Nanling Buji, Longgang, Shenzhen, China erklärt hiermit, dass: Produktbeschreibung : Laserdrucker Produktbezeichnung : HL-2030, HL-2040, HL-2070N Modellnummer : HL-20 die Anforderungen der einschlägigen Richtlinien erfüllen: Niederspannungsrichtlinie 73/23/EEC (gemäß Änderungen 93/68/EEC) und Richtlinie über Elektromagnetische Kompatibilität 89/336/EEC (gemäß Änderungen 91/263/EEC, 92/31/EEC und 93/68/EEC). -
Seite 133: Index
Macintosh® ........... 2-12 Manueller Duplexdruck ......1-17 Manueller Einzug ....1-10, 1-13, 1-18 Bedruckbarer Bereich ......1-6 BRAdmin Professional ......2-16 Brother Solutions Center ......2-1 NC-2100p ..........4-2 Brother-Niederlassungen (Europa und andere Länder) NC-2200w ..........4-1 Netzwerk ..........2-16 Netzwerkverknüpfung ......A-2 Normalpapier ........... - Seite 134 Index Störungsmeldung ........3-5 Stromversorgung ........1-3 Symbole ..........A-9 Systemanforderungen ......A-5 Testseite drucken ........3-8 Toner leer ......... 3-3, 5-3 Tonerkassette ......... 5-2, A-4 Tonerkassette falsch positioniert ..... 3-3 Trommel ..........A-4 Trommel bestellen ........3-3 Trommeleinheit ........5-7 Trommelfehler ......... 3-4 Umschläge ........
- Seite 135 Drucker mitgelieferten CD-ROM lesen oder ausdrucken. Bewahren Sie die CD gut zugänglich auf. Alles, was Sie für Ihr Gerät benötigen, finden Sie auf den Brother Webseiten, wo Sie die neuesten Treiber und Dienstprogramme für Ihre Drucker von Brother herunterladen sowie Antworten auf häufig gestellte Fragen und Tipps zur Problemlösung lesen können (Deutschland: (http://www.brother.de,...
-
Seite 136: Warnungen, Hinweise Und Anmerkungen
Der Inhalt des Handbuches und die technischen Daten des Produkts können ohne vorherige Ankündigung geändert werden. Das Unternehmen Brother behält sich das Recht vor, die technischen Daten und den Inhalt dieses Handbuchs ohne vorherige Bekanntgabe zu ändern und übernimmt keine Haftung für etwaige Fehler in diesem Handbuch oder daraus möglicherweise resultierende Schäden. - Seite 137 Inhaltsverzeichnis Einführung .........................1-1 Überblick............................1-1 Arten der Netzwerkverbindung ......................1-2 Beispiel einer Netzwerkverbindung ..................... 1-2 Drucken mit Peer-to-Peer und TCP/IP ..................1-2 Über das Netzwerk gemeinsam benutzte Drucker ..............1-3 Protokolle............................1-4 TCP/IP-Protokolle und Funktionalität ..................1-4 DHCP/BOOTP/RARP......................1-4 APIPA ............................1-4 DNS-Client..........................
- Seite 138 4.0 ..................4-1 PrintServer-Konfiguration ......................4-1 Den Workgroup/Domänennamen mit BRAdmin Professional ändern........4-2 Arbeitsgruppen-/Domänennamen mit einem Web-Browser ändern........4-3 Workgroup/Domänen-Namen mit TELNET ändern..............4-3 Brother NetBIOS Port Monitor installieren ................... 4-4 Drucker verknüpfen ........................4-5 ® Windows 95/98/Me ........................ 4-5 ®...
- Seite 139 CD-ROM wurde ins Laufwerk eingelegt, aber startet nicht automatisch ......... 8-1 Werkseitige Voreinstellungen des Brother-PrintServers zurücksetzen ........8-1 Installationsprobleme......................... 8-1 Der Brother PrintServer wird während des Einrichtens nicht von der Installationssoftware für ® Netzwerkdruck oder vom Treiber des Brother-Druckers unter Windows gefunden ....
-
Seite 140: Einführung
TCP/IP-Protokolle sowie Macintosh -Netzwerke QuickDraw über TCP/IP unterstützen. Um das Brother-Gerät in einem Netzwerk zu verwenden, müssen Sie den PrintServer konfigurieren und die Computer einrichten, die Sie verwenden. In diesem Kapitel erfahren Sie etwas über die Grundlagen von Netzwerkverbindungen sowie -protokolle. -
Seite 141: Arten Der Netzwerkverbindung
■ Die IP-Adresse des Brother-Gerätes muss entsprechend konfiguriert werden. ■ Falls es einen Router gibt, können Computer durch diesen Router auf das Brother-Gerät zugreifen. ■ (In diesem Fall muss die Gateway-Adresse für beide Computer sowie den Drucker konfiguriert werden.) 1 - 2... -
Seite 142: Über Das Netzwerk Gemeinsam Benutzte Drucker
In einer Netzwerkumgebung verschickt jeder Computer Daten über einen zentral verwalteten Computer an den Brother-Drucker und empfängt von diesem auch Daten. Diese Art von Computer werden "Server" oder "PrintServer" genannt. Der Server greift auf die Druckaufträge der anderen Computer zu und koordiniert die Drucke. -
Seite 143: Protokolle
DHCP/BOOTP/RARP-Server), vergibt das APIPA-Protokoll (Automatic Private IP Addressing) automatisch eine im folgenden Bereich liegende IP-Adresse: 169.254.1.0 bis 169.254.254.255. DNS-Client Die DNS-Client-Funktion (DNS = Domain Name Service) wird vom Brother-PrintServer unterstützt. Mit dieser Funktion kann der PrintServer mit Hilfe des DNS-Namens mit anderen Geräten kommunizieren. NetBIOS/IP ®... -
Seite 144: Port9100
SNMP (Simple Network Management Protocol) wird zum Verwalten und Überwachen von Geräten verwendet, z. B. Computer, Router und Terminals eines TCP/IP-Netzwerkes. Webserver (HTTP) Zum Brother PrintServer gehört ein Webserver, der ein Überwachen des Status oder das Ändern von Konfigurationseinstellungen ermöglicht. Hinweis Wir empfehlen die Verwendung des Internet Explorer 5.0 (oder höher) oder Netscape Navigator 4.0 (oder... -
Seite 145: Netzwerkdrucker Konfigurieren
Netzwerkdrucker konfigurieren Überblick Die Angaben des TCP/IP-Protokolls Ihres Brother-Netzwerkdruckers müssen vor dem Einsatz im Netzwerk konfiguriert werden. In diesem Kapitel wird die TCP/IP-Konfiguration beschrieben und erklärt, wie Sie Ihren Netzwerkdrucker für das TCP/IP-Protokoll konfigurieren. Auf der dem Drucker beiliegenden CD-ROM ist ein Programm zur automatischen Installation enthalten. -
Seite 146: Subnetzmaske
Addressing) automatisch eine IP-Adresse zwischen 169.254.1.0 bis 169.254.254.255 zuweisen. Für weitere Informationen zu APIPA siehe IP-Adresse über APIPA konfigurieren auf Seite A-3. Bei deaktiviertem APIPA-Protokoll lautet die Standard-IP-Adresse des Brother-PrintServers 192.0.0.192. Sie können diese IP-Adresse jedoch einfach ändern, damit Sie mit den IP-Adressendetails Ihres Netzwerks kompatibel ist. -
Seite 147: Ip-Adresse Und Subnetzmaske Einrichten
Ihren Drucker mit BRAdmin Professional konfigurieren Hinweis • Bitte benutzen Sie die Version von BRAdmin Professional, die Sie auf der mit Ihrem Brother-Gerät mitgelieferten CD-ROM finden. Die neueste Version von Brother BRAdmin Professional können Sie ® unter http://solutions.brother.com herunterladen. Dieses Programm ist nur für Windows geeignet. -
Seite 148: Weitere Methoden, Um Den Netzwerkdrucker Zu Konfigurieren
4.0 und ® Windows 2000/XP). Klicken Sie dazu auf Start / Programme / Brother Administrator Utilities / Brother BRAdmin Professional Utilities / BRAdmin Professional. Wählen Sie TCP/IP im linken Rahmen des Hauptfensters von BRAdmin. Wählen Sie den gewünschten PrintServer im rechten Rahmen des Hauptfensters von BRAdmin, um ihn zu konfigurieren. -
Seite 149: Http (Web-Browser) Und Tcp/Ip-Protokoll Zum Ändern Der Printserver-Einstellungen Verwenden
Netzwerkdrucker konfigurieren HTTP (Web-Browser) und TCP/IP-Protokoll zum Ändern der PrintServer-Einstellungen verwenden Die Einstellungen des PrintServers können mit einem normalen Web-Browser (wir empfehlen Microsoft ® ® Internet Explorer 5.0 oder höher/Netscape Navigator 4.0 oder höher) mit HTTP (Hyper Text Transfer Protocol) geändert werden. Um einen Web-Browser verwenden zu können, müssen Sie dem PrintServer eine IP-Adresse zugewiesen haben. -
Seite 150: Netzwerkdruck In Windows Drucke Mit Peer-To-Peer Und Tcp/Ip
Vergewissern Sie sich, dass Hostcomputer und PrintServer entweder auf dem gleichen Subnetzwerk sind, oder dass andernfalls der Router korrekt für die Datenübertragung zwischen den beiden Geräten konfiguriert ist. • Das Standardkennwort für den Brother-PrintServer lautet access. Windows 2000/XP ® ®... -
Seite 151: Druckertreiber Bereits Installiert
® Netzwerkdruck in Windows : Drucke mit Peer-to-Peer und TCP/IP Wählen Sie jetzt die Option Lokaler Drucker und deaktivieren Sie Automatische Druckererkennung und Installation von Plug-&-Play-Druckern. Klicken Sie auf Weiter. Jetzt wählen Sie den korrekten Netzwerk-Print-Anschluss aus. Wählen Sie im Pulldown-Menü Einen neuen Anschluss erstellen und anschließend Standard TCP/IP Port. -
Seite 152: Windows Nt ® 4.0
Installation der Brother Peer-to-Peer-Software Starten Sie das Installationsprogramm der CD-ROM wie in der Installationsanleitung des Druckers beschrieben. Wählen Sie HL-2070N und die gewünschte Sprache. Klicken Sie dann auf Andere Treiber oder Dienstprogramme installieren. Wählen Sie dann das Installationsprogramm der Software für den Netzwerkdruck. -
Seite 153: Drucker Verknüpfen
Wählen Sie Arbeitsplatz (nicht Netzwerkdrucker) und klicken Sie auf Weiter. Wählen Sie den Brother-LPR-Anschluss (den in Schritt 7 der Anleitung in diesem Kapitel zur Installation von Brother Peer-to-Peer-Druck (LPR) zugewiesenen Anschlussnamen), und klicken Sie auf Weiter. Wählen Sie das entsprechende Druckermodell. Wird das korrekte Modell nicht angezeigt, so klicken Sie auf die Option Datenträger, und legen Sie die mit dem Drucker gelieferte CD-ROM ein. -
Seite 154: Zweiten Brother-Lpr-Anschluss Hinzufügen
Brother-Software für den Netzwerkdruck nicht erneut installieren. Starten Sie das Installationsprogramm der CD-ROM wie in der Installationsanleitung beschrieben. Wählen Sie HL-2070N und die gewünschte Sprache. Klicken Sie dann auf Andere Treiber oder Dienstprogramme installieren. Wählen Sie dann das Installationsprogramm der Software für den Netzwerkdruck. -
Seite 155: Drucker Verknüpfen
Treiber zu behalten (dies wird empfohlen) oder ihn zu ersetzen. Wählen Sie die gewünschte Option, und klicken Sie auf Weiter. Wählen Sie den Brother LPR Port (den Anschlussnamen, den Sie in Schritt 7 von Installation der Brother Peer-to-Peer-Software auf Seite 3-5 zugewiesen haben) und klicken Sie auf Weiter. -
Seite 156: Zweiten Brother-Lpr-Anschluss Hinzufügen
® Netzwerkdruck in Windows : Drucke mit Peer-to-Peer und TCP/IP Geben Sie einen Namen für den Brother-Drucker ein und klicken Sie auf Weiter. So können Sie den Drucker zum Beispiel „Vernetzter Brother-Drucker“ nennen. ® Windows fragt nun, ob eine Testseite ausgedruckt werden soll. Wählen Sie Ja, und klicken Sie dann auf Weiter. -
Seite 157: Netzwerkdruck In Windows Peer-To-Peer (Netbios)
95/98/Me/2000/XP oder Windows NT 4.0 System die Fehlermeldung „Der Drucker ist ausgelastet“ erhält, wenn mehrere Anwender zu drucken versuchen. Für diesen Fall stellt Brother eine spezielle NetBIOS Port Monitor-Software zur Verfügung, die es Anwendern ermöglicht, weiterhin Druckaufträge zu spoolen, wenn der Drucker ausgelastet oder nicht funktionsfähig ist oder kein Papier hat. -
Seite 158: Den Workgroup/Domänennamen Mit Bradmin Professional Ändern
Konfigurieren Ihres Netzwerkdruckers verwenden (nur für Windows ) auf Seite 2-3. • Bitte benutzen Sie die Version von BRAdmin Professional, die Sie auf der mit Ihrem Brother-Gerät mitgelieferten CD-ROM finden. Die neueste Version von Brother BRAdmin Professional können Sie ®... -
Seite 159: Arbeitsgruppen-/Domänennamen Mit Einem Web-Browser Ändern
Arbeitsgruppen-/Domänennamen mit einem Web-Browser ändern Außerdem können Sie den NetBIOS-Namen auch über den Standard-Web-Browser ändern. Dazu stellen Sie zuerst über die IP-Adresse die Verbindung zum Brother-PrintServer her und wählen dann in der Netzwerk-Konfiguration die Registerkarte NetBIOS. Geben Sie anschließend den gewünschten Arbeitsgruppen-/Domänennamen in das Textfeld Domänenname ein. -
Seite 160: Brother Netbios Port Monitor Installieren
Brother-Software für den Netzwerkdruck nicht erneut installieren. Starten Sie das Installationsprogramm der CD-ROM wie in der Installationsanleitung des Druckers beschrieben. Wählen Sie HL-2070N und die gewünschte Sprache. Klicken Sie dann auf Andere Treiber oder Dienstprogramme installieren. Wählen Sie dann das Installationsprogramm der Software für den Netzwerkdruck. -
Seite 161: Drucker Verknüpfen
Wählen Sie den Brother-NetBIOS-Anschluss (den in Schritt 7 der Anleitung zur Installation von Brother NetBIOS Port Monitor zugewiesenen Druckernamen), und klicken Sie auf Weiter. Geben Sie einen Namen für den Brother-Drucker ein und klicken Sie auf Weiter. So können Sie den Drucker zum Beispiel „Vernetzter Brother-Drucker“ nennen. -
Seite 162: Zweiten Netbios-Druckanschluss Hinzufügen
Treiber entweder beibehalten (dies wird empfohlen) oder ersetzen. Wählen Sie die gewünschte Option, und klicken Sie auf Weiter. Geben Sie einen Namen für den Brother-Drucker ein und klicken Sie auf Weiter. So können Sie den Drucker zum Beispiel „Vernetzter Brother-Drucker“ nennen. -
Seite 163: Weitere Informationen
® Netzwerkdruck in Windows : Peer-to-Peer (NetBIOS) Weitere Informationen Weitere Informationen zum Netzwerkdruck finden Sie unter http://solutions.brother.com. Einzelheiten dazu, wie man die IP-Adresse für den Drucker konfiguriert, finden Sie in Kapitel 2 . 4 - 7... -
Seite 164: Internet-Druck Für Windows
Vergewissern Sie sich, dass Hostcomputer und PrintServer entweder auf dem gleichen Subnetzwerk sind, oder dass andernfalls der Router korrekt für die Datenübertragung zwischen den beiden Geräten konfiguriert ist. • Das Standardkennwort für den Brother-PrintServer lautet access. ® Windows 2000/XP IPP-Druck ®... -
Seite 165: Eine Andere Url Angeben
Sie werden nun aufgefordert, den Datenträger mit den Treibern einzulegen. Klicken Sie auf Durchsuchen und wählen Sie die CD-ROM oder Netzwerkadresse aus, die die gewünschten Brother-Druckertreiber enthält. Geben Sie die Modellbezeichnung Ihres Druckers ein. Hat der Druckertreiber, den Sie installieren wollen, kein digitales Zertifikat, so wird eine Warnmeldung angezeigt. -
Seite 166: Weitere Informationen
Beachten Sie, dass die Option Weitere Informationen keine Druckerdaten anzeigt. Wenn Sie die integrierten Servicenamen verwenden, die die Brother-PrintServer unterstützen, können Sie auch die folgenden Befehle verwenden (beachten Sie jedoch, dass die Option Weitere Informationen keine Druckerdaten anzeigt.):... -
Seite 167: Netzwerkdruck Mit Macintosh
-Treibers im Netzwerk unter Mac OS 9.1 bis 9.2, finden Sie in der Installationsanleitung Ihres Druckers. ® Die neuesten Lösungen zum Druck über einen Macintosh finden Sie auf der Brother Solutions Website unter: http://solutions.brother.com ® Druck von einem Macintosh mittels der einfachen ®... -
Seite 168: Konfiguration Mit Einem Web-Browser Ändern
Netzwerkdruck mit Macintosh Wählen Sie die folgende Option. Wählen Sie die Serie Brother HL-2070N, und klicken Sie auf Hinzufügen. Klicken Sie auf den Drucker und klicken Sie auf Als Standard verwenden, um den Drucker als Standarddrucker einzurichten. Der Drucker ist nun druckbereit. -
Seite 169: Weitere Informationen
® Netzwerkdruck mit Macintosh Weitere Informationen Weitere Informationen zum Netzwerkdruck finden Sie unter http://solutions.brother.com. Einzelheiten dazu, wie man die IP-Adresse für den Drucker konfiguriert, finden Sie in Kapitel 2 . 6 - 3... -
Seite 170: Druck Über Funktionstastenfeld Auslösen
Druck über Funktionstastenfeld auslösen Überblick Das Funktionstastenfeld hat folgende Funktionen: Ausdruck der Druckereinstellungen Siehe Ausdruck der Druckereinstellungen auf Seite 7-2, um Informationen zum Drucken der Konfigurationsseite zu erhalten. Wiederherstellen der werkseitigen Voreinstellungen Siehe Wiederherstellen der werkseitigen Voreinstellungen auf Seite 7-2, um die werkseitige Voreinstellung wiederherzustellen. -
Seite 171: Ausdruck Der Druckereinstellungen
Druck über Funktionstastenfeld auslösen Ausdruck der Druckereinstellungen Hinweis Knotenname: Der Knotenname wird auf dem Ausdruck der Druckereinstellungen angezeigt. Der Standardknotenname ist "BRN_xxxxxx" ("xxxxxx" stellt die letzten sechs Stellen der Ethernet-Adresse dar.). Mit dem Druck der Druckereinstellungen erhalten Sie alle aktuellen Einstellungen des Druckers einschließlich Netzwerkeinstellungen. -
Seite 172: Apipa -Protokoll Deaktivieren
LEDs aufleuchten. Das APIPA-Protokoll ist dann deaktiviert. Hinweis • Informationen zum Thema APIPA siehe Kapitel 1 und Kapitel 2 , oder unter http://solutions.brother.com. • Das APIPA-Protokoll kann auch unter Verwendung eines Web-Browsers bzw. von BRAdmin Professional oder Web BRAdmin deaktiviert werden. -
Seite 173: Problemlösung
Problemlösung Überblick Dieses Kapitel enthält Abhilfemaßnahmen für mögliche Probleme bei der Arbeit mit Brother-PrintServern, und ist in die folgenden Abschnitte gegliedert: Allgemeine Probleme ■ Probleme beim Installieren der Netzwerkdrucksoftware ■ Druckprobleme ■ Protokollspezifische Abhilfemaßnahmen ■ Allgemeine Probleme CD-ROM wurde ins Laufwerk eingelegt, aber startet nicht automatisch Wenn Ihr Computer die Funktion AutoPlay nicht unterstützt, wird die CD-ROM nicht automatisch gestartet. - Seite 174 (1) Wählen Sie im Apple-Menü die Option Auswahl. (2) Klicken Sie auf das Brother Laser (IP)-Symbol und stellen Sie sicher, dass der Name des PrintServers im rechten Fenster angezeigt wird. Ist dies der Fall, so ist die Verbindung gut. Gehen Sie andernfalls zu Schritt 5.
-
Seite 175: Druckprobleme
Problemlösung (5) Wählen Sie die folgende Option. Stellen Sie sicher, dass Ihr PrintServer angezeigt wird. Ist dies der Fall, so ist die Verbindung gut. Gehen Sie andernfalls zu Schritt 5. Funktioniert es nach dem Ausführen von Schritt 1 oder 4 immer noch nicht, dann setzen Sie den PrintServer bitte wieder auf die werkseitigen Voreinstellungen zurück und führen Sie die Anleitung zur Ersteinrichtung erneut durch. -
Seite 176: Peer-To-Peer-Druck (Lpr) Und Windows
(1) Wählen Sie im Apple-Menü die Option Auswahl. (2) Klicken Sie auf das Brother Laser (IP)-Symbol und stellen Sie sicher, dass der Name des PrintServers im rechten Fenster angezeigt wird. Ist dies der Fall, so ist die Verbindung gut. Gehen Sie andernfalls zu Schritt 4. -
Seite 177: Fehler Beim Drucken
® Bei Schwierigkeiten mit dem Druck über ein Windows 95/98/Me, Windows NT 4.0 (oder höher) Peer-to-Peer-Netzwerk (LPR-Methode) prüfen Sie Folgendes: Vergewissern Sie sich, dass der Brother-LPR-Anschlusstreiber wie in den Kapiteln zum ® ® Windows 95/98/Me oder Windows NT 4.0 Peer-to-Peer-Netzwerk beschrieben installiert und konfiguriert ist. -
Seite 178: Windows ® 2000/Xp Ipp-Fehlerbehebung
Weitere Informationen arbeiten wollen, müssen Sie folgende URL verwenden: http://ip_adresse ® Windows 2000/XP wird dann gezwungen, Anschluss 80 für die Kommunikation mit dem Brother-PrintServer zu verwenden. Problemlösung für Web-Browser (TCP/IP) Können Sie mit Ihrem Web-Browser keine Verbindung zum PrintServer herstellen, so empfiehlt es sich, die Proxy-Einstellungen Ihres Browsers zu überprüfen. -
Seite 179: Mit Diensten Arbeiten
Anhang A Mit Diensten arbeiten Ein Dienst oder Service ist eine Ressource, auf die Computer, die über den Brother-PrintServer drucken wollen, zugreifen können. Der Brother-PrintServer bietet die folgenden vordefinierten Services (mit dem Befehl SHOW SERVICE in der Fernkonsole des Brother-PrintServers kann man eine Liste der verfügbaren Dienste abrufen): Wenn Sie an der Eingabeaufforderung HELP eingeben, erhalten Sie eine Liste der unterstützten Befehle. -
Seite 180: Ip-Adresse Über Bootp Konfigurieren
Wie bei rarp lädt der PrintServer beim Einschalten des Druckers seine IP-Adresse vom BOOTP-Server. IP-Adresse über RARP konfigurieren Die IP-Adresse des Brother-PrintServers kann auch mit der Funktion Reverse ARP (RARP) auf Ihrem Hostcomputer konfiguriert werden. Dazu wird die Datei /etc/ethers mit einem Eintrag wie dem Folgenden versehen (wenn diese Datei nicht vorhanden ist, können Sie sie erzeugen):... -
Seite 181: Ip-Adresse Über Apipa Konfigurieren
-basierten Systemen geben Sie ein: ps -ef | grep -v grep | grep rarpd Der Brother-PrintServer erhält die IP-Adresse vom rarp-Dämon, wenn er eingeschaltet wird. IP-Adresse über APIPA konfigurieren Das APIPA-Protokoll (Automatic Private IP Addressing) wird vom PrintServer unterstützt. Mit APIPA konfigurieren DHCP-Clients automatisch eine IP-Adresse und Subnetzmaske, wenn kein DHCP-Server verfügbar ist. -
Seite 182: Unix ® /Linux-Systeme
Zuweisungssysteme erhalten. In diesem Fall brauchen Sie den Befehl ARP nicht zu verwenden. Der ARP-Befehl funktioniert nur einmal. Aus Sicherheitsgründen kann man die IP-Adresse des Brother-PrintServers, nachdem man sie einmal mit dem ARP-Befehl erfolgreich programmiert hat, mit diesem Befehl nicht mehr ändern. Der PrintServer ignoriert dann sämtliche Änderungsversuche. Soll die IP-Adresse wieder geändert werden, so kann dies über einen Web-Browser, TELNET (mit dem Befehl SET... -
Seite 183: Mit Brother Web Bradmin Serversoftware Für Iis* Die Ip-Adresse Konfigurieren
Systeme geeignet ist, ist die Web BRAdmin Server Software mit einem Java unterstützenden Web-Browser über jeden Client-Computer zugänglich. Bitte beachten Sie, dass diese Software nicht auf der mit Ihrem Brother-Gerät gelieferten CD enthalten ist. Gehen Sie zu http://solutions.brother.com/webbradmin, um mehr über diese Software zu erfahren und sie herunterzuladen. -
Seite 184: Printserver-Spezifikationen
Anhang A PrintServer-Spezifikationen ® ® ® Unterstützte Windows 95/98/Me, Windows NT 4.0, Windows 2000/XP ® ® Betriebssysteme Mac OS 9.1 bis 9.2, Mac OS X 10.2.4 oder höher Protokollunterstützung TCP/IP APR, RARP, BOOTP, DHCP, APIPA (Auto IP), NetBIOS Name Resolution, WINS, DNS Resolver, LPR/LPD, Custom Raw Port/Port9100, SMTP Client, SMB Print, IPP, FTP Server, mDNS, TELNET, SNMP, HTTP Netzwerktyp... -
Seite 185: Brother Kontaktieren (Europa Und Andere Länder)
Häufig gestellte Fragen (FAQs) Alles, was Sie für Ihren Drucker benötigen, finden Sie im Brother Solutions Center. Sie können dort die neuesten Treiber und Dienstprogramme für Ihre Drucker herunterladen, Antworten auf häufig gestellte Fragen und Tipps zur Problemlösung finden. -
Seite 186: Internet-Adressen
Anhang B Internet-Adressen Globale Brother Website: http://www.brother.com Für Antworten auf häufig gestellte Fragen, Produktsupport, technische Fragen und Abrufen von Treibern und Dienstprogrammen: http://solutions.brother.com Deutschland: http://www.brother.de Schweiz: http://www.brother.ch Österreich: http://www.brother.at Wichtige Informationen: Vorschriften Warnhinweis für LAN-Anschluss Schließen Sie dieses Gerät nur an einen LAN-Anschluss an, der keinen Überspannungen ausgesetzt ist. -
Seite 187: Index
BRAdmin Professional ....2-3, 2-4, 4-2 LED (PrintServer) ........8-2 BRN_xxxxxx_P1 ........A-1 LPR/LPD ..........1-4 Brother LPR-Port ......3-5, 3-7 Brother NetBIOS Port Monitor ..4-1, 4-4 Brother Peer-to-Peer-Software ....3-5 Brother Solutions Center ......2-3 Mac OS 9 ..........6-1 Brother-Niederlassungen Mac OS X .......... - Seite 188 Index SMB ............4-1 SMTP-Client ..........1-5 SNMP ............1-5 Spezifikationen ........A-6 Subnetzmaske ........2-2 TCP/IP ............. 1-4 TCP/IP-Druck .......... 3-1 TELNET ........1-5, 4-3, A-4 TEXT_P1 ..........A-1 Warenzeichen ..........i Web BRAdmin .........A-5 Web-Browser ......2-5, 4-3, 6-2 Webserver ..........1-5 Werkseitige Voreinstellungen ....
- Seite 189 < > < >...
- Seite 190 Revised for Addition of HL-5140/5150D/5150DN and addition of a section of Carbon Copy and addition of a table of Tray Selection of TRAYCOMMAND Special. Ver. K December, 2004 Revised for Addition of HL-2070N. Ver. L March, 2006 Revised for Addition of HL- 5240/5250DN/5270DN/5280DW.
- Seite 191 Compilation and Publication Under the supervision of Brother Industries Ltd., this manual has been compiled and published, covering the latest product's descriptions and specifications. The contents of this manual and the specifications of this product are subjected to change without notice.
- Seite 193 TABLE OF CONTENTS GLOSSARY CHAPTER 1 INTRODUCTION 1. ABOUT THE MANUAL ----------------------------------------------------------------------------------- 3 2. AREAS OF USE ------------------------------------------------------------------------------------------- 4 CHAPTER 2 PCL PRINTER CONTROL LANGUAGE 1. COMMAND LIST ------------------------------------------------------------------------------------------ 7 2. INTRODUCTION ----------------------------------------------------------------------------------------- 10 3. CONTROLLING THE PRINTER ---------------------------------------------------------------------- 11 4.
- Seite 194 CHAPTER 6 EPSON FX-850 1. COMMAND LIST ------------------------------------------------------------------------------------------ 3 2. INTRODUCTION ------------------------------------------------------------------------------------------ 5 3. EMULATION DETAILS ---------------------------------------------------------------------------------- 6 4. TERMINOLOGY ------------------------------------------------------------------------------------------- 7 5. CONTROLLING THE PRINTER ----------------------------------------------------------------------- 8 6. COMMANDS------------------------------------------------------------------------------------------------ 9 7. INDEX ------------------------------------------------------------------------------------------------------- 28 CHAPTER 7 IBM PROPRINTER XL 1.
- Seite 195 GLOSSARY Absolute plotting A method of plotting in the HP-GL and HP-GL/2 graphics language where coordinates are specified relative to the origin of the coordinate system currently in use. Anchor point The top left-hand corner of the PCL picture frame. You can position this on the page using a PCL command.
- Seite 196 Control panel reset A reset or factory reset performed using the printer control panel. Cross-hatching A method of shading using perpendicular diagonal lines that cross one another. Current units The current unit type in use in HP-GL and HP-GL/2 mode. Current units are either user units or graphics units depending on whether an SC command has been used.
- Seite 197 Fixed spacing See monospacing. A collection of characters that are designed to work in harmony together. A font Font has several characteristics that identify it uniquely: character or symbol set, spacing, pitch, height or point size, style, stroke weight and typeface. Fonts can either be resident in the printer's ROM, installed on cartridge or downloaded from your computer.
- Seite 198 Justification The way in which text is aligned. For example, left justification involves aligning the left end of every line of text. Label A text string that forms part of an HP-GL and HP-GL/2 plot. Landscape The orientation in which the top edge of the page is longer than the side edges. Logical page The area of the physical page on which the cursor can be positioned in LaserJet mode.
- Seite 199 Perforation skip A feature whereby the printer automatically compensates for a page break and resumes printing from the top of the text area on the next page. Permanent font A downloaded font that is retained when a printer reset is performed. Permanent macro A macro stored in the printer that will not be erased if the printer is reset.
- Seite 200 Random Access Memory. The printer's memory in which fonts and macros can be stored and where pages that are to be printed are composed. Raster graphics A method of representing a graphic image as a series of zeroes and ones that correspond to white and black dots respectively.
- Seite 201 Soft clip limits See graphics window. The soft limits are determined by the IW command. Source image The graphic image that is applied to the destination image in the LaserJet print model. The interaction of the two images is determined by the current source and pattern transparency settings.
- Seite 202 Vertical motion index. The vertical distance that the print position moves down the page when a line feed is performed. This can be set using printer commands or with the printer's control panel by adjusting the "Lines" menu option in PAGE FORMAT MODE.
- Seite 203 CHAPTER 1 INTRODUCTION CHAPTER 1 INTRODUCTION - 1...
- Seite 204 ONTENTS 1. ABOUT THE MANUAL ....................3 2. AREAS OF USE ......................4 Using Word Processing Packages and Spreadsheets ............4 Graphics ..........................4 Programming ........................4 Font Development ....................... 5 CHAPTER 1 INTRODUCTION - 2...
-
Seite 205: About The Manual
1. ABOUT THE MANUAL This technical reference manual is intended to help you get the most out of each of the emulation modes supported by your HL-Series printer. It is divided into nine sections - this introductory section and one section for each of the emulation modes. -
Seite 206: Areas Of Use
2. AREAS OF USE There are several different applications for which you may want to use your HL-Series printer. Four general areas are outlined in the following sections. Using Word Processing Packages and Spreadsheets You may simply wish to use the printer with your software application packages, such as word-processors or spreadsheets. - Seite 207 Font Development In LaserJet mode you can send your own character designs to an HL-Series printer and print text using them. To do this you need first to design your characters on paper. Having done this you can then either input and download your characters using a commercial software package, or encode your designs numerically and write your own program to download them.
- Seite 208 CHAPTER 2 PRINTER CONTROL LANGUAGE CHAPTER 2 PCL - 1...
- Seite 209 ONTENTS COMMAND LIST ........................7 INTRODUCTION ........................ 10 CONTROLLING THE PRINTER ..................11 3.1. Control Codes ........................... 11 3.1.1. Backspace (08) <08h> .......................... 11 3.1.2. Line feed (10) <0Ah> ..........................11 3.1.3. Form feed (12) <0Ch> .......................... 11 3.1.4. Carriage return (13) <0Dh> ........................11 3.1.5.
- Seite 210 4.2.5. HP-GL/2 graphics window ........................29 4.2.6. Portrait page dimensions ........................30 4.2.7. Landscape page dimensions ........................ 32 4.2.8. Coordinates ............................34 4.2.9. Units ..............................34 4.2.10. Unit of measure ............................. 34 4.2.11. Setting the left and right margins ......................34 4.2.12.
- Seite 211 5.2.5. Selecting the symbol set ........................52 5.2.6. Selecting the type of character spacing ....................54 5.2.7. Selecting the pitch ..........................54 5.2.8. Selecting the height ..........................55 5.2.9. Scaling the scalable fonts vertically or horizontally ................55 5.2.10. Selecting the style ..........................55 5.2.11.
- Seite 212 6.5. The Picture Frame ........................98 6.5.1. The default picture frame ........................98 6.5.2. Set picture frame anchor point ......................98 6.5.3. Set picture frame vertical size ....................... 98 6.5.4. Set picture frame horizontal size ......................98 6.5.5. Specify vertical plot size ........................98 6.5.6.
- Seite 213 8.5.14. Symbol set response .......................... 110 8.5.15. Entity error codes ..........................111 8.5.16. Free space command ......................... 111 8.5.17. Font cache ............................112 8.5.18. Memory status response ........................112 8.5.19. Memory error response ........................112 8.5.20. Flush all pages command ........................112 8.5.21.
-
Seite 214: Command List
COMMAND LIST Control Codes Escape sequences Esc&k#G Line termination Esc&s#C End-of-line wrap EscY Display function mode EscZ Display function mode Environments Job Control Esc&l#A Page size Esc&n# Media type selection Esc&l#G Output tray Esc&l#H Paper source Esc&l#U Left long-edge offset registration Esc&l#Z Top offset registration Esc&l#S... - Seite 215 Esc(s#V, Esc)s#V Selecting the height EscCR!#H, EscCR!#V Scaling the scalable fonts vertically or horizontally Esc(s#S, Esc)s#S Selecting the style Esc(s#B, Esc)s#B Selecting the stroke weight Esc(s#T, Esc)s#T Selecting the typeface Esc&p#X Transparent print data Esc&d#D, Esc&d@ Underlining text Esc&*c#D Font ID Esc*c#F Operations on downloaded fonts Esc(#X, Esc)#X...
- Seite 216 Status Readback Esc*s#T Set status readback location type Esc*s#U Set status readback location unit Esc*s#I Inquire status readback entity Esc*s1M Free space command Esc&r#F Flush all pages command Esc*s#X Echo command CHAPTER 2 PCL - 9...
-
Seite 217: Introduction
INTRODUCTION This laser / ink printer provides a complete emulation of the supported Hewlett Packard LaserJet printer. Features include raster and vector graphics, support for bitmap and scalable fonts and page control. There are many resident fonts in the printer and you can gain access to more by inserting a font cartridge/card or the storage device into the printer or by downloading fonts from your computer. -
Seite 218: Controlling The Printer
CONTROLLING THE PRINTER 3.1. Control Codes Control codes are ASCII codes that tell the printer to perform a given function, such as a carriage return. You can send these codes to the printer as part of a program. 3.1.1. Backspace (08) <08h>... -
Seite 219: Escape Sequences
3.2. Escape Sequences Escape sequences, also known as PCL (Printer Control Language) commands, tell the printer which operations to perform. An escape sequence consists of the Esc character followed by a string of characters which define the operation to be performed. Some escape sequences require parameter values. These are included in the sequence as numeric characters. -
Seite 220: End-Of-Line Wrap
3.2.2. End-of-line wrap If the printer tries to print a line of text that is longer than the width of the text area, the end of the line will normally be lost. However, you can set the printer to flow text onto the next line so that text is not lost. You can turn on the automatic text wrap feature either from the printer's control panel (see the User Guide) or by sending the printer the following escape sequence: Esc&s0C... -
Seite 221: Environments
3.3. Environments 3.3.1. Factory default environment The factory default environment is the collection of printer settings programmed into the printer before it leaves the factory. You can restore the factory default environment using the printer's control panel. See the User's Guide to find how to reset the printer from the printer's control panel. Some settings cannot be restored to the factory default environment with the RESET operation from the printer's control panel. -
Seite 222: Commands
JOB CONTROL 4.1. Commands 4.1.1. Page size Esc&l#A (27)(38)(108)#(65) <1Bh><26h><6Ch>#<41h> # stands for the type of paper or envelope to be used. Values for # correspond to the paper or envelope sizes shown in the table. Envelopes sizes are shown in the shaded part of the table. - Seite 223 1850/1870N/5 040/5050/507 HL-1250/ HL-4040CN/ 5140/5150D/5 HL-1050/ HL-1660e/ HL-2400C/ 5340D/5350 Model 1270N/ HL-3400CN HL-3260N HL-2460 HL-7050 HL-2600CN HL-3450CN HL-8050N HL-2700CN 4050CDN/ 2150N/2170 170DN/6050/6 1070 2060 2400Ce 1450/1470N 1650/1670N DN/5370DW 050D/ P2500 4070CDW /5380DN 6050DN/2070 N/5240/5250D N/5270DN/52 80DW ...
- Seite 224 L5000D/558 2250DN/227 L8250CDN/L L2360DN/L2 0D/L5100DN 5440D/5450 Model 3070CW/30 0DW/4140C 8350CDW/L 360DW/L23 /L5200DW/L DN/5470DW S7000DN 3170CDW 75CW N/4150CDN/ 9200CDW/L 65DW/2560 6200DW/L6 /6180DW 4570CDW 9300CDW DN/2569DW 300DW/L64 00DW Executive ...
-
Seite 225: Media Type Selection
When the printer receives this command any unprinted pages are printed and the left, right and top margins and the text length are set to their factory defaults for the new page size. The cursor is moved to the top left of the text area on the new page. ... -
Seite 226: Output Tray
4.1.3. Output tray Esc&l#G (27)(38)(108)#(71) <1Bh><26h><6Ch>#<47h> # denotes the output tray. Select the printer output tray. Select #1 bin. (CT:HL-8050N) Select #2 bin. Select #3 bin. Select #4 bin. Select #5 bin. Select #6 bin. Select #7 bin. Select #8 bin. Select #9 bin. -
Seite 227: Paper Source
4.1.4. Paper source Esc&l#H (27)(38)(108)#(72) <1Bh><26h><6Ch>#<48h> # denotes the paper source. Values for # may be 0, 1, 2, 3, or 4. If # = 0 the current page is ejected and the paper source remains the same. If # = 1 the current page is printed and the upper cassette becomes the paper source. ... - Seite 228 If PJL TRAYCOMMAND is NORMAL; 1850/1870 4050CDN/ 5240/5250 4070CDW/ 1250/1270 DN/5270D 1660e/206 5050/5070 2070N/215 4140CN/41 N/P2500/ N/5280DW HL-5040/ HL-2460/ HL-1050 HL-1070 HL-3260N 0N/2170W/ HL-8050N 2600CN/ 50CDN/45 1450/1470 3400CN /5340D/53 5140 7050 S7000DN 3450CN 4040CN 1650/1670 5150D/517 2250DN/22 2700CN 70CDW/54 N/2400C/C 50DN/5370 0DN/ 70DW...
- Seite 229 L5000D/55 L2360DN/ 80D/L5100 L8250CDN 3070CW/3 L2360DW/ DN/L5200 L9300CD /L8350CD 075CW/31 L2365DW/ DW/L6200 W/L9200C 70CDW 2560DN/25 DW/L6300 69DW DW/L6400 ...
- Seite 230 If PJL TRAYCOMMAND is SPECIAL; 1850/1870 4050CDN/ 5240/5250 L5000D/55 4070CDW/ DN/5270D L2360DN/ 80D/L5100 1660e/206 5050/5070 2070N/215 4140CN/41 L8250CDN HL-2400C/ N/5280DW HL-5040/ 3070CW/3 L2360DW/ DN/L5200 HL-3260N 0N/2170W/ 2600CN/27 50CDN/45 L9300CD /L8350CD 3400CN /5340D/53 5140 3450CN 4040CN 075CW/31 S7000DN L2365DW/ DW/L6200 1650/1670 5150D/517 2250DN/22 00CN...
-
Seite 231: Left Long-Edge Offset Registration
4.1.5. Left long-edge offset registration Esc&l#U (27)(38)(108)#(85) <1Bh><26h><6Ch>#<55h> # stands for the distance in decipoints (1/720") that the left edge of the logical page is to be moved. Values for # may be in the range -32,767 to 32,767. ... -
Seite 232: Simplex/Duplex Printing
4.1.7. Simplex/duplex printing (For HL-1660e/2060/3400CN/1650/1670N/3260N/2460/7050/1850/1870N/5150D/5170DN/5250DN/ 5270DN/5280DW/4050CDN/4070CDW/5340D/5350DN/5370DW/5380DN/2240D/2250DN/2270DW/415 0CDN/4570CDW/5440D/5450DN/5470DW/6180DW/S7000DN/3170CDW/ L8250CDN/L8350CDW/L9200CDW/L9300CDW /L2360DN/L2360DW/L2365DW/2560DN/2569DW) Esc&l#S (27)(38)(108)#(83) <1Bh><26h><6Ch>#<53h> # can be 0, 1, or 2. # = 0 indicates Simplex printing. # = 1 indicates Duplex – Long edge binding printing. # = 2 indicates Duplex – Short edge binding printing. ... - Seite 233 You can also perform a printer reset using the printer's control panel or remote printer console program (see the User Guide). CHAPTER 2 PCL - 26...
-
Seite 234: Reset To Factory Default Settings
4.1.11. Reset to factory default settings EscCRFD (27)(13)(70)(68) <1Bh><0Dh><46h><44h> This command causes a factory reset to be performed, restoring all the printer's factory default settings. See the section "Factory default environment" for a list of the factory default settings. ... - Seite 235 HL-1470N HL-7050 HL-1850/1870N HL-5040/5140 HL-2070N/ HL-5050/5070N/ 5150D/5170DN HL-2600CN HL-3450CN ...
-
Seite 236: The Page
4.2. The Page 4.2.1. Physical page The physical page refers to the size of the paper or envelope currently in use: A4, Letter, B5, JIS B5, Legal and Executive are the permitted paper sizes: Monarch, COM-10, International DL and International C5 are the allowable envelope sizes. -
Seite 237: Portrait Page Dimensions
4.2.6. Portrait page dimensions (DEFAULT VALUES) Physical page Printable area Logical page Default HP-GL/2 picture frame Physical page length Maximum logical page length Distance from edge of physical page to edge of logical page PAPER SIZE LETTER 2550 3300 2400 3300 LEGAL 2550... - Seite 238 Envelop #4 1240 2776 1098 2776 Envelop MAX 1417 2776 1275 2776 A5 Long Edge 2480 1748 2338 1748 A4 Short 2480 3189 2338 3189 16K(197x273mm 2325 3225 2175 3225 16K(195x270mm 2303 3189 2161 3189 16K(184x260mm 2173 3070 2031 3070 All measurements are in 1/300"...
-
Seite 239: Landscape Page Dimensions
4.2.7. Landscape page dimensions (DEFAULT VALUES) Physical page Printable area Logical page Default HP-GL/2 picture frame Physical page length Maximum logical page length Distance from edge of physical page to edge of logical page PAPER SIZE LETTER 3300 2550 3180 2550 LEGAL 4200... - Seite 240 Envelop MAX 2776 1417 2658 1417 A5 Long Edge 1748 2480 1630 2480 A4 Short 3189 2480 3071 2480 16K(197x273mm 3225 2325 3105 2325 16K(195x270mm 3189 2303 3071 2303 16K(184x260mm 3070 2173 2952 2173 All measurements are in 1/300" units CHAPTER 2 PCL - 33...
-
Seite 241: Coordinates
4.2.8. Coordinates The printer control language coordinate system has its origin at the intersection of the left edge of the logical page and the top margin. The x-coordinate value of the current cursor position increases as the cursor moves from left to right, the y-coordinate value increases as the cursor moves down the page. The cursor can be explicitly positioned anywhere on the current logical page using the PCL coordinate system. -
Seite 242: Resetting The Horizontal Margins
If the current cursor position is to the right of your new right margin setting, the cursor will be moved to the new right margin. The factory default left and right margin settings are at the left and right edges of the logical page respectively. -
Seite 243: Setting The Vertical Motion Index (Vmi)
4.2.14. Setting the vertical motion index (VMI) Esc&l#C (27)(38)(108)#(67) <1Bh><26h><6Ch>#<43h> # stands for the height of one row in 1/48". # can have any value in the range 0-32767. The distance specified by the VMI is the vertical distance moved down the page when the printer performs a line feed. -
Seite 244: Setting Line Spacing
10 REM ***** SETTING THE CHARACTER PITCH ***** 20 ESC$=CHR$(27) 30 REM --- DEFAULT IS 10 CPI PITCH --- 40 LPRINT "10 PITCH " 50 REM --- SET 5 CPI PITCH --- 60 LPRINT ESC$+"&k24H"; 70 LPRINT "AAA" 80 REM --- SET 6 CPI PITCH --- 90 LPRINT ESC$+"&k20H";... -
Seite 245: Page Length
Top margin Page length Text length Bottom margin 4.2.18. Page length Esc&l#P (27)(38)(108)#(80) <1Bh><26h><6Ch>#<50h> # stands for the length of the logical page in lines (at the current VMI). If you specify a page length greater than is allowed by the physical size of the paper in the currently installed paper tray, a control panel message prompts you to load paper of the appropriate size. -
Seite 246: Positioning The Cursor
4.2.20. Positioning the cursor You can position the cursor anywhere on the logical page. In addition, the cursor position is automatically changed when text or graphics are printed. You can either position the cursor using absolute PCL coordinate values or position it relative to the current cursor position, using dots, decipoints or rows and columns as units. In case of using dots, the units value is defined by the ESC &... -
Seite 247: Horizontal Position
4.2.22. Horizontal position Horizontal cursor positioning - columns Esc&a#C (27)(38)(97)#(67) <1Bh><26h><61h>#<43h> # = number of columns A plus or minus sign preceding the number of columns parameter indicates that the cursor is to be positioned relative to its current position. A signed positive parameter value signifies that the cursor is to be repositioned to the right on the page, a negative value means that it will be moved to the left. -
Seite 248: Positioning The Cursor Using Control Codes
100 REM --- MOVING CURSOR 1 INCH TO THE RIGHT --- 110 LPRINT ESC$+"*p+300X"; 120 LPRINT "C"; 130 REM --- PAPER EJECT --- 140 LPRINT CHR$(12); 150 END <Sample file 4> Horizontal cursor positioning - decipoints Esc&a#H (27)(38)(97)#(72) <1Bh><26h><61h>#<48h> # = number of decipoints 1/720" ... -
Seite 249: Half Line Feed
4.2.25. Half line feed Esc= (27)(61) <1Bh><3Dh> This command moves the cursor down half a row as defined by the last VMI or line spacing command (Esc&l#C). 4.2.26. Logical page orientation Esc&l#O (27)(38)(108)#(79) <1Bh><26h><6Ch>#<4Fh> # = 0, 1, 2 or 3 ... - Seite 250 40 REM --- MOVING CURSOR TO X=500, Y=500 --- 50 LPRINT CHR$(27);"*p500X"; 60 LPRINT CHR$(27);"*p500Y"; 70 REM --- 0 deg --- 80 LPRINT CHR$(27);"&a0P"; 90 LPRINT "BROTHER "; 100 REM --- 90 deg --- 110 LPRINT CHR$(27);"&a90P"; 120 LPRINT "BROTHER "; 130 REM --- 180 deg --- 140 LPRINT CHR$(27);"&a180P";...
-
Seite 251: Using Fonts
USING FONTS 5.1. Introduction A font is a collection of characters that have common characteristics, such as size, style and typeface, and which ranges over a given set of symbols. For example, 12 point Tennessee Bold in the Roman-8 symbol set is a typical HL Series font. - Seite 252 Atlanta Book, BookOblique, Demi, DemiOblique Copenhagen Roman, Italic, Bold, Bold italic Portugal Roman, Italic, Bold, Bold italic Calgary MediumItalic Brother Original Fonts: HL-1050/1070/1250/1270N/1450/1470N/P2500/ 1660e/2060/2400C/2400Ce/3400CN/1650/1670N/ 3260N/2460/7050/1850/1870N/5040/5050/5070N/ 5140/5150D/5170DN/2600CN/3450CN/6050/ 6050D/6050DN/8050N/2700CN/2070N5240/5250DN/ 5270DN/5280DW/4040CN/4050CDN/4070CDW/215 0N/2170W/5340D/5350DN/5370DW/5380DN/3070C W/3075CW/2250DN/2270DW/4140CN/4150CDN/45 70CDW/5440D/5450DN/5470DW/6180DW/S7000D N/3170CDW/L8250CDN/L8350CDW/L9200CD W L9300CDW/ Bermuda Script ...
-
Seite 253: Bound Fonts
5.1.4. Bound fonts Bound fonts are fonts which have only a single symbol set. 5.1.5. Unbound fonts Unbound fonts are fonts which have a large amount of symbols selected from a complementary symbol index (intellifont) or unicode symbol index (TrueType). 5.1.6. -
Seite 254: Selecting The Default Fonts
5.1.13. Selecting the default fonts To set the primary font settings to those of the printers default font and discard all the software settings you have made in the meantime, send the printer the following escape sequence: Esc(3@ (27)(40)(51)(64) <1Bh><28h><33h><40h> To set the secondary font settings to those of the printers default font send: Esc)3@ (27)(41)(51)(64) <1Bh><29h><33h><40h>... -
Seite 255: Criteria For Font Selection
5.1.15. Criteria for font selection The printer will try to match your stated font requirements as best it can with the fonts available to it in any of the three possible font locations. In most cases you will be specifying a font you know to be present in one of the locations and the resulting printed text will appear exactly as you envisaged. -
Seite 256: Stroke Weight
5.1.22. Stroke weight Stroke weight refers to the thickness of the lines which make up the printed characters. Characters of normal line thickness are called medium. Thicker lines are referred to as bold or black and thinner lines as light or thin. You can specify 15 different stroke weights - 0 denotes medium weight, negative values signify thinner strokes, and positive values signify bolder (thicker) strokes. -
Seite 257: Font Selection Commands
5.2. Font Selection Commands 5.2.1. User-defined symbol sets User-defined symbol sets can be used with Unbound scalable fonts. Three new commands below are prepared for use to control a user-defined symbol set. To define a symbol set, its ID code must first be defined. Next, a list of symbols for the symbol set must be downloaded. - Seite 258 0 -1: Header size (UI) - set to 18 or greater. This value stands for the number of header bytes. 2 -3 : Encoded Symbol Set Designator (UI) - should be as same as the ID code which is defined by ESC*c#R. Format (UB) - 1 for MSL (Intellifont), 3 for Unicode (TrueType).
-
Seite 259: Symbol Set Control Command
Symbol map (Array of UI ) The symbol map, which has a list of symbol index numbers, is used to define the symbols for the symbol set. This map defines the combinations of symbol index numbers and character codes. 5.2.4. Symbol set control command Esc*c#S (27)(42)(99)#(83) <1Bh><2Ah><63h>#<53h>... - Seite 260 170 LPRINT 180 REM --- PAPER EJECT --- 190 LPRINT CHR$(12); 200 END There is a further group of symbol sets that are available for Brother fonts only. You can select these as follows: Esc(s#C (27)(40)(115)#(67) <1Bh><28h><73h>#<43h> This command selects the symbol set (character set) for the primary font.
-
Seite 261: Selecting The Type Of Character Spacing
60 REM --- PRINT CHARACTERS ---- 70 FOR I=33 TO 127 80 LPRINT CHR$(I); 90 NEXT 100 LPRINT 110 REM --- FRENCH CHARACTER SET SELECTION ------ 120 LPRINT ESC$+"(s5C"; 130 REM --- PRINT CHARACTERS ---- 140 FOR I=33 TO 127 150 LPRINT CHR$(I);... -
Seite 262: Selecting The Height
The selection will apply to whichever font you are currently specifying (primary or secondary). If the printer doesn't have the specified size font, the next largest size font is used. If the printer doesn't have a larger sized font, the next smallest one is used. ... -
Seite 263: Selecting The Stroke Weight
Value Font Style Upright & solid Italic Condensed Condensed italic Compressed, or extra condensed Expanded Outline Inline Shadowed Outline shadowed 10 REM ****** PRINT IN ITALIC & UPRIGHT STYLE ****** 20 ESC$=CHR$(27) 30 WIDTH "LPT1:",255 40 REM --- PRINT USING AN ITALIC FONT ---- 50 LPRINT ESC$+"(s1S";... -
Seite 264: Font Orientation
The available values vary with the printer model. The following table shows the value for each typeface and availability. Typeface Set primary Set secondary font font 1050/ 2070N/ 1070/1270N/1660e/2060/2400C/ 1250/ 2150N/ 2400Ce/3400CN/1450/1470N/ P2500 2170W/ 1650/1670N/2460/3260N/7050/ 2250DN/ 1850/1870N/5040/5050/5070N/ 2270DW 5140/5150D/5170DN/2600CN/ 3450CN/6050/6050D/6050DN/ 8050N/2700CN/5240/5250DN/ 5270DN/5280DW/4040CN/... -
Seite 265: Transparent Print Data
5.2.14. Transparent print data Esc&p#X (character codes) (27)(38)(112)#(88) <1Bh><26h><70h>#<58h> This command enables you to print characters which are normally unprintable. # is the number of bytes of data that follow the command. Each byte of data is interpreted as a character code and the corresponding character in the currently selected symbol set is printed (if there is one). -
Seite 266: Downloadable Font Manipulation
5.3. Downloadable font manipulation Fonts that you have bought on diskette can be downloaded to the printer from diskette or hard disk using the DOS COPY command or a font downloading applications program. To create your own fonts you can use PCL commands to send the various blocks of data that comprise a do(wnloadable font. -
Seite 267: Creating Downloadable Fonts
5.4. Creating Downloadable Fonts 5.4.1. Downloading You can download existing fonts (that is, ones that you have bought or ones that you have created previously) using either a font downloading application program or the DOS command COPY/b <filename> PRN In addition, some word-processing and DeskTop publishing programs will automatically download the fonts that have been used in a document when that document is printed. - Seite 268 The Font descriptor has information for the whole character set. When this font descriptor is sent to the printer with a font header to identify the font ID, the descriptor parameters become the basis of the downloaded fonts. The data format for each type of font descriptor block is shown below. <Bitmap font>...
- Seite 269 <Intellifont Scalable Bound font> Byte 15 (MSB) (LSB) 0 0 Font Descriptor Size (>80) 2 Descriptor Format (10) Font Type 4 Style MSB Reserved 6 Base Line Position 8 Cell Width 10 Cell Height 12 Orientation Spacing 14 Symbol Set 16 Pitch (Default HMI) 18 Height 20 x-Height...
- Seite 270 <Intellifont Scalable Unbound font> Byte 15 (MSB) (LSB) 0 0 Font Descriptor Size (<88) 2 Descriptor Format (11) Font Type (10) 4 Style MSB Reserved 6 Base Line Position 8 Cell Width 10 Cell Height 12 Orientation Spacing 14 Symbol Set 16 Pitch (Default HMI) 18 Height 20 x-Height...
- Seite 271 <TrueType Scalable Bound font> Byte 15 (MSB) (LSB) 0 0 Font Descriptor Size (>72) 2 Descriptor Format (15) Font Type 4 Style MSB Reserved 6 Base Line Position 8 Cell Width 10 Cell Height 12 Orientation Spacing 14 Symbol Set 16 Pitch (Default HMI) 18 Height 20 x-Height...
- Seite 272 Unbound font. Character codes corresponding to MSL numbers are acceptable. Unbound font. Character codes corresponding to Unicode numbers are acceptable. When a 7-bit font or 8-bit font is selected, it is possible for codes 00H to FFH to load characters or delete them.
- Seite 273 Symbol set name Symbol set ID Symbol set name Symbol set ID Default Set Math-7 Line Draw-7 HP Large Characters (264x Terminals) ISO 60: Danish/Norwegian ISO 61: Norwegian version 2 Roman Extensions ISO 4: United Kingdom ISO 25: French ISO 69: French HP German ISO 21: German Greek-8...
- Seite 274 For Intellifont-scalable fonts only, the default HMI is calculated as follows. Default HMI (in dots) = (300 x master design pitch x required point size) / {Master x Resolution /(height x 8)} Default HMI ( in dots ) = (300 x master design pitch x required point size) / {72.307 x scale factor} Height (UI) - specifies the height of the font in 1/4 dots.
- Seite 275 Value Vendor Reserved Agfa Division, Miles Inc. Bitstream Inc. Linotype Company The Monotype Corporation plc Adobe Systems Inc. The Typeface family number can be 0 to 4095. This value is calculated as follows; (TrueType base value) + (Vendor value x 4096) = Typeface Family ...
- Seite 276 Font number (ULI) - ignored by these HL Series printers. This 4-byte field specifies the number assigned to the font by the vending company. The number is stored as a hexadecimal value in the lower three bytes, bytes 44, 45 and 46. ...
- Seite 277 Unicode Symbol Index Bit Field Designated Use 32 - 63 Miscellaneous uses (South Asian, Armenian, other alphabets, bar codes, OCR, Math, etc.) 28 - 31 Reserved for Latin fonts. 22 - 27 Reserved for platform / application variant fonts. 3 - 21 Reserved for Cyrillic, Arabic, Greek and Hebrew fonts.
-
Seite 278: Unicode Symbol Index Character Complement Bits
5.4.3. Unicode symbol index character complement bits Bit Field Designated Use 0 if font is compatible with 7-bit ASCII; otherwise set to 1. 0 if font is compatible with ISO 8859/1 Latin 1 (West Europe) character sets; otherwise set to 1. 0 if font is compatible with ISO 8859/2 Latin 2 (East Europe) character sets;... -
Seite 279: Sending A Character Code
*Segment Size (UI) - indicates the size of each item in the data segment. *Data segment - AP - Application support segment (reserved) CC - Character Complement Function and form are as same as character complement flag in the font descriptor. This is only for unbound fonts. - Seite 280 <Bitmap continuation data> Byte Data Format Continuation Raster Character Data The bytes which follow the header are the raster data that make up the character. Attributes are in one of four numerical formats. Unsigned integer (UI) 0 to 65535 Signed integer (SI) –32768 to 32767 Unsigned byte (UB) 0 to 255 Boolean - 0 or 1...
- Seite 281 <Intellifont-scalable contour data> Contour Data size Metric data offset Character Intellifont data offset Contour tree offset XY data offset Metric data Character Intellifont Data Contour tree data XY coordinate data <Continuation data for Intellifont scalable contour data> Byte Data Format Continuation 2 - 3 Continuous contour character data...
- Seite 282 [TrueType scalable font] <TrueType character descriptor> Byte Data Format (15) Continuation (0) 2 - 3 Descriptor size Class (15) Additional descriptor size 2 + Desc.size Character Data Size 4 + Desc. size Glyph ID 6 + Desc. size TrueType Glyph Data Format (15) Continuation (0) 2 - 3...
- Seite 283 Portrait character Paper motion Raster scan Top offset = 22 dots Baseline Character height = 31 dots Cursor position after character has been printed Character reference point Left offset Character width = 26 dots = 2 dots Delta X = 30 dots CHAPTER 2 PCL - 76...
- Seite 284 Landscape character Paper motion Top offset = 27 dots Character height = 26 dots Raster scan Left offset = 22 dots Baseline Character width = 31 dots Cursor position after character has been printed Character reference point Delta X = 30 dots CHAPTER 2 PCL - 77...
-
Seite 285: Using Graphics
USING GRAPHICS This HL Series printer affords the user considerable flexibility in the creation of graphic images. Vector, raster and rectangle graphics are available, all of which allow a range of shading and filling options. The HP-GL/2 graphics commands that are supported are described in the HP-GL/2 section of this manual. 6.1. - Seite 286 For example Pattern Source image Destination image With transparent With opaque source image source image Possible results 6.1.2. Set pattern transparency Esc*v#O (27)(42)(118)#(79) <1Bh><2Ah><76h>#<4Fh> This command sets the pattern transparency. # is either 0 or 1. Set # to 0 to select transparent mode and to 1 to specify opaque mode. ...
-
Seite 287: Set Area Fill Identity
For example Pattern Source image (Source image is transparent) Destination image With transparent With opaque pattern pattern Possible results 6.1.3. Set area fill identity Esc*c#G (27)(42)(99)#(71) <1Bh><2Ah><63h>#<47h> This command sets the pattern ID of a shading tone, a fill pattern or a user-defined pattern for subsequent selection with the Set Pattern Type command. -
Seite 288: User-Defined Pattern Command
6.1.4. User-defined pattern command Esc*c#W [ data ] (27)(42)(99)#(87) <1Bh><2Ah><63h>#<57h> # should be in the range 0 ~ 32767. # stands for the number of pattern data bytes. User defined patterns can be defined by binary data or an 8 byte pattern descriptor. ... -
Seite 289: User-Defined Pattern Control
6.1.6. User-defined pattern control Esc*c#Q (27)(42)(99)#(81) <1Bh><2Ah><63h>#<51h> # = 0 deletes all (temporary and permanent) user-defined patterns from the printer memory. # = 1 deletes all temporary user-defined patterns from the printer memory. # = 2 deletes the pattern whose ID number was specified most recently. ... - Seite 290 See the following example for programming examples using patterns. Pattern example 10 WIDTH "LPT1:", 255 20 ESC$ = CHR$(27) 30 REM --- RESET PRINTER --- 40 LPRINT ESC$; "E"; 50 REM --- SET SOURCE=TRANSPARENT --- 60 REM --- SET PATTERN=OPAQUE --- 70 LPRINT ESC$;...
-
Seite 291: Plotting Rectangles
6.2. Plotting Rectangles Drawing rectangles is a basic case of printing graphics: the source image consists solely of the rectangle itself. Thus only the pattern transparency has any bearing on the final effect - the source transparency is irrelevant. 6.2.1. Cursor position Position the cursor using the commands described in the chapter entitled "The Page". - Seite 292 See the following example for programming examples using gray scales. Gray scale example 10 ESC$ = CHR$(27) 20 WIDTH "LPT1:", 255 30 REM --- DRAW A PATTERN USING 64 GRAY SCALES --- 40 X = 50: Y = 100: XL=50 :YL=200 50 FOR GRAY = 0 TO 100 STEP 2 60 GOSUB 220 70 X=GRAY*10+50 :XL=X-XL...
-
Seite 293: Raster Graphics
6.3. Raster Graphics 6.3.1. Positioning the cursor Position the cursor using the commands described in the chapter entitled "The Page", using dots, decipoints or rows and columns as coordinate units. 6.3.2. Set raster resolution Esc*t#R (27)(42)(116)#(82) <1Bh><2Ah><74h>#<52h> This command sets the raster image resolution in dots per inch. ... -
Seite 294: Commands
6.3.5. Set raster area height Esc*r#T (27)(42)(114)#(84) <1Bh><2Ah><72h>#<54h> This command sets the height of the raster image to be printed. # is the number of raster rows. If you use this command after using a Start Raster Graphics or a Transfer Raster Data command, it does not take effect until after the next End Raster Graphics command. - Seite 295 # = 3 indicates that delta row compression is to be used. In this method byte sequences identify how each raster row differs from the last row that was transmitted. The first byte identifies the number of consecutive bytes (the value of the most significant 3 bits plus 1) to be changed and the position in the line at which to start substituting the replacement bytes (the least significant 5 bits plus 1).
- Seite 296 # = 9 Mode 9 compression Like mode 3 compression, this mode 9 compression data contains only the difference of the current row from the preceding row. Replacement data often consists of a repetition of a particular byte in mode 3 compression. Mode 9 compression is effective in such cases.
- Seite 297 If bit 6 and bit 5 are '1', then an optional offset byte follows the control byte. If the value of this optional offset byte is 255, another (second) optional offset byte follows the first optional offset byte. The addition of the offset count in the control byte and any optional offset bytes gives the total offset count.
- Seite 298 Byte Data Description position 0 - 1 6E 6E 'nn' This is header ID. 2 - 3 0A 00 Reserved 4 - 7 5E 00 00 00 Picture data start offset from header top 8 - 11 File length File length including 94 Byte header. If file length is 65,536 byte, these 4 bytes become "00 00 01 00"...
- Seite 299 We recommend 150 dpi or less resolution for APT to reduce data size. # = 1025 indicates the Brother original Compression Method. # = 1026 indicates the Brother Advanced Data Transfer Mode. CHAPTER 2 PCL - 92...
-
Seite 300: Start Raster Transfer
6.3.9. Start raster transfer Esc*r#A (27)(42)(114)#(65) <1Bh><2Ah><72h>#<41h> This command signals the start of the transfer of a raster image to the printer. # is 0 or 1. # = 0 denotes that the image will be printed starting from the left edge of the logical page. ... - Seite 301 Raster graphics example 10 REM ***** A EXAMPLE OF RASTER GRAPHICS ***** 20 ESC$=CHR$(27) 30 WIDTH "LPT1:",255 40 REM --- SET GRAPHICS RESOLUTION TO 300 DPI --- 50 LPRINT ESC$+"*t300R"; 60 REM --- START RASTER GRAPHICS --- 70 LPRINT ESC$+"*r1A"; 80 REM --- TRANSFER RASTER GRAPHICS --- 90 FOR I=1 TO 28 100 REM --- TRANSFER 1 LINE OF DOTS (4 byte = line) ---...
-
Seite 302: Horizontal 1200-Dpi Image Format Mode (Raster Graphic Mode 1027)
6.3.13. Horizontal 1200-dpi image format mode (Raster Graphic Mode 1027) The printer supports 1200 dpi printing for special image formats in 1200 dpi mode. We recommend that the installed printer memory is 10 Mbytes or more for 1200 dpi printing. To set 1200 dpi mode, 1. - Seite 303 <Compressed Image Data> Data compression compresses the original image data word by word (16 bits). The compressed data consists of both horizontal compression which uses 16 bit, 8 bit and 4 bit repeating patterns within 1 word or 2 words of data and vertical compression which indicates how many times to repeat the same data as in the previous line within 1 word of data.
-
Seite 304: Vector Graphics
6.4. Vector Graphics For large-scale graphic images it is more efficient to use vector graphics. In LaserJet emulation mode you can set up the page area on which to print vector graphics images. The vector graphics capabilities of these HL Series printers working in HP-GL/2 mode are described in the HP-GL/2 section of this manual. -
Seite 305: The Picture Frame
6.5. The Picture Frame The PCL picture frame is the rectangular area of the page on which you can print graphic images. You can position and size the picture frame to suit your requirements and achieve effects such as scaling or distortion of vector graphics images. -
Seite 306: Macros
MACROS 7.1. The Purpose of a Macro A macro is a sequence of commands that you wish to execute. You can specify the command sequence and download it to the printer after which you can execute it with a single command. For example, you might wish to draw a raster image at the top of each page you print. -
Seite 307: Defining A Macro
7.2. Defining a Macro To define a macro you must first assign an ID number to it, then send to the printer a Start Macro Definition command, the macro definition itself (consisting of a sequence of PCL commands) and finally an End Macro Definition command. -
Seite 308: Running A Macro
7.3. Running a Macro Macros can be invoked in three different ways: they can be 'executed', 'called' or 'enabled for overlay'. When a macro is 'executed' it uses the current modified print environment. Any changes it makes to the environment are permanent. -
Seite 309: Handling Macros
7.4. Handling Macros 7.4.1. Delete all macros Esc&f6X (27)(38)(102)(54)(88) <1Bh><26h><66h><36h><58h> This command deletes all macros from the printer's memory. 7.4.2. Delete all temporary macros Esc&f7X (27)(38)(102)(55)(88) <1Bh><26h><66h><37h><58h> This command deletes all temporary macros from the printer's memory. Temporary macros are those which have not been made permanent with the Esc&f10X command. -
Seite 310: Execute Data
120 REM --- SET FONT TO LETTER GOTHIC (18 DOTS WIDE) --- 130 LPRINT ESC$+"(s0p16.66h8.5v0s0b130T"; 140 REM --- PRINT COMMENT --- 150 LPRINT "Printed by this printer"; 160 REM --- SET CURSOR POSITION X=1790 DOT, Y=-40 DOT --- 170 LPRINT ESC$+"*p1790x-40Y"; 180 REM --- PERFORM SHADING --- 190 REM --- SET SHADING WIDTH TO 23 CHARACTERS + 20 DOTS --- 200 LPRINT ESC$+"*c";23*18+20;"A";... -
Seite 311: Mio Video I/O Port Control
If the key is [RENAME], this command allows the printer to change the name field of the AppleTalk name binding protocol. <ESC>&b#WRENAME<sp>printername printername should be specified with 1 to 31 characters. The characters $00 to $FF (except for $00, @, :, *, =, $C5) can be used for the printername. $00 is used as the terminator. -
Seite 312: Status Readback
STATUS READBACK 8.1. Introduction Status readback features are explained in this section. The printer sends a status response message after receiving a request for its status by these commands. You can get the information as shown below from the printer. - available printer (user) memory - current available fonts and symbol sets - the ID numbers of downloaded macros and user-defined patterns to verify their... -
Seite 313: Status Response Syntax
8.5. Status Response Syntax All of the status responses begin with "PCL", Carriage Return control code and a Line Feed control code. The response is ended by a Carriage Return and a Line Feed control code. At the end of the transaction, status responses are ended by a Form Feed Control code. -
Seite 314: Inquire Status Readback Entity
all downloaded entities downloaded entity as temporary downloaded entity as permanent All cartridge/cards the cartridge/card which has the highest priority. the cartridge/card which has the lowest priority When the location value is 0, 1 and 2, it ignores the unit value (which might be set to any value). The default value is 0, and whenever you reset the printer, the value is reset to the default value. -
Seite 315: Bitmap Fonts
In a font status response, the "SELECT=" keyword line specifies the individual fonts. The font is identified by this line by specifying the font selection characteristics such as symbol set, spacing, pitch, height, style, stroke weight, and typefaces. It returns the "SELECT=" for all font types. In a status response, the five characters "<", "E", "s", "c", and "&>"... -
Seite 316: Font Extended Response
"LOCUNIT=" specifies the location unit of the font which is selected at present. The value field of the Set Status Readback Unit command is related to the value returned. For instance, if the printer font which is selected at present is a bold 12 point Presentation bitmap font which is selected from a cartridge, and a font entity request with the location type set to 1 is produced, the response will be returned as follows. -
Seite 317: Macro Response
For instance, a font extended response with the location type set to 1( selected at present ) where the font which is selected at present is the internal Pc Tennessee (18 point identified for printing) bold, returns the response as follows. -
Seite 318: Entity Error Codes
Status location type 1 (selected at present) is an incorrect location for unbound font symbol sets and returns an error. Example responses in this section for "SYMBOLSETS=" do not indicate the complete list of symbol sets which are available internally, but only a partial list . The internal symbol sets depend on the printer and might differ according to the printer. -
Seite 319: Font Cache
These stored bitmap characters are known as the font cache. If a Brother HL-Series printer encounters a memory low condition, all of the font cache is automatically deleted. Also, font cache and temporary entities can be cleared by a Printer Reset command. - Seite 320 INDEX end-of-line wrap .............. 13 entity error code ............111 entity status ..............105 entity status response ............ 107 adaptive compression ............88 envelope ................15 anchor point ..............98 environment ..............14 AppleTalk configuration ..........103 error response APT ................. 92 memory ..............
- Seite 321 internal font ..............46 page ................. 29 italic ................. 56 page dimensions landscape ..............32 portrait ................ 30 page length ..............38 page size ................15 Job separation command ..........25 paper side selection ............25 paper source ..............20 paper type ................
- Seite 322 status response ............... 105 memory ..............112 status response syntax ........... 106 unbound font ..............46 stroke weight ..............49 unbound scalable font ........... 108 select ................56 underlining text ............... 58 style ................48, 55 unit of measure ..............34 select ................
- Seite 323 CHAPTER 3 PCL5C CHAPTER 3 PCL5C - 1...
- Seite 324 ONTENTS INTRODUCTION ......................... 3 COLOR MODES ......................... 4 2.1. Using Simple Color Mode - Set Simple Color ................4 2.2. Using PCL Color Mode - Set PCL Color Setting ................ 5 2.3. Using HP-GL/2 Color Mode ......................9 COLOR PALETTES ......................10 3.1.
-
Seite 325: Introduction
INTRODUCTION This chapter describes the enhanced commands for the PCL5C emulation. PCL5C is upwards-compatible with PCL5e. For the commands of PCL5e, refer to "Chapter 2 PCL" which describes the PCL5e emulation. If you are reading this technical manual for the first time, it is recommended that you read Chapter 2 first before reading this Chapter. -
Seite 326: Color Modes
COLOR MODES The PCL5C emulation provides a B/W mode, which is the default, and three color modes as follows; 1) Simple Color Mode 2) PCL Color Mode 3) HP-GL/2 Color Mode Simple Color Mode allows you to use a maximum of 8 colors easily. PCL Color Mode allows you to use a maximum of 16,000,000 colors logically. -
Seite 327: Using Pcl Color Mode - Set Pcl Color Setting
2.2. Using PCL Color Mode - Set PCL Color Setting Command ESC*v#W (27)(42)(118)#(87) <1Bh><2Ah><76h>#<57h> # = 6, 18 # stands for the number of bytes of data that follow this command. This command sets the palette size and transformation between the entered value and device-specific value. This command has two types of format, short format and long format. - Seite 328 [Example] If you want to send index No. 7,6,5,4,3,2,1,0; Enter 'ESC*v6W 00h 00h 04h 08h 08h 08h', then select Send Index No by Plane. Select 4 bits/index. (2 = 16 Palettes) ESC*r1A Start Raster Transfer ESC*b1V 10101010B Send Plane1 data (The Index No Bit0 data) ESC*b1V 11001100B Send Plane2 data (The Index No Bit1 data) ESC*b1V 11110000B...
- Seite 329 (i.e.) ESC*b#V r, r, r, r, r... Plane 1 1st raster ESC*b#V g, g, g, g, g... Plane 2 ESC*b#W b, b, b, b, b... Plane 3 ESC*b#V r, r, r, r, r... Plane 1 2nd raster ESC*b#V g, g, g, g, g... Plane 2 ** The Italic characters shown above are the index No.
- Seite 330 ♣ Bits/index Specifies the palette size at 2 . n indicates bits/index. (n=4 2 =16 palettes) When the encoding mode is 0 or 1, the palette size selected by the bits/index value specifies the range of the index No., which can be used for raster data.
-
Seite 331: Using Hp-Gl/2 Color Mode
♣ Black reference for value #1, #2, #3 ♣ This mode specifies the black value (the highest level of density). ♣ Each value indicates a color as follows; green blue Range: -32767 ~ 32767 When the encoding mode is 2 or 3, this setting is valid. 2.3. - Seite 332 COLOR PALETTES 3.1. Set Color #1 Command ESC*v#A (27)(42)(118)#(65) <1Bh><2Ah><76h>#<41h> Range = -32767 ~ 32767 Default value = 0 This command sets the red value in the palette. Use the Set Color to Palette command to set the value. ...
-
Seite 333: Select Color
3.5. Select Color Command ESC*v#S (27)(42)(118)#(83) <1Bh><2Ah><76h>#<53h> # = 0 ~ current palette size Default value = 0 This command selects the color as the index number in the palette. This command is valid for text, underline, rule and graphics. ... -
Seite 334: Color Graphics
COLOR GRAPHICS 4.1. Start Raster Transfer Command ESC*r#A (27)(42)(114)#(65) <1Bh><2Ah><72h>#<41h> # = 0 * Prints the image from the left edge of the logical page. Prints the image from the current cursor position. Executes scaling. Prints the image from the left edge of the logical page. -
Seite 335: Set Scale Algorithm
4.4. Set Scale Algorithm Command ESC*t#K (27)(42)(116)#(75) <1Bh><2Ah><70h>#<4Bh> # = 0 * Takes the lighter overlying dots when reducing. Takes the darker overlying dots when reducing. * Default value = 0 This command sets which algorithm the data is reduced by. ... -
Seite 336: Enhance Output
ENHANCE OUTPUT 5.1. Set Render Algorithm Command ESC*t#J (27)(42)(116)#(74) <1Bh><2Ah><70h>#<4Ah> # = 0 Scatter dither Snap to primaries Snap black to white, all other colors to black = 3 * Scatter dither Scatter dither Monochrome device best dither Monochrome scatter dither Clustered dither Monochrome clustered dither User-defined dither... -
Seite 337: Set Gamma Correction
5.3. Set Gamma Correction Command ESC*t#I (27)(42)(116)#(73) <1Bh><2Ah><74h>#<49h> # = 0.0 ~ 32767.0 (command is ignored for invalid values) Default value = 0 (gamma correction off) This command does not destroy the contents of the current palette, but setting a gamma value replaces any lookup table input in either Device CMY or Device RGB. -
Seite 338: In (Initialize Set Instruction) Command
HP-GL/2 A few HP-GL/2 commands are added for the HL-2400C/Ce, HL-3400CN, HL-2600CN, HL-3450CN, HL- 2700CN, HL- 4040CN/4050CDN/4070CDW/3070CW/3075CW/4140CN/4150CDN/4570CDW/3170CDW/L8250CDN/L835 0CDW/L9200CDW/L9300CDW color laser printer, and the features of some existing commands are also expanded. The new or revised HP-GL/2 commands as follows are described in this chapter; ... -
Seite 339: Np (Number Of Pens) Command
PC [pen;]: sets the pen to the default color. Number of pens in palette Pen number Color 2 ("NP 2;") White Black 4 ("NP 4;") White Black Green 8 ("NP 8;") White Black Green Yellow Blue Magenta Cyan ** If the number of pens in the palette is over 8, the color is set to black. 6.3. - Seite 340 INDEX algorithm ................. 13 monochrome mode ............14 B/W mode ................. 4 NP command ..............17 black value ................ 9 number of pens ..............17 blue value ................ 10 palette ................. 4 color palette ..............10 palette size................5 color range ............... 17 PC command ..............
- Seite 341 CHAPTER 4 HP-GL/2 GRAPHICS LANGUAGE CHAPTER 4 HP-GL/2 - 1...
- Seite 342 ONTENTS COMMAND LIST ........................4 INTRODUCTION ........................6 TERMINOLOGY ........................7 3.1. Picture Frame........................... 7 3.2. Anchor Point ..........................7 3.3. Graphics Window ........................7 3.4. Hard Clip Limits ........................7 3.5. Soft Clip Limits ......................... 7 3.6. Graphics Units ......................... 7 3.7.
- Seite 343 7.5. Plot Function Instructions ....................... 30 7.6. Character Plot Instructions ..................... 38 7.6.1. Introduction ............................39 INDEX ..........................52 CHAPTER 4 HP-GL/2 - 3...
-
Seite 344: Command List
COMMAND LIST Default set instruction Initialize set instruction Input scaling point Input relative scaling points Scale Window Rotate coordinate system Pen up Pen down Plot absolute Relative coordinate pen move Draw absolute arc Draw relative arc Absolute arc three point Relative arc three point Polyline encoded Bezier relative... - Seite 345 Absolute direction Relative direction Define variable text path Relative character movement Character fill mode Set absolute character size Set relative character size Character slant Scalable or bitmap fonts Extra space Transparent data CHAPTER 4 HP-GL/2 - 5...
-
Seite 346: Introduction
INTRODUCTION Some of the HL series printers can be used in HP-GL/2 graphics mode to produce vector graphics output using the commands of the HP-GL/2 graphics language or to print out existing HP-GL/2 format images. HP-GL/2 is a part of the PCL emulation, which includes graphics command. The Default plotting measurement unit in the HP-GL/2 graphics mode is 1/1016"... -
Seite 347: Terminology
TERMINOLOGY 3.1. Picture Frame The printer frame is the rectangular area of the page on which graphic output can be printed. This is based on the logical page defined for the selected paper size. 3.2. Anchor Point The anchor point of the picture frame is the top left hand corner of the frame. This can be moved on the page using PCL language page control commands. -
Seite 348: Absolute And Relative Plotting
3.10. Absolute and Relative Plotting Drawing commands are of two distinct types: absolute commands, in which the coordinates specified are the absolute user or graphics coordinates and relative commands, whose coordinates are relative to the coordinate position at which the previous graphics command terminated. 3.11. -
Seite 349: Command Syntax
COMMAND SYNTAX An HP-GL and HP-GL/2 command can consist of up to four items: a mnemonic, a parameter field, a separator and a terminator. 4.1. Mnemonic The two-letter mnemonic is the name of the command and should help remind you of its function. 4.2. -
Seite 350: The Hp-Gl Graphics Window
THE HP-GL GRAPHICS WINDOW 5.1. Units When you first enter graphics mode, the prevailing coordinate system has its origin in the bottom left hand corner of the graphics window and has x- and y-units of 1/1016". Using the SC command you can divide the axes into more convenient units. -
Seite 351: Preparing To Print Graphic Images
PREPARING TO PRINT GRAPHIC IMAGES 6.1. Setting Up the Graphics Window Before entering HP-GL/2 mode you will probably want to set the dimensions and position of the PCL picture frame and hence the graphics window. (Remember that when you enter HP-GL/2 mode they are initially the same). -
Seite 352: Commands
COMMANDS 7.1. Initialize Commands DF - Default set instruction DF[;] Returns the graphics mode to default conditions. The following are the default settings. Function Equivalent Condition Instruction Plot mode Absolute plotting Absolute direction DI 1,0; Horizontal Line type Solid line Line pattern length 4% of distance from P1 to P2 Anchor corner... - Seite 353 IN - Initialize set instruction IN[;] Returns the graphics mode to initial conditions; Function Equivalent Condition Instruction Plot mode Absolute plotting Relative character direction DR 1,0; Horizontal Line type Solid line Line pattern length 4% of distance from P1 to P2 Window Set at limits of printable area according to paper size...
-
Seite 354: Plot Area And Unit Setting Instructions
7.2. Plot Area and Unit Setting Instructions Instruction Function Scaling point Input relative scaling points Scale Input window Rotate coordinate system IP - Input scaling point IP [ P1 , P1 [,P2 ]] [;] coordinate of P1 coordinate of P1 coordinate of P2 coordinate of P2 ... - Seite 355 SC - Scale <HP-GL/2> SC [ X [, type ]] [;] (Type = 0) SC [ X , type [ left, bottom]] [;] ( Type =1) SC [ X [, type ]] [;] ( Type = 2) factor factor ; X coordinate of P1 ;...
- Seite 356 With type 1 scaling you can specify the percentage of unused space that is to lie below, or to the left of, the isotropic area. left specifies the percentage of unused space you want to lie to the left of the isotropic area and can be from 0 to 100.
- Seite 357 IW - Window IW [ X 1 , Y 1 , X 2 , Y 2 ] [;] -Window lower left X coordinate -Window lower left Y coordinate -Window upper right X coordinate -Window upper right Y coordinate This instruction sets the window inside which drawing can be performed (the soft clip limits). ...
-
Seite 358: Pen Control And Plot Instructions
7.3. Pen Control and Plot Instructions Instruction Function Pen Up Pen Down Plot Absolute Relative Coordinate Pen Move Absolute Arc Plot Relative Arc Plot Absolute Three Point Arc Relative Three Point Arc Polyline Encoded Circle Bezier Relative Bezier Absolute PU - Pen up PU [ X,Y [,...]] [;] X ;... - Seite 359 PA - Plot absolute PA [ X, Y [,...]] [;] X ; X coordinate of the cursor movement destination Y ; Y coordinate of the cursor movement destination Coordinates are absolute values in user or current units. Whether used with or without parameters the command establishes absolute plotting as the plotting mode. ...
- Seite 360 AA - Draw absolute arc AA [ X, Y, qc [, qd ]] [;] X ; Arc centre X coordinate Y ; Arc centre Y coordinate qc ; Arc angle in degrees qd ; Chord angle in degrees Coordinates are absolute coordinates in current units. ...
- Seite 361 AR - Draw relative arc AR X, Y, qc (, qd )[;] X ; Arc centre X coordinate Y ; Arc centre Y coordinate qc ; Arc angle in degrees qd ; Chord angle in degrees Coordinates are relative values in current units. ...
- Seite 362 RT - Relative arc three point RT X [,qd] [;] ; x-coordinate of intermediate point ; y-coordinate of intermediate point ; x-coordinate of end point ; y-coordinate of end point qd ; the chord angle used to draw the arc ...
- Seite 363 The following flags are used: ':' - Select pen. The number which follows is the required pen number. A PE command that does not include a select pen command uses the currently selected pen. '<' - Pen up. The pen is raised and moved to the specified coordinate pair. All coordinate pair values not preceded by this flag are automatically interpreted as pen down plotting commands.
- Seite 364 To avoid placing an unwanted dot at the centre of the circle precede the CI command with a PU command. 10 '-- Circle -- 20 WIDTH "LPT1:",255 30 LPRINT CHR$(27);"E"; 40 LPRINT CHR$(27);"%0B"; 50 LPRINT "IN;SP1;"; 60 LPRINT "SC-75,75,-75,75,1;" 70 LPRINT "PA0,0;LT;CI5;LT0;CI-12;"...
-
Seite 365: The Polygon Group
7.4. The polygon group Instruction Function Polygon Mode Edge Absolute Rectangle Edge Relative Rectangle Edge Polygon Edge Wedge Fill Absolute Rectangle Fill Relative Rectangle Fill Wedge Fill Polygon PM - Polygon mode PM [ ms ] [;] This command is used for entering and leaving polygon mode, the mode that allows you to access the polygon buffer. - Seite 366 10 '-Edge Rectangle Absolute- 20 WIDTH "LPT1:", 255 30 LPRINT CHR$(27); "E"; 40 LPRINT CHR$(27); "%0B"; 50 LPRINT "IN;SP1;"; 60 LPRINT "SC0,150,0,150,1;" 70 LPRINT "PA25;105;EA65;130;" 80 LPRINT "PA30;110;EA70,135;" 90 LPRINT "PA35;115;EA75;140;" 100 LPRINT CHR$(27); "%0A"; 110 LPRINT CHR$(27); "E"; 120 END <sample 31>...
- Seite 367 r specifies the radius of the circle. A positive value for r places the 0º reference point onto the positive x- axis and a negative value for r places the 0º reference point onto the negative x-axis. The value for q1 is a clamped real number. 0°...
- Seite 368 90 LPRINT "FT4,100,45;RA4250,4750;" 100 LPRINT CHR$(27); "%0A"; 110 LPRINT CHR$(27); "E"; 120 END <Sample 34> RR - Fill rectangle relative RR X, Y[;] X ; X coordinate of opposite corner for the rectangle Y ; Y coordinate of opposite corner for the rectangle ...
- Seite 369 10 ' - Fill Wedge - 20 WIDTH "LPT1:", 255 30 LPRINT CHR$(27); "E"; 40 LPRINT CHR$(27); "%0B"; 50 LPRINT "IN;SP2;FT3,100;" 60 LPRINT "PA2000,5000;" 70 LPRINT "WG1250,90,180,5;" 80 LPRINT "SP3;EW1250,90,180,5;" 90 LPRINT "SP4;FT4,100,45;" 100 LPRINT "WG1250,270,120;" 110 LPRINT "SP3;EW1250,270,120;" 120 LPRINT "SP1;FT1;" 130 LPRINT "WG1250,30,60;"...
- Seite 370 7.5. Plot Function Instructions Instruction Function Anchor Corner Fill Type Line Attribute Line Type Pen Width Raster Fill Definition Symbol Mode Select Pen Screened Vectors Transparency Mode User-defined Line Type Select Unit for Pen Width AC - Anchor corner AC [ X, Y ] [;] X ;...
- Seite 371 FT - Fill type FT n (, d (, q ))[;] n ; Fill type d ; option 1 q ; option 2 Sets the fill type, interval and angle when filling an area. This setting is effective for the commands FP, RA, RR, WG and CF.
- Seite 372 LA - Line attribute LA [ l, v [ , l , v [ , l , v ]]] [;] l ; line attribute v : value This command specifies the shape of line joins and line ends. These settings are effective for the line widths thicker than 0.35 mm. ...
- Seite 373 LT - Line type selection LT [, n [, p [, m ]]] [;] n ; Line pattern number p ; Line pattern length (percentage or millimeters of distance between P1 and P2) m : mode This command specifies the line pattern for use when drawing lines with the vector group commands. ...
-
Seite 374: Index
PW - Pen width PW [ w , [, p ]] [;] w ; width p ; pen This command specifies the width of the pen. Pen width can either be specified as a fixed width in millimeters ( the default ) or relative to the distance between the scaling points P1 and P2. - Seite 375 10 '--Raster Fill Definition== 20 WIDTH "LPT1:", 255 30 LPRINT CHR$(27); "E"; 40 LPRINT CHR$(27); "%0B"; 50 LPRINT "IN;SP1;"; 60 LPRINT "PU5,5;PA3500,2500;" 70 LPRINT "RF2,8,4,0,0,0,0,0,0,0,0,0,0,0,1,1,0,0,0,0,0,1,1,0,0,0,0,0,0,0,0,0,0,0, 0,;" 80 LPRINT "FT11,2;RR4000,800;EP;" 90 LPRINT CHR$(27); "%0A"; 100 LPRINT CHR$(27); "E"; 110 END <Sample 43> SM - Symbol mode SM c [;] c ;...
- Seite 376 With screen type 21 option 1 specifies one of six predefined PCL cross-hatch patterns (patterns 1 - 6). option 2 is ignored. With screen type 22, option 1 specifies the ID number of PCL user-defined pattern which is defined by the ESC*c#W command.
- Seite 377 170 'Source 2 180 LPRINT "FT10,50;PA4000,5000;RR500,500;PA4500,5500;RR500,500;" 190 LPRINT "FT10,1;PA4500,5000;RR500,500;PA4000,5500;RR500,500;FT;" 200 ' 210 '( POLYGON ) 220 LPRINT "PA2000,1000;PM0;PDPA4000,1000,3000,3000;PM1;" 230 LPRINT "PA2500,1200,3500,1200,3000,2500;PM1;" 240 LPRINT "PA3000,800,3700,2500,2300,2500;PM1;" 250 LPRINT "PM2;FP;" 260 LPRINT CHR$(27); "%0A"; 270 LPRINT CHR$(27); "E"; 280 END <Sample 45> UL - User-defined line type UL [ i ] [, g [...,]] [;] i ;...
- Seite 378 The command sets all pen widths to a default of 0.35mm. Hence it should be used before the PW command. Using the command with no parameter defaults the type to 0 (metric) and all pen widths to 0.35mm. ...
- Seite 379 7.6.1. Introduction The character group commands enable you to print text to accompany your HP-GL/2 generated graphics without leaving graphics mode. You can use any font that would be available to you in LaserJet emulation mode and you can modify various printing characteristics of the text such as the size, direction and slant of the characters.
- Seite 380 attribute = 1 : Symbol set Valu Name Valu Name number number Math - 7 Line Draw - 7 HP Large Characters Norwegian v1 Roman Extensions French v1 HP German Hebrew - 7 Italian JIS ASCII Line Draw - 7 Math - 7 ECMA-94 Latin1 (8-bit 8859/1...
- Seite 381 attribute = 2 : Spacing Value Meaning Monospacing Proportional spacing attribute = 3 : Pitch Specify pitch in characters per inch (cpi). The pitch value you specify can be in the range 0 to 32767.9999. Pitch only applies to monospaced fonts. ...
- Seite 382 AD - Define alternate font AD [ attribute , value ] [..] [;] attribute : a font attribute to be defined value : the value of the attribute This command allows you to define the alternate font and its attribute. ...
- Seite 383 FI - Select primary font FI font-ID [;] font-ID ; the identity number of any accessible font. This command allows you to select any accessible font, which has previously been given an identity number in LaserJet mode, as the primary (standard) font. All subsequently printed labels will appear in the primary font.
- Seite 384 DT - Define label terminator DT [ c [, m ]] [;] c : Character m : mode This command allows you to specify the character that terminates strings printed with the LB instruction. The character immediately following DT is taken to be the terminator. Hence, do not put a space between the DT and your chosen character.
- Seite 385 When you use an LO instruction the carriage return point is set to be the new label origin. To send the pen back to a label's origin when you have finished printing it, include a carriage return between the last character of the label and the terminating character.
- Seite 386 90 LPRINT "DT";" 100 LPRINT "DT0,2;LB_*_1988#"; "DI2,2;LB_*_1989#"; 110 LPRINT "DT2,0;LB_*_1990#"; "DI2,-2;LB_*_1991#"; 120 LPRINT "DT0,-2;LB_*_1992#"; "DI-2,-2;LB_*_1993#"; 130 LPRINT "DT-2,0;LB_*_1994#"; "DI-2,2;LB_*_1995#"; 140 LPRINT "PA3500,5350;DI", COS(0),SIN(0); "LB_*_2000"; CHR$(13); "#"; 150 LPRINT "DI", COS(RAD); SIN(RAD); "LB_RETURN POINT"; CHR$(13); "#"; 160 LPRINT CHR$(27); "%0A"; 170 LPRINT CHR$(27); "E"; 180 END <sample 54>...
- Seite 387 DV - Define variable text path DV [ path [, line ]] [;] path : text printing path - horizontal or vertical, and left to right, right to left, upwards or downwards. line: the effect of a line feed. This command determines the printing direction for labels and the carriage return point. ...
- Seite 388 CF - Character fill mode CF [ fill [, pen ]] [;] fill : the fill pattern used to fill characters pen : the pen used to edge characters This command determines how characters are edged and filled. Only scalable fonts can be both filled and edged - bitmap fonts and the stick font cannot be edged and can only be filled with raster fill, shading or PCL cross-hatch patterns.
- Seite 389 10 ' -Absolute Character Size- 20 WIDTH "LPT1:", 255 30 LPRINT CHR$(27); "E"; 40 LPRINT CHR$(27); "%0B"; 50 LPRINT "IN;SP1;"; 60 LPRINT "PA700,3000;DT#;LBPrinter#" 70 LPRINT "PA700,2000;SI0.75,1;LBPrinter#" 80 LPRINT "SI;SD1,21,2,1,3,12,5,0,6,0,7,52;SS;" 90 LPRINT "PA40003000;LBPrinter#" 100 LPRINT "PA4000,2000;SI1,1.5;LBPrinter#" 110 LPRINT CHR$(27); "%0A"; 120 LPRINT CHR$(27); "E"; 130 END <Sample 57>...
- Seite 390 10 ' -Character Slant- 20 WIDTH "LPT1:", 255 30 LPRINT CHR$(27); "E"; 40 LPRINT CHR$(27; "%0B"; 50 LPRINT "IN;SP1;"; 60 LPRINT "SD1,21,2,1,4,25,5,0,6,0,7,5;SI0.7,1;" 70 LPRINT "PA1000,1000;DT#,1;SL0.36,LBPrinter#" 80 LPRINT "PA1000,300;SL-0.36;LBPrinter#" 90 LPRINT CHR$(27); "%0A"; 100 LPRINT CHR$(27); "E"; 110 END <Sample 59> SB - Scalable or bitmap fonts SB [ n ] [;] n : font category selection...
- Seite 391 mode is set to either 0 or 1. If mode is set to 0, control codes perform their normal functions and are not printed. If mode=1, all characters are printed, if possible. No control characters perform any function except the label terminator. Any non-printing or undefined characters appear as a space. ...
- Seite 392 INDEX Absolute arc three point ..........21 hard clip limits ..............7 absolute commands ............8 Absolute direction ............45 Anchor corner ..............30 anchor point ............... 7 image plots ............... 11 Initialize command ............12 Initialize set instruction ............ 13 Input relative scaling points ..........
- Seite 393 Select primary font ............43 Transparency mode ............36 Select secondary font ............43 Transparent data ............... 50 Select standard font ............42 Select unit for pen width ..........37 separators ................9 Set absolute character size ..........48 user units ................7 Set relative character size ..........
- Seite 394 CHAPTER 5 PRINTER JOB LANGUAGE CHAPTER 5 PJL - 1...
- Seite 395 ONTENTS INTRODUCTION ........................4 1.1. About PJL ........................... 4 1.2. In Case of Using PJL with a Non-PJL Printer ................5 1.2.1. PCL jobs ..............................5 1.2.2. Postscript jobs ............................5 1.2.3. Other printer languages .......................... 5 1.3. PJL Syntax and Format ......................6 1.4.
- Seite 396 6.2. Variables ........................... 18 6.2.1. Variables for HL-1050/1070/1250/1270N/1450/1470N/P2500/1650/1670N/3260N/2460/ 7050/1850/1870N/5040/5050/5070N/5140/5150D/5170DN/6050/6050D/6050DN/8050N/ 2070N/5240/5250DN/5270DN/5280DW/2140/2150N/2170W/5340D/5350DN/5370DW/5380DN/2130/2240D/ 2250DN/2270DW/4140CN/4150CDN/4570CDW/5440D/5450DN/5470DW/6180DW/S7000DN/3140CW/3150 CDW/3150CDN/3170CDW/1110/HL1111/1112/1118/L8250CDN/L8350CDW(T)/L9200CDW(T)/L9300CDW(T )/L2300/L2300D/L2320D/L2321D/2260/2260D/L2305W/L2340DW/L2360DN/L2361DN/2560DN/L2360DW/L2 365DW/L2366DW/2569DW/1212W/1210W/1210WR/1212WR/1210WE/1211W/ 1218W/1200/1201/1202/1208/L5000D/5580D/5585D/5595DN/L5102DW/L5100DN(T)/5590DN/L5200DW(T)/ L5202DW/L6200DW(T)/L6202DW/L6250DN/L6250DW/L6300DW(T)/L6400DW(T)/L6402DW) ..... 18 6.2.2. Variables for HL- 1660e/2060/2400C/2400Ce/3400CN/2600CN/3450CN/2700CN/4040CN/4050CDN/4070CDW/3040CN/3045 CN/3070CW/3075CW ............................49 6.3. Default Command ........................54 6.4. Initialize Command ........................54 6.5. Reset Command ........................55 6.6.
-
Seite 397: Introduction
INTRODUCTION 1.1. About PJL Printer Job Language(PJL) provides job status control by sending the printer status information to the application. PJL can be a valuable tool for the single-user environment, but is a much more useful tool for the networking / sharing environment. Emulations ( BR-Script, PCL, IBM, EPSON etc... -
Seite 398: In Case Of Using Pjl With A Non-Pjl Printer
1.2. In Case of Using PJL with a Non-PJL Printer Our recent printer models support PJL, however, earlier models do not . If the PJL commands are sent to a non-PJL printer, the printer acts as follows; 1.2.1. PCL jobs For a PCL printer which does not support the PJL language, the PJL command is printed as ASCII text until initial PCL printer reset command (<ESC>E) is received. -
Seite 399: Pjl Syntax And Format
1.3. PJL Syntax and Format Syntax <For Example> @PJL ENTER LANGUAGE = emulation [<CR>]<LF> @PJL PJL Prefix ENTER Command name LANGUAGE Option name @PJL ENTER LANGUAGE Enter this portion verbatim The words in brackets [ ... ] indicates optional parameters. You should not type the brackets themselves in the command. -
Seite 400: Variables
1.4. Variables PJL can use alphanumeric variables, numeric variabless and strings. 1.4.1. Alphanumeric variables The first character must always be a character in the allowable range of letters and digits. Letters consists of the uppercase characters (ASCII 65-90) and lowercase characters (ASCII 97-122). Digits consists of the numbers 0-9 (ASCII 48-57). -
Seite 401: How To Use Pjl
HOW TO USE PJL 2.1. Overview PJL resides "above" printer languages such as Postscript and PCL. Each job can be distinguished from the other jobs by PJL, and it can switch between PJL commands and printer language commands for each job. PJL Code PCL Job PJL Code... -
Seite 402: Command Group
COMMAND GROUP Command Group Command Command Description Kernel Commands Exits current printer language and returns control to PJL. EXECUTE Orders the printer to execute the specified operation. COMMENT Comments can be placed in the command line ENTER Selects a printer language Job Separation Informs printer of job start Commands... -
Seite 403: Kernel Commands
KERNEL COMMANDS 4.1. Introduction This section explains three PJL command, UEL, ENTER and COMMENT. These commands provide the minimum set of tools to operate job control. UEL command (Universal Exit Command) ENTER command COMMENT command 4.2. UEL Command The Universal Exit Command causes the printer to exit the current printer language and sets the printer into PJL mode. -
Seite 404: Enter Command
If this command specifies an operation which is not supported, this command is ignored. Example <ESC>%-12345X@PJL<CR><LF> @PJL EXECUTE DEMOPAGE <CR><LF> <ESC>%-12345X 4.4. ENTER Command The ENTER command specifies which emulation the printer uses to print data. Syntax @PJL ENTER LANGUAGE = emulation [<CR>]<LF> Parameters ... -
Seite 405: Printer Language Switching
Example <ESC>%-12345X@PJL<CR><LF> @PJL COMMENT -----------------------------<CR><LF> @PJL COMMENT -- PCL & PS JOB --<CR><LF> @PJL COMMENT -----------------------------<CR><LF> @PJL <CR><LF> @PJL SET RET = ON <CR><LF> @PJL ENTER LANGUAGE = PCL <CR><LF> <ESC>E..PCL JOB..<ESC>E <ESC>%-12345X@PJL<CR><LF> @PJL COMMENT Start of Postscript job <CR><LF> @PJL ENTER LANGUAGE = POSTSCRIPT <CR><LF>... -
Seite 406: Job Separation Commands
JOB SEPARATION COMMANDS 5.1. Introduction This section explains two PJL command, JOB and EOJ. These commands are used to determine the boundaries of a job. When these commands are used with status readback, the printer also can send status information at the beginning and end of each job. 5.2. -
Seite 407: Eoj Command
Example <ESC>%-12345X@PJL<CR><LF> @PJL JOB NAME = "KKK data from spooler" <CR><LF> <ESC>%-12345X@PJL<CR><LF> @PJL COMMENT Postscript Job <CR><LF> @PJL JOB NAME = "YYY data from spooler 2" <CR><LF> @PJL ENTER LANGUAGE = POSTSCRIPT <CR><LF> %!PS..PS JOB..^D <ESC>%-12345X@PJL<CR><LF> @PJL EOJ NAME = "End of YYY data" <CR><LF> <ESC>%-12345X@PJL <CR><LF>... -
Seite 408: Environment Commands
ENVIRONMENT COMMANDS 6.1. Introduction Our recent printers have many features which you are able to set using printer commands, through the printer control panel or by using the remote printer console program. A combination of PJL commands and printer emulation commands allows you to set printer features to the desired state. This chapter describes the setting of printer features known as printer environments, PJL commands you are able to use to set printer features to a desired state are as follows;... -
Seite 409: Pjl Reset Conditions
The diagram below illustrates how the environments interact and how the modified print environment is affected. FACTORY DEFAULT ENVIRONMENT @PJL INITIALIZE CONTROL PANEL USER DEFAULT ENVIRONMENT OR @PJL DEFAULT @PJL RESET @PJL SET PJL CURRENT ENVIRONMENT LANGUAGE RESET, @PJL ENTER, OR ANY LANGUAGE SWITCH MODIFIED PRINT ENVIRONMENT 6.1.2. -
Seite 410: Pjl Environment Variables
6. Always use the PJL RESET command after a job is completed if the SET command is used in the PJL job. 6.1.4. PJL environment variables This section lists the PJL environment variables. There are two kinds of PJL environment variables, General PJL environment variables and Printer language -specific variables. - Seite 411 6.2. Variables 6.2.1. Variables for HL-1050/1070/1250/1270N/1450/1470N/P2500/1650/1670N/3260N/2460/ 7050/1850/1870N/5040/5050/5070N/5140/5150D/5170DN/6050/6050D/6050DN/8050N/ 2070N/5240/5250DN/5270DN/5280DW/2140/2150N/2170W/5340D/5350DN/5370DW/538 0DN/2130/2240D/2250DN/2270DW/4140CN/4150CDN/4570CDW/5440D/5450DN/5470D W/6180DW/S7000DN/3140CW/3150CDW/3150CDN/3170CDW/1110/HL1111/1112/1118/ L8250CDN/L8350CDW(T)/L9200CDW(T)/L9300CDW(T)/L2300/L2300D/L2320D/L2321D/ 2260/2260D/L2305W/L2340DW/L2360DN/L2361DN/2560DN/L2360DW/L2365DW/L2366 DW/2569DW/1212W/1210W/1210WR/1212WR/1210WE/1211W/1218W/1200/1201/1202/ 1208/L5000D/5580D/5585D/5595DN/L5102DW/L5100DN(T)/5590DN/L5200DW(T)/L5202 DW/L6200DW(T)/L6202DW/L6250DN/L6250DW/L6300DW(T)/L6400DW(T)/L6402DW General PJL Environment Variables The PJL environment variables which are not printer language-specific are listed in the following table. When using these variables, do not use LPARM. CHAPTER 5 PJL - 18...
- Seite 412 PERSONALITY Sets the emulation mode. AUTO, PCL, IBM, EPSON, POSTSCRIPT (HL- 1050/1070/1250/1270N/1450/1470N/P2500/1650/1670N/1850/1870N/5050/5070N/5150D/5170DN/6050/6050D/6050DN/8050N/5240/5 250DN/5270DN/5280DW/5340D/5350DN/5370DW/5380DN/5440D/5450DN/5470DW/6180DW ) AUTO, PCL, IBM, EPSON, POSTSCRIPT, HPGL (HL-3260N/2460/7050) AUTO, PCL, IBM, EPSON (HL-2070N) AUTO,PCL,POSTSCRIPT(HL-S7000DN/3170CDW/L8250CDN/L8350CDW(T)/L9200CDW(T)/L9300CDW(T)) PCL(HL-5040/5140/2150N/2170W/2130/2240D/2250DN/2270DW/ AUTO, PCL, POSTSCRIPT(HL-4140CN/ 4150CDN/4570CDW) AUTO, PCL, PCLXL, IBM, EPSON, POSTSCRIPT (HL- L5000D/5580D/5585D/5595DN/L5102DW/L5100DN(T)/5590DN/L5200DW(T)/L5202DW/L6200DW(T)/L6202DW/L6250DN/L6250DW/L...
- Seite 413 Variables Description Sample Value Range HPFSEL ALL, LJ4 (HL-1650/1670N/ 3260N/2460/7050/1850/1870N/ 5040/5050/5070N/5140/5150D/ 5170DN/6050/6050D/6050DN/ 8050N/2070N/5240/5250DN/5270DN/5280DW/2140/2150N/2170W/5340D/5350DN/5370DW/5380DN/2250DN/2270DW /4140CN/ 4150CDN/4570CDW/5440D/5450DN/5470DW/6180DW/S7000DN/3140CW/3150CDW/3150CDN/3170CDW/L8250CDN/L8350CDW(T) /L9200CDW(T)/L9300CDW(T)/ L2300/L2300D/L2320D/L2321D/2260/2260D/L2305W/L2340DW/L2360DN/L2361DN/2560DN/L2360DW/L2365DW/L2366DW/2569DW/ 1212W/1210W/1210WR/1212WR/1210WE/1211W/1218W/L5000D/5580D/5585D/5595DN/L5102DW/L5100DN(T)/5590DN/L5200DW( T)/L5202DW/L6200DW(T)/L6202DW/L6250DN/L6250DW/L6300DW(T)/L6400DW(T)/L6402DW) AUTOFF Sets the auto FF setting to ON or OFF. ON or OFF TIMEOUTFF Sets the timeout value for auto FF. 1 to 99 seconds TIMEOUT Sets the timeout value for Automatic interface switching...
-
Seite 414: L5202Dw/L6200Dw(T)/L6202Dw/L6250Dn/L6250Dw/L6300Dw(T)/L6400Dw(T)/L6402Dw)
ENGLISH, FRENCH, GERMAN, DUTCH, SPANISH, ITALIAN, DANISH (HL-3260N) ENGLISH, FRENCH, GERMAN, DUTCH, SPANISH, ITALIAN, NORWEGIAN, DANISH, SWEDISH (HL-2460/7050) ENGLISH,FRENCH,GERMAN, DUTCH,SPANISH,ITALIAN, NORWEGIAN,DANISH, PORTUGUESE (HL-6050/ 6050D/6050DN) ENGLISH,FRENCH,GERMAN, DUTCH,SPANISH,ITALIAN, PORTUGUESE(HL-8050N) ENGLISH,FRENCH,GERMAN, DUTCH,SPANISH,ITALIAN, NORWEGIAN,FINNISH, PORTUGUESE,DANISH, SWEDISH (HL-2070N) ENGLISH,FRENCH,GERMAN, DUTCH,SPANISH,ITALIAN, PORTUGUESE(HL-8050N) ENGLISH,FRENCH,GERMAN, DUTCH,SPANISH,ITALIAN, NORWEGIAN,FINNISH, PORTUGUESE,DANISH, HUNGARIAN,RUSSIA,BULGARIAN,ROMANIAN (HL-5240/5250DN/5270DN/5280DW) - Seite 415 Variables Description Sample Value Range BIDI ON or OFF (HL-1650/1670N/ 3260N/2460/7050/1850/1870N/ 5040/5050/5070N/5140/5150D/ 5170DN/6050/6050D/6050DN/ 8050N/2070N/5240/5250DN/5270DN/5280DW/5340D/5350DN/5370DW/5380DN) POWERSAVE Sets the power save mode ON or OFF. ON or OFF (HL-1650/1670N/ 3260N/2460/7050/1850/1870N/ 5040/5050/5070N/5140/5150D/ 5170DN/6050/6050D/6050DN/ 8050N/2070N/5240/5250DN/5270DN/5280DW/2140/2150N/2170W/5340D/5350DN/5370DW/5380DN/2130/2240D/2250DN/2270DW/5 440D/5450DN/5470DW/6180DW/S7000DN/3140CW/3150CDW/3150CDN/3170CDW/ L2300/L2300D/L2320D/L2321D/2260/2260D/L2305W/L2340DW/L2360DN/L2361DN/2560DN/L2360DW/L2365DW/L2366DW/2569DW ) HL-1212W, 1210W, 1210WR, 1212WR, 1210WE, 1211W, 1218W/L5000D/5580D/5585D/5595DN/L5102DW/L5100DN(T)/5590DN/L5200DW(T)/L5202DW/L6200DW(T)/L6202DW/L6250DN/L62 50DW/L6300DW(T)/L6400DW(T)/L6402DW) POWERSAVETIM...
- Seite 416 Variables Description Sample Value Range IMAGEADAPT OFF, ON AUTO (HL-1650/ 1670N/3260N/2460/7050/1850/ 1870N/5040/5050/5070N/5140/ 5150D/5170DN/2070N/5240/5250DN/5270DN/5280DW/2140/2150N/2170W/5340D/5350DN/5370DW/5380DN/2130/2240D/2250DN/22 70DW/4140CN/4150CDN/4570CDW/5440D/5450DN/5470DW/6180DW/S7000DN/3140CW/3150CDW/3150CDN/3170CDW/ L8250CDN/L8350CDW(T)/L9200CDW(T)/L9300CDW(T)/L2300/L2300D/L2320D/L2321D/2260/2260D/L2305W/L2340DW/L2360DN/L2 361DN/2560DN/L2360DW/L2365DW/L2366DW/2569DW) HL-1212W, 1210W, 1210WR, 1212WR, 1210WE, 1211W, 1218W) INTRAY 1 Returns the auto-selection lock status for the MP tray. LOCKED, UNLOCKED (HL-1650/1670N/3260N/2460/ 7050/1850/1870N/5040/5050/ 5070N/5140/5150D/5170DN/ (Read Only) Returns the auto-selection lock status for the Tray1 (HL-8050N) 6050/6050D/6050DN/8050N/5240/5250DN/5270DN/5280DW/5340D/5350DN/5370DW/5380DN/4140CN/4150CDN/4570CDW/5440D/5 450DN/5470DW/6180DW/S7000DN/L8250CDN/L8350CDW(T)/L9200CDW(T)/L9300CDW(T)/L5000D/5580D/5585D/5595DN/L5102D...
- Seite 417 Variables Description Sample Value Range ANY,LETTER,LEGAL,A4,EXECUTIVE,COM10,DL,JISB5,B5,A5,A5L,B6,A6,MONARCH,C5,FOLIO,DLL,POSTCARD,USERDEFINED,E NVYOU4,ENVCHOU3,P3X5,ROC16K,SIXTEENK195X270,SIXTEENK184X260 (HL-4140CN/4150CDN/4570CDW) ANY,LETTER,LEGAL,A4,EXECUTIVE,COM10,DL,JISB5,B5,A5,A5L,B6,A6,MONARCH,C5,FOLIO,DLL,POSTCARD,USERDEFINED,E NVYOU4,ENVCHOU3,P3X5,ROC16K,SIXTEENK195X270,SIXTEENK184X260(HL-5440D/5450DN/5470DW/6180DW) ANY,LETTER,LEGAL,A4,EXECUTIVE,JISB5,B5,JISB6,A5,A5L,A6,FOLIO,P3X5,POSTCARD (HL-S7000DN) LETTER, LEGAL, A4, EXECUTIVE, COM10, DL, JISB5, B5, A5, A6, MONARCH, C5, FOLIO, P3X5, POSTCARD, ENVYOU4, ENVCHOU3, A5L, JISB6, ROC16K, SIXTEENK195X270, SIXTEENK184X260(HL- L8250CDN/L8350CDW(T)/L9200CDW(T)/L9300CDW(T)) LETTER, LEGAL, MEXICANLEGAL, INDIALEGAL, A4, B5, EXECUTIVE, DL, COM10, MONARCH, C5, JISB5, A5, JIS B6, A6, POSTCARD, FOLIO, P3X5, ENVYOU4, JENVCHOU4, JENVCHOU3, A5L, ROCK16K, SIXTEENK195X270, SIXTEENK184X260 (HL- L5000D/5580D/5585D/5595DN/L5102DW/L5100DN(T)/5590DN/L5200DW(T)/L5202DW/L6200DW(T)/L6202DW/L6250DN/L6250DW/L 6300DW(T)/L6400DW(T)/L6402DW)
- Seite 418 AUTO, MPTRAY, TRAY1, TRAY2, TRAY3 (HL-5240/5250DN/5270DN/5280DW/5340D/5350DN/5370DW/5380DN) AUTO, TRAY1, TRAY2, TRAY3, TRAY4, MPTRAY (HL-3260N/2460/7050/S7000DN) TRAYID1, TRAYID2, TRAYID3, TRAYID4 (HL-2460/ 7050/S7000DN) AUTO, TRAY1, TRAY2, TRAY3, TRAY4 (HL-8050N) AUTO, TRAY1 (HL-2070N/2140/2150N/2170W/HL-3140CW/HL-3150CDW/HL-3150CDN/HL-3170CDW/HL-1110/HL-1111/HL-1112/HL- 1118/ HL-1212W, 1210W, 1210WR, 1212WR, 1210WE, 1211W, 1218W L2300/L2300D/L2320D/L2321D/2260/2260D/L2305W/L2340DW/L2360DN/L2361DN/2560DN/L2360DW/L2365DW/L2366DW/2569DW/ 1200/1201/1202/1208) AUTO, TRAY1, TRAY2, TRAY3, TRAY4, TRAY5 (HL-...
- Seite 419 Variables Description Sample Value Range ANY, LETTER, LEGAL, A4, EXECUTIVE, COM10, MONARCH, C5, DL, DLL, B5, A5, A6, B6, JISB5, A4LONG, POSTCARD, ORGANIZERJ, ORGANIZERK, ORGANIZERL, ORGANIZERM, FOLIO, USERDEF(HL-1850/1870N/ 5040/5050/5070N/5140/5150D/ 5170DN/6050/6050D/6050DN/5240/5250DN/5270DN/5280DW) LETTER, LEGAL, EXECUTIVE, A4, JISB5, B5, A5, B6, A6, COM10, DL, MONARC, C5, A4LONG, ANY, FOLIO, POSTCARD, ORGANIZERJ, ORGANIZERK, ORGANIZERM, ORGANIZERL, USERDEFINED, DLL, A5L, ENVYOU4, ENVCHOU3, P3X5 (HL- 5340D/5350DN/5370DW/5380DN) ANY, LETTER, LEGAL, A4, EXECUTIVE, COM10, DL, JISB5, B5, A5, A5L, B6, A6, MONARCH, C5, FOLIO, DLL, POSTCARD,...
- Seite 420 Variables Description Sample Value Range LETTER,LEGAL,A4,EXECUTIVE,JISB5,A5,FOLIO,ROC16K,A6,A5L,SIXTEENK195X270,SIXTEENK184X260 (HL- 1212W/1210W/1210WR/1212WR/1210WE/1211W/1218W) LETTER, LEGAL, MEXICANLEGAL, INDIALEGAL, A4, EXECUTIVE, JISB5, A5, JISB5, A5, POSTCARD, FOLIO, A5L, ROCK16K, SIXTEENK195X270, SIXTEENK184X260 (HL- L5000D/5580D/5585D/5595DN/L5102DW/L5100DN(T)/5590DN/L5200DW(T)/L5202DW/L6200DW(T)/L6202DW/L6250DN/L6250DW/L 6300DW(T)/L6400DW(T)/L6402DW) TRAY2SIZE A3, JISB4, LEDGER, A4, A4S, A5, B5, B5S, A6, LEGAL LETTER, LTRS, EXECUTIVE, EXECUTIVES, COM10, C5, DL MONARCH ANY, LETTER, LEGAL, A4, EXECUTIVE, B5, A5, JISB5, A4LONG, FOLIO (HL-1850/ 1870N/5040/5050/5070N/5140/ 5150D/5170DN) DETECTSENSOR, LETTER, LEGA>, EXECUTIVE, A4, JISB5, B5, A5, B6, FOLIO (HL-6050/6050D/6050DN) DETECTSENSOR, B5, B6, A6, COM10, DL, MONARCH, C5, USERDEFINED (HL-8050N)
- Seite 421 Variables Description Sample Value Range DENSITY Returns the printing density level setting from 1 to 15. The default value is -6, -5, -4, -3, -2, -1, 0, 1, 2, 3, 4, 5, 6 (HL-1650/1670N/1850/1870N/ 5040/5050/5070N/5140/5150D/ 5170DN/6050/6050D/6050DN/ 2070N/5240/5250DN/5270DN/5280DW/2140/2150N/2170W/5340D/5350DN/5370DW/5380DN /2130/2240D/2250DN/2270DW/5440D/5450DN/5470DW/6180DW/S7000DN/1110/1111/1112/1118/ L2300/L2300D/L2320D/L2321D/2260/2260D/L2305W/L2340DW/L2360DN/L2361DN/2560DN/L2360DW/L2365DW/L2366DW/2569DW/ 1212W/1210W/1210WR/1212WR/1210WE/1211W/1218W/1200/1201/1202/1208/L5000D/5580D/5585D/5595DN/L5102DW/L5100DN( T)/5590DN/L5200DW(T)/L5202DW/L6200DW(T)/L6202DW/L6250DN/L6250DW/L6300DW(T)/L6400DW(T)/L6402DW) -2, -1, 0, 1, 2 (HL-3260N/2460/ 7050/8050N) LOWTONER...
- Seite 422 Variables Description Sample Value Range FSEL300DPI LOW or HIGH (HL-1650/1670N/ 1850/1870N/5040/5050/5070N/ 5140/5150D/5170DN/6050/ 6050D/6050DN/8050N/2070N/5240/5250DN/5270DN/5280DW/2150N/2170W/5340D/5350DN/5370DW/5380DN/2250DN/2270DW /4140CN/4150CDN/4570CDW/5440D/5450DN/5470DW/6180DW/S7000DN/3140CW/3150CDW/3150CDN/3170CDW/L8250CDN/L835 0CDW(T)/L9200CDW(T)/L9300CDW(T)/L2360DN/L2361DN/2560DN/L2360DW/L2365DW/L2366DW/2569DW/1212W/1210W/1210WR /1212WR/1210WE/1211W/1218W/L5000D/5580D/5585D/5595DN/L5102DW/L5100DN(T)/5590DN/L5200DW(T)/L5202DW/L6200DW( T)/L6202DW/L6250DN/L6250DW/L6300DW(T)/L6400DW(T)/L6402DW) DEFPAPER A4, LETTER, DEFAULT (HL-1650/1670N/2460/7050/ 1850/1870N/5040/5050/5070N/ 5140/5150D/5170DN/6050/ 6050D/6050DN/8050N/2070N/5240/5250DN/5270DN/5280DW/2140/2150N/2170W/5340D/5350DN/5370DW/5380DN/2130/2240D/225 0DN/2270DW/4140CN/4150CDN/4570CDW/5440D/5450DN/5470DW/6180DW/S7000DN /3140CW/3150CDW/3150CDN/3170CDW/1110/1111/1112/1118/L8250CDN/L8350CDW(T)/L9200CDW(T)/L9300CDW(T)/L2300/L2300 D/L2320D/L2321D/2260/2260D/L2305W/L2340DW/L2360DN/L2361DN/2560DN/L2360DW/L2365DW/L2366DW/2569DW/1212W/1210 W/1210WR/1212WR/1210WE/1211W/1218W/1200/1201/1202/1208/L5000D/5580D/5585D/5595DN/L5102DW/L5100DN(T)/5590DN/L 5200DW(T)/L5202DW/L6200DW(T)/L6202DW/L6250DN/L6250DW/L6300DW(T)/L6400DW(T)/L6402DW) PSIMAGEMASK ON or OFF (HL-1650/1670N/ 2460/7050/1850/1870N/5040/ 5050/5070N/5140/5150D/ 5170DN/6050/6050D/6050DN/ 8050N/5240/5250DN/5270DN/5280DW/5340D/5350DN/5370DW/5380DN/4140CN/4150CDN/4570CDW/5440D/5450DN/5470DW/6180 DW/S7000DN/3170CDW/L8250CDN/L8350CDW(T)/L9200CDW(T)/L9300CDW(T)) HPESCE RESET, FF (HL-1650/1670N/ 2460/7050/1850/1870N/5040/ 5050/5070N/5140/5150D/ 5170DN/6050/6050D/6050DN/ 8050N/2070N/5240/5250DN/5270DN/5280DW/2150N/2170W/5340D/5350DN/5370DW/5380DN/2250DN/2270DW/4140CN/4150CDN/...
- Seite 423 Variables Description Sample Value Range FXLFSETMODE NORMAL, ALL (HL-1650/ 1670N/3260N/2460/7050/1850/ 1870N/5040/5050/5070N/5140/5150D/5170DN/6050/6050D/ 6050DN/8050N/2070N/5240/5250DN/5270DN/5280DW/5340D/5350DN/5370DW/5380DN) FXLFITAMODE OBLIQUE, ITALIC (HL-1650/ 1670N/3260N/2460/7050/1850/ 1870N/5040/5050/5070N/5140/ 5150D/5170DN/6050/6050D/ 6050DN/8050N/2070N/5240/5250DN/5270DN/5280DW/5340D/5350DN/5370DW/5380DN) ENVINTERVAL 0 to 255 (HL-1650/1670N/1850/ 1870N/5040/5050/5070N/5140/5150D/5170DN/6050/6050D/ 6050DN) PSCEILMODE FLOOR, CEIL (HL-1650/1670N/ 3260N/2460/7050/1850/1870N/ 5040/5050/5070N/5140/5150D/ 5170DN/6050/6050D/6050DN/ 8050N/5240/5250DN/5270DN/5280DW/5340D/5350DN/5370DW/5380DN/4140CN/4150CDN/4570CDW/5440D/5450DN/5470DW/6180 DW/S7000DN/3170CDW/L8250CDN/L8350CDW(T)/L9200CDW(T)/L9300CDW(T)) PS300RESO NO, IF2M, FORCE (HL-1650/ 1670N/3260N/2460/7050/1850/ 1870N/5040/5050/5070N/5140/ 5150D/5170DN/6050/6050D/ 6050DN/8050N/5240/5250DN/5270DN/5280DW/5340D/5350DN/5370DW/5380DN) DUPLEX Duplex mode...
- Seite 424 Variables Description Sample Value Range 1 to 10 (HL-8050N) GLPENSIZE2 1 to 16 (HL-3260N/2460/7050) 1 to 10 (HL-8050N) GLPENSIZE3 1 to 16 (HL-3260N/2460/7050) 1 to 10 (HL-8050N) GLPENSIZE4 1 to 16 (HL-3260N/2460/7050) 1 to 10 (HL-8050N) GLPENSIZE5 1 to 16 (HL-3260N/2460/7050) 1 to 10 (HL-8050N) GLPENSIZE6 1 to 16 (HL-3260N/2460/7050)
- Seite 425 ER,ALLSTACKER,SFL (HL-L6300DW(T)/L6400DW(T)/L6402DW) MAILBOXPROTE 0-4 (HL-3260N) 0-10 (HL-2460/7050) AVOIDMAILBOXF ON or OFF (HL-3260N2460/ 7050/8050N/L6300DW(T)/L6400DW(T)/L6402DW) TOWERFEED ON or OFF (HL-2460/7050) RAMDISKSIZE 0 to XX Mbyte(s) (Except for HL-2070N/5270DN/5280DW/5380DN) TRANSFERVOLT MODE1, MODE2, MODE3, MODE4 MODE1: Normal, MODE2: Low, MODE3: Middle, MODE4: High (HL-2460/7050) COLDSTARTMOD Sets the cold start mode.
- Seite 426 Variables Description Sample Value Range MESSAGESCROL Sets scrolling time at Scroll message. 1-10 (HL-7050/6050/6050D/ 6050DN/5270DN/5280DW/5380DN/4140CN/4150CDN/4570CDW/5440D/5450DN/5470DW/6180DW/S7000DN/3140CW/3150CDW/31 50CDN/3170CDW/L8250CDN/L8350CDW(T) /L2300/L2300D/L2320D/L2321D/2260/2260D/L2305W/L2340DW/L2360DN/L2361DN/2560DN/L2360DW/L2365DW/L2366DW/2569DW /L5000D/5580D/5585D/5595DN/L5102DW/L5100DN(T)/5590DN/L5200DW(T)/L5202DW/L6200DW(T)/L6202DW/L6250DN/L6250DW) ERRORBUZZER Sets Buzzer mode at Error condition. OFF, ON (HL-7050/6050/6050D/ 6050DN) PANELBUZZER Sets Buzzer mode for Panel Operation. OFF, ON (HL-7050/6050/6050D/ 6050DN) BUZZERVOLUME Sets Buzzer volume.
- Seite 427 Variables Description Sample Value Range CARBON8TRAY Select input tray for the first page. REMAINING, MP, TRAY1, TRAY2 (If available) (HL-6050/ 6050D/6050DN/5270DN/5280DW/5380DN) MPTRAY, TRAY1, TRAY2, TRAY3, TRAY4, TRAY5 (HL- L5000D/5580D/5585D/5595DN/L5102DW/L5100DN(T)/5590DN/L5200DW(T)/L5202DW/L6200DW(T)/L6202DW/L6250DN/L6250DW/L 6300DW(T)/L6400DW(T)/L6402DW) CARBON1MACRO Sets if a Macro is added to first page or not. OFF, ON (HL-6050/6050D/ 6050DN/5270DN/5280DW/5380DN/L5000D/5580D/5585D/5595DN/L5102DW/L5100DN(T)/5590DN/L5200DW(T)/L5202DW/L6200DW( T)/L6202DW/L6250DN/L6250DW/L6300DW(T)/L6400DW(T)/L6402DW)
- Seite 428 Variables Description Sample Value Range CARBON6MACRO Sets Macro ID to added to sixth page. (ID Number) (HL-6050/6050D/ 6050DN/5270DN/5280DW/5380DN/L5000D/5580D/5585D/5595DN/L5102DW/L5100DN(T)/5590DN/L5200DW(T)/L5202DW/L6200DW( T)/L6202DW/L6250DN/L6250DW/L6300DW(T)/L6400DW(T)/L6402DW) CARBON7MACRO Sets Macro ID to added to seventh page. (ID Number) (HL-6050/6050D/ 6050DN/5270DN/5280DW/5380DN/L5000D/5580D/5585D/5595DN/L5102DW/L5100DN(T)/5590DN/L5200DW(T)/L5202DW/L6200DW( T)/L6202DW/L6250DN/L6250DW/L6300DW(T)/L6400DW(T)/L6402DW) CARBON8MACRO Sets Macro ID to added to eighth page. (ID Number) (HL-6050/6050D/ 6050DN/5270DN/5280DW/5380DN/L5000D/5580D/5585D/5595DN/L5102DW/L5100DN(T)/5590DN/L5200DW(T)/L5202DW/L6200DW( T)/L6202DW/L6250DN/L6250DW/L6300DW(T)/L6400DW(T)/L6402DW)
- Seite 429 PCL-Specific Variables The following values are PCL (HP LaserJet emulation) specific and can be set and requested using PJL. These variables must be set using the LPARM : PCL option. CHAPTER 5 PJL - 36...
- Seite 430 Variables Description Sample Value Range PAPER Sets the paper size. LETTER, A4, LEGAL, A5, A6, B5, EXECUTIVE, JISB5 (All models except for HL-1110/HL-1111/HL-1112/HL-1118) B6, COM10, MONARCH, C5, DL (HL-8050N) B6, COM10, MONARCH, C5, DL, A4LONG (HL-1650/1670N/2460/7050) A3, LEDGER, JISB4, LTRS, EXECUTIVES, B5S, COM10, MONARCH, C5, DL, A4LONG(HL-3260N) B6, COM10, MONARCH, C5, DL, DLL, POSTCARD, ORGANIZERJ, ORGANIZERK, ORGANIZERL, ORGANIZERM, FOLIO, USERDEF, A4LONG(HL-1850/1870N/5040/5050/5070N/5140/5150D/5170DN/6050/6050D/ 6050DN/2070N/5240/5250DN/5270DN/5280DW)
- Seite 431 Variables Description Sample Value Range FONTSOURCE Sets the font source to Internal fonts or I or S (HL-1050/1070/1250/1270N/1450/1470N/P2500/1650/1670N/ 1850/1870N/5040/5050/5070N/ Permanent Soft Fonts 5140/5150D/5170DN/2070N/5240/5250DN/2150N/2170W/5340D/5350DN/5370DW/2250DN/2270DW /4140CN/4150CDN/4570CDW/3170CDW/L8250CDN/L8350CDW(T)/L9200CDW(T)/L9300CDW(T)/L5000D/5580D/5585D/5595DN/L51 02DW/L5100DN(T)/5590DN/L5200DW(T)/L5202DW/L6200DW(T)/L6202DW/L6250DN/L6250DW/L6300DW(T)/L6400DW(T)/L6402DW I, C1, C2, S (HL-3260N/2460/ 7050) I, C,S (HL-6050/6050D/6050DN/ 8050N/5270DN/5280DW/5380DN) I,C1,S(HL-5440D/5450DN/5470DW/6180DW/S7000DN/L2360DN/L2361DN/2560DN/L2360DW/L2365DW/L2366DW/2569DW) FONTNUMBER Sets the font number 0 to n (HL-1050/1070/1250/1270N/1450/1470N/P2500) 0 to 0x7FFFFFFF (HL-1650/ 1670N/3260N/2460/7050/1850/ 1870N/5040/5050/5070N/5140/ 5150D/5170DN/6050/6050D/ 6050DN/8050N/2070N/5240/5250DN/5270DN/5280DW/2150N/2170W/5340D/5350DN/5370DW/5380DN/2250DN/2270DW/4140CN/41...
- Seite 432 Variables Description Sample Value Range PC1004,WINBALT,SYMBOL,OCRA,OCRB,WDINGS,HEBREW7, ,ISOL6,PC775,ABIBP,ABIINTL,RUSSIAN,UKRAINIAN,PC866,PC8LG,PC851,WINGREEK,ISOLC,ISOGREEK,PC853,PC855,PC857,P C858,PC860,PC861,PC863,PC865,PC869,ISOL9,PC8B,PC8G,PC8PC,GREEK8,TURKISH8,ROMAN9,ROMANEXT,WINC(HL- 5440D/5450DN/5470DW/6180DW/S7000DN/HL-3170CDW) AUTOLF Sets AUTO LF ON or OFF AUTOCR Sets AUTO CR ON or OFF AUTOWRAP Sets AUTO WRAP ON or OFF AUTOSKIP Sets AUTO SKIP ON or OFF CHAPTER 5 PJL - 39...
- Seite 433 EPSON-Specific Variables The following values are EPSON (EPSON FX-850 emulation) specific and can be set and requested using PJL. These variables must be set using the LPARM : EPSON option. CHAPTER 5 PJL - 40...
- Seite 434 Variables Description Sample Value Range PAPER Sets the paper size. LETTER, A4, LEGAL, A5, A6, B5, EXECUTIVE, COM10, MONARCH, C5, DL, JISB5 (All models) B6 (HL-8050N) B6, A4LONG (HL-1650/1670N/2460/7050) A3, LEDGER, JISB4, LTRS, EXECUTIVES, B5S, A4LONG(HL-3260N) B6, DLL, POSTCARD, ORGANIZERJ, ORGANIZERK, ORGANIZERL, ORGANIZERM, FOLIO, USERDEF, A4LONG(HL- 1850/1870N/5050/5070N/5150D/5170DN/6050/6050D/ 6050DN/2070N/5240/5250DN/5270DN/5280DW) B6, DLL, POSTCARD, FOLIO, A4LONG, A5L, P3X5, ENVYOU4, ENVCHOU3(HL-5340D/5350DN/5370DW/5380DN) B6,POSTCARD,FOLIO,P3X5,ENVYOU4,ENVCHOU3,A5L,JISB6,ROC16K,SIXTEENK195X270,SIXTEENK184X260(HL-...
- Seite 435 Variables Description Sample Value Range SYMSET Sets the symbol set. USASCII, GERMAN, UKASCI1, FRENCH1, DANISH1, ITALY, SPANISH, SWEDISH, JAPAN, NORWEG, DANISH2, UKASCI2, FRENCH2, DUTCH, SAFRICA, PC8, PC8DN, PC850, PC852, PC860, PC863, PC865, PC8TK, SYMBOL, WDINGS, OCRA, OCRB (HL-1050/1070/1250/1270N/1450/1470N/P2500) USASCII, GERMAN, UKASCII1, FRENCH1, DANISH1, ITALY SPANISH, SWEDISH, JAPANESE, NORWEGIAN, DANISH2, UKASCII2, FRENCH2, DUTCH, SOUTHAFRICAN, PC8, PC8DN, PC850, PC852, PC860, PC863, PC865, PC8TK (HL-1650/1670N/ 3260N/2460/7050/1850/1870N/ 5050/5070N/5150D/5170DN/6050/6050D/6050DN/8050N/2070N/5240/5250DN/5270DN/5280DW/5340D/5350DN/5370DW/5380DN/54...
- Seite 436 IBM-Specific Variables The following values are IBM (IBM Proprinter XL emulation) specific and can be set and requested using PJL. These variables must be set using the LPARM : IBM option. CHAPTER 5 PJL - 43...
- Seite 437 Variables Description Sample Value Range PAPER Sets the paper size. LETTER, A4, LEGAL, A5, A6, B5, EXECUTIVE, COM10, MONARCH, C5, DL, JISB5 (All models) B6 (HL-8050N) B6, A4LONG (HL-1650/1670N/2460/7050) A3, LEDGER, JISB4, LTRS, EXECUTIVES, B5S, A4LONG(HL-3260N) B6, DLL, POSTCARD, ORGANIZERJ, ORGANIZERK, ORGANIZERL, ORGANIZERM, FOLIO, USERDEF, A4LONG(HL- 1850/1870N/5050/5070N/5150D/5170DN/6050/6050D/ 6050DN/2070N/5240/5250DN/5270DN/5280DW) B6, DLL, POSTCARD, FOLIO, A4LONG, A5L, P3X5, ENVYOU4, ENVCHOU3(HL-5340D/5350DN/5370DW/5380DN) B6,POSTCARD,FOLIO,P3X5,ENVYOU4,ENVCHOU3,A5L,JISB6,ROC16K,SIXTEENK195X270,SIXTEENK184X260 (HL-...
- Seite 438 Variables Description Sample Value Range AUTOCR Sets AUTO CR ON or OFF AUTOMASK Sets AUTO MASK ON or OFF CHAPTER 5 PJL - 45...
- Seite 439 PostScript-Specific Variables The following values are PostScript ( BR-Script ) specific and can be set and requested using PJL. The BR- Script mode is standard in some models but may be available only when the optional BR-Script 2 ROM board is installed into the printer. These variables must be set using the LPARM : IBM option. CHAPTER 5 PJL - 46...
- Seite 440 Variables Description Sample Value Range PAPER Sets the paper size. LETTER, A4, LEGAL, A5, A6, B5, EXECUTIVE, JISB5 (All models) B6, COM10, MONARCH, C5, DL (HL-8050N) B6, COM10, MONARCH, C5, DL, A4LONG (HL-1650/1670N/2460/7050) A3, LEDGER, JISB4, LTRS, EXECUTIVES, B5S, COM10, MONARCH, C5, DL, A4LONG(HL-3260N) B6, COM10, MONARCH, C5, DL, DLL, POSTCARD, ORGANIZERJ, ORGANIZERK, ORGANIZERL, ORGANIZERM, FOLIO, USERDEF, A4LONG(HL-1850/1870N/5050/5070N/5150D/5170DN/6050/6050D/ 6050DN/5240/5250DN/5270DN/5280DW) B6, COM10, MONARCH, C5, DL, DLL, POSTCARD, FOLIO, A4LONG, A5L, P3X5, ENVYOU4, ENVCHOU3(HL-...
- Seite 441 HPGL-Specific Variables The following values are HPGL (HP LaserJet emulation) specific and can be set and requested using PJL. These variables must be set using the LPARM: HPGL option. Variables Description Sample Value Range PAPER Sets the paper LETTER, LEGAL, EXECUTIVE, A4, JISB5, B5, A5, B6, A6, COM10, DL, size.
-
Seite 442: Variables For Hl- 1660E/2060/2400C/2400Ce/3400Cn/2600Cn/3450Cn/2700Cn/4040Cn/4050Cdn/4070Cdw/3040Cn/3045 Cn/3070Cw/3075Cw
6.2.2. Variables for HL- 1660e/2060/2400C/2400Ce/3400CN/2600CN/3450CN/2700CN/4040CN/4050CDN/4070C DW/3040CN/3045CN/3070CW/3075CW General PJL Environment Variables The PJL environment variables which are not printer language-specific are listed in the following table. When using these valuables, do not use the LPARM command. CHAPTER 5 PJL - 49... - Seite 443 Variables Description Sample Value Range COPIES Number of uncollated copies for each page of the job. 1 to 999 PAPER Paper size. LETTER, A4, LEGAL, MEXICANLEGAL, INDIALEGAL, EXECUTIVE, COM10, MONARCH, C5, DL, JISB5, A4LONG , B5, A5, A6, B6, DLL, POSTCARD, ORGANIZERJ, ORGANIZERK, ORGANIZERL, ORGANIZERM, FOLIO, P3X5, ENVYOU4, ENVCHOU3, JENVCHOU3, JENVCHOU4, A3, LEDGER, JISB4, LTRS, EXECUTIVES, B5S, USERDEF ORIENTATION Page orientation.
- Seite 444 Variables Description Sample Value Range INTRAY5SIZE Returns the size information for the optional lower paper cassette. (same as INTRAY1SIZE) INTRAY6SIZE Returns the size information for the optional lower paper cassette. (same as INTRAY1SIZE) SOURCETRAY Selects the paper source tray. AUTO, MPTRAY, TRAY1, TRAY2, TRAY3, TRAY4, TRAY5 XOFFSET Sets the X offset ( horizontal offset ) value.
- Seite 445 Variables Description Sample Value Range TIMESETHOUR Clock: hour setting 0 to 23 TIMESETMIN Clock: minute setting 0 to 59 TIMESETSEC Clock: second setting 0 to 59 TIMESTYLE Sets the display style of the clock. YMD (YYYY/MM/DD hh/mm), MDY (MM/DD/YYYY hh/mm), DMY (DD/MM/YYYY hh/mm) SUMMERTIME Clock: summer time setting OFF, ON...
- Seite 446 PCL-Specific Variables The following values are PCL (HP LaserJet emulation) specific and can be set and requested using PJL. These variables must be set using the LPARM : PCL option. Variables Description Sample Value Range FONTSOURCE The valid values for FONTSOURCE are I, C, C1, S, I (Internal Fonts) C (Cartridge Fonts)
-
Seite 447: Default Command
6.3. Default Command The DEFAULT command changes the User-Default environment which is stored in NV-RAM and it is activated following a PJL reset condition. The current print environment is not affected by the DEFAULT command, but when a PJL reset condition happens, this command takes effect. This doesn't change the current print environment, but is activated when a PJL reset condition happens. -
Seite 448: Reset Command
6.5. Reset Command The PJL RESET command resets the PJL Current Environment variables to the User Default values. Use this command at the end of any PJL jobs in which the PJL SET command was used. Syntax @PJL RESET [<CR>]<LF> Parameters ... - Seite 449 Examples: <ESC>%-12345X@PJL <CR><LF> @PJL COMMENT Setting PCL job <CR><LF> @PJL COMMENT to desired state <CR><LF> @PJL SET RET = DARK <CR><LF> @PJL SET PAGEPROTECT = OFF <CR><LF> @PJL SET RESOLUTION = 600 <CR><LF> @PJL ENTER LANGUAGE = PCL <CR><LF> <ESC> E..PCL job ..<ESC>E <ESC>%-12345X@PJL <CR><LF>...
-
Seite 450: Status Readback Commands
STATUS READBACK COMMANDS 7.1. Introduction Applications can request, by sending a PJL command to the printer, information such as the configuration and status of the printer. The printer can be programmed to send back this information when requested and also can send back voluntarily unsolicited information of its status such as cover open, off-line state, toner empty, displayed prompt message on the LCD and other necessary information. -
Seite 451: Inquire Command
7.2. Inquire Command The INQUIRE command is used in order to get the information of the current value of a specified variable in the PJL DEFAULT setting. (PJL environment). It is possible to get the information for variables the value of which PJL cannot change (Read-only). This INQUIRE command can request only one variable at a time. -
Seite 452: Dinquire Command
Example 2 : This example requests the PCL-specific settings. <ESC>%-12345X@PJL <CR><LF> @PJL COMMENT ***Inquiring PCL settings*** <CR><LF> @PJL ECHO 19:20:05 02-20-1993 <CR><LF> @PJL INQUIRE LPARM:PCL FONTSOURCE<CR><LF> @PJL INQUIRE LPARM:PCL FONTNUMBER<CR><LF> <ESC>%-12345X The printer may return the following response for the above INQUIRE commands : @PJL ECHO 19:20:05 02-20-1993 <CR><LF>... -
Seite 453: Echo Command
Examples Example 1 : This example requests the current print environment settings for RET, PAPER, and ORIENTATION : <ESC>%-12345X@PJL <CR><LF> @PJL COMMENT ***Requesting*** <CR><LF> @PJL COMMENT about User Default Settings** <CR><LF> @PJL ECHO 20:30:00 02-20-1993<CR><LF> @PJL DINQUIRE RET<CR><LF> @PJL DINQUIRE PAPER<CR><LF> @PJL DINQUIRE ORIENTATION<CR><LF>... -
Seite 454: Info Command
Response Syntax @PJL ECHO [< words >] <CR><LF> <FF> < words > The beginning of this parameter must be a printable character. Then this parameter consists of characters from ASCII 33 to 255, space characters and horizontal tab characters. This <... - Seite 455 Parameters Category Information requesting The printer model number. For example the HL-1660e will return 'Brother HL-1660e'. CONFIG A list of the printer configuration information (available options) within the format of the number of types and/or the description of each available type of;...
-
Seite 456: Id Category
<ESC>%-12345X The printer sends back the answer for the above INFO command if the printer name is HL-1660e: @PJL INFO ID<CR><LF> "Brother HL-1660e"<CR><LF> <FF> 7.5.2. CONFIG category The application can use @PJL INFO CONFIG command to have the printer return a list of printer configuration information. - Seite 457 Parameters Parameter Range of Characters Description alphabetical letters (ASCII 65-90 or Name of an item of the printer configuration : feature 97-122), numbers (ASCII 48-57) * Beginning with a letter for example ) IN TRAYS (paper sources) OUT TRAYS (output trays) PAPER (paper sizes) LANGUAGES (printer languages) USTATUS (unsolicited status)
-
Seite 458: Memory Category
Example The application sends the following command to the printer : <ESC>%-12345X@PJL<CR><LF> @PJL INFO CONFIG<CR><LF> <ESC>%-12345X The printer may send back the answer for the above INFO command : @PJL INFO CONFIG<CR><LF> IN TRAYS [1 ENUMERATED]<CR><LF> INTRAY1 PC<CR><LF> INTRAY2 LC<CR><LF> OUT TRAYS [2 ENUMERATED]<CR><LF>... -
Seite 459: Status Category
7.5.4. STATUS category The application can use the @PJL INFO STATUS command to check the printer on-line/off-line status, the current message on the LCD and a status code. The ONLINE=TRUE indicates the printer is online, while the ONLINE=FALSE shows it is off-line. Refer to the list of the PJL Status Codes in the Appendix for the meanings of the returned status codes. - Seite 460 C5<CR><LF> DL<CR><LF> B5<CR><LF> ORIENTATION=PORTRAIT [2 ENUMERATED]<CR><LF> PORTRAIT<CR><LF> LANDSCAPE<CR><LF> FORMLINES=60 [2 RANGE] 5<CR><LF> 128<CR><LF> MANUALFEED=OFF [2 ENUMERATED]<CR><LF> OFF<CR><LF> ON<CR><LF> RET=MEDIUM [4 ENUMERATED]<CR><LF> OFF<CR><LF> LIGHT<CR><LF> MEDIUM<CR><LF> DARK<CR><LF> PAGEPROTECT=OFF [4 ENUMERATED]<CR><LF> OFF<CR><LF> LETTER<CR><LF> LEGAL<CR><LF> A4<CR><LF> RESOLUTION=600 [2 ENUMERATED]<CR><LF> 300<CR><LF> 600<CR><LF> PERSONALITY=AUTO EPSON [8 ENUMERATED]<CR><LF> AUTO<CR><LF>...
-
Seite 461: Ustatus Category
A4<CR><LF> EXECUTIVE<CR><LF> MONARCH<CR><LF> COM10<CR><LF> C5<CR><LF> DL<CR><LF> B5<CR><LF> LPARM:PCL FONTSOURCE=I [4 EMULATED]<CR><LF> I<CR><LF> C<CR><LF> C1<CR><LF> S<CR><LF> LPARM:PCL FONTNUMBER=0 [2 RANGE]<CR><LF> 0<CR><LF> 70<CR><LF> LPARM:PCL PITCH=10.00 [2 RANGE]<CR><LF> 0.44<CR><LF> 99.99<CR><LF> LPARM:PCL PTSIZE=12.00 [2 RANGE]<CR><LF> 4.00<CR><LF> 999.75<CR><LF> LPARM:PCL SYMSET=ROMAN8 [43 ENUMERATED]<CR><LF> ROMAN8<CR><LF> ISOL1<CR><LF> ISOL2<CR><LF> .. -
Seite 462: Ustatus Command
Parameters Variable Value Description DEVICE Makes unsolicited device status valid for any status change VERBOSE Makes unsolicited device status valid for any of PJL parser warning, error and status change Makes unsolicited device status invalid for any status change Makes unsolicited job status (reporting job start/job end) valid Makes unsolicited job status invalid PAGE Makes unsolicited page status (reporting respective page printed and... -
Seite 463: Device Variable
The printer status to be sent to the host computer are ; Device status changes - printer cover open, paper jams, paper out, etc Job status changes - completion of the printing of a job, receiving a JOB command ... -
Seite 464: Job Variables
Status code Status 10000 - 10999 Status information such as printer on-line or off-line. 11000 - 11999 Status of available paper in paper input sources, such as paper empty and auto-switching to another paper source. 20000 - 20999 PJL parser errors. The entire command line of a PJL command is ignored when an error (except for code 20004 ) occurs. -
Seite 465: Page Variable
<ESC>%-12345X The printer may send back the answer for the above command. @PJL USTATUS JOB<CR><LF> START<CR><LF> NAME="JOB 88554"<CR><LF> <FF> [ . . time period while job is printing . . . ] @PJL USTATUS JOB<CR><LF> END<CR><LF> NAME = "JOB 88554"<CR><LF> PAGES=5<CR><LF>... -
Seite 466: Ustatusoff Command
7.7. USTATUSOFF Command The @PJL USTATUSOFF command makes all unsolicited status reporting inactive. Syntax @PJL USTATUSOFF [<CR>]<LF> Parameters There are no parameters for this command. Example <ESC>%-12345X@PJL <CR><LF> @PJL USTATUSOFF <CR><LF> @PJL USTATUS DEVICE = ON <CR><LF> <ESC>%-12345X 7.8. JOB Recovery You can recover a failed job with the combination of JOB and EOJ commands and the USTATUS PAGE command. -
Seite 467: Device Attendance Commands
DEVICE ATTENDANCE COMMANDS 8.1. Introduction You can change display messages on the printer control panel by using PJL. The Operator can be alerted by this feature to what specific actions should be taken. This chapter shows you three device attendance commands. -
Seite 468: Opmsg Command
The following is an example of how to restore the display to the normal ready message. <ESC>%-12345X@PJL <CR><LF> @PJL COMMENT Normal READY message <CR><LF> @PJL RDYMSG DISPLAY = "" <CR><LF> @PJL EOJ NAME = "End of Tom's Job" <CR><LF> <ESC>%-12345X 8.3. - Seite 469 Parameters Parameter Functional Range Default DISPLAY = "message" ASCII 33 and ASCII 35 through 255, <SP>, <HT> ONLINE, RESET DISPLAY = "message" You can use any combination of characters available on the printer except for the quotation marks (ASCII 34) up to 16 characters total including spaces or horizontal tab. Characters must be enclosed in double quotes.
-
Seite 470: Index
INDEX COMMENT command ............ 11 Kernel command .............. 10 conditions ................8 context switching ............12 OPMSG command ............75 DEFAULT command ............54 DEMOPAGE..............10 Device Attendance command .......... 74 PCL-specific variables ......... 36, 48, 53 DINQUIRE command ............. 59 PERMFONT .............. - Seite 471 CHAPTER 6 EPSON FX-850 CHAPTER 6 EPSON - 1...
- Seite 472 ONTENTS 1. COMMAND LIST ........................3 2. INTRODUCTION ........................5 3. EMULATION DETAILS ......................6 3.1. Ignored Commands ............................6 3.2. Resolution ..............................6 4. TERMINOLOGY ........................7 4.1. Syntax ................................7 4.2. Conventions ..............................7 5. CONTROLLING THE PRINTER ................... 8 5.1.
-
Seite 473: Command List
COMMAND LIST Null Bell Space Backspace Carriage return Line Feed Form Feed Esc SP n Set inter-character space Esc a n Select justification mode Esc $ n1 n2 Set absolute print position Esc \ n1 n2 Set relative print position Esc <... - Seite 474 Esc H Cancel double-strike mode Esc W n Select / Cancel double-width printing Select single-line double-width printing (I) Esc SO Select single-line double-width printing (II) Cancel single-line double-width printing Esc 4 Select italic mode Esc 5 Cancel italic mode Esc S n Select superscript / subscript mode Esc T Cancel superscript / subscript mode...
-
Seite 475: Introduction
INTRODUCTION In this mode you can control the HL-Series printers that support this emulation directly by incorporating control codes and escape sequences into your program. Alternatively, applications software (for example, your word-processing or spreadsheet software) may send the necessary commands to the printer automatically. -
Seite 476: Emulation Details
EMULATION DETAILS The following points should be borne in mind when using the printer in Epson FX-850 mode. 3.1. Ignored Commands The following commands are ignored: the BEL control code (ASCII code 7) which is normally used to sound a printer's bell, the DC1 (ASCII 17) and DC3 (ASCII 19) control codes, used to enable and disable a printer, the Esc 9 and Esc 8 commands, which normally enable and disable the out-of-paper sensor, the Esc <... -
Seite 477: Terminology
TERMINOLOGY 4.1. Syntax The following conventions are used in this description of the Epson FX-850 mode software commands: A single letter, two or three-letter control code mnemonic, or number in upright bold text is a literal character and should be sent to the printer as the character code. A letter or word in italics is a variable and you must substitute an appropriate value when you use the command. -
Seite 478: Controlling The Printer
CONTROLLING THE PRINTER Commands are invoked using either control codes or escape sequences. You can send them to the printer as part of a program using the same command that you would use to print a string on the printer. For example in BASIC you would use the LPRINT command. -
Seite 479: Commands
COMMANDS 6.1. Basic printer operations The most common printer operations are described in this section. Some are invoked using control codes alone - the rest require escape sequences. For the sake of completeness, several instructions which are part of the Epson FX-850 mode instruction sets, but which an HL Series printer ignores are included. Null <00h>... -
Seite 480: Esc
Set inter-character space EscSPn (27)(32)n <1Bh><20h>n This command allows you to set the space between successive characters. n is the space between characters in multiples of 1/120". n must be in the range 0 to 127. LPRINT CHR$(27); CHR$(32); CHR$(5); 'Set 1/24" char space Select justification mode Escan (27)(97)n... -
Seite 481: Esc = Set Data Msb To
Set data MSB to 0 Esc= (27)(61) <1Bh><3Dh> This command enables you to set the most significant bit of incoming data bytes to 0. This command does not affect data comprising a graphics image or data that defines a downloadable character. -
Seite 482: Esc Cr Mode
Feed from the Tray 1. n = 2 Feed from the Tray 2. n = R Eject paper. n Value HL-2070N n = 0 Initialize the feeder mode. n = 2 Feed from the tray. n = R Eject paper. -
Seite 483: Page Set Up
Enable out-of-paper sensor Esc9 (27)(57) <1Bh><39h> The printer ignores this command. Disable out-of-paper sensor Esc8 (27)(56) <1Bh><38h> The printer ignores this command. 6.2. Page set up Set page length EscC n (27)(67)n <1Bh><43h>n This command sets the page length in lines. EscCNULn (27)(67)(00)n <1Bh><43h><00h>n ... - Seite 484 If the bottom margin specified by this command would be located above the top margin, the command is ignored. LPRINT CHR$(27); CHR$(78); CHR$(4); 'Set bottom margin to 4 lines. CHAPTER 6 EPSON - 14...
-
Seite 485: Line Spacing
Cancel perforation skip EscO (27)(79) <1Bh><4Fh> This command cancels the automatic perforation skip feature. LPRINT CHR$(27); CHR$(79); 'Cancel perforation skip. 6.3. Line Spacing Select 1/6" line spacing Esc2 (27)(50) <1Bh><32h> This command sets the line spacing to 1/6". All subsequent line feed operations will move the print position 1/6"... -
Seite 486: Using Tabs
Perform n/216" reverse line feed Escjn (27)(106)n <1Bh><6Ah>n This command performs a single reverse line feed, moving the print position up the page by n/216". This command does not perform a carriage return. The current line spacing setting is not affected. ... -
Seite 487: Using Standard Characters
You can set up to eight different sets of vertical tab stops and select any of these sets for use at any time. Each set of tab stops is called a channel - channels are numbered from 0 to 7. ... -
Seite 488: Escm
Set pitch to 12 characters per inch EscM (27)(77) <1Bh><4Dh> This command sets the printing pitch to 12 characters per inch (cpi). LPRINT CHR$(27); CHR$(77); 'Set pitch to 12 cpi Select / cancel proportional spacing Escpn (27)(112)n <1Bh><70h>n This command allows you to turn proportional spacing on or off. ... -
Seite 489: Select Double-Strike Mode
Select double-strike mode EscG (27)(71) <1Bh><47h> This command turns double-strike mode on. Subsequent text is printed with a bold stroke width. LPRINT CHR$(27); CHR$(71); 'Turn double-strike printing mode on Cancel double-strike mode EscH (27)(72) <1Bh><48h> This command turns double-strike mode off. Subsequent text is printed with a medium stroke width. LPRINT CHR$(27);... -
Seite 490: Esc
Select italic mode Esc4 (27)(52) <1Bh><34h> This command enables the italic printing mode. Subsequent text is printed in italic style. You can still use italic text even after selecting the extended character set with the Esc t command. LPRINT CHR$(27);... -
Seite 491: Select Printing Mode
Select printing mode Esc!n (27)(33)n <1Bh><21h>n This command allows you to select a combination of printing modes with just one command. The various modes are weighted as shown. Add the numbers that correspond to each mode you require and set n to the total. -
Seite 492: Select International Character Set
Select international character set EscRn (27)(82)n <1Bh><52h>n This command selects one of the available international character sets, refer to the printer User Guide for supported character sets. Each character set varies slightly from the others and contains a small number of special characters necessary for printing in that particular language. -
Seite 493: Using Customized Characters
6.6. Using customized characters Define characters Esc&NUL n <character definition data>) (27)(38)(00)n1n2(n3..) <1Bh><26h><00h>n1n2(n3...) This command enables you to define and download characters for printing. Monospaced characters are designed on a grid eleven dots wide by nine dots high. Characters either occupy the top 8 rows of the grid (ascending characters) or rows 2 to 9 of the grid (descending characters). -
Seite 494: Graphics
Copy ROM character to RAM Esc:000 (27)(58)(00)(00)(00) <1Bh><3Ah><30h><30h><30h> In order to use your own customized characters in conjunction with the standard characters contained in the printer, you must first download the printer standard ROM characters to the printer RAM, then define and download your own customized characters, and finally select the downloaded characters for printing using the Esc % 1 NUL escape sequence. -
Seite 495: Esc^an1N2
c is the character which signifies the graphics mode: K = single-density (60 dpi), L = double-density (120 dpi), Y = double-speed, double-density (120 dpi) and Z = quadruple-density (240 dpi). m defines the new horizontal resolution to be assigned to the specified graphics mode. m must be in the range 0 to 7. -
Seite 496: Print Single-Density Image
Print single-density image EscKn <image data> (27)(75)n1n2..<1Bh><4Bh>n1n2.. This command enables you to define and print a single line raster bit image on a single text line. n and n define the number of bytes that comprise the image. ... - Seite 497 Print double-speed double-density image EscYn <image data> (27)(89)n1n2..<1Bh><59h>n1n2.. This command enables you to define and print a single line raster bit image on a single text line. n and n define the number of bytes that comprise the image. ...
-
Seite 498: Index
INDEX 9 bit image ............... 25 justification mode ............10 absolute print position ............. 10 left margin ................ 13 line feed ................15 Line feed ................9 line spacing ..............15 Backspace ................9 page length ............... 13 perforation skip ..............13 Carriage return .............. - Seite 499 CHAPTER 7 IBM PROPRINTER CHAPTER 7 IBM PROPRINTER - 1...
- Seite 500 ONTENTS 1. COMMAND LIST ........................3 2. INTRODUCTION ........................5 3. EMULATION DETAILS ......................6 3.1. Ignored Commands ........................6 3.2. Resolution ............................ 6 3.3. Character Set selection ........................ 6 3.4. Controlling the Printer ........................6 3.5. Control Codes ..........................6 3.6.
-
Seite 501: Command List
COMMAND LIST Null Bell Escape Space Backspace Line Feed Form Feed Carriage return Esc5n Automatic line feed Enable printer EscQ22 Disable printer EscQ3 Disable printer EscCRmode Reset printer / change emulation mode EscCR!#R User reset EscEMn Paper input control EscCn Set page length EscCNULn Set page length... - Seite 502 EscKn1n2<image data> Set single-density image mode EscLn1n2<image data> Set double-density image mode EscYn1n2<image data> Set double-speed, double-density image mode EscZn1n2<image data> Set quadruple-density image mode CHAPTER 7 IBM PROPRINTER - 4...
-
Seite 503: Introduction
INTRODUCTION Some of these HL Series printers offer a complete emulation of the IBM Proprinter. In Proprinter XL mode you can drive the printer directly by incorporating control codes and escape sequences in your program, or alternatively, applications software (for example, your word-processing software) may send the necessary commands to the printer automatically. -
Seite 504: Emulation Details
EMULATION DETAILS The following points should be borne in mind when running the HL Series printers in IBM Proprinter XL mode. 3.1. Ignored Commands A few IBM Proprinter XL commands have reduced effect, or no effect at all. In some cases this is due to the physical nature of an HL Series printer. -
Seite 505: Notation Used In This Emulation Description
NOTATION USED IN THIS EMULATION DESCRIPTION 4.1. Syntax The following conventions are used in this description of the Proprinter XL software commands. A letter, word or number in upright bold text is the literal character which and should be sent to the printer as a character code. -
Seite 506: Commands
COMMANDS 5.1. Basic Printer Operation The most common printer operations are described in this section. Most are invoked using control codes. For the sake of completeness the instructions which HL Series printers ignore are included. Null <0h> NUL (ASCII 0) is ignored. Bell (07) <07h>... -
Seite 507: Automatic Line Feed
Automatic line feed Esc5n (27)(53)n <1Bh><35h>n When automatic line feed is ON, a line feed is automatically performed every time a carriage return is sent to the printer. To turn the automatic line feed function ON, set n to 1. ... -
Seite 508: Paper Input Control
= 1 Feed from Tray 1. n = 2 Feed from Tray 2. n = R Eject paper. n Value HL-2070N n = 0 Initialize the feeder mode. n = 2 Feed from the tray. n = R Eject paper. -
Seite 509: Page Format
5.2. Page Format Set page length EscCn (27)(67)n <1Bh><43h>n This command sets the page length in lines. EscCNULn (27)(67)(0)n <1Bh><43h><00h>n This command sets the page length in inches. n is the number of lines that make up one page, or the length of the page in inches, according to the form of the command. -
Seite 510: Esc0
Line spacing and tabs Set 1/8" line spacing Esc0 (27)(48) <1Bh><30h> This command sets the line spacing to 1/8". All subsequent line feed operations will move the print position 1/8" down the page. LPRINT CHR$(27); CHR$(48); 'Set line spacing to 1/8". Set 7/72"... -
Seite 511: Horizontal Tab
Set horizontal tabs EscD<n1><n2><n3>...NUL (27)(68)n1n2n3...(00) <1Bh><44h>n1n2n3...<00h> This command enables you to set up to 28 horizontal tab stops using the current character pitch. The tab stops should be set in ascending order. Esc D 0 clears all horizontal tab settings. ... -
Seite 512: Using Characters
5.3. Using Characters Select character set I Esc7 (27)(55) <1Bh><37h> This command selects IBM Character set I for use in subsequent printing operations. LPRINT CHR$(27); CHR$(55); 'Select character set I Select character set II Esc6 (27)(56) <1Bh><36h> This command selects IBM character set II for use in subsequent printing operations. LPRINT CHR$(27);... -
Seite 513: Can
Set enlarged character mode for a single line (14) <0Eh> This command turns enlarged character mode on for one line only. The subsequent line of text is printed using double-width characters and with the line space setting doubled. The following commands cancel enlarged character mode set using the SO control code: CR, CAN, LF, FF, VT, Esc W 0, DC4 and Esc [@. -
Seite 514: Underline Mode
Underline mode Esc-n (27)(126)n <1Bh><7Eh>n This command turns character underlining on or off. If n is set to 1 subsequent text is underlined. Horizontal tab spaces are not underlined irrespective of whether underlining mode is on or off. ... -
Seite 515: Select Character Font
Select a character from the All Character Code table Esc^<char-code> (27)(94)<Char-code> <1Bh><5Eh><Char-code> This command enables you to print a single character from the All Character Code table. A control code is not executed if the code is sent immediately following this instruction. LPRINT CHR$(27);... -
Seite 516: Graphics
If bits 1 and 2 of n are 01 the least significant bit of each data byte is replicated in rows 9 to 12 of the grid. If bits 1 and 2 of n are 10 the bits 1 to 4 of each data byte are replicated in rows 9 to 12 of the grid. ... - Seite 517 Images are printed at an approximate horizontal resolution of 120 dots per inch and at an approximate vertical resolution of 72 dots per inch. Each byte represents a vertical column of eight dots, the most significant bit representing the dot at the top.
- Seite 518 Set quadruple-density image mode EscZn <image data> (27)(90)n1n2<image data> <1Bh><5Ah>n1n2<image data> This command enables you to define and print a single line raster bit image on a single text line. n and n define the number of bytes that comprise the image. ...
-
Seite 519: Index
INDEX Line feed ................8 line spacing ..............12 Automatic line feed ............9 overline mode ..............16 Backspace ................8 page length ............... 11 paper input control ............10 perforation skip ..............11 cancel ................15 pitch ................. 14 Carriage return .............. - Seite 520 CHAPTER 8 BAR CODE CONTROL CHAPTER 8 BAR CODE CONTROL - 1...
- Seite 521 ONTENTS 1. INTRODUCTION ........................3 2. PRINT BAR CODES OR EXPANDED CHARACTERS ............4 3. DEFINITION OF PARAMETERS ..................5 3.1. Bar Code Mode ..........................5 3.2. Bar Code Style, Expanded Character Shading, Line Block Drawing & Box Drawing Shading ..5 3.3.
-
Seite 522: Introduction
INTRODUCTION Some of the HL series printers can print bar codes in the HP LaserJet, EPSON FX-850, and IBM Proprinter XL emulation modes, refer to the printer User guide for information. CHAPTER 8 BAR CODE CONTROL - 3... -
Seite 523: Print Bar Codes Or Expanded Characters
PRINT BAR CODES OR EXPANDED CHARACTERS ESC i n ... n \ (27)(105)n ... n (92) <1Bh><69h>n ... n <5Ch> Creates bar codes or expanded characters according to the parameters "n n". For further information about the parameters, see the following "Definition of Parameters." This command must end with the " \ " code (5CH). -
Seite 524: Definition Of Parameters
DEFINITION OF PARAMETERS This bar code command can have the following parameters in the parameter segment (n ... n). Parameters are effective only within the single command sequence using the syntax ESC i n ... n \. They do not take effect in any subsequent bar code commands. -
Seite 525: Bar Code Scaling (Width Only)
Line Block Drawing & Box Drawing Shading "S" 1 = Black 2 = Vertical stripes 3 = Horizontal stripes 4 = Cross hatch 3.3. Bar Code Scaling (Width only) n = "mnnn" or "Mnnn" (nnn = 0 ~ 32767) This parameter specifies the bar code width scaling. -
Seite 526: Bar Code, Expanded Character, Line, Block Drawing & Box Drawing Offset In The X-Axis
3.7. Bar Code, Expanded Character, Line, Block Drawing & Box Drawing Offset in the X-axis n = "xnnn" or "Xnnn" This parameter specifies the offset from the current print position in the "u"- or "U"-specified units. 3.8. Bar Code & Expanded Character Offset in the Y-axis n = "ynnn"... -
Seite 527: Bar Code Data Start
3.12. Bar Code Data Start n = "b" or "B" Data that follows "b" or "B" is read in as bar code data. Bar code data must end with the " ¥ " code (5CH), which also terminates this command. The acceptable bar code data is subject to the bar code mode selected by "t"... -
Seite 528: Box Drawing
When Code 128 Set A, Set B, or Set C is selected with the parameter "t12" or "12," "t13" or "T13," or "t14" or "T14" respectively: Code sets A, B and C are individually selectable. Set A encodes characters in the range Hex 00 to 5F. Set B encodes characters in the range Hex 20 to 7F. -
Seite 529: Table Of Code(Ean) 128 Set C
3.16. Table of Code(EAN) 128 set C Code(EAN) 128 set C describes an original command. The correspondence table is as follows. No. Code 128 Set C Input command No. Code 128 Set C Input command 0x00 0x34 0x01 0x35 0x02 0x36 0x03 0x37... -
Seite 530: Example Program Listings
EXAMPLE PROGRAM LISTINGS 10 ' Barcode 20 WIDTH "LPT1:", 255 30 ' CODE 39 40 LPRINT CHR$(27); "it0r1s0x00y00b123456\"; 50 'INTER LEAVED 60 LPRINT CHR$(27); "it1r1s0x70y00b123456\"; 70 ' EAN-13 80 LPRINT CHR$(27); "it5r1s0x00y020b123456789012?\"; 90 LPRINT CHR$(27); "it5r1s0x70y020b123456789012?+12345\"; 100 ' UPC-A 110 LPRINT CHR$(27); "it5r1s0x00y050b12345678901?\"; 120 LPRINT CHR$(27);... - Seite 531 CHAPTER 9 HP-GL GRAPHICS LANGUAGE CHAPTER 9 HP-GL - 1...
- Seite 532 ONTENTS COMMAND LIST ........................3 INTRODUCTION ........................4 2.1. HP-GL Syntax .......................... 4 2.2. Font Selection .......................... 4 2.3. Coordinate System and Printing Area ..................4 2.3.1. Coordinate system ..........................4 2.3.2. Printing area ............................5 COMMANDS ........................6 3.1. Initialization and Default Setting Instructions ................
-
Seite 533: Command List
Relative direction Character plot Set absolute character size Set relative character size Character slant User-defined character EscCRRO, EscCRRL, EscCRRM, EscCRRD Set high resolution control (Brother original) EscCR!#R User reset (Brother original) EscCRFD Factory reset (Brother original) CHAPTER 9 HP-GL - 3... -
Seite 534: Introduction
INTRODUCTION The HP-GL graphics mode emulates 40 out of 56 instructions for the HP 7475A plotter made by Hewlett- Packard. Default measurement unit in the HP-GL graphics mode is 1/1016"(0.025mm). 2.1. HP-GL Syntax A command consists of a two-letter instruction mnemonic, a parameter field (not needed for some instructions) and a terminator. -
Seite 535: Printing Area
2.3.2. Printing area (mm) 5 (HL-3400CN/3260N/3450CN) Letter Legal CHAPTER 9 HP-GL - 5... -
Seite 536: Commands
COMMANDS 3.1. Initialization and Default Setting Instructions DF - Default set instruction DF[;] Returns the graphics mode to the default conditions. The following are the default settings. Function Equivalent Condition Instruction Plot mode Absolute plotting Relative character direction DR 1,0;... -
Seite 537: Plot Area And Unit Setting Instructions
Function Equivalent Condition Instruction Fill type Bi-directional fill, type 1 Fill distance 1% of distance from P1 to P2 Fill slant 0 degrees Pen thickness Set at 0.3 mm Pen condition Pen up Rotation Set at 0 degrees Scaling points Initialized according to paper size 3.2. -
Seite 538: Pen Control And Plot Instructions
IW - Input window IW [ X ] [;] X1-Window lower left X coordinate Y1-Window lower left Y coordinate X2-Window upper right X coordinate Y2-Window upper right Y coordinate This instruction sets the window inside which plotting can be performed. ... - Seite 539 PU - Pen up PU [ X,Y [,...]] [;] X ; X coordinate of the cursor movement destination Y ; Y coordinate of the cursor movement destination X and Y are either relative or absolute, depending on whether a PA or a PR was the last plot command executed.
- Seite 540 (X1, Y1) (Xn, Yn) (X2,Y2) (X3, Y3) Current position 10 '*** PAEX1 *** 20 LPRINT "IN;SP1;" 30 LPRINT "PA2000,6000;PD0,6000,2000,7500,2000,6000;PU2500,6000;" 40 LPRINT "PAPD4500,6000,2500,7500,2500,6000;PU10365,500;" 50 END <Sample 62> 10 ' *** PAEX2 *** 20 LPRINT "IN;SP1;SC0,100,0,100;" 30 LPRINT "PA50,30;PD25,30,50,50,50,30;PU55,30;" 40 LPRINT "PAPD80,30,55,50,55,30,PU;" 50 END <Sample 63>...
- Seite 541 AA - Draw absolute arc AA [ X, Y, qc [, qd ]] [;] X ; Arc centre X coordinate Y ; Arc centre Y coordinate qc ; Arc angle in degrees qd ; Chord angle in degrees X and Y coordinates are absolute coordinates in user units or graphics units. ...
-
Seite 542: Circle Plot
Plotting is performed only when the pen is down. When the pen is up, plotting is not performed but the cursor position moves to the plot end point. When scaling has been performed, the cursor is moved by relative coordinates in user units. ... -
Seite 543: The Polygon Group
10 '*** CIEX1 *** 20 LPRINT "IN;SP1;IP2650,1325,7650,6325;" 30 LPRINT "SC-100,100,-100,100;" 40 LPRINT "PA-60,50;CI40,45;" 50 LPRINT "PA60,50;CI40,30;" 60 LPRINT "PA-60,-50;CI40,15;" 70 LPRINT "PA60,-50;CI40,5;" 80 END <Sample 65> 10 '*** CIEX2 *** 20 LPRINT "IN;SP1;IP2650,1325,8650,7325;" 30 LPRINT "SC0,170,0,170;" 40 LPRINT "PA100,100;LT;CI10,5;LT0;CI-20,5;LT1;CI30,5;" 50 LPRINT "LT2;CI-40,5;LT3;CI50,5;LT4;CI- 60,5;LT5;CI70,5;LT6;CI80,5;"... - Seite 544 When there is no scaling, the coordinate values for X and Y are integer numbers. (X, Y) Current position 10 '*** EAEX *** 20 LPRINT "IN;SP1;PA7000,4000;" 30 LPRINT "PT.3;FT1;RA6000,3000;" 40 LPRINT "SP3,;EA6000,3000;" 50 LPRINT "SP4;FT3,100;RA8000,3000;" 60 LPRINT "SP3,;EA8000,3000;" 70 LPRINT "SP5;PT.3;FT2;RA8000,5000;" 80 LPRINT "SP3;EA8000,5000;"...
- Seite 545 EW - Edge wedge EW r,q1,qc(,qd)[;] r ; Radius in user units or graphics units q1; Start point angle qc ; Arc angle qd ; Chord angle Plots a wedge centred on the current position with radius r, start point angle q1, arc angle qc and chord angle ...
- Seite 546 RA - Fill rectangle absolute RA X, Y[;] X ; X coordinate of opposite angle for the rectangle Y ; Y coordinate of opposite angle for the rectangle X and Y coordinates are absolute coordinates in user units or graphics units. ...
- Seite 547 WG - Fill wedge WG r,q1,qc(,qd)[;] r ; Radius in user units or graphics units q1 ; Start point angle qc ; Arc angle qd ; Chord angle Fill in a wedge centred on the current position with radius r, start point angle q1, arc angle qc and chord angle qd.
-
Seite 548: Plot Function Instructions
3.5. Plot Function Instructions Instruction Function Fill Type Line Type Pen Width Symbol Mode Select Pen Tick Length X Tick Y Tick Pen Thickness FT - Fill type FT [ n [, d [, q]]] [;] n : Fill type d : Fill interval (interval between the parallel lines of the area being filled) q : Fill angle (degrees ) ... - Seite 549 PW-Pen width PW n[;] w ; width (unit = 1/300 inch) This command specifies the width of the currently selected pen. The value of w is an integer number from 1 to 10. SM - Symbol mode SM c[;] c ;...
-
Seite 550: Character Plot Instructions
XT - X-axis tick XT [;] Plots vertical tick marks as specified by the TL instruction from the current position. After plotting, the cursor returns to its point of origin. Plotting is performed whether the pen is up or down. YT - Y-axis tick YT [;] ... - Seite 551 Character Set ANSI ASCII 9825 Character Set French/German Scandinavian Spanish/Latin American JIS ASCII ROMAN 8 Extensions ISO IRV ISO Swedish ISO Swedish for Names ISO Norway, Version 1 ISO German ISO French ISO Kingdom ISO Italian ISO Spanish ISO Portuguese ISO Norway, Version 2 SS - Select standard character set SS [;]...
- Seite 552 LB - Character plot LB [ cs ] < terminator > [;] cs : character string Plots character strings, numerical expressions, variables etc. Plotting is performed whether the pen is up or down. After plotting, the cursor moves to the position of the next character. 10 '*** LBEX1 *** 20 LPRINT "SP2;PA1000,4000;"...
- Seite 553 DR - Relative direction DR [ run, rise ] [;] run : X direction component rise : Y direction component A percentage of the distance in the X and Y directions between P1 and P2 is used as the units ...
- Seite 554 10 '*** SIEX1 *** 20 LPRINT "IN;SP1;PA1000,1000;" 30 LPRINT "SI2,1.5;LBLASER";CHR$(3) 40 END <Sample 86> 10 '*** SIEX2 *** 20 LPRINT "IN;SP1;PA5000,3000:" 30 LPRINT "SI-.35,.35;LBCHARACTER";CHR$(3) 40 END <Sample 87> 10 '*** SIEX3 *** 20 LPRINT "IN;SP1;PA5000,3000;" 30 LPRINT "SI.35,-.35;LBCHARACTER";CHR$(3) 40 END <Sample 88>...
- Seite 555 10 '"*** SLEX *** 20 LPRINT "DF;SP1;SI1.3,1.3;PA100,6000;" 30 LPRINT "SL2;LBLASER";CHR$(3) 40 LPRINT "SL-2;PR3000,0;LBLASER";CHR$(3) 50 END <Sample 91> UC - User-defined character UC X1, Y1, X2, Y2..., Xn, Yn[;] Xi : Number of grids in X direction Yi : Number of grids in Y direction ...
-
Seite 556: Dual Context Extensions
EscCRRM This command sets high resolution control medium level. EscCRRD This command sets high resolution control dark level. User reset (Brother original) EscCR!#R # can be 0, 1 or 2. #0 indicates the current setting are restored. #1 indicates the user settings 1 are restored. - Seite 557 INDEX Absolute direction ............22 Pen down ................9 Alternate character set ............. 20 Pen thickness select ............20 Pen up ................9 Pen width ................. 19 Plot absolute ............... 9 printing area ............... 5 Character plot ............22, 23 character set ...............
- Seite 558 CHAPTER 10 CARBON COPY FUNCTION CHAPTER 10 CARBON COPY FUNCTION - 1...
- Seite 559 ONTENTS 1. OUTLINE ..........................3 1.1. Outline of the function ........................3 2. SPECIFICATIONS ........................ 4 2.1. Explanation of each function ......................4 2.1.1. Carbon copy mode setting ........................4 2.1.2. Setting of the number of copies ........................ 4 2.1.3. Paper tray selection setting ........................4 2.1.4.
-
Seite 560: Outline
OUTLINE 1.1. Outline of the function This function allows you to print two or more copies of the one page data on the printer side. The function also allows you to select the paper tray and register an additional macro for each copy. Therefore it is possible to change the printing format for each copy by selecting the paper tray to change the paper type or registering different macros. -
Seite 561: Specifications
SPECIFICATIONS 2.1. Explanation of each function 2.1.1. Carbon copy mode setting Sets the carbon copy function to ON or OFF. ON: Turns on the carbon copy function. OFF: Turns off the carbon copy function. AUTO: Turns on the carbon copy function when the @PJL ENTER LANGUAGE command is not included in the print data, and turns off when the @PJL ENTER LANGUAGE command is included. -
Seite 562: How To Set Each Function
2.2. How to set each function 2.2.1. Setting on the control panel PRINT CARBON CARBON COPY =OFF/ON/AUTO Sets the carbon copy mode. MENU MENU / PARALLEL COPIES =1 - 8 Sets the number of copies. COPY 1 TRAY =AUTO/REMAINING Selects the paper tray. MPTRAY TRAY 1 TRAY 2... -
Seite 563: Setting With The Pjl Command
2.2.2. Setting with the PJL command This function supports each of the SET, DEFAULT, INQUIRE and DINQUIRE commands in the PJL commands. PJL command Setting value Default value Descriptions CARBONMODE =OFF OFF: Turns off the function. ON: Turns on the function. AUTO AUTO: Turns on when the PJL ENTER PARALLEL... -
Seite 564: Example
2.3. Example The following sections describe the setting method of the example below. The number of copies is 4 (four). The carbon copy function is enabled by sending the data only through the parallel interface. 1st page: The paper is fed from the Tray 1. The ID=128 macro is added. 2nd page: The paper is fed from the Tray 2. -
Seite 565: Detailed Information
DETAILED INFORMATION 3.1. Details on the specifications 3.1.1. Usable emulation Only the PCL emulation can be used since the macro is supported only on the PCL emulation. For the request to use the EPSON / IBM emulation, however, the filter function which converts the EPSON / IBM emulation data to the PCL emulation one is provided. - Seite 566 APPENDIX A COMPARISON LIST APPENDIX A -COMPARISON LIST - 1...
- Seite 567 PCL Specific Variables ..............82 ONTENTS PostScript Specific Variables ............85 PCL5/5E (PAPER SIZE) ..........3 EPSON Specific Variables ............87 IBM Specific Variables ..............89 PCL5/5E (TRAY: IF PJL TRAYCOMMAND IS NORMAL.) ..............9 PCL5/5E (TRAY: IF PJL TRAYCOMMAND IS SPECIAL.) ..12 PCL5/5E (OTHERS) .............
- Seite 568 In this chapter, you can find which commands are supported by your printer. PCL5/5e (Paper Size) COMMAND Esc&l1A Paper Size Executive Esc&l2A ...
- Seite 569 COMMAND Esc&l1037A Paper Size DL Long Edge Feeding Esc&l1038A Paper Size Folio Esc&l1039A Paper Size 3"X5" Esc&l1040A Paper Size Envelop #4 Esc&l1041A Paper Size Envelop Max Esc&l2048A ...
- Seite 570 HL-3260N HL-8050N 5240/50D/70DN/ 80DW HL-6050/6050D/ 6050DN HL-2070N HL-5140/5150D/ 5170DN HL-5040/5050/ 5070N HL-1850/1870N HL-1650/1670N HL-3450CN HL-3400CN HL-2700CN HL-2600CN HL-2400C/Ce HL-1660e/2060 HL-1450/1470N HL-1250/1270N/ P2500 HL-1050/1070...
- Seite 571 COMMAND Esc&l1A Paper Size Executive Esc&l2A Paper Size Letter Esc&l3A ...
- Seite 572 COMMAND Esc&l1037A Paper Size DL Long Edge Feeding Esc&l1038A Paper Size Folio Esc&l1039A ...
- Seite 573 L5000D/5580D/L 5100DN/L5200D L6200DW/L6300D W/L6400DW L2360DN/L2360D L2365DW/2560DN L8250CDN/L8350 CDW(T)/ L9200CDW(T)/L92 00CDW(T) HL-3170CD HL-S7000DN 5440D/5450DN/5 470DW/6180DW 2250DN/2270D 4140CN/4150CD N/4570CDW 3070CW/3075C 5340D/5350DN/5 370DW/5380DN 2150N/2170W HL-4040CN/40 50CDN/4070CD HL-7050 HL-2460...
-
Seite 574: Pcl5/5E (Tray: If Pjl Traycommand Is Normal.)
PCL5/5e (Tray: If PJL TRAYCOMMAND is NORMAL.) COMMAND Esc&l0H Paper Eject Esc&l1H Feeder1 Upper Cassette Tray1 Primary Tray Esc&l2H ... - Seite 575 COMMAND Esc&l0H Paper Eject Esc&l1H Tray1 Primary Tray Esc&l2H Manual Feed Esc&l3H Feed from Manual Feed Envelope...
- Seite 576 COMMAND Esc&l0H Paper Eject Esc&l1H Tray1 Primary Tray Esc&l2H Manual Feed Esc&l3H Feed from Manual Feed Envelope Esc&l4H MP Tray Secondary Tray Esc&l5H Tray2 Tray2 Optional Tray Esc&l6H Esc&l7H Automatic Selection Esc&l8H Tray3 Tray3...
-
Seite 577: (Tray: If Pjl Traycommand Is Special.)
PCL5/5e (Tray: If PJL TRAYCOMMAND is SPECIAL.) COMMAND Esc&l0H Paper Eject Esc&l1H Feeder1 Upper Cassette Tray1 Primary Tray Esc&l2H ... - Seite 578 COMMAND Esc&l0H Paper Eject Esc&l1H Tray1 Primary Tray Esc&l2H Manual Feed Esc&l3H Feed from Manual Feed Envelope...
- Seite 579 COMMAND Esc&l0H Paper Eject Esc&l1H Tray1 Primary Tray Esc&l2H Manual Feed Esc&l3H Feed from Manual Feed Envelope Esc&l4H Tray2 Tray2 Secondary Tray Esc&l5H Tray2 Tray2 Optional Tray Esc&l6H MP Tray Esc&l7H Automatic Selection Esc&l8H Tray3...
-
Seite 580: Pcl5/5E (Others)
PCL5/5e (Others) COMMAND Esc&n# Media type selection Esc&k#G Line Termination Esc&s#C ... - Seite 581 COMMAND Esc&l#C Line Pitch Esc&k#H ...
- Seite 582 COMMAND EscCR!#E Execute Card Data Esc&a#P ...
- Seite 583 COMMAND Esc&d#D, Esc&d@ Auto Underline Esc*c#D ...
- Seite 584 COMMAND Esc*v#T #: 0 ~ 4, 130, 258 Select Pattern Esc*c#A Pattern Horizontal Size(dot) Esc*c#H ...
- Seite 585 COMMAND Esc*rC End Raster Graphics Esc%#B ...
- Seite 586 COMMAND Esc&f1036X Delete Current Macro from Card Esc&f1038X Save Current Macro into Card Esc*s#T...
- Seite 587 COMMAND Esc&n# Media type selection Esc&k#G Line Termination Esc&s#C ...
- Seite 588 COMMAND Esc&l#C Line Pitch Esc&k#H Character Pitch Esc&l#D ...
- Seite 589 COMMAND EscCR!#E Execute Card Data Esc&a#P Print Direction Esc(3@, Esc)3@ Secondary Font Select ...
- Seite 590 COMMAND Esc&d#D, Esc&d@ Auto Underline Esc*c#D Download Font Font ID Set #: 0 ~ 6, #: 0 ~ 6, 1026, Esc*c#F 1026,...
- Seite 591 COMMAND Esc*v#T #: 0 ~ 4, 130, 258 Select Pattern Esc*c#A Pattern Horizontal Size(dot) Esc*c#H ...
- Seite 592 COMMAND Esc*rC End Raster Graphics Esc%#B Enter HP-GL/2 Mode Esc*c0T ...
- Seite 593 COMMAND Esc&f1036X Delete Current Macro from Card Esc&f1038X Save Current Macro into Card Esc*s#T Set Status Readback Location Type Esc*s#U ...
-
Seite 594: Typeface Selection (Pcl)
Typeface Selection (PCL) Command Typeface Esc(s129T Anelia Esc(s128T Brougham Esc(s130T Letter Gothic ... - Seite 595 Command Typeface Esc(s129T Anelia Esc(s128T Brougham Esc(s130T Letter Gothic Esc(s104T OCR-A ...
- Seite 596 HP-GL/2 HL-1050/1070/1250/1270N/1450/1470N/P2500/1660e/2060/2400C/2400Ce/3400CN/1650/1670N/3260N/2460/7050/1850/1870N/5050/5070N/ 5150D/5170DN/2600CN/3450CN/6050/6050D/6050DN/8050N/2700CN/2070N/5240/5250DN/5270DN/5280DW/4040CN/4050CDN/4070CDW/ COMMAND 2150N/2170W/5340D/5350DN/5370DW/5380DN/3070CW/3075CW/4140CN/4150CDN/4570CDW/2250DN/2270DW/ 5440D/5450DN/5470DW/6180DW/S7000DN/L8250CDN/L8350CDW(T)/L9200CDW(T)/ L9300CDW(T)/L2360DN/L2360DW/L2365DW/2560DN/2569DW/L5000D/5580D/L5100DN/L5200DW/L6200DW/L6300DW/L6400DW ...
- Seite 597 HL-1050/1070/1250/1270N/1450/1470N/P2500/1660e/2060/2400C/2400Ce/3400CN/1650/1670N/3260N/2460/7050/1850/1870N/5050/5070N/ 5150D/5170DN/2600CN/3450CN/6050/6050D/6050DN/8050N/2700CN/2070N/5240/5250DN/5270DN/5280DW/4040CN/4050CDN/4070CDW/ COMMAND 2150N/2170W/5340D/5350DN/5370DW/5380DN/3070CW/3075CW/4140CN/4150CDN/4570CDW/2250DN/2270DW/ 5440D/5450DN/5470DW/6180DW/S7000DN/L8250CDN/L8350CDW(T)/L9200CDW(T)/ L9300CDW(T)/L2360DN/L2360DW/L2365DW/2560DN/2569DW/L5000D/5580D/L5100DN/L5200DW/L6200DW/L6300DW/L6400DW APPENDIX A -COMPARISON LIST - 32...
- Seite 598 Epson FX-850 HL-1050/1070/1250/1270N/1450/1470N/P2500/1660e/2060/2400C/2400Ce/3400CN/1650/1670N/3260N/2460/7050/1850/1870N/ Command 5050/5070N/5150D/5170DN/2600CN/3450CN/6050/6050D/6050DN/8050N/2700CN/2070N/5240/5250DN/5270DN/5280DW/ 5340D/5350DN/5370DW/5380DN/5440D/5450DN/5470DW/6180DW/L5000D/5580D/L5100DN/L5200DW/L6200DW/L6300DW/L6400DW Esc SP n Esc a n Esc $ n1 n2 Esc \ n1 n2 Esc < Esc > Esc # Esc @ ...
- Seite 599 HL-1050/1070/1250/1270N/1450/1470N/P2500/1660e/2060/2400C/2400Ce/3400CN/1650/1670N/3260N/2460/7050/1850/1870N/ Command 5050/5070N/5150D/5170DN/2600CN/3450CN/6050/6050D/6050DN/8050N/2700CN/2070N/5240/5250DN/5270DN/5280DW/ 5340D/5350DN/5370DW/5380DN/5440D/5450DN/5470DW/6180DW/L5000D/5580D/L5100DN/L5200DW/L6200DW/L6300DW/L6400DW Esc 5 Esc S n Esc T Esc w n Esc -n Esc ! n Esc 6 Esc 7 Esc l n Esc R n Esc t n ...
-
Seite 600: Ibm Proprinter Xl
IBM ProPrinter XL HL-1050/1070/1250/1270N/1450/1470N/P2500/1660e/2060/2400C/2400Ce/3400CN/1650/1670N/3260N/2460/7050/1850/1870N/ Command 5050/5070N/5150D/5170DN/2600CN/3450CN/6050/6050D/6050DN/8050N/2700CN/2070N/5240/5250DN/5270DN/5280DW/ 5340D/5350DN/5370DW/5380DN/5440D/5450DN/5470DW/6180DW/L5000D/5580D/L5100DN/L5200DW/L6200DW/L6300DW/L6400DW Esc 5 n Esc Q 22 Esc Q 3 Esc CR ! #R Esc EM n Esc C n Esc C NUL n ... - Seite 601 HL-1050/1070/1250/1270N/1450/1470N/P2500/1660e/2060/2400C/2400Ce/3400CN/1650/1670N/3260N/2460/7050/1850/1870N/ Command 5050/5070N/5150D/5170DN/2600CN/3450CN/6050/6050D/6050DN/8050N/2700CN/2070N/5240/5250DN/5270DN/5280DW/ 5340D/5350DN/5370DW/5380DN/5440D/5450DN/5470DW/6180DW/L5000D/5580D/L5100DN/L5200DW/L6200DW/L6300DW/L6400DW Esc K n1 n2 Esc L n1 n2 Esc Y n1 n2 Esc Z n1 n2 APPENDIX A -COMPARISON LIST - 36...
-
Seite 602: Bar Code
BAR CODE 1050/1070/1250/1270N/1450/1470N/P2500/1660e/2060/2400C/2400Ce/3400CN/16 50/1670N/3260N/2460/7050/1850/1870N/5050/ 5070N/5150D/5170DN/2600CN/3450CN/6050/6050D/6050DN/8050N/2700CN/2070 N/5240/5250DN/5270DN/5280DW/ Command HL-L5000D/5580D/L5100DN/L5200DW/L6200DW/L6300DW/L6400DW 4040CN/4050CDN/4070CDW/2150N/2170W/5340D/5350DN/5370DW/5380DN/307 0CW/3075CW/4140CN/4150CDN/4570CDW/ 2250DN/2270DW/5440D/5450DN/5470DW/6180DW/S7000DN/L8250CDN/L8350C DW(T)/L9200CDW(T)/L9300CDW(T)/ L2360DN/L2360DW/L2365DW/2560DN/2569DW CODE 39 Interleaved 2 of 5 FIM(US-Post Net) Post Net EAN8,EAN13, UPC A UPC E ... - Seite 603 HP-GL COMMAND ...
- Seite 604 COMMAND ...
-
Seite 605: Hpgl
Command ESC%-123245X PJL ENTER LANGUAGE = personality ... - Seite 606 Command @PJL INFO DRUMLIFE [<CR>]<LF> @PJL USTATUS variable = value DEVICE, JOB, PAGE, TIMED ...
- Seite 607 Command ESC%-123245X PJL ENTER LANGUAGE = personality ...
- Seite 608 Command @PJL INFO DRUMLIFE [<CR>]<LF> @PJL USTATUS variable = value DEVICE, JOB, PAGE, TIMED ...
- Seite 609 Command ESC%-123245X PJL ENTER LANGUAGE = personality PCLXL EPSON POSTSCRIPT HPGL @PJL EXECUTE operation SHUTDOWN DEMOPAGE ...
- Seite 610 HL-L5000D/5580D/5585D/ 5595DN/L5102DW/ L5100DN(T)/5590DN/ L5200DW(T)/L5202DW/ L6200DW(T)/L6202DW/ L6250DN/L6250DW/ L6300DW(T)/L6400DW(T)/ L6402DW HL-1200/1201/1202/1208 HL-1212W/1210W/ 1210WR/1212WR/ 1210WE/1211W/1218W 2260DW/L2305W/L2340D/L2 360DN/L2361DN/2560DN/L23 60DW/L2365DW/L2366DW/2 569DW L2300/L2300D/L2320D/L2321 D/2260/ L8250CDN/L8350CDW(T)/L9 200CDW(T)/L9300CDW(T) HL-1110/HL-1111/HL- 1112/HL-1118 HL-3170CDW HL-3150CDW/3150CDN HL-3140CW...
-
Seite 611: General Pjl Environment Variables
General PJL Environment Variables General PJL Environment Variables COPIES 1 ~ 200 1 ~ 999 PAPER LETTER ... - Seite 612 General PJL Environment Variables SIXTEENK195X270 SIXTEENK184X260 ORIENTATION PORTRAIT, LANDSCAPE 5 ~ 128 FORMLINES MANUALFEED ON, OFF LIGHT, MEDIUM, DARK, OFF PAGEPROTECT AUTO, OFF, LETTER, LEGAL, A4 300, 600 300, 600, HQ1200 300, 600 300, 600, HQ1200 RESOLUTION PERSONALITY ...
- Seite 613 General PJL Environment Variables INTRAY4 INTRAY5 INTRAY6 INTRAY1SIZE LETTER LEGAL MEXICANLEGAL INDIALEGAL EXECUTIVE ...
- Seite 614 General PJL Environment Variables ENVCHOU3 JENVCHOU4 JENVCHOU3 USERDEFINED USERDEF NOCASSETTE ROCK16K SIXTEENK195X270 SIXTEENK184X260 INTRAY2SIZE A4LETTER B5EXECUTIVE ENVELOPES LETTER LEGAL MEXICANLEGAL INDIALEGAL EXECUTIVE COM10 MONARCH JISB5 JIS B6 A4LONG POSTCARD ORGANIZERJ ORGANIZERK ORGANIZERL ORGANIZERM FOLIO P3X5 ENVYOU4 ENVCHOU3 APPENDIX A -COMPARISON LIST - 49...
- Seite 615 General PJL Environment Variables USERDEFINED NOCASSETTE ROCK16K SIXTEENK195X270 SIXTEENK184X260 INTRAY3SIZE LETTER LEGAL MEXICANLEGAL INDIALEGAL EXECUTIVE JISB5 JISB6 FOLIO NOCASSETTE ROCK16K SIXTEENK195X270 SIXTEENK184X260 INTRAY4SIZE LETTER LEGAL MEXICANLEGAL INDIALEGAL EXECUTIVE JISB5 JISB6 FOLIO ROCK16K SIXTEENK195X270 SIXTEENK184X260 APPENDIX A -COMPARISON LIST - 50...
- Seite 616 General PJL Environment Variables INTRAY5SIZE LETTER LEGAL MEXICANLEGAL INDIALEGAL EXECUTIVE JISB5 FOLIO ROCK16K SIXTEENK195X270 SIXTEENK184X260 INTRAY6SIZE LETTER LEGAL MEXICANLEGAL INDIALEGAL EXECUTIVE JISB5 FOLIO ROCK16K SIXTEENK195X270 SIXTEENK184X260 SOURCETRAY AUTO MPTRAY TRAY1 TRAY2 TRAY3 TRAY4 TRAY5 TRAYID1...
- Seite 617 General PJL Environment Variables TRAYID3 TRAYID4 XOFFSET -500 ~ 500 YOFFSET -500 ~ 500 ON, OFF DUPLEX LONGEDGE, SHORTEDGE BINDING FIRSTPRINT NORMAL, MIDDLE, HIGH DENSITY 1 ~ 15 -6 ~ 6 LANG ...
- Seite 618 General PJL Environment Variables CPLOCK ON, OFF PASSWORD 0 ~ 65535 ECONOMODE OFF, ON ECONOLEVEL MPTRAY CASSETTE, FIRST TIMEOUT 1 ~ 99 AUTOFF ON, OFF TIMEOUTFF 1 ~ 99 AUTOSLEEP ON, OFF ON, OFF TIMEOUTSLEEP 1 ~ 99 CDCCHIGH ON, OFF DTRCTRL...
- Seite 619 General PJL Environment Variables DOUBLESTRIKE ON, OFF ON, OFF COLLATE HOLD HOLDTYPE HOLDKEY TIMESETYEAR TIMESETMONTH TIMESETDAY TIMESETHOUR TIMESETMIN TIMESETSEC TIMESTYLE SUMMERTIME ZONESET TIMEZONE RENDERMODE APTMODE COLORADAPT STRINGCODESET APPENDIX A -COMPARISON LIST - 54...
- Seite 620 General PJL Environment Variables COPIES 1 ~ 999 PAPER LETTER LEGAL MEXICANLEGAL INDIALEGAL ...
- Seite 621 General PJL Environment Variables SIXTEENK195X270 SIXTEENK184X260 ORIENTATION PORTRAIT, LANDSCAPE 5 ~ 128 5 ~ 128 FORMLINES (onlyHL- 2150N/2170W) MANUALFEED ON, OFF LIGHT, MEDIUM, DARK, OFF LIGHT, MEDIUM, DARK, OFF AUTO, OFF, PAGEPROTECT AUTO, OFF, LETTER, LEGAL, A4 LETTER, LEGAL, 300, 600, 300, 600, 300, 600, 300, 600,...
- Seite 622 General PJL Environment Variables LOCKED, UNLOCKED INTRAY4 INTRAY5 LOCKED, UNLOCKED INTRAY6 INTRAY1SIZE LETTER LEGAL MEXICANLEGAL INDIALEGAL ...
- Seite 623 General PJL Environment Variables ENVCHOU3 JENVCHOU4 JENVCHOU3 USERDEFINED USERDEF NOCASSETTE ROCK16K SIXTEENK195X270 SIXTEENK184X260 INTRAY2SIZE A4LETTER B5EXECUTIVE ENVELOPES ...
- Seite 624 General PJL Environment Variables USERDEFINED NOCASSETTE ROCK16K SIXTEENK195X270 SIXTEENK184X260 INTRAY3SIZE LETTER LEGAL MEXICANLEGAL INDIALEGAL EXECUTIVE JISB5 JISB6 FOLIO NOCASSETTE ROCK16K SIXTEENK195X270 SIXTEENK184X260 INTRAY4SIZE LETTER LEGAL MEXICANLEGAL INDIALEGAL EXECUTIVE JISB5 JISB6...
- Seite 625 General PJL Environment Variables INTRAY5SIZE LETTER LEGAL MEXICANLEGAL INDIALEGAL EXECUTIVE JISB5 FOLIO ROCK16K SIXTEENK195X270 SIXTEENK184X260 INTRAY6SIZE LETTER LEGAL MEXICANLEGAL INDIALEGAL EXECUTIVE JISB5 FOLIO ROCK16K SIXTEENK195X270 SIXTEENK184X260 SOURCETRAY AUTO ...
- Seite 626 General PJL Environment Variables TRAYID3 TRAYID4 XOFFSET -500 ~ 500 -104 ~ 500 -500 ~ 500 YOFFSET -500 ~ 500 -50 ~ 500 -500 ~ 500 ON, OFF DUPLEX ON, OFF LONGEDG LONGEDGE, SHORTEDGE BINDING SHORTED FIRSTPRINT DENSITY -6 ~ 6...
- Seite 627 General PJL Environment Variables CPLOCK ON, OFF PASSWORD 0 ~ 65535 ECONOMODE OFF, ON ECONOLEVEL MPTRAY CASSETTE, FIRST CASSETTE, FIRST TIMEOUT 1 ~ 99 AUTOFF ON, OFF TIMEOUTFF 1 ~ 99 AUTOSLEEP ON, OFF TIMEOUTSLEEP 1 ~ 99 1~240 0~240 1~240 CDCCHIGH DTRCTRL...
- Seite 628 General PJL Environment Variables DOUBLESTRIKE ON, OFF ON, OFF COLLATE OFF, STORE HOLD HOLDTYPE HOLDKEY 0000~9999 0000~9999 TIMESETYEAR TIMESETMONTH TIMESETDAY TIMESETHOUR TIMESETMIN TIMESETSEC YMD, MDY, TIMESTYLE SUMMERTIME ZONESET TIMEZONE COLOR, GRAYSCALE, RENDERMODE AUTOCOLOR OFF, ON, ON4, B8, B8H APTMODE OFF, ON COLORADAPT HPROMAN8, HPROMAN8, ISO88592,...
- Seite 629 General PJL Environment Variables COPIES 1 ~ 999 PAPER LETTER LEGAL MEXICANLEGAL INDIALEGAL ...
- Seite 630 General PJL Environment Variables SIXTEENK195X270 SIXTEENK184X260 ORIENTATION PORTRAIT, LANDSCAPE 5 ~ 128 5 ~ 128 FORMLINES 5 ~ 128 MANUALFEED ON, OFF ON, OFF AUTO, OFF, PAGEPROTECT...
- Seite 631 General PJL Environment Variables LOCKED, LOCKED, INTRAY4 UNLOCKED UNLOCKED LOCKED, INTRAY5 UNLOCKED INTRAY6 INTRAY1SIZE LETTER LEGAL MEXICANLEGAL INDIALEGAL ...
- Seite 632 General PJL Environment Variables ENVCHOU3 JENVCHOU4 JENVCHOU3 USERDEFINED USERDEF NOCASSETTE ROCK16K SIXTEENK195X270 SIXTEENK184X260 INTRAY2SIZE A4LETTER B5EXECUTIVE ENVELOPES ...
- Seite 633 General PJL Environment Variables USERDEFINED NOCASSETTE ROCK16K SIXTEENK195X270 SIXTEENK184X260 INTRAY3SIZE LETTER ...
- Seite 634 General PJL Environment Variables INTRAY5SIZE LETTER LEGAL MEXICANLEGAL INDIALEGAL EXECUTIVE JISB5 FOLIO ROCK16K SIXTEENK195X270 SIXTEENK184X260 INTRAY6SIZE LETTER LEGAL MEXICANLEGAL INDIALEGAL EXECUTIVE JISB5 FOLIO ROCK16K SIXTEENK195X270 SIXTEENK184X260 SOURCETRAY ...
- Seite 635 General PJL Environment Variables TRAYID3 TRAYID4 -500 ~ 500- XOFFSET -500 ~ 500 -500 ~ 500 50 ~ 500 YOFFSET -500 ~ 500 -50 ~ 500 -500 ~ 500 ON, OFF (only ON, OFF ON, OFF ON, OFF DUPLEX ON, OFF ON, OFF (only HL- 4150CDN/4570...
- Seite 636 General PJL Environment Variables CPLOCK ON, OFF ON, OFF ON, OFF PASSWORD 0 ~ 65535 0 ~ 65535 0 ~ 65535 ECONOMODE OFF, ON ECONOLEVEL CASSETTE, CASSETTE, MPTRAY CASSETTE, FIRST FIRST FIRST TIMEOUT 1 ~ 99 AUTOFF ON, OFF ON, OFF ON, OFF TIMEOUTFF 1 ~ 99...
- Seite 637 General PJL Environment Variables DOUBLESTRIKE ON, OFF COLLATE OFF, STORE OFF, STORE OFF, PROOF , STORE OFF, PROOF , STORE HOLD Only HL- 5380DN PUBLIC, PUBLIC, PRIVATE PUBLIC, PRIVATE HOLDTYPE PRIVATE,P ERSONAL 0000~9999 HOLDKEY 0000~9999 0000~9999 Only HL- 5380DN TIMESETYEAR TIMESETMONTH TIMESETDAY TIMESETHOUR...
- Seite 638 General PJL Environment Variables COPIES 1 ~ 999 PAPER LETTER LEGAL MEXICANLEGAL INDIALEGAL ...
- Seite 639 General PJL Environment Variables SIXTEENK195X270 SIXTEENK184X260 ORIENTATION PORTRAIT, LANDSCAPE 5 ~ 128 FORMLINES 5 ~ 128 5 ~ 128 MANUALFEED ON, OFF PAGEPROTECT 300, 600 RESOLUTION 300,600,HQ1200,TR1200 PERSONALITY...
- Seite 640 L5000D/5580D/5585D/ 5595DN/L5102DW/ L5100DN(T)/5590DN/ L5200DW(T)/L5202DW/ L6200DW(T)/L6202DW/ L6250DN/L6250DW/ L6300DW(T)/L6400DW(T L6402DW HL-1212W/1210W/ 1210WR/1212WR/ 1210WE/1211W/1218W/ DCP-1610W/1610WR/ 1610WE/1617NW/ 1612W/1612WR/1615NW / 1616NW/1618W/ MFC- 1910W/1912WR/1910WE 1911W/1911NW/1915W/1 916NW/1919NW HL-1200/1201/1202/1208 L2360DN/L2361DN/2560 DN/L2360DW/ L2365DW/L2366DW/256 L2305W/L2340D L2300/L2300D/L2320D/L 2321D/2260/2260D W/ HL-L9300CDW(T) L8250CDN/L8350CDW(T) /L9200CDW(T)
- Seite 641 General PJL Environment Variables ENVCHOU3 JENVCHOU4 JENVCHOU3 USERDEFINED USERDEF NOCASSETTE ROCK16K SIXTEENK195X270 SIXTEENK184X260 INTRAY2SIZE A4LETTER B5EXECUTIVE ENVELOPES LETTER ...
- Seite 642 General PJL Environment Variables USERDEFINED NOCASSETTE ROCK16K SIXTEENK195X270 SIXTEENK184X260 INTRAY3SIZE ...
- Seite 643 L5000D/5580D/5585D/ 5595DN/L5102DW/ L5100DN(T)/5590DN/ L5200DW(T)/L5202DW/ L6200DW(T)/L6202DW/ L6250DN/L6250DW/ L6300DW(T)/L6400DW(T L6402DW HL-1212W/1210W/ 1210WR/1212WR/ 1210WE/1211W/1218W/ DCP-1610W/1610WR/ 1610WE/1617NW/ 1612W/1612WR/1615NW / 1616NW/1618W/ MFC- 1910W/1912WR/1910WE 1911W/1911NW/1915W/1 916NW/1919NW HL-1200/1201/1202/1208 L2360DN/L2361DN/2560 DN/L2360DW/ L2365DW/L2366DW/256 L2305W/L2340D L2300/L2300D/L2320D/L 2321D/2260/2260D W/ HL-L9300CDW(T) L8250CDN/L8350CDW(T) /L9200CDW(T)
- Seite 644 General PJL Environment Variables TRAYID3 TRAYID4 XOFFSET -500 ~ 500 YOFFSET -500 ~ 500 ON, OFF DUPLEX ON,OFF LONGEDGE, LONGEDGE, BINDING SHORTEDGE SHORTEDGE FIRSTPRINT DENSITY -6 ~ 6 LANG ENGLISH ...
- Seite 645 General PJL Environment Variables CPLOCK ON, OFF ON, OFF ON, OFF ON, OFF PASSWORD 0 ~ 65535 0 ~ 65535 0 ~ 65535 0 ~ 65535 ECONOMODE OFF, ON ECONOLEVEL MPTRAY CASSETTE, FIRST CASSETTE, FIRST TIMEOUT 1 ~ 99 1 ~ 99 1 ~ 99 AUTOFF ON, OFF...
- Seite 646 General PJL Environment Variables DOUBLESTRIKE COLLATE ON, OFF OFF, PROOF , STORE HOLD PUBLIC, PRIVATE HOLDTYPE HOLDKEY 0000~9999 TIMESETYEAR TIMESETMONTH TIMESETDAY TIMESETHOUR TIMESETMIN TIMESETSEC TIMESTYLE SUMMERTIME ZONESET TIMEZONE COLOR, GRAYSCALE RENDERMODE OFF, ON, ON4, B8, B8H APTMODE OFF, ON COLORADAPT HPROMAN8 HPROMAN8 ISO88592...
- Seite 647 PCL Specific Variables PCL Specific Variables FONTSOURCE I, S I, C, C1, S I, S I, C, S I, C1, C2, S I, S I, C, S FONTNUMBER 0,1,2, ... n 0 - 0x7FFFFFF 0,1,2, ... n PITCH 0.44, 0.45 ~ 99.99 0.44 ~ 99.99 PTSIZE 4.00, 4.25 ~ 999.75...
- Seite 648 PCL Specific Variables FONTSOURCE I, C, S I,C1,S I, C1, S I, S I,C1,S FONTNUMBER 0 - 0x7FFFFFF 0- 0x47 0 ~ 0x7FFFFFF 0 ~ 0x7FFFFFF 0 ~ 0x7FFFFFF PITCH 0.44 ~ 99.99 0.44 ~ 99.99 0.44 ~ 99.99 0.44 ~ 99.99 PTSIZE 4.00 ~ 999.75 4.00 ~ 999.75...
- Seite 649 PCL Specific Variables FONTSOURCE FONTNUMBER 0 ~ 0x7FFFFFF PITCH 0.44 ~ 99.99 PTSIZE 4.00 ~ 999.75 LEFTMARGIN 0 ~ 126columns RIGHTMARGIN 10 ~ 136 columns 0, 0.33, 0.5, 1.0, 1.5, TOPMARGIN 2.0 inch 0, 0.33, 0.5, 1.0, 1.5, BOTMARGIN 2.0 inch FORMLINES 5 ~ 128 AUTOLF...
- Seite 650 hL-1110/HL-1111/HL-1112/HL-1118/HL- 1200/HL-1201/HL-1202/HL-1208 HL-3170CDW HL-3140CW/3150CDW/3150CDN HL-S7000DN HL-5440D/ 5450DN/5470DW/6180DW 3070CW/3075CW/4140CN/4150CDN/457 0CDW HL-5340D/5350DN/5370DW/5380DN HL-4050CDN /4070CDW HL-7050/6050/ 6050D/6050DN/ 8050N/5240/5250DN/5270DN/5280DW HL-2460 HL-3260 HL-1650/1670N/ 1850/1870N/ 5050/5070N/ 5150D/5170DN HL-1660e/ 2060/ 2400C/Ce/ 3400CN/ 2600CN/ 3450CN/ 2700CN HL-1270N/ 1470N HL-1070 HL-1050/ 1250/1450/ P2500...
- Seite 651 HL-L5000D/5580D/5585D/5595DN/ L5102DW/L5100DN(T)/5590DN/ L5200DW(T)/L5202DW/L6200DW(T)/ L6202DW/L6250DN/L6250DW/ L6300DW(T)/L6400DW(T)/L6402DW HL-1212W, 1210W, 1210WR, 1212WR, 1210WE, 1211W, 1218W L2300/L2300D/L2320D/L2321D/2260/2260D/ L2305W/L2340DW/L2360DN/L2361DN/2560 DN/L2360DW/L2365DW/L2366DW/2569DW L8250CDN/L8350CDW(T)/L9200CDW(T) /L9300CDW(T)
- Seite 652 EPSON Specific Variables EPSON Specific Variables ORIENTATION PORTRAIT,LANDSCAPE LEFTMARGIN 0 ~ 145 0 ~ 126 columns 0 ~ 145 columns 0 ~ 126 columns 10 ~ 155 10 ~ 136 10 ~ 155 10 ~ 136 columns RIGHTMARGIN columns columns columns 0, 0.33, 0.5, 1.0, 0, 0.33, 0.5, 1.0, 1.5, 2.0 inch...
- Seite 653 EPSON Specific Variables PORTRAIT,LANDSC ORIENTATION LEFTMARGIN 0 ~ 126 columns RIGHTMARGIN 10 ~ 136 columns 0, 0.33, 0.5, 1.0, 1.5, TOPMARGIN 2.0 inch 0, 0.33, 0.5, 1.0, 1.5, BOTMARGIN 2.0 inch FORMLINES 5 ~ 128 FONTNUMBER 0-0x7FFFFFFF PITCH 0.44, 0.45 ~ 99.99 PTSIZE 4.00, 4.25 ~ 999.75 USASCII,GERMAN,U...
- Seite 654 IBM Specific Variables IBM Specific Variables PORTRAIT, PORTRAIT,LANDSCAP ORIENTATION PORTRAIT, LANDSCAPE LANDSCAP 0 ~ 145 0 ~ 126 0 ~ 145 0 ~ 126 columns LEFTMARGIN 0 ~ 126 columns columns columns columns 10 ~ 155 10 ~ 136 10 ~ 155 RIGHTMARGIN 10 ~ 136 columns 10 ~ 136 columns...
- Seite 655 APPENDIX B FLASH/PCMCIA CARD COMMANDS <For HL-1270N/1470N/1660e/2060/2400C/2400Ce/3400CN/ 1650/1670N/2460/3260N/7050/1850/1870N/5070N/5170DN/ 2600CN/3450CN/6050/6050D/6050DN/8050N/2700CN/5270DN/5280DW/ 5380DN/6180DW/5470DW/5450DN/5440D/S7000DN Only> APPENDIX B - FLASH/PCMCIA CARD COMMANDS - 1...
- Seite 656 ONTENTS INTRODUCTION ......................3 HOW TO READ THE CARD COMMANDS SPECIFICATION........4 Commands .......................... 4 Available Devices ........................ 4 Description .......................... 4 Error ............................ 4 COMMANDS ........................ 5 Select Storage Device Command ..................5 (For HL-2060/2400C/2400Ce/3400CN/2460/3260N/7050/2600CN/3450CN/6050/6050D/ 6050DN Only) ..........................5 Format Command .......................
- Seite 657 INTRODUCTION The Flash/Card Commands described in this chapter are applicable to the HL-1270N/1470N/1660e/2060/ 2400C/2400Ce/3400CN/1650/1670N/2460/3260N/7050/1850/1870N/5070N/5170DN/2600CN/3450CN/ 6050/6050D/6050DN/8050N/2700CN/5270DN/5280DW/5380DN/6180DW/5470DW/5450DN/5440D/S7000D N printers only. The following types of devices can be used for the printers; 1) Flash memory card (HL-1660e/2060/2400C/2400Ce/3400CN/2600CN/3450CN) 2) ATA flash memory card (HL-1660e/1060/2400C/2400Ce/3400CN/2460/3260N/7050/ 2600CN/3450CN/6050/6050D/6050DN/8050N/2700CN) 3) Internal flash memory (HL-1270N/1470N/1650/1670N/1850/1870N/5070N/5170DN/6050/6050D/ 6050DN/5270DN/5280DW/5380DN/6180DW/5470DW/5450DN/5440D/S7000DN)
-
Seite 658: How To Read The Card Commands Specification
HOW TO READ THE CARD COMMANDS SPECIFICATION Each command is described in the following four sections of this manual. Commands Command data sequences and syntax. ESC or CR stands for 0x1b or 0x0d as follows; ESC ----0x1b CR ---- 0x0d Available Devices The supported memory card devices which can be used for each command are represented in this manual using the abbreviations as follows. -
Seite 659: Select Storage Device Command
COMMANDS Select Storage Device Command (For HL-2060/2400C/2400Ce/3400CN/2460/3260N/7050/2600CN/3450CN/ 6050/6050D/6050DN Only) Command ESC CR ! 12358F Slot No ** Slot No = 1 Slot No = 2 (Slot No. 2 is not used for the HL-2460/3260N.) Slot No = 3 (Internal HDD) Default = 1 For HL-6050/6050D/6050DN ** Slot No = 1 (ATA flash memory Card.) - Seite 660 Format Command 3.2.1 Physical format Command ESC CR ! 12340F Available Devices F, A, H, I Description This command executes a physical format for the storage device. This will delete all existing data on the device. When two devices are installed into the printer, the command formats the device specified by the select storage device command.
- Seite 661 Save Data Command 3.3.1 Save specified type Command ESC CR ! 12345F type(4byte) size(4byte) data... ** type = MCRO, DATA Available Devices F, A, H Description This command saves data of the specified type with the data ID which is set with the ESC & f # Y (Macro ID Configuration) command.
-
Seite 662: Save Data Command
Data 3.4.1 Save data Command ESC CR ! 12347F ID(2byte) size(4byte) data... Available Devices F, A, H Description This command saves data which is sent from the PC with the specified ID onto the device. If there is insufficient memory in the printer to store the data, a memory full error occurs. When the printer supports two or more storage devices, the command saves the data onto the device specified by the select storage device command. -
Seite 663: Save Primary Font
Font 3.5.1 Save primary font Command ESC CR ! 12343F Available Devices F, A, H, I Description This command saves the primary font which is currently selected into the device. The primary font can also be saved by control panel operation. The ID specified with the ESC * c # D (Font ID ) command is used for registration. -
Seite 664: Delete All Download Fonts
3.5.3 Delete all download fonts Command ESC * c 1028F Available Devices F, A, H, I Description This command deletes all the download fonts which are saved in the device. When two devices are installed into the printer, the command deletes the download fonts in the device specified by the select storage device command. -
Seite 665: Save Download Font With Specified Id
3.5.5 Save download font with specified ID Command ESC * c 1029F Available Devices F, A, H, I Description This command saves the font with the ID which is specified with the ESC * C # D (Font ID) command. When two devices are installed into the printer, the command saves the download fonts in the device specified by the select storage device command. -
Seite 666: Delete All Macros
Macro 3.6.1 Delete all macros Command ESC & f 1030X Available Devices F, A, H, I Description This command deletes all the macros which are saved in the device. When two devices are installed into the printer, the command deletes all the macros in the device specified by the select storage device command. -
Seite 667: Save Macro With Specified Id
3.6.3 Save macro with specified ID Command ESC & f 1038X Available Devices F, A, H, I Description This command saves a macro with the ID which is specified with the ESC & f # Y (Macro ID Configuration) command on the device. When two devices are installed into the printer, the command saves the macros on the device specified by the select storage device command. - Seite 668 3.6.5 Save image (Printing location not fixed) Command ESC CR ! 12350F Available Device Description After transferring the last print data into the image data area, this command saves the data with the ID which is specified with the ESC & f # Y (Macro ID Configuration) command as a PCL command on the device. The printing location for the saved data is not fixed on the page.
-
Seite 669: Copy Card (For Hl-1660E/2060/2400C/2400Ce/3400Cn/2460/3260N/7050/2600Cn/ 3450Cn Only)
Copy Card (For HL-1660e/2060/2400C/2400Ce/3400CN/2460/3260N/7050 /2600CN/3450CN Only) Command ESC CR ! 12357F Available Devices F, A Description 1) Flash memory card After executing a logical format on the transfer device, this command copies to the transfer device only when the two devices have the same memory size. It is essential that the transfer device has already been formatted. The specify device command allows you to specify the source device. -
Seite 670: Use Card Commands From Pcl
USE CARD COMMANDS FROM PCL Execute Macros Command ESC & l 2 X Execute Macro ESC & l 3 X Call Macro ESC & l 4 X Macro Overlay Available Devices F, A, H, I Description The macros saved in the device can be executed from the PCL command language as well as saving macros in the printer memory. -
Seite 671: Use Download Fonts
Use Download Fonts Command ESC ( # X Designates soft font # as Primary ESC ) # X Designates soft font # as Secondary ** # = font ID number Available Devices F, A, H, I Description The download fonts saved in the device can be selected from the PCL command language as well as saving download fonts in printer memory. -
Seite 672: Use Card Commands From Postscript
USE CARD COMMANDS FROM POSTSCRIPT The PostScript emulation recognizes the storage device as a hard disk (except a Flash memory card) and the PostScript file operation allows you to read/write data on these devices. (i.e.) Create the file named "test" and write the data, "This is a data string" onto the device which is inserted into Slot /fl (%disk0%test)(w)file def fl (This is a data string) write fl closefile... - Seite 673 APPENDIX C HBP MODE COMMANDS <For HL-820/1020/1040 Only> APPENDIX C HBP MODE COMMANDS - 1...
- Seite 674 ONTENTS DESCRIPTIONS ........................3 COMMAND TO ENTER HBP MODE ................... 4 HBP COMMANDS ........................ 5 Command List ..........................5 Commands (Detailed Explanation) ....................6 3.2.1 Resolution setting commands ....................... 6 3.2.2 Economy mode setting commands ...................... 6 3.2.3 Sleep mode setting commands ......................7 3.2.4 Mode setting commands ........................
- Seite 675 DESCRIPTIONS The HBP mode commands can be used for the HL-820/1020/1040 printers only. The following commands and syntax are used in these specifications. Description: meaning or code <Esc>: 0 x 1b <Space>: 0 x 20 <LF>: 0 x 0a 1byte of data sign for combining data ( This is not a control code.) (••••)B: character string enclosed in parentheses means 1 data byte described in binary format...
-
Seite 676: Command To Enter Hbp Mode
COMMAND TO ENTER HBP MODE Command <ESC>%-12345X@PJL<LF> @PJL<Space>ENTER<Space>LANGUAGE<Space>=<Space>HBP<LF> Function The printer enters the HBP mode when this command is received. Explanation The printer can receive this command when it is in the idle condition (during HP emulation, IBM emulation, Epson emulation and Auto emulation for HL-1040). The printer reports an error if it receives this command when it is already in HBP mode. -
Seite 677: Hbp Commands
HBP COMMANDS An HBP command is composed of '@' + an Uppercase Alphabetic character + parameters (not necessary for some commands). Command List <Character string> <Functions> Reserved Reserved Not used Speed setting for Centronics I/F Economy mode setting Form feed Data input Not used Information request... -
Seite 678: Commands (Detailed Explanation)
Commands (Detailed Explanation) 3.2.1 Resolution setting commands Command @L + * Function This command sets the printer resolution. Command Resolution @ L+ (00000000)B 600dpi (Default) @ L+ (00000101)B 300dpi @ L+ (00001010)B 150dpi Explanation The resolution is set when the printer receives this command. This command is applied from the next page printed after the FormFeed command after this command is sent (i.e. -
Seite 679: Sleep Mode Setting Commands
3.2.3 Sleep mode setting commands Command @T+ * Function This command sets the sleep time in minutes. Explanation This command is valid immediately after the printer receives the command. The command is valid until one of the following occurs. (1) The printer receives the Exit command. (2) The printer receives a new sleep time setting command. -
Seite 680: Mode Setting Commands
3.2.4 Mode setting commands Command @M+* Function This command allows various error mode operations to be set. 1 byte, used as 8 bits, that follows the @M command select the settings for each mode. Bit0:0 = The printer clears the input buffer when a Paper Jam error or Undefined Code error occurs. The printer does not recover automatically from a Print Overrun error. -
Seite 681: Engine Related Setting Commands
3.2.5 Engine related setting commands Command @J+* Function This command allows the setting of engine related commands. Each setting depends on the value of the 3 byte command string. @J+CHR$ (0) +CHR$ (n): Sets Media Type This command allows the printer to change the temperature control for the fuser unit when printing. n=0: Regular (Default) n=1:... -
Seite 682: Graphic Data Input Commands
3.2.7 Graphic data input commands Command @G+[data length(3bytes)]+data Function The 3 bytes of data following the @G command shows the length of the data, N. The N bytes following this 3 byte header is handled as graphic data. (Example) fprintf(fp,"@G%c%c%c", (char)((data_length>>16)&0xff), (char)((data_length>>8)&0xff), (char)((data_length>>0)&0xff) );... -
Seite 683: Graphic Data Format
Graphic Data Format The data format, which follows the @G+ [number of data bytes (3 bytes)] command, is as shown below. the number of command byte 1 modified data 1 command byte 2 modified data 2 command bytes for raster 1 the number of command byte 1 modified data 1... - Seite 684 The 5th byte data onward is replaced by the twelve data bytes AAh. 11101010b,02h,Aah When the replacement position and the amount of replacement data are overflow, the next data byte becomes an Expansion Offset Byte. However, if the number is FFh, 00h is added. The number of command bytes = 300, FFh+2Dh The number of command bytes = 510, FFh+FFh+00h If there are more than two command bytes for 1 raster, the replacement position for the second command...
-
Seite 685: Recommended Command String
RECOMMENDED COMMAND STRING The command strings below shows the recommended command stream for two pages of a print job. <Esc>%-12345X@PJL<LF> used for HL-820/1020/1040 @PJL DEFAULT AUTOSLEEP=0<LF> used for HL-820/1020/1040 @PJL DEFAULT TIMEOUTSLEEP= 15<LF> used for HL-820/1020/1040 <Esc>%-12345X@PJL<LF> @PJL ENTER LANGUAGE = HBP<LF> Enter into HBP mode @L<00H>... - Seite 686 APPENDIX D REFERENCE LIST OF MX-2000/4000/5000/ 7000 SERIES UNIQUE COMMANDS APPENDIX D REFERENCE LIST OF MX-2000/4000/5000/7000 SERIES UNIQUE COMMANDS - 1...
- Seite 687 ONTENTS 1. INTRODUCTION ....................3 2. GENERAL SPECIFICATION ................4 3. COMMAND REFERENCE LIST ................5 3.1. Commands Descriptions ................... 5 3.1.1. PJL output tray & mode setting ..................5 3.1.2. PJL mailbox protection & bin number setting ..............6 3.1.3.
-
Seite 688: Introduction
INTRODUCTION This manual covers the general specifications and the command reference list of the MX-2000 series (MX-2001 / MX-2002 / MX-2003), MX-4000 series (MX-4000 / MX-4100 / MX-4200 / MX-4300), MX-5000 and MX- 7000 series (MX-7000 / MX-7005 / MX-7010 ) Mailbox units. The MX-2000 series Mailbox units are optionally installed onto the HL-2060 printer, the MX-4000 is optionally installed onto the HL-L6300/L6400 series printer, the MX-4100 / MX-4200 / MX-4300 is optionally installed onto the HL-2460 printer, MX-5000 series are optionally installed onto the HL-3260N printer, and MX-7000 series are optionally installed onto the... -
Seite 689: General Specification
GENERAL SPECIFICATION The Mailbox unit is an option for the HL-2060, HL-2460, HL-3260 or HL-7050 printer and the MX-2000/4000/ 7000 series composed of three types of units. The MX-2001/4100/7000 Lower Mailbox unit consists of five bins. The MX-2002/4200/7005 Upper Mailbox unit is additionally installed onto the MX-2001/4100 and also consists of five bins. -
Seite 690: Command Reference List
COMMAND REFERENCE LIST This section describes the specific commands as listed below used to support the functions of the Mailbox unit. 1) PJL output tray & mode setting 2) PJL mailbox protection & bin number setting 3) PJL avoidance of output bin full 4) PCL output tray setting 5) PS output tray &... -
Seite 691: Pjl Mailbox Protection & Bin Number Setting
3.1.2. PJL mailbox protection & bin number setting Format @PJL SET/DEFAULT MAILBOXPROTECT=TrayNumber Parameter TrayNumber <HL-2060/2460/7050> Lower unit: #1 to 5 from bottom to top Lower unit + Upper unit: #1 to 10 from bottom to top <HL-3260> #1 to 4 from bottom to top Default = 0 <HL-L6300/L6400>... -
Seite 692: Pcl Output Tray Setting
3.1.4. PCL output tray setting Command Esc&l#G (27)(38)(108)#(71) <1Bh><38h><6ch>#<47h> Parameter # denotes the output tray. Select the printer face-down output tray. Select #1 bin of the Mailbox unit. Select #2 bin of the Mailbox unit. Select #3 bin of the Mailbox unit. ... - Seite 693 Default = 0 <HL-L6300/L6400> Select the printer face-down output tray. Select automatic output tray Select the stacker function. Select the sorter function. 4~10: Select the printer face-down output tray. Select #1 bin of the Mailbox unit. ...
-
Seite 694: Ps Mailbox Protection & Bin Number Setting
3.1.6. PS mailbox protection & bin number setting Command <HL-2060> # setoutputprotect <HL-2460/3260/7050> <</BROutbinProtect #>> setpagedevice Parameter <HL-2060/2460/7050> Lower unit: #1 to 5 from bottom to top Lower unit + Upper unit: #1 to 10 from bottom to top <HL-3260>... - Seite 695 APPENDIX E REFERENCE LIST OF FS-5050 UNIQUE COMMANDS APPENDIX E REFERENCE LIST OF FS-5050 SERIES UNIQUE COMMANDS - 1...
- Seite 696 ONTENTS 1. INTRODUCTION ....................3 2. GENERAL SPECIFICATION ................3 3. COMMAND REFERENCE LIST ................3 3.1. Commands Descriptions ................... 4 3.1.1. PJL output tray ........................ 4 3.1.2. PCL output tray ....................... 4 3.1.3. PS output tray Command ....................4 3.1.4.
-
Seite 697: Introduction
INTRODUCTION This manual covers the general specifications and the command reference list of the FS-5050 Finisher/Stapler units, which are optionally installed onto the HL-3260 printer. GENERAL SPECIFICATION The Finisher/Stapler unit is an option for the HL-3260 printer. Function Description Finisher/ Printed pages can be sorted or stapled. -
Seite 698: Ps Output Tray Command
3.1. Commands Descriptions 3.1.1. PJL output tray Format @PJL SET/DEFAULT OUTBIN= TrayName Parameter TrayName* Select the tray of the Finisher/Stapler unit FINISHER: Default = ALLSTACKER Explanation This command selects the Finisher/Stapler unit. This command is ignored when the Finisher/Stapler unit is not available. ... -
Seite 699: Pjl Staple On/Off
3.1.4. PJL staple on/off Format @PJL SET/DEFAULT STAPLE= StapleName Parameter StapleName* Select the upper left of the Finisher/Stapler unit UPPER LEFT: UPPER RIGHT: Select the upper right of the Finisher/Stapler unit LOWER LEFT: Select the lower left of the Finisher/Stapler unit ... -
Seite 700: Pjl Job Offset On/Off
3.1.6. PJL job offset on/off Format @PJL SET/DEFAULT JOBOFFSET=ON/OFF Parameter Paper is ejected offset by each job. OFF: Paper is ejected together. Default = ON Explanation This command selects the job offset. This command is ignored when the Finisher/Stapler unit is not available. ... - Seite 702 Brother Industries, Ltd., 15-1, Naeshiro-cho, Mizuho-ku, Nagoya 467-8561, Japan Producent: Brother Industries, Ltd. , 15-1, Naeshiro-cho, Mizuho-ku, Nagoya 467-8561, Japonia Oświadczamy na własną odpowiedzialność, że podane urządzenie spełnia postanowienia i istotne wymogi dyrektyw Wir erklären in alleiniger Verantwortung, dass das aufgeführte Gerät allen Bestimmungen und notwendigen Anforderungen der auf Seite 1 dieses Dokuments aufgeführten Richtlinien genügt.