
Verwandte Anleitungen für HomeMatic HM-WDS100-C6-O


Inhaltszusammenfassung für HomeMatic HM-WDS100-C6-O
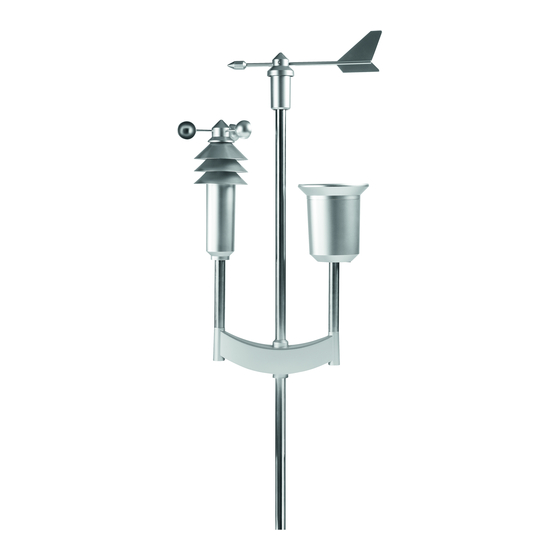
- Seite 1 Montage- und Bedienungsanleitung (S. 2) Mounting instruction and operating manual (p. 12) Funk-Kombisensor (OC3): Radio-controlled weather data sensor (OC3): HM-WDS100-C6-O...
- Seite 2 3. Ausgabe Deutsch November 2008 Dokumentation © 2007 eQ-3 Ltd., Hong Kong Alle Rechte vorbehalten. Ohne schriftliche Zustimmung des Herausgebers darf dieses Handbuch auch nicht auszugsweise in irgendeiner Form reproduziert werden oder unter Verwendung elektronischer, mechanischer oder chemischer Verfahren vervielfältigt oder verarbeitet werden. Es ist möglich, dass das vorliegende Handbuch noch drucktechnische Mängel oder Druckfehler aufweist.
-
Seite 3: Inhaltsverzeichnis
Funktion ............4 Allgemeine Systeminformation zu HomeMatic......5 Allgemeine Hinweise zum Funkbetrieb . -
Seite 4: Hinweise Zu Dieser Anleitung
Hinweise zu dieser Anleitung Lesen Sie diese Anleitung sorgfältig, bevor Sie ihre HomeMatic Komponenten in Betrieb nehmen. Bewahren Sie die Anleitung zum späteren Nachschlagen auf! Wenn Sie das Gerät anderen Personen zur Nutzung überlassen, übergeben Sie auch diese Bedienungsanleitung. Benutzte Symbole: Achtung! Hier wird auf eine Gefahr hingewiesen. -
Seite 5: Allgemeine Systeminformation Zu Homematic
Garantie- und Haftungsausschluß. Dies gilt auch für Umbauten und Veränderungen. Allgemeine Systeminformationen zu HomeMatic Dieses Gerät ist Teil des HomeMatic Haussteuersystems und arbeitet mit dem bidirektionalen BidCoS® Funkprotokoll. Alle Geräte werden mit einer Standardkonfi- guration ausgeliefert. Darüber hinaus ist die Funktion des Gerätes über ein Program- miergerät und Software konfigurierbar. -
Seite 6: Inbetriebnahme
• Kein Empfang - Sender wird von Störquelle überlagert (Funkgerät, Funkkopfhörer/-lautsprecher) Störquelle beseitigen oder andere Position für Sender und Empfänger suchen. Oft sind Störungen nur zeitlich begrenzt vorhanden (Funksprechverkehr) bzw. können sehr einfach be sei tigt werden. Werden in Ihrem Haus oder in der Nachbarschaft z. - Seite 7 3. Sockel in das Rohr stecken und so drehen, 4. Stecker in die Buchse dass er mit den beiden Schrauben in den der Windfahne stecken dafür vorgesehenen Bohrungen im Rohr arretiert werden kann 5. Fußabdeckung bis zum Anschlag hochschieben und durch Rechts- drehen arretieren • Montieren Sie die Windfahne wie folgend beschrieben: • Setzen Sie die Rohre des Steckmastes zusammen. Der Sensorträger wird...
- Seite 8 • Bei der ersten Inbetriebnahme ist die Spitze der Windfahne nach Norden auszurichten, um ein Einnorden des Sensors vorzunehmen. Arretieren Sie dazu ggf. die Windfahne in dieser Stellung mit einem Stück Klebeband am Gehäuse. • Öffnen Sie das Gehäuse des Sensors durch Linksdrehen und Herunterzie- hen des Gehäuses (siehe Bild nächste Seite). • Drücken Sie mit einem spitzen Gegenstand den Taster oberhalb des Bat- teriefachs und legen Sie drei Mignon-Batterien entsprechend der Markie- rung im Batteriefach polrichtig in das Batteriefach ein.
-
Seite 9: Wartung, Pflege, Abgleich
Wartung, Pflege, Abgleich Der Kombisensor ist von Zeit zu Zeit von anhaftendem Schmutz zu reinigen. Dabei ist die Leichtgängigkeit der Windsensoren sowie der feste Sitz der Sensoren auf dem Träger zu überprüfen. Regenmengensensor reinigen • Je nach Standort gelangen Blätter, mit dem Wind getragene Schmutzparti- kel, Sand, Äste u.a. in den Auffangtrichter des Regenmengensensors. Grö- ßere Teile können dabei den Durchfluss verstopfen. -
Seite 10: Regensensor Abgleichen
• Nun wird der Regenfall-Sensor nach oben abgenommen, zur Kabelseite geklappt und es kann die Zählwippe herausgenommen werden. • Reinigen Sie Auffangtrichter, Kontakte, Zählwippe und das Ablaufloch im Gehäuse unten von Rückständen. • Setzen Sie die Zählwippe wieder in ihre Halterung ein. Dabei muss sich der Magnet der Zählwippe auf der Seite befinden, die zum Kabel zeigt. • Setzen Sie den Regenfall-Sensor in seine Halterung ein. Er hält automatisch auch die Zählwippe fest. Kabel des Regenfall-Sensors und Magnet der Zähl- wippe müssen sich auf der gleichen Seite befinden. -
Seite 11: Batteriewechsel
Batteriewechsel Die Batterien im WDS100-C6-O haben eine Lebensdauer von bis zu 2 Jahren (Alka- line-Batterien). Falls der Sensor im Datenabfragemodus betrieben wird, erreichen die Batterien eine Lebensdauer von ca. 1 Jahr. Die Batterien sind zu wechseln, wenn an der entsprechenden Empfangsstation bei Anwahl des Kombisensors ein Batterie- Leer-Symbol ( ) erscheint. - Seite 12 1st English edition 11/2008 Documentation © 2008 eQ-3 Ltd. Hong Kong All rights reserved. No parts of this manual may be reproduced or processed in any form using electronic, mechanical or chemical processes in part or in full without the prior explicit written permission of the publisher.
- Seite 13 Function ............14 General information about HomeMatic......15 General information about radio operation.
-
Seite 14: Information Concerning These Instructions
Information concerning these instructions Read these instructions carefully before beginning operation with your HomeMatic components. Keep the instructions handy for later consultation! Please hand-over the operating manual as well when you hand-over the device to other persons for use. Symbols used: Attention! This indicates a hazard. -
Seite 15: General Information About Homematic
This also applies to any conversion or modification work. General information about HomeMatic This device is part of the HomeMatic home control system and works with the bi- directional BidCoS® wireless protocol. All devices are delivered in a standard confi- guration. -
Seite 16: Start-Up
Eliminate the source of interference or find another position for the transmitter or the receiver. Often the interference is only present on a temporary basis (radio telephony) or can be eliminated very easily. If radio headphones, wireless baby monitors or other similar devices are operated at 868 MHz in your home or in the neigh- bourhood, for example, they are usually only switched on for a limited period of time. - Seite 17 3. Insert the base into the pipe and turn it until 4. Push the plug into the both screws can be locked into place in the weathervane’s socket. holes provided on the pipe. 5. Push the foot cover up as far as it will go and lock it in place by turning it clockwise.
- Seite 18 orientated. If you need to, you can fix the weathervane in this position using a piece of double-sided adhesive tape on the housing. • Open the sensor housing by turning it anticlockwise and pulling it down (see image on the next page). • Use a pointed object to press the button above the battery compartment, and insert three Mignon batteries into it, observing the correct polarity (as indicated by the markings).
-
Seite 19: Maintenance, Care And Adjustment
Maintenance, care and adjustment The combination sensor will need to be cleaned from time to time to remove the dirt that will accumulate on it. When you do this, you should also check that the wind sensors can move easily and that the sensors are properly seated on their supports. Cleaning the rain sensor • Depending on the location, leaves, dirt particles transported by the wind, sand, branches, etc., may get into the rain sensor’s collecting funnel. -
Seite 20: Adjusting The Rain Sensor
• The rain sensor can now be detached from above and moved to the side with the cable, and the counter rocker can be removed. • Clean the collecting funnel, contacts, counter rocker and drain hole in the bottom of the housing to remove any residues. • Place the counter rocker back in its holder. In doing so, the counter rocker magnet must be at the side facing the cable. • Place the rain sensor in its holder. It will automatically take hold of the coun- ter rocker. The rain sensor cable and counter rocker magnet must be at the same side. -
Seite 21: Battery Replacement
Battery replacement The batteries in the WDS100-C6-O (alkaline batteries) have a service life of up to 2 years. If the sensor is operated in data retrieval mode, the batteries can achieve a service life of up to approximately 1 year. If the symbol indicating that a battery is empty ( ) appears on the reception station when the combination sensor is selected, the batteries need to be replaced. - Seite 24 eQ-3 AG Maiburger Straße 29 D-26789 Leer www.eQ-3.com...