Kapitel
Inhaltsverzeichnis

Verwandte Anleitungen für Reely 1577674


Inhaltszusammenfassung für Reely 1577674
- Seite 1 Bedienungsanleitung Elektro-Quadrocopter „Folding Drone FPV“ RtF Best.-Nr. 1577674 Seite 2 - 40 Operating Instructions Electrical quadrocopter "Folding Drone FPV" RtF Item No. 1577674 Page 41 - 79...
-
Seite 2: Inhaltsverzeichnis
Inhaltsverzeichnis Seite Einführung ................................4 Symbol-Erklärung ..............................4 Bestimmungsgemäße Verwendung ........................5 Lieferumfang ................................5 Produktbeschreibung ............................6 Sicherheitshinweise .............................7 a) Allgemein ...............................7 b) Vor der Inbetriebnahme ..........................8 c) Während des Betriebs ...........................8 Batterie- und Akkuhinweise ..........................9 a) Sender ................................9 b) Flugakku ..............................10 Startvorbereitungen ............................11 a) Batterien in den Sender einlegen ....................... - Seite 3 Seite 15. FPV-Betrieb ...............................25 a) Allgemeine Informationen ..........................25 b) App herunterladen ............................25 c) Modell startbereit machen ...........................26 d) Funktionen der App .............................26 e) Betrieb mit der App ............................30 f) Bilder oder Videos ansehen ........................30 g) Bilder oder Videos auf MicroSD-Karte speichern ..................30 16.
-
Seite 4: Einführung
1. Einführung Sehr geehrte Kundin, sehr geehrter Kunde, wir bedanken uns für den Kauf dieses Produkts. Dieses Produkt entspricht den gesetzlichen, nationalen und europäischen Anforderungen. Um diesen Zustand zu erhalten und einen gefahrlosen Betrieb sicherzustellen, müssen Sie als Anwender diese Bedienungsanleitung beachten! Diese Bedienungsanleitung gehört zu diesem Produkt. -
Seite 5: Bestimmungsgemäße Verwendung
3. Bestimmungsgemäße Verwendung Der Elektro-Quadrocopter „Folding Drone FPV RtF“ ist ein hubschrauberähnliches Flugmodell und ausschließlich für den privaten Einsatz im Modellbaubereich und für die damit verbundenen Betriebszeiten ausgelegt. Für einen anderen Einsatz ist dieses System nicht geeignet. Eine andere Verwendung als zuvor beschrieben kann zur Beschädigung des Produktes mit den damit verbundenen Gefahren wie z.B. -
Seite 6: Produktbeschreibung
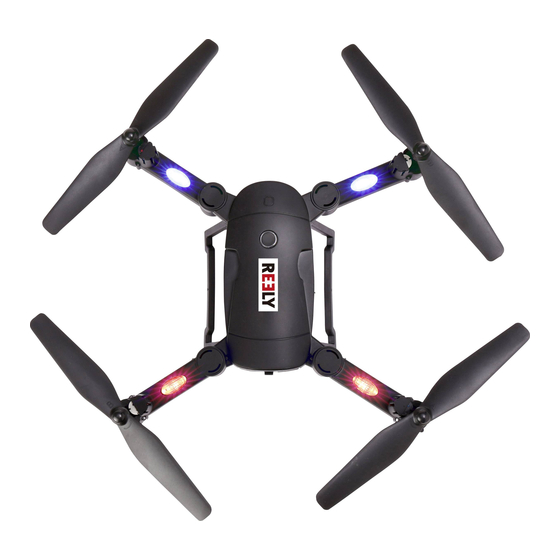
5. Produktbeschreibung Bei dem Quadrocopter „Folding Drone FPV RtF“ handelt es sich um ein vormontiertes hubschrauberähnliches Flug- modell mit vier Rotoren und eingebauter Kamera. Im professionellen Bereich werden solche Fluggeräte bereits für verschiedenste Aufgaben eingesetzt. Die Ausleger der vier Rotoren können angeklappt werden. Hierdurch ist der Quadrocopter besonders einfach zu transportieren. -
Seite 7: Sicherheitshinweise
6. Sicherheitshinweise Bei Schäden, die durch Nichtbeachtung dieser Bedienungsanleitung verursacht werden, erlischt die Gewährleistung/Garantie. Für Folgeschäden übernehmen wir keine Haftung! Bei Sach- oder Personenschäden, die durch unsachgemäße Handhabung oder Nichtbeachten der Sicherheitshinweise verursacht werden, übernehmen wir keine Haftung! In solchen Fällen erlischt die Gewährleistung/Garantie. -
Seite 8: B) Vor Der Inbetriebnahme
b) Vor der Inbetriebnahme • Stellen Sie sicher, dass innerhalb der Reichweite der Fernsteuerung keine weiteren Modelle auf dem gleichen 2,4 GHz-Band (Sendefrequenz) betrieben werden. Prüfen Sie immer, ob gleichzeitig betriebene 2,4 GHz Sendeanlagen Ihr Modell nicht stören. • Überprüfen Sie regelmäßig die Funktionssicherheit Ihres Modells und der Fernsteueranlage. Achten Sie dabei auf sichtbare Beschädigungen, wie z.B. -
Seite 9: Batterie- Und Akkuhinweise
• Bei einem Absturz müssen Sie sofort die Rotor-Motoren ausschalten. Drehende Rotoren können bei Kontakt mit Hindernissen bzw. beim Aufschlag beschädigt werden. Vor einem erneuten Flug sind diese unbedingt auf eventuelle Risse oder Bruchstellen zu prüfen! • Um Schäden am Modell durch einen Absturz aufgrund von Unterspannung bzw. durch eine Tiefent- ladung des Akkus zu vermeiden, empfehlen wir Ihnen, im Flug die Leuchtsignale zur Unterspannung unbedingt zu beachten. -
Seite 10: B) Flugakku
b) Flugakku • Belassen Sie den Ein-/Ausschalter des Quadrocopters in der „ausgeschaltet“-Stellung („OFF“), wenn Sie das Flugmodell nicht benutzen (z.B. bei Transport oder Lagerung). Andernfalls kann der LiPo- Flugakku tiefentladen werden, wodurch der Akku zerstört und unbrauchbar wird! Zudem besteht die Gefahr von Fehlfunktionen durch Störimpulse. -
Seite 11: Startvorbereitungen
8. Startvorbereitungen a) Batterien in den Sender einlegen Bild 1 Entfernen Sie den Batteriefachdeckel auf der Rückseite des Senders. Hierzu müssen Sie die Schraube (1) des De- ckels (1) herausdrehen und den Clip (2) in Pfeilrichtung schieben. Erst dann kann der Batteriefachdeckel abgehoben werden. -
Seite 12: Flugakku Laden
b) Flugakku laden Zur Stromversorgung des mitgelieferten USB-Ladegeräts kann ein geeignetes USB-Netzteil oder ein USB-Zigaret- tenanzünderadapter verwendet werden (jeweils nicht im Lieferumfang), die jeweils über einen Ausgangsstrom von mindestens 1200 mA verfügen müssen. Verwenden Sie keinesfalls einen USB-Port eines Computers oder eines USB-Hubs. Der Strombedarf des Ladegeräts von bis zu ca. -
Seite 13: Endmontage
9. Endmontage Das Modell besitzt schwenkbare Rotorenausleger. Hierdurch wird ein sehr kleines Packmaß erreicht und erleichtert somit den Transport. Für den Flugbetrieb müssen die Rotorenausleger aus- geklappt werden. Drehen Sie hierzu jeden der vier Ausleger vorsichtig nach außen, bis die Ausleger hör- und spürbar einras- ten. -
Seite 14: Bedienelemente Des Senders
10. Bedienelemente des Senders Bild 5 1 Smartphone-Halter 2 Antennen 3 Ein-/Ausschalter mit LED zur Funktionskontrolle 4 Taste „Photo/Video“ (bei diesem Modell ohne Funktion) 5 Taste „Flugmode“ 6 Linker Steuerstick (steigen/sinken und Gier) 7 Taste „Motoren starten“ 8 Trimmung für Gier 9 Taste „Motor Stop“... -
Seite 15: Sicherheitseinrichtungen
Bild 5 zeigt den bereits montierten Smartphone-Halter (Bild 5, Pos. 1). Hier kann ein Smartphone mit einer Breite von bis zu 100 mm eingeklemmt werden. Die Montage des Halters erfolgt von oben, indem der Halter in die im Sender vorgesehene Befestigungsmöglichkeit eingeschoben wird, bis dieser einrastet. -
Seite 16: Informationen Zum Ersten Start
12. Informationen zum ersten Start Um die Erklärung der Steuerung einfacher und einheitlicher zu gestalten, werden hier die klassischen Begriffe verwendet. Diese kommen aus der Fliegersprache und sind weit verbreitet. Richtungsbezeichnungen sind dabei stets aus der Perspektive eines „virtuellen“ Piloten im Modell zu ver- stehen. -
Seite 17: Gier-Funktion
b) Gier-Funktion Als „Gier“ wird die Drehung des Quadrocopters um die Hochachse (senkrechte Achse) bezeichnet. Diese Bewegung tritt entweder ungewollt aufgrund des Drehmoments der Rotoren oder gewollt als Flugrichtungsänderung auf. Beim Quadrocopter wird diese Bewegung durch Drehzahländerung der einzelnen Rotoren zueinander bewirkt. Bewegen Sie den linken Steuerknüppel (Bild 5, Pos. -
Seite 18: Roll-Funktion
d) Roll-Funktion Als „Roll“ wird die Bewegung um die Längsachse bezeichnet, vergleichbar mit dem Seitwärtsrollen einer Kugel (oder dem Seitwärtsgehen einer Krabbe). Dadurch bewegt sich durch Anheben einer Seite der Quadrocopter unabhängig seiner Vorwärtsrichtung zur Seite. Bewegen Sie den rechten Steuerknüppel (Bild 5, Pos. 12) nach links, wird der Quadrocopter in der Gesamtheit nach links schweben. -
Seite 19: Flugmodus
13. Flugmodus Bei dem Quadrocopter können Sie je nach Ihrer Flugerfahrung zwischen drei verschiedenen Flugmodis wählen. Den Flugmodus ändern Sie, indem die Taste „Flugmodus“ (Bild 5, Pos. 5) am Sender kurz gedrückt wird. • Anfänger-Modus Im Anfänger-Modus sind die Steuerbefehle in der Art begrenzt, dass Sie sehr leicht und sehr schnell das Fliegen mit dem Quadrocopter erlernen können. -
Seite 20: Der Erste Start
14. Der erste Start a) Starten Die Bedienung und der Betrieb von ferngesteuerten Flugmodellen muss erlernt werden! Wenn Sie noch nie ein solches Modell gesteuert haben, so starten Sie besonders vorsichtig und machen Sie sich erst mit den Reaktionen des Modells auf die Fernsteuerbefehle vertraut. Haben Sie Geduld! Orientieren Sie sich an den Hinweisen im Kapitel 12. -
Seite 21: B) Trimmen
Wenn Sie sich schon etwas mir den Flugeigenschaften des Modells vertraut gemacht haben, können Sie weitere Übungen durchführen. Hierbei sollten Sie mit einfachen Flugmanövern wie z.B. einen Meter vorwärts/rückwärts flie- gen (Nick-Funktion) beginnen. Anschließend üben Sie das Schweben nach links/rechts (Roll-Funktion). Haben Sie auch hier die notwendige Übung, können Sie beginnen, Kreise und Achterfiguren zu fliegen. Wenn Sie den Flugbetrieb einstellen wollen, müssen nach der Landung zuerst die Rotoren abgeschaltet werden. Bringen Sie dann den Ein-/Ausschalter vom Modell in die Stellung „OFF“... -
Seite 22: Automatisches Starten Und Landen Per Knopfdruck
d) Automatisches Starten und Landen per Knopfdruck Achtung! Das automatische Starten des Modells benötigt einen barrierefreien Startplatz in alle Richtungen. Diese Funktion kann somit nur in großen Räumen/Hallen oder im Freien angewendet werden. Personen und Ge- genstände müssen mindestens 5 Meter vom Startplatz entfernt sein. Bei Nichtbeachtung besteht Gefahr von Sachschäden am Modell bzw. -
Seite 23: Flip-Funktion
f) Flip-Funktion Das Modell kann einen Flip (eine 360°-Drehung) durchführen. Bringen Sie hierzu den Quadrocopter in ausreichen- dem Abstand zum Piloten und Hindernissen in einen stabilen Schwebeflug (mindestens 1,5 Meter Flughöhe). Drücken Sie jetzt am Sender die Taste „360° Flip“ (Bild 5, Pos. 11). Der Sender wird zur Kontrolle, dass Sie den Flip- Modus angewählt haben, in gleichbleibendem Rhythmus einen Kontrollton abgeben. -
Seite 24: Return-Funktion
Da normalerweise in dem Moment, wenn ein Modell auf Sie zu fliegt, bei der Steuerung ein Umdenken erforderlich ist (Sie steuern nach links, der Quadrocopter fliegt aus Ihrer Sicht aber nach rechts), kann der Headless-Modus dieses Umdenken für Sie übernehmen. Egal, wie der Quadrocopter gerade ausgerichtet ist, diese Art der relativen Steuerung führt gerade für Anfänger schnell zu Erfolgen. Wer jedoch „richtig“ fliegen lernen möchte, sollte sich das Fliegen im Headless-Modus nicht angewöhnen, sondern gleich das „normale“ Steuern lernen. Zum Aktivieren des Headless-Modus binden Sie Sender und Quadrocopter miteinander (Startvorbereitung). -
Seite 25: Fpv-Betrieb
15. FPV-Betrieb a) Allgemeine Informationen Der Quadrocopter ist serienmäßig mit einer Kamera ausgerüstet, die per Funk ein Video zu einem geeigneten Smart- phone (nicht im Lieferumfang) live überträgt. Die Aufnahme von Bildern und Videos als auch die Steuerung der Kamera werden von einer auf dem Smartphone installierten App gesteuert. Bilder bzw. -
Seite 26: Modell Startbereit Machen
c) Modell startbereit machen Bringen Sie Ihren Quadrocopter in Betriebsbereitschaft, in dem Sie den Quadrocopter mit dem eingeschalteten Sen- der binden. Das Modell strahlt jetzt ein Sendesignal ab. Aktivieren Sie bei Ihrem Smartphone unter „Einstellungen“ die „WiFi-Funktion“. Verbinden Sie anschließend die App „GX-FPV“... - Seite 27 Bei dem Fragezeichen-Symbol (Bild 13, Pos. 1) finden Sie entsprechende Hinweise zum Betrieb in englischer Spra- che, die Ihnen weiterhelfen können, falls die Bedienungsanleitung nicht zur Hand ist. Diesen Bildschirminhalt können Sie verlassen, indem Sie das Symbol links oben anwählen. Bei dem Zahnrad-Symbol (Bild 13, Pos. 2) können Sie folgende Funktionen einstellen: • „Parameters auto save“: Automatische Speicherung von Bildern und Videos (empfohlen).
- Seite 28 Wählen Sie „Play“ (Bild 13, Pos. 3) an, öffnet sich die nachfolgende Bedienoberfläche. Die die in der oberen Reihe gezeigten Symbole (1 - 10) haben folgende Funktionen: Bild 14 1 Bildschirminhalt verlassen 2 Bild mit der Quadrocopter-Kamera erstellen 3 Video mit der Quadrocopter-Kamera erstellen 4 Gespeicherte Bilder bzw. Videos ansehen 5 Flugmodus (30% = Anfänger / 60% = Fortgeschrittener / 100% = Profi; siehe auch Kapitel 13) 6 „Gravity sensor mode“ (Steuerung des Modells mit den Lagesensoren des Smatphone; Funktion nur, wenn die Steuerelemente eingeblendet sind) 7 „Auto-Start/Landung“...
- Seite 29 Wird das Zahnrad (siehe Bild 14, Pos. 10) aktiviert, werden zusätzliche Symbole (11..17) angezeigt: Bild 15 11 „Mikrofon“ (bei dem vorliegenden Modell ohne Funktion) 12 „Fischauge“ (bei dem vorliegenden Modell ohne Funktion) 13 „REV“ = Bild der Kamera drehen 14 „VR“ = Einstellung für 3D-Livebild-Ansicht (nur mit spezieller „VR-Brille“ möglich) 15 „Headless Mode“...
-
Seite 30: Betrieb Mit Der App
e) Betrieb mit der App Ist der Quadrocopter startbereit und die App in Ihrem Smartphone mit „Play“ aktiviert, erhalten Sie ein Live-Bild von der Quadrocopter-Kamera. Sie können somit sofort starten und – wenn gewünscht – den Quadrocopter anhand der Kamerabilder im sog. FPV-Modus fliegen. Das Modell wird hierbei mit dem Sender gesteuert. Zusätzlich können Sie vor oder während dem Betrieb des Quadrocopters auf dem Display Ihres Smartphones durch Anwählen des jeweiligen Symbols (siehe Bild 14, Pos. -
Seite 31: Betrieb Des Quadrocopters Mit Dem Smartphone
16. Betrieb des Quadrocopters mit dem Smartphone Der Quadrocopter kann anstatt mit dem Sender aus dem Lieferumfang auch allein nur mit einem Smart- phone gesteuert werden. Hierbei gibt zwei Möglichkeiten, die nachfolgend aufgezeigt werden. Für eine störungsfreie Übertragung der Steuer- und Videosignale dürfen keine weiteren Sender im 2,4 GHz Sendebereich des Modells vorhanden sein. - Seite 32 In Bild 16 Pos. 23 sehen Sie das Trimmelement für „Gier“. Die Position 24 ist das Trimmelement für „Nick“ und Posi- tion 25 ist die Trimmung für „Roll“. Zum Trimmen betätigen Sie je nach Bedarf bei Gier und Roll den linken bzw. den rechten oder bei Nick den oberen bzw.
-
Seite 33: Weitere Steuerelemente Der App
b) Weitere Steuerelemente der App Bild 17 Über das in Bild 17, Pos. 5 gezeigte Symbol kann der Flugmodus (siehe auch Kapitel 13) eingestellt werden. In der Grundkonfiguration ist die App auf „30%“ eingestellt. Dies entspricht dem Anfänger-Modus. Die Steuerfunktio- nen sind in Ihrer Wirkweise eingeschränkt. Wenn Sie dieses Symbol nochmals berühren, erscheint „60%“. Dies entspricht dem Fortgeschrittenen-Modus. Das Modell reagiert agiler auf Steuerbefehle. - Seite 34 Wird das „Zahnrad“-Symbol (Bild 17, Pos. 10) angewählt, erscheinen weitere Symbole zur Bedienung des Modells. Mit „REV“ (Bild 17, Pos. 13) invertieren Sie das Videobild um 180°. Es steht somit alles auf dem Kopf. Wählen Sie „VR“ (Bild 17, Pos. 14) an, wird hiermit eine „3D-Funktion“ aktiviert. Hierbei wird die Live-Ansicht der Ka- merabilder auf dem Display des Smartphone zweigeteilt.
- Seite 35 Bringen Sie hierzu das Modell in einen stabilen Flugzustand und aktivieren das in Bild 17/18, Pos. 17 gezeigte Sym- bol. Zeichnen Sie jetzt eine Route auf dem Display auf. Ist auf dem in Bild 18, Pos. 26 gezeigten Symbol „1:1“ eingeblendet, so ist das Zeitfenster für die gezeichnete Figur am kürzesten.
-
Seite 36: Steuerung Mit Den Lagesensoren Des Smartphones
c) Steuerung mit den Lagesensoren des Smartphones In modernen Smartphones sind Lagesensoren eingebaut, die z.B. das Display je nach Lage des Gerätes immer entsprechend so drehen, dass Sie den Inhalt lesen bzw. erkennen können. Der Quadrocopter kann mit diesen Sen- soren in den Steuerfunktionen „Nick“... -
Seite 37: Wartung, Pflege Und Reparatur
17. Wartung, Pflege und Reparatur a) Regelmäßige Reinigung Der Quadrocopter ist ein sehr einfach aufgebautes Fluggerät. Es gibt keine mechanischen Teile, die einer Schmierung oder sonstigen Wartung bedürfen. Dennoch sollten Sie den Quadrocopter nach jedem Flugbetrieb von eventuell vorhandenen Verschmutzungen (Wollfäden, Haare, Staub etc.) reinigen. Äußerlich darf das Modell und die Fernsteuerung nur mit einem weichen, trockenen Tuch oder Pinsel gereinigt wer- den. Verwenden Sie auf keinen Fall aggressive Reinigungsmittel oder chemische Lösungen, da sonst die Oberflä- chen der Gehäuse beschädigt werden könnten. -
Seite 38: Entsorgung
18. Entsorgung a) Produkt Elektronische Geräte sind Wertstoffe und gehören nicht in den Hausmüll. Entsorgen Sie das Produkt am Ende seiner Lebensdauer gemäß den geltenden gesetzlichen Bestimmungen. Entnehmen Sie evtl. eingelegte Batterien/Akkus und entsorgen Sie diese getrennt vom Produkt. b) Batterien/Akkus Sie als Endverbraucher sind gesetzlich (Batterieverordnung) zur Rückgabe aller gebrauchten Batterien/Akkus ver- pflichtet; eine Entsorgung über den Hausmüll ist untersagt. -
Seite 39: Technische Daten
20. Technische Daten a) Sender Sendefrequenz ..........2,4 GHz Sendeleistung ...........13 dBm Sender-Reichweite ...........max. 40 m (Freifeld) Betriebsspannung ..........6 V/DC (4 Batterien vom Typ Mignon/AA) Abmessungen (B x L x H) .........150 x 150 x 56 mm Gewicht .............ca. 255 g (mit Batterien und Smartphone-Halter) b) Quadrocopter Flugzeit .............bis 8 min (je nach Flugstil) Gesamtdurchmesser ........380 mm... -
Seite 40: E) Flugakku
e) Flugakku Bauart ...............LiPo, 1 Zelle Nennspannung ..........3,7 V Kapazität ............850 mAh Entladerate ............15C f) Allgemein Zulässiger Flugbetrieb ........in Gebäuden und im Außenbereich bei Windstille Umgebungsbedingungen .........Temperatur 0 °C bis +40 °C, Luftfeuchte max. 75% relativ, nicht kondensierend... - Seite 41 Table of Contents Page Introduction ................................43 Explanation of Symbols .............................43 Intended Use ..............................44 Scope of Delivery ...............................44 Product Description ............................45 Safety Notes ..............................46 a) General ................................46 b) Before Commissioning ..........................47 c) During Operation ............................47 Battery and Rechargeable Battery Notes ......................48 a) Transmitter..............................48 b) Flight Battery ...............................48 Start Preparations ..............................50...
- Seite 42 Page 15. FPV Operation ..............................64 a) General Information .............................64 b) Download App .............................64 c) Make the Model Ready to Start ........................65 d) Function of the App ............................65 e) Operation with the App ..........................69 f) Viewing Pictures or Videos ..........................69 g) Saving Pictures or Videos on the MicroSD-Card ..................69 16.
-
Seite 43: Introduction
1. Introduction Dear Customer, thank you for purchasing this product. This product complies with the statutory national and European requirements. To maintain this status and to ensure safe operation, you as the user must observe these operating instructions! These operating instructions are part of this product. They contain important notes on commissioning and handling. -
Seite 44: Intended Use
3. Intended Use The electrical quadrocopter "Folding Drone FPV RtF" is a helicopter-like model solely designed for private use in the model making area and the operating times associated with this. This system is not suitable for other types of use. Any use other than that described above can damage the product and involves additional risks such as short circuit, fire, electric shock, etc. The safety information must be observed at all times! The product must not get damp or wet. -
Seite 45: Product Description
5. Product Description The quadrocopter "Folding Drone FPV RtF" is a pre-assembled helicopter-like flight model with four rotors and an integrated camera. In the professional field, such flight devices are already used for the most diverse of tasks. The booms of the four rotors can be folded in. This makes the quadrocopter particularly easy to transport. State-of-the-art microprocessor-controlled electronics with position control and acceleration sensors stabilise the flight position and flying altitude of the quadrocopter. Live transmission using the camera installed in the quadrocopter permits "FPV-operation"... -
Seite 46: Safety Notes
6. Safety Notes In case of damage caused by non-compliance with these operating instructions, the warranty/ guarantee will expire. We do not assume any liability for consequential damage! We do not assume any liability for property damage or personal injury caused by improper use or non-compliance with the safety instructions! In such cases the warranty/guarantee is voided. -
Seite 47: Before Commissioning
b) Before Commissioning • Make sure that no other models are operated within the range of the remote control on the same 2.4 GHz band (transmitter frequency). Always check if concurrently operated 2.4 GHz transmission systems interfere with your model. • Regularly check the functional safety of your model and of the remote control system. -
Seite 48: Battery And Rechargeable Battery Notes
7. Battery and Rechargeable Battery Notes Although use of batteries and rechargeable batteries in everyday life is a matter of course today, there are many dangers and problems. In particular in LiPo/LiIon batteries with high energy content (as compared to conventional NiCd or NiMH batteries), various provisions must be complied with to avoid danger of explosion and fire. - Seite 49 • Place the flight battery on a fire-resistant surface for charging (e.g. a plate). Keep a distance to flam- mable objects (use USB extension cable if required). • As the charger and the rechargeable LiPo flight battery both heat up during the charging procedure, it is necessary to ensure sufficient ventilation. Never cover the charger and flight battery! • Never leave LiPo batteries unattended while charging them. • Remove the battery from the charger when it is fully charged. • The charger is intended for dry indoor use only. The charger and the rechargeable battery must not become damp or wet.
-
Seite 50: Start Preparations
8. Start Preparations a) Inserting the Batteries in the Transmitter Figure 1 Remove the battery compartment lid on the back of the transmitter. For this, you need to turn out the screw (1) of the lid (1) and push the clip (2) in the direction of the arrow. Only then can be battery compartment lid be lifted off. Insert four mignon/AA size batteries with the correct polarity (3). -
Seite 51: B) Charge Flight Battery
b) Charge Flight Battery A suitable USB mains unit or USB cigarette lighter adapter (neither enclosed) may be used for power supply to the enclosed USB charger; they each must have an output current of at least 1200 mA. Never use a USB port of a computer or a USB hub. The power demand of your charger at up to approx. 1200 mA exceeds the currents possible for a USB-port. -
Seite 52: Final Assembly
9. Final Assembly The model has swivelling rotor outriggers. This leads to a very small packing size and thus makes transport easier. The rotor outriggers must be folded out for flight opera- tion. For this, carefully turn each of the four outriggers out- wards until the outriggers latch audibly and noticeably. Figure 3 The delivery includes four safety grids to protect the ro- tors. -
Seite 53: Operating Elements Of The Transmitter
10. Operating Elements of the Transmitter Figure 5 1 Smartphone holder 2 Aerials 3 On/off switch with LED for function control 4 Button "Photo/Video" (without function in this model) 5 Button "Flight mode" 6 Left control stick (rise/lower and yaw) 7 Button "Start motors"... -
Seite 54: Safety Devices
Figure 5 shows the already-installed Smartphone holder (figure 5, item 1). A Smartphone with a width of up to 100 mm can be clamped here. The holder is installed from above by pushing the holder into the attachment provided in the transmitter until it latches. The Smartphone holder can be disassembled by pushing the entire holder out from the transmitter. Push the rear of the transmitter above the battery compartment lid onto the grooved surface and push the holder up. -
Seite 55: Information For First Take-Off
12. Information for First Take-Off For a simpler and consistent explanation of steering, classic terminology is used here as well. This comes from flight language and is widely used. Directional descriptions are always to be interpreted from the perspective of a "virtual" pilot in the model. The two blue LEDs in the front rotor outriggers (or the camera) are direction indicators that mean "front". -
Seite 56: B) Yaw Function
b) Yaw Function "Yaw" denotes the rotation of the quadrocopter around the yaw axis (vertical axis). This movement either occurs unin- tentionally due to the speed torque of the rotors or intentionally as a flight direction change. This movement is caused by speed changes of the individual rotors towards each other in the quadrocopter. If you move the left control lever (figure 5, item 6) to the left, the quadrocopter will turn to the left. If you move the control lever to the right, the quadrocopter will turn to the right. Figure 7 c) Nod Function "Nod"... -
Seite 57: D) Roll Function
d) Roll Function "Roll" denotes the movement around the centre line which can be compared to the sideways rolling of a ball (or the sideways crawl of a crab). In this way, through lifting one side the quadrocopter moves independent of its forward direction to the side. -
Seite 58: Flight Mode
13. Flight Mode The quadrocopter permits you to choose between three different flight modes depending on your experience. You can change the flight mode by briefly pushing the button "Flight mode" (figure 5, item 5) at the transmitter. • Beginner's mode In beginner mode, the control commands are limited to permit you learning how to fly the quadrocopter very quickly and easily. This flight mode is recommended for pilots who have no or only very little flight experience with helicop- ters or quadrocopters yet. The beginner's mode is the basic configuration after switching the transmitter on each time. • Advanced mode The advanced mode is recommended to pilots who have already collected some experience with other quadro- copter models. In this mode, the quadrocopter is much more agile in its control conduct than in beginner's mode. In order to activate this mode, push the button "Flight mode" at the transmitter (figure 5, item 5) briefly repeatedly until you hear a double sound. -
Seite 59: The First Start
14. The First Start a) Start The operation and handling of remote controlled flight models must be learned! If you have never steered such a model, start especially carefully and get used to the reactions of the model to the remote control commands first. Do be patient! Use the information from chapter 12 as reference. Do not take any risks when operating the product! Your own safety and that of your environment depends completely on your responsible use of the model. -
Seite 60: B) Trimming
b) Trimming The quadrocopter is generally not 100% internally stable due to its technical equipment and will not always stop in place but may drift in some direction or another at times. The drift is caused by outer circumstances (e.g. wind) or by uncalibrated sensors (gyros). This is absolutely normal in this price class, however, and can be eliminated by calibration of the sensors as well as by trimming. -
Seite 61: D) Automatic Starting And Landing By Pushing A Button
d) Automatic Starting and Landing by Pushing a Button Attention! Automatic starting of the model requires an accessible starting position in all directions. This function therefore can only be used in large rooms/halls or outdoors. Persons and objects must be at least 5 metres away from the starting position. -
Seite 62: Flip Function
f) Flip Function The model can perform a flip (a 360° turn). For this, put the quadrocopter into a stable hover flight (at an altitude of at least 1.5 metres) at sufficient distance from the pilot and any obstacles. Now push the transmitter's button "360° flip" (figure 5, item 11). The transmitter will emit a control sound at an even rhythm to confirm that you have chosen flip mode. The control sound will remain activated until the flip is completed. Now, briefly put the right control lever in the direction in which the flip is to take place. Examples: If you push the right lever forward, the quadrocopter will turn over forwards. If you push the right control lever to the right, the quadrocopter will turn over to the right. After you have specified the flip direction at the transmitter, put the right control lever into the neutral position again at once. -
Seite 63: Return Function
Since you usually need to think reversed as soon as a model flies towards you (you will steer to the left but the quad- rocopter will fly to the right from your point of view), the headless mode can take over this reversal for you. It doesn't matter where the quadrocopter is currently facing in headless mode, this type of relative control can lead to quick success for beginners. If you want to fly "properly", however, you should not get used to flying in headless mode, but learn "normal" steering right away. To activate the headless mode, bind the transmitter and quadrocopter to each other (start preparation). The rotors are still off/deactivated for the first activation. Now align the ready-to-start quadrocopter on the ground so that the front, blue LEDs in one line to the transmitter, point away from it (forward). -
Seite 64: Fpv Operation
15. FPV Operation a) General Information The quadrocopter is serially equipped with a camera that transmits a video to a suitable Smartphone (not enclosed) live by radio. Recording of pictures and videos and control of the camera are possible by an app installed on the Smartphone. -
Seite 65: C) Make The Model Ready To Start
c) Make the Model Ready to Start Make your quadrocopter ready for operation by binding the quadrocopter with the activated transmitter. The model will now emit a transmission signal. Activate the "WiFi function" in your Smartphone under "Settings". Then connect the "GX-FPV" App to the quadrocop- ter (WLAN ID e.g. - Seite 66 For the question mark symbol (figure 13, item 1), you can find the corresponding notes on operation in the English language, which may help you if you do not have the operating instructions at hand. You can leave this screen by selecting the icon in the upper left. The gear icon (figure 13, item 2) can be used to set the following functions: • "Parameters auto save": Automatic storage of pictures and videos (recommended). • "Reset the parameters": Resets the app to the factory settings.
- Seite 67 Select "Play" (figure 13, item 3) to open the following operating interface. The symbols shown in the upper row (1 - 10) have the following functions: Figure 14 1 Leaving the screen 2 Taking pictures with the quadrocopter camera 3 Recording video with the quadrocopter camera 4 Viewing stored pictures or videos 5 Flight mode (30% = beginner / 60% = advanced / 100% = pro; also see chapter 13) 6 "Gravity sensor mode"...
- Seite 68 If a gear (see figure 14, item 10) is activated, additional symbols (11..17) are shown: Figure 15 11 "Microphone" (no function in this model) 12 "Fish eye" (no function in this model) 13 "REV" = Turn the image of the camera 14 "VR" = Settings for 3D-Livefigure view (only possible with special "VR glasses") 15 "Headless Mode" (also see chapter 14. g) 16 Calibration (calibrates the sensors in the quadrocopter; also see chapter 14. c) 17 "Flight route" = Figures drawn on the display (e.g. a circle) or a route are automatically flown by the quadrocopter.
-
Seite 69: E) Operation With The App
e) Operation with the App When the quadrocopter is ready to start and the app is activated in your Smartphone with "Play", you will receive a live image from the quadrocopter camera. You can start at once and – if desired – fly the quadrocopter in FPV mode using the camera images. The model is controlled by the transmitter here. Additionally, you can take a picture with the quadrocopter camera or start a video recording (figure 14, item 2 or 3) on the display of your Smartphone before or during operation of the quadrocopter by selecting the respective symbol. -
Seite 70: Operating The Quadrocopter With Your Smartphone
16. Operating the Quadrocopter with your Smartphone The quadrocopter can be operated with your Smartphone alone rather than via the enclosed transmitter as well. There are two options that will be described below. For interference-free transmission of the control and video signals, no other transmitters must be present in the 2.4 GHz transmission range of the model. - Seite 71 In figure 16 item 23, you can see the trimming element for "yaw". Item 24 is the trimming element for "nod" and item 25 is the trim for "roll". To trip, push the left or right arrow for yaw and roll or the upper or lower arrow for nod as often as you need to in order to reach the desired flight behaviour. Other notes on trimming the model can be found in chapters 14. b) and c). If you want to control the model with your Smartphone and the operating elements in the App, proceed as follows: • Switch on the quadrocopter. The LEDs in the outriggers flash. The model will now emit a transmission signal.
-
Seite 72: B) Further Control Elements Of The App
b) Further Control Elements of the App Figure 17 The symbol shown in figure 17, item 5 sets the flight mode (also see chapter 13). In the basic configuration, the App is set to "30%". This corresponds to beginner's mode. The control functions are limited in their effects. If you touch this symbol again, "60%" will appear. This corresponds to advanced mode. The model reacts more agile to the control commands. If the symbol is touched again, "100%" appears (see above in figure 17). This corresponds to professional mode. The control functions are not limited then. By touching it again, beginner's mode is activated again (display "30%"). - Seite 73 If the "gear" symbol (figure 17, item 10) is selected, you will see further symbols to operate the model. "REV" (figure 17, item 13) inverts the video image by 180°. Therefore, everything is upside down. Select "VR" (figure 17, item 14) to activate a "3D function". The live view of the camera images on the display of your Smartphone is divided in two here. This serves to perform FPV operation virtually in 3D (i.e. with spatial view) with "Virtual Reality glasses" ("VR glasses", not enclosed, must be purchased separately). Activate the 3D function (figure 17, item 14) in the App and install your Smartphone in the VR glasses. Now put on the VR glasses and start flying. Use the symbol shown in figure 17, item 15 to activate headless mode. This is a relative control mode, i.e.no matter the alignment of the quadrocopter, it will always fly to the right when viewed from the pilot's position when steering to the right - no matter if the model points backwards, to the left, front or right. The quadrocopter is shown the direction into which it is to go with the right control element ("right dot"...
- Seite 74 For this, put the model into a stable flight condition and activate the symbol shown in figure 17/18, item 17. Now draw a route on the display. If the symbol shown in figure 18, item 26 shows "1:1" so that the time window for the drawn figure is shortest. If "1:5" is displayed, the time window for the drawn figure is the longest. You can switch the time window by touching the icon (endless loop from 1:1 to 1:5). While flying the flight route, you can use the left control element to influence the flight height as well as the yaw. The drawn route will be flown automatically as soon as you lift your fingers again after drawing on the display. Attention! For automatic flying of a route, the model requires a barrier-free flight space in all directions. This function therefore can only be used in very large rooms/halls or outdoors. Persons and objects must be at least 10 metres away from the starting position. When not observing this, there is a danger of damage to the model or other objects nearby and a danger of injury to persons/animals in the vicinity! Automatic flying of flight routes is a fixed procress. The prerequisite for this is a stable flight condition (float- ing); that the flight altitude ideally does not exceed 1.5 metres and that the route has a distance of at least...
-
Seite 75: C) Control Using The Position Sensors Of Your Smartphone
c) Control Using the Position Sensors of your Smartphone Modern Smartphones have position sensors, e.g. to turn the display to make the contents legible or recognisable no matter how you hold your device. The quadrocopter can be controlled using these sensors in the control functions "nod"... -
Seite 76: Maintenance And Repair
17. Maintenance and Repair a) Regular Cleaning The quadrocopter is a very simply built flight model. There are no mechanical parts that need to be lubricated or require special maintenance. However, after each flight operation, you should clean the quadrocopter of possible contamination (wool threads, hair, dust etc.). Clean the exterior of the model and the remote control only with a soft, dry cloth or brush. Never use abrasive cleaning agents or chemical solutions as these could damage the surfaces of the casings. b) Replacing the Rotors If a rotor is damaged in a crash or other action, replace it immediately. This also applies if there are any fine tears or grazing in the rotor. -
Seite 77: Disposal
18. Disposal a) Product Electronic devices are recyclable and should not be disposed of in household waste. Dispose of the prod- uct according to the applicable statutory provisions at the end of its service life. Remove any inserted batteries/rechargeable batteries and dispose of them separately from the product. b) Batteries/Rechargeable Batteries You as the end user are required by law (Battery Ordinance) to return all used batteries/rechargeable batteries. -
Seite 78: Technical Data
20. Technical Data a) Transmitter Transmission frequency........2.4 GHz Transmission output .........13 dBm Transmitter range ..........max. 40 m (free field) Operating voltage ..........6 V/DC (4 batteries type Mignon/AA) Dimensions (W x L x H) ........150 x 150 x 56 mm Weight ..............approx. 255 g (with batteries and Smartphone holder) b) Quadrocopter Flight time ............up to 8 min (depending on flight style) Total diameter ...........380 mm... -
Seite 79: E) Flight Battery
e) Flight Battery Build ..............LiPo, 1 cell Rated voltage ...........3.7 V Capacity ............850 mAh Discharge rate ..........15C f) General Permissible flight operation ......in buildings and outdoors in wind still conditions Ambient conditions ...........Temperature 0 °C to +40 °C, humidity max. 75% relative, non- condensing... - Seite 80 Dies ist eine Publikation der Conrad Electronic SE, Klaus-Conrad-Str. 1, D-92240 Hirschau (www.conrad.com). Alle Rechte einschließlich Übersetzung vorbehalten. Reproduktionen jeder Art, z. B. Fotokopie, Mikroverfilmung, oder die Erfassung in elektronischen Datenverarbeitungsanlagen, bedürfen der schriftlichen Genehmigung des Herausgebers. Nachdruck, auch auszugsweise, verboten. Die Publikation entspricht dem technischen Stand bei Drucklegung. Copyright 2017 by Conrad Electronic SE.