Anmelden
Hochladen
Anleitungen
Marken
Christie Anleitungen
Beamer
Lx41 series
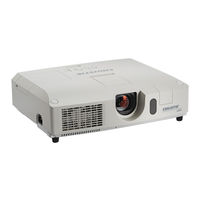
Christie Lx41 series Handbücher
Anleitungen und Benutzerhandbücher für Christie Lx41 series. Wir haben
3
Christie Lx41 series Anleitungen zum kostenlosen PDF-Download zur Verfügung: Bedienungsanleitung
Christie Lx41 series Bedienungsanleitung (784 Seiten)
Marke:
Christie
| Kategorie:
Beamer
| Dateigröße: 79.9 MB
Inhaltsverzeichnis
English
4
Inhaltsverzeichnis
4
1 Connection to the Network
6
System Requirements
6
Required Equipment Preparation
6
Hardware and Software Requirement for Computer
6
Quick Connection
6
Manual Network Connection Setting
7
Equipments Connection
7
Network Settings
7
Internet Option" Setting
10
2 Network Presentation
11
3 Web Control
12
Logon
13
Network Information
15
Network Settings
16
Port Settings
17
Mail Settings
19
Alert Settings
20
Schedule Settings
22
Date/Time Settings
25
Security Settings
27
Projector Control
28
Remote Control
34
Projector Status
35
Network Restart
36
4 My Image Function
37
5 Messeger Function
38
6 Network Bridge Function
39
Connecting Devices
39
Communication Setup
40
Communication Port
40
Transmission Method
41
Half-Duplex
41
Full-Duplex
42
7 Other Functions
43
E-Mail Alerts
43
Projector Management Using SNMP
45
Event Scheduling
46
Command Control Via the Network
49
Command Format
51
8 Troubleshooting
54
9 Warranty and After-Sales Service
55
Français
60
1 Connexion au Réseau
62
Conditions Requises au Système
62
Préparation de L'équipement Requis
62
Configuration Matérielle et Logicielle Requise pour le PC
62
Connexion Rapide
62
Réglage de Connexion Réseau Manuel
63
Connexion du Matériel
63
Paramètres Réseau
63
Paramètres "Options Internet
66
2 Présentation en Réseau
67
3 Contrôle Web
68
Ouverture de Session
69
Informations Réseau
71
Réglages Réseau
72
Réglages de Port
73
Réglages E-Mail
75
Réglages des Alertes
76
Réglages du Planning
78
Réglages Date/Heure
81
Réglages de Sécurité
83
Commande du Projecteur
84
Commande à Distance
90
Statut du Projecteur
91
Redémarrage du Réseau
92
4 Fonction Mes Images
93
5 Fonction Messager
94
6 Fonction Pont Réseau
95
Connexion de Périphériques
95
Configuration de la Communication
96
Port de Communication
96
Méthode de Transmission
97
Semi-Duplex
97
Duplex Intégral
98
7 Autres Fonctions
99
Alertes E-Mails
99
Organisateur du Projecteur Avec SNMP
101
Prévision D'éVènements
102
Contrôle des Commandes Via le Réseau
105
Format des Commandes
107
8 Dépannage
110
9 Garantie et Service Après-Vente
111
Funktionen
115
Deutsch
116
1 Verbindung mit dem Netzwerk
118
Systemvoraussetzungen
118
Notwendige Vorbereitungen
118
PC-Hardware- und Softwarevoraussetzungen
118
Schnellverbindung
118
Manuelle Einstellung der Netzwerverbindung
119
Verbindung der Geräte
119
Netzwerk Einstellungen
119
Internetoptionen" Einstellung
122
2 Netzwerkpräsentation
123
3 Web-Steuerung
124
Login
125
Netzwerkinformationen
127
Netzwerk Einstellungen
128
Port-Einstellungen
129
E-Mail-Einstellungen
131
Benachrichtigungseinstellungen
132
Zeitplaneinstellungen
134
Datums-/Uhrzeiteinstellungen
137
Sicherheitseinstellungen
139
Projektorsteuerung
140
Fernbedienung
146
Eingabe Rückst Bild auf
146
Projektorstatus
147
Netzwerk-Neustart
148
Die Funktion "Mein Bild
149
5 Messenger-Funktion
150
Die Funktion "Netzbrücke
151
Anschließen von Geräten
151
Kommunikations-Setup
152
Kommunikationsport
152
Übertragungsmethode
153
Halb-Duplex
153
Voll-Duplex
154
7 Weitere Funktionen
155
E-Mail Alarm
155
Mail Einstellungen (&17)
155
Projektor Steuerung über SNMP
157
SNMP Einstellungen (&15)
157
Ereignis Planung
158
Ablaufeinstellungen (&20)
159
Datum und Zeit Einstellung (&23)
160
Bedienung über das Netzwerk
161
Command Control Einstellungen (&15)
161
Format der Antwort Daten
164
Automatischer Abbruch der Verbindung
165
Authentisierung
165
8 Fehlersuche
166
9 Garantie und Kundendienst
167
Español
172
1 Conexión a la Red
174
Requisitos del Sistema
174
Preparación Necesaria del Equipo
174
Requisitos de Hardware y Software para PC
174
Conexión Rápida
174
Configuración Manual de la Conexión de Red
175
Conexión de Los Equipos
175
Configuración de la Red
175
Ajuste de "Opciones de Internet
178
2 Presentación de Red
179
3 Control por la Web
180
Inicio de Sesión
181
Información de Red
183
Configuraciones de Red
184
Configuraciones de Puerto
185
Configuraciones de E-Mail
187
Configuraciones de Alertas
188
Configuraciones de Programa
190
Configuraciones de Fecha/Hora
193
Configuraciones de Seguridad
195
Control del Proyector
196
Control Remoto
202
Estado del Proyector
203
Reiniciar Red
204
4 Función MI Imagen
205
5 Función de Mensajero
206
6 Función Puente de Red
207
Conectar Dispositivos
207
Configuración de la Comunicación
208
Puerto de Comunicación
208
Método de Transmisión
209
Dúplex Medio
209
Dúplex Completo
210
7 Otras Funciones
211
Alertas de Correo Electrónico
211
Administración del Proyector Mediante SNMP
213
Programación de Eventos
214
Control por Comandos a Través de la Red
217
8 Solución de Problemas
222
9 Garantía y Servicio Posventa
223
Italiano
228
1 Connessione Alla Rete
230
Requisiti DI Sistema
230
Preparazione Dell'apparecchiatura Necessaria
230
Requisito Hardware E Software Per PC
230
Connessione Rapida
230
Impostazione Della Connessione DI Rete Manuale
231
Connessione Dell'apparecchiatura
231
Impostazioni Della Rete
231
Impostazione "Opzioni Internet
234
2 Presentazione DI Rete
235
3 Controllo Web
236
Accesso
237
Información de Red
239
Impostazioni Rete
240
Impostazioni Porta
241
Impostazioni Mail
243
Impostazioni Avviso
244
Impostazioni Programma
246
Impostazioni Data/Ora
249
Impostazioni Sicurezza
251
Controllo Proiettore
252
Telecomando
258
Stato Proiettore
259
Riavvio Rete
260
4 Funzione Immagini
261
5 Funzione Messenger
262
6 Funzione Bridge DI Rete
263
Collegamento Delle Periferiche
263
Configurazione Della Comunicazione
264
Porta DI Comunicazione
264
Metodo DI Transmissione
265
Bidirez. Non Simult
265
Bidirez. Simultanea
266
7 Altre Funzioni
267
Avvisi Tramite E-Mail
267
Gestione del Proiettore Tramite SNMP
269
Programmazione Evento
270
Controllo Comandi Tramite la Rete
273
8 Risoluzione Dei Problemi
278
9 Garanzia E Servizio Post-Vendita
279
Norsk
284
1 Tilkobling Til Nettverket
286
Systemkrav
286
Påkrevet Utstyrsklargjøring
286
Maskinvare Og Programvarekrav for Datamaskin
286
Hurtigtilkobling
286
Manuell Innstilling Av Nettverkstilkobling
287
Utstyrstilkobling
287
Nettverksinnstillinger
287
Innstilling for "Internettalternativer
290
2 Nettverkspresentasjon
291
3 Webkontroll
292
Logginn
293
Nettverksinformasjon
295
Nettverksinnstillinger
296
Portinnstillinger
297
Postinnstillinger
299
Alarminnstillinger
300
Planinnstillinger
302
Dato/Tid-Innstillinger
305
Sikkerhetsinnstillinger
307
Projektorkontroll
308
Fjernkontroll
314
Projektorstatus
315
Nettverksomstart
316
4 Funksjoner for Mitt Bilde
317
5 Budbringerfunksjon
318
6 Funksjon for Nettverksbro
319
Koble Til Apparater
319
Oppsett Av Kommunikasjon
320
Kommunikasjonsport
320
Overførings Metodo
321
Halv-Dupleks
321
Full-Dupleks
322
7 Andre Funksjoner
323
E-Postvarsler
324
Projektorbehandling Ved Bruk Av SNMP
325
Hendelsesplanlegging
326
Kommandokontroll Via Nettverket
329
8 Feilsøking
334
9 Garanti Og Etter-Salg-Service
335
Dutch
340
1 Verbinding Maken Met Het Netwerk
342
Systeemeisen
342
Vereiste Apparatuur Voorbereiding
342
Vereiste Pc-Hardware en -Software
342
Snelle Verbinding
342
Handmatige Netwerkverbinding Installatie
343
Apparatuurverbinding
343
Netwerkinstellingen
343
Internet-Optie" Instelling
346
2 Netwerkpresentatie
347
3 Webbesturing
348
Inloggen
349
Netwerkinformatie
351
Netwerkinstellingen
352
Poortinstellingen
353
E-Mailinstellingen
355
Waarschuwingsinstellingen
356
Planningsinstellingen
358
Datum/Tijd-Instellingen
361
Beveiligingsinstellingen
363
Projectorbesturing
364
Afstandsbediening
370
Projectorstatus
371
Netwerk Resetten
372
4 De Functie Mijn Beeld
373
5 Messengerfunctie
374
6 De Functie Netwerkbrug
375
De Apparaten Aansluiten
375
Communicatie-Instellingen
376
Communicatiepoort
376
Overdrachtmethode
377
Half Duplex
377
Volledig Duplex
378
7 Overige Functies
379
E-Mail Waarschuwingen
379
Projectorbeheer M.b.V. SNMP
381
Agenda Schema
382
Opdrachtenbeheer Via Het Netwerk
385
8 Oplossingen Vinden
390
9 Garantie en Naverkoopservice
391
Português
396
1 Conexão Com a Rede
398
Requisitos Do Sistema
398
Requisitos de Hardware E Software para PC
398
Conexão Rápida
398
Definição Manual da Conexão de Rede
399
Conexão Com Equipamentos
399
Configurações de Rede
399
Configurações "Opções da Internet
402
2 Apresentação Em Rede
403
3 Controlo Via Internet
404
Registar-Se
405
Informação Rede
407
Definições Rede
408
Definições Porta
409
Definições Correio
411
Definições Alerta
412
Definições Programação
414
Definições Data/Hora
417
Definições Segurança
419
Controlo Projector
420
Telecomando
426
Estado Projector
427
Reiniciar Rede
428
4 Função Minha Imagem
429
5 Função Mensageiro
430
6 Função Ponte de Rede
431
Ligar Dispositivos
431
Configuração da Comunicação
432
Porta de Comunicação
432
Método de Transmissão
433
Half-Duplex
433
Full-Duplex
434
Outras Funções
435
Alertas de E-Mails
435
Gestão de Projector Com O SNMP
437
Programação de Evento
438
Controlo de Comando Através da Rede
441
8 Solução de Problemas
446
9 Garantia E Serviço Pós Venda
447
Werbung
Christie Lx41 series Bedienungsanleitung (560 Seiten)
Marke:
Christie
| Kategorie:
Beamer
| Dateigröße: 32.2 MB
Inhaltsverzeichnis
English
4
Inhaltsverzeichnis
4
1 Introduction
5
Entries and Graphical Symbols Explanation
5
Important Safety Instruction
5
Instant Stack Feature
5
General Installation
7
Basic Information and Preparations
8
Instant Stack
8
Intellectual Stack and Simple Stack
8
Remote Control for Intellectual Stack and Simple Stack
8
Installation Styles
8
Tentative Terms for the Two Projectors
8
2 Installation
9
Preparing for Intellectual Stack
9
Installing the First Projector (Set A)
10
Removing Pocket Caps
10
Preparing Elevator Feet
10
Deciding Installation Position
10
Setting up Set a
11
Installing the Second Projector (Set B)
13
Stacking the Projectors
13
Connecting Projectors
13
Setting up Set B
14
Confirming Main and Sub Settings
16
Fine Adjusting Image Position
17
For Intellectual Stack Users
17
For Simple Stack Users
18
3 STACK Menu Settings
19
Displaying STACK Menu
19
Selecting Main, Sub or off
20
Selecting Lamp Operation Mode
21
Selecting Lamp Switching Mode
23
Selecting Input Source for Sub
24
Exiting Intellectual Stack Menu
25
STACK Menu
25
Dialog from STACK Menu
25
Important Information for Intellectual Stack
26
4 Connecting Cables
29
Connecting an RS-232C Cable
29
Connecting Signal Cables
30
Inputting Image from Main to Sub
30
Inputting Image to Sub and Main Individually
30
5 Setting Input Ports Using Menu
31
Preparing for Menu Operations
31
Checking Main Projector's Operating Status
31
Starting up Main Projector
32
Setting the Menu
33
Inputting Image from Main to Sub - Computer Signal
33
Inputting Image from Main to Sub - Video Signal (Either Component or Video)
34
Inputting Image to Sub and Main Individually
34
6 Restrictions on Schedule Function
36
7 Troubleshooting
38
Operating
39
Français
44
1 Introduction
45
Explication des Conventions et Symboles
45
Instructions de Sécurité Importantes
45
Option Empilement Rapide
45
Installation Générale
47
Informations de Base et Préparations
48
Empilement Rapide
48
Empilement Complexe et Empilement Simple
48
Télécommande pour L'empilement Complexe et L'empilement Simple
48
Styles D'installation
48
Termes des Essais pour les Deux Projecteurs
48
2 Installation
49
Préparation à L'empilement Complexe
49
Installation du Premier Projecteur (Appareil A)
50
Retrait des Capuchons Creux
50
Préparation des Pieds de L'élévateur
50
Choix de la Position de L'installation
50
Configuration de L'appareil a
51
Installation du Second Projecteur (Appareil B)
53
Empilement des Projecteurs
53
Raccordement des Projecteurs
53
Configuration de L'appareil B
54
Confirmation des Paramètres des Appareils Principal et Secondaire
56
Réglage Fin de la Position de L'image
57
Pour les Utilisateurs de L'empilement Complexe
57
Pour les Utilisateurs de L'empilement Simple
58
3 Réglages du Menu FAISCEAU
59
Affichage du Menu FAISCEAU
59
Sélection Principal, Secondaire ou Éteint
60
Sélection du Mode de Fonctionnement de la Lampe
61
Sélection du Mode de Commutation de la Lampe
63
Sélection D'une Source D'entrée pour L'appareil Secondaire
64
Sortie du Menu D'empilement Complexe
65
Menu FAISCEAU
65
Boîte de Dialogue du Menu FAISCEAU
65
Informations Importantes pour L'empilement Complexe
66
4 Raccordement des Câbles
69
Raccordement D'un Câble RS-232C
69
Raccordement des Câbles de Signal
70
Entrée D'une Image de L'appareil Principal Vers le Secondaire
70
Entrée D'une Image Individuelle Vers Secondaire et Principal
70
5 Réglage des Ports D'entrée à L'aide du Menu
71
Préparation à L'utilisation du Menu
71
Vérification de L'état de Fonctionnement du Projecteur Principal
71
Allumage du Projecteur Principal
72
Configuration du Menu
73
Entrée D'une Image de L'appareil Principal Vers le Secondaire - Signal D'ordinateur
73
Entrée D'une Image de L'appareil Principal Vers le Secondaire - Signal VIDéo (soit Composant soit VIDéo)
74
Entrée D'une Image Individuelle Vers Secondaire et Principal
74
6 Restrictions à la Fonction Planning
76
7 Dépannage
78
Deutsch
84
1 Einleitung
85
Erläuterung der Kennwörter und Grafischen Symbole
85
Wichtige Sicherheitsanweisungen
85
Schnellstapel-Funktion
85
Wichtige Sicherheitsanweisungen - Schnellstapel-Funktion
86
Allgemeine Installationshinweise
87
Grundlegende Informationen und Vorbereitungen
88
Schnellstapel
88
Intelligentes Stapeln und Einfaches Stapeln
88
Fernbedienung für Intelligentes Stapeln und Einfaches Stapeln
88
Installationsstile
88
Installationsbezeichnung der Zwei Projektoren
88
2 Installation
89
Vorbereitungen für Intelligentes Stapeln
89
Installation des Ersten Projektors (Gerät A)
90
Entfernen der Einsatzkappen
90
Vorbereiten der Nivellierfüße
90
Festlegen der Installationsposition
90
Einrichten von Gerät a
91
Installation des Ersten Projektors (Gerät A) - Einrichten von Gerät a
92
Installation des Zweiten Projektors (Gerät B)
93
Stapeln der Projektoren
93
Anschließen der Projektoren
93
Einrichten von Gerät B
94
Installation des Zweiten Projektors (Gerät B) - Einrichten von Gerät B
95
Bestätigen der Primär- und Sekundäreinstellungen
96
Feineinstellung der Bildposition
97
Bei Benutzung von Intelligentes Stapeln
97
Bei Benutzung von Einfaches Stapeln
98
3 STAPEL Menüeinstellungen
99
Anzeige des Menüs STAPEL
99
Auswahl von Primär, Sekundär oder aus
100
Auswahl des Lampenbedienmodus
101
Auswahl des Lampenschaltmodus
103
Auswahl der Eingangsquelle für Sekundär
104
Verlassen des Menüs Intelligentes Stapeln
105
Menü STAPEL
105
Dialogfenster IM Menü STAPEL
105
Wichtige Informationen für das Intelligente Stapeln
106
4 Anschluss der Kabel
109
Anschluss eines RS-232C-Kabels
109
Anschluss von Signalkabeln
110
Bildübertragung von Primär zu Sekundär
110
Individuelle Bildübertragung zu Sekundär und Primär
110
5 Einstellen der Eingangsanschlüsse über das Menü
111
Vorbereiten der Menübedienung
111
Prüfen des Betriebsstatus des Primärgeräts
111
Einschalten des Primärgeräts
112
Prüfen des Betriebsstatus des Primärgeräts Ausgeführt
112
Einrichten des Menüs
113
Bildübertragung von Primär zu Sekundär - Computersignal
113
Bildübertragung von Primär zu Sekundär
114
Videosignal (Komponenten- oder Videosignal)
114
Individuelle Bildübertragung zu Sekundär und Primär
114
Einrichten des Menüs - Individuelle Bildübertragung zu Sekundär und Primär
115
6 Einschränkungen der Zeitplan-Funktion
116
7 Fehlersuche
118
Características
123
Español
124
1 Introducción
125
Explicación de Entradas y Símbolos Gráficos
125
Instrucciones de Seguridad Importantes
125
Función Apilamiento Instantáneo
125
Instalación General
127
Información Básica y Preparativos
128
Apilamiento Instantáneo
128
Apilamiento Inteligente y Apilamiento Simple
128
Control Remoto para Apilamiento Inteligente y Apilamiento Simple
128
Estilos de Instalación
128
Términos Provisionales para Los Dos Proyectores
128
2 Instalación
129
Preparación para el Apilamiento Inteligente
129
Instalación del Primero Proyector (Posición A)
130
Extracción de las Tapas de Orificios
130
Preparación de Los Pies Elevadores
130
Decidir la Posición de Instalación
130
Configuración de la Posición a
131
Instalación del Segundo Proyector (Posición B)
133
Apilamiento de Los Proyectores
133
Conexión de Los Proyectores
133
Configuración de la Posición B
134
Confirmación de Los Ajustes Principales y Secundarios
136
Ajuste Preciso de la Posición de la Imagen
137
Para Usuarios de la Función Apilamiento Inteligente
137
Para Usuarios de la Función Apilamiento Simple
138
3 Configuración del Menú APILAMIENTO
139
Visualización del Menú APILAMIENTO
139
Selección de Principal, Secundario O Desactivado
140
Selección del Modo de Funcionamiento de la Lámpara
141
Selección del Modo de Conmutación de la Lámpara
143
Selección de la Fuente de Entrada para Secundario
144
Salir del Menú de Apilamiento Inteligente
145
Menú APILAMIENTO
145
Cuadro de DIálogo del Menú APILAMIENTO
145
Información Importante sobre Apilamiento Inteligente
146
4 Conexión de Cables
149
Conexión de un Cable RS-232C
149
Conexión de Cables de Señales
150
Entrada de Imagen desde Principal a Secundario
150
Entrada de Imagen a Secundario y Principal Individualmente
150
5 Configuración de Los Puertos de Entrada Utilizando el Menú
151
Preparación para Operaciones de Menú
151
Comprobación del Estado de Funcionamiento del Proyecto Principal
151
Puesta en Marcha del Proyector Principal
152
Configuración del Menú
153
Entrada de Imagen desde Principal a Secundario - Señal de Ordenador
153
Entrada de Imagen desde Principal a Secundario - Señal de Vídeo (Componente O Vídeo)
154
Entrada de Imagen a Secundario y Principal Individualmente
154
6 Restricciones de la Función Programa
156
7 Solución de Problemas
158
Caratteristiche
163
Italiano
164
1 Introduzione
165
Illustrazione Delle Voci E Dei Simboli Grafici
165
Istruzioni DI Sicurezza Importanti
165
Funzione Stack Istantaneo
165
Installazione Generale
167
Informazioni Base E Preparazione
168
Stack Istantaneo
168
Stack Intelligente E Stack Semplice
168
Telecomando Per Stack Intelligente E Stack Semplice
168
Stili DI Installazione
168
Termini Provvisori Per I Due Proiettori
168
2 Installazione
169
Preparazione Dello Stack Intelligente
169
Installazione del Primo Proiettore (Set A)
170
Rimozione Dei Tappi Delle Cavità
170
Preparazione Dei Piedini DI Sollevamento
170
Scelta Della Posizione DI Installazione
170
Predisposizione del Set a
171
Installazione del Secondo Proiettore (Set B)
173
Creazione DI uno Stack DI Proiettori
173
Collegamento Dei Proiettori
173
Predisposizione del Set B
174
Conferma Delle Impostazioni DI Principale E Secondario
176
Regolazione Fine Della Posizione Dell'immagine
177
Per Gli Utenti Dello Stack Intelligente
177
Per Gli Utenti Dello Stack Semplice
178
3 Impostazioni del Menu
179
Visualizzazione del Menu STACK
179
Selezione DI Principale, Secondario O Spento
180
Selezione Della Modalità DI Funzionamento Della Lampada
181
Selezione Della Modalità DI Commutazione Della Lampada
183
Selezione DI una Fonte DI Ingresso Per Secondario
184
Uscita Dal Menu Stack Intelligente
185
Menu STACK
185
Finestra DI Dialogo Dal Menu STACK
185
Informazioni Importanti Per lo Stack Intelligente
186
4 Collegamento Dei Cavi
189
Collegamento DI un Cavo RS-232C
189
Collegamento Dei Cavi DI Segnale
190
Ingresso Dell'immagine da Principale a Secondario
190
Ingresso Dell'immagine a Secondario E Principale Individualmente
190
5 Impostazione Dell Porte DI Ingresso Utilizzando Il Menu
191
Preparazione alle Operazioni DI Menu
191
Controllo Dello Stato DI Funzionamento del Proiettore Principale
191
Avvio del Proiettore Principale
192
Impostazione del Menu
193
Ingresso Dell'immagine da Principale a Secondario
193
Segnale del Computer
193
Ingresso Dell'immagine da Principale a Secondario - Segnale Video (Component O Video)
194
Ingresso Dell'immagine a Secondario E Principale Individualmente
194
6 Limitazioni Della Funzione Programma
196
7 Risoluzione Dei Problemi
198
Guida Operativa
198
Norsk
204
1 Innledning
205
Forklaringer På Adgang Og Grafiske Symboler
205
Viktig Sikkerhetsforholdsregel
205
Hurtigstablingsfunksjon
205
Generell Installasjon
207
Grunnleggende Informasjon Og Klargjøring
208
Hurtigstabling
208
Smart Stabling Og Enkel Stabling
208
Fjernkontroll for Smart Stabling Og Enkel Stabling
208
Installasjonsmetoder
208
Foreløpige Termer for de to Projektorene
208
2 Installation
209
Klargjøring for Smart Stabling
209
Installere den Første Projektoren (Sett A)
210
Ta Av Hulldeksler
210
Klargjøre Elevatorføtter
210
Velge Installasjonsstilling
210
Konfigurere Sett a
211
Installere den Andre Projektoren
211
Installere den Andre Projektoren (Sett B)
213
Stable Projektorene
213
Koble Til Projektorene
213
Konfigurere Sett B
214
Installere den Andre Projektoren (Sett B) - Konfigurere Sett B
215
Bekrefte Viktigste Og Sub Innstillinger
216
Finjustere Bildeposisjon
217
For Smart Stabling-Brukere
217
For Enkel Stabling-Brukere
218
3 STABEL-Menyinnstillinger
219
Vise STABEL-Meny
219
Velge Viktigste, Sub Eller Av
220
Velge Lampedriftsmodus
221
Sikkerhet
222
Velge Lampebyttemodus
223
Velge Inndatakilde for Sub Projektor
224
Avslutte Smart Stabling-Meny
225
STABEL-Meny
225
Dialogboks Fra STABEL-Meny
225
Viktig Informasjon for Smart Stabling
226
4 Tilkobling Av Kabler
229
Koble Til en RS-232C-Kabel
229
Koble Til Signalkabler
230
Sende Bilde Fra Viktigste Til Sub Projektor
230
Sende Bilde Til Sub Og Viktigste Projektor Enkeltvis
230
5 Konfigurere Inndataporter Med Menyen
231
Klargjøre for Menyoperasjoner
231
Kontrollere Viktigste Projektorens Driftsstatus
231
Starte Opp Viktigste Projektoren
232
Konfigurere Menyen
233
Sende Bilde Fra Viktigste Til Sub Projektor - Datasignal
233
Sende Bilde Fra Viktigste Til Sub Projektor - Videosignal (Enten Komponent Eller Video)
234
Sende Bilde Til Sub Og Viktigste Projektor Enkeltvis
234
6 Begrensninger for Plan-Funksjon
236
7 Feilsøking
238
Dutch
244
1 Inleiding
245
Uitleg Van de Gebruikte Titels en Symbolen
245
Belangrijke Veiligheidsinstructies
245
Overlappingsfunctie
245
Algemene Installatie
247
Basisinformatie en Voorbereiding
248
Overlap
248
Intellectuele Stapeling en Gewone Stapeling
248
Afstandsbediening Voor Intellectuele Stapeling en Gewone Stapeling
248
Installatiestijlen
248
Voorlopige Voorwaarden Voor de Twee Projectors
248
2 Installatie
249
Voorbereiden Op Intellectuele Stapeling
249
De Eerste Projector Plaatsen (Set A)
250
Kapjes Voor Opening Verwijderen
250
Verstelvoetjes Voorbereiden
250
Plaatsingspositie Bepalen
250
De Eerste Projector Plaatsen (Set B)
253
De Projectors Stapelen
253
Verbinding Maken Met de Projsectors
253
Set B Opstellen
254
De Hoofd- en Subinstellingen Bevestigen
256
De Afbeeldingspositie Verfijnen
257
Voor Gebruikers Van Intellectuele Stapeling
257
Voor Gebruikers Van Gewone Stapeling
258
3 OVERLAPPEN Menu-Instellingen
259
Menu OVERLAPPEN Tonen
259
Selecteer Hoofd-, Sub- of Uit
260
Lampmodus Selecteren
261
Lampwisselmodus Selecteren
263
Invoerbron Voor Sub- Selecteren
264
Uitgang Menu Intellectuele Stapeling
265
OVERLAPPEN Menu
265
Dialoog Van OVERLAPPEN Menu
265
Belangrijke Informatie Voor Intellectuele Stapeling
266
4 Verbindingskabels
269
Een Kabel RS-232C Verbinden
269
Signaalkabels Verbinden
270
Een Afbeelding Van Hoofd- Naar Sub- Brengen
270
Een Individuele Afbeelding Naar Sub- en Hoofd- Brengen
270
5 Invoerpoorten Instellen Via Het Menu
271
Voorbereiden Op Menuhandelingen
271
Gebruiksstatus Van Hoofdprojector Controleren
271
Hoofdprojector Opstarten
272
Menu Instellen
273
Een Afbeelding Van Hoofd- Naar Sub- Brengen - Computersignaal
273
Een Afbeelding Van Hoofd- Naar Sub- Brengen - Videosignaal (Component of Video)
274
Een Individuele Afbeelding Naar Sub- en Hoofd- Brengen
274
6 Beperkingen Op Plannings Functie
276
7 Oplossingen Vinden
278
Christie Lx41 series Bedienungsanleitung (290 Seiten)
Kurzform
Marke:
Christie
| Kategorie:
Beamer
| Dateigröße: 10.19 MB
Inhaltsverzeichnis
English
5
Inhaltsverzeichnis
5
First of All
6
Entries and Graphical Symbols Explanation
6
Important Safety Instruction
6
Regulatory Notices
7
About Electro-Magnetic Interference
7
About Waste Electrical and Electronic Equipment
8
Contents of Package
8
Preparations
9
Loading Batteries into the Remote Control
9
Arrangement
10
Connecting with Your Devices
11
Connecting Power Supply
12
Turning on the Power
12
Adjusting the Projector's Elevator
13
Displaying the Picture
14
Turning off the Power
15
Replacing the Lamp
16
Cleaning and Replacing the Air Filter
18
Replacing the Internal Clock Battery
20
Using the CD Manual
21
Specifications
22
Troubleshooting - Warranty and After-Service
23
Français
25
Préliminaires
26
Explication des Conventions et Symboles
26
Instructions de Sécurité Importantes
26
Réglementations
27
À Propos des Interférences
27
À Propos des Déchets D'équipements
28
Contenu de L'emballage
28
Préparations
29
Mise en Place des Piles Dans la Télécommande
29
Disposition
30
Connecter Vos Appareils
31
Connexion Électrique
32
Mise Sous Tension
32
Réglage de L'élévateur du Projecteur
33
Affichage de L'image
34
Mise Hors Tension
35
Remplacement de la Lampe
36
Nettoyer et Remplacer le Filtre à Air
38
Remplacement de la Pile D'horloge Interne
40
Utiliser le Manuel Sur CD
41
Caractéristiques Techniques
42
Garantie et Service Après-Vente
43
Deutsch
45
Einleitende Hinweise
46
Erläuterung der Kennwörter und
46
Wichtige Sicherheitsanweisungen
46
Richtlinien und Vorschriften
47
Elektromagnetische Verträglichkeit
47
Elektronik-Altgeräten
48
Lieferumfang
48
Vorbereitungen
49
Batterien in die Fernbedienung Einsetzen
49
Anordnung
50
Anschließen der Geräte
51
Einschalten des Geräts
52
Stromversorgung Anschließen
52
Ausrichten des Projektors
53
Anzeige des Bildes
54
Verwenden Sie die VOLUME+/VOLUME
54
Ausschalten des Geräts
55
Austausch der Lampe
56
Reinigung und Austausch des Luftfilters
58
Austausch der Internen Uhr Batterie
60
Verwendung der CD-Anleitung
61
Systemvoraussetzungen
61
Wie Sie die CD Verwenden
61
Technische Daten
62
Fehlersuche - Garantie und Kundendienst
63
Español
65
Antes de Comenzar
66
Explicación de Entradas y Símbolos Gráficos
66
Instrucciones de Seguridad Importantes
66
Advertencias Reguladoras
67
Acerca de la Interferencia Electromagnética
67
Acerca del Desecho de Equipos Eléctricos y Electrónicos
68
Contenido del Paquete
68
Preparativos
69
Cargue las Pilas en el Control Remoto
69
Disposición
70
Conexión de Sus Dispositivos
71
Conexión de la Alimentación
72
Conexión de la Fuente de Alimentación
72
Ajustar el Elevador del Proyector
73
Visualización de Imagenes
74
Desconexión de la Alimentación
75
Reemplazo de la Lámpara
76
Limpieza y Reemplazo del Filtro de Aire
78
Reemplazo de la Pila del Reloj Interno
80
Utilización del Manual del CD
81
Especficaciones
82
Solución de Problemas - Garantía y Servicio Posventa
83
Italiano
85
Per Iniziare
86
Illustrazione Delle Voci E Dei Simboli GrafiCI
86
Istruzioni DI Sicurezza Importanti
86
Avvisi DI Legge
87
Sull'interferenza Elettromagnetica
87
Sullo Smaltimento Degli Apparecchi Elettrici Ed Elettronici
88
Contenuto Della Confezione
88
Preparativi
89
Caricamento Delle Pile Nel Telecomando
89
Posizionamento
90
Collegamento Delle Periferiche
91
Accensione
92
Collegamento Dell'alimentazione
92
Impostazione Dei Piedini DI Regolazione del Proiettore
93
Visualizzazione Dell'e Immaginei
94
Spegnimento
95
Sostituzione Della Lampada
96
Pulizia E Sostituzione del Filtro Dell'aria
98
Sostituzione Della Batteria Dell'orologio Interno
100
Lettura Dei Manuali Su CD
101
Dati Tecnici
102
Risoluzione Dei Problemi - Garanzia E Servizio Post-Vendita
103
Norsk
105
For Det Første
106
Forklaringer På Adgang Og Grafiske Symboler
106
Viktig Sikkerhetsforholdsregel
106
Merknader Om Reguleringer
107
Om Elektromagnetisk Interferens
107
Om Avfall Fra Elektrisk Og Elektronisk Utstyr
108
Innholdspakke
108
Klargjøring
109
Isetting Av Batterier I Fjernkontrollen
109
Plassering
110
Tilkopling Av Utstyr
111
Koble Il Strømforsyningen
112
Påslåing Av Strømmen
112
Justere Projektorens Elevator
113
Fremvisning Av Bilde
114
Avslåing Av Strømmen
115
Utskifting Av Lampen
116
Rengjøring Og Utskifting Av Luftfilteret
118
Utskifting Av Det Interne Klokkebatteriet
120
Bruk Av Veiledningene På CD
121
Spesifikasjoner
122
Garanti Og Etter-Salg-Service
123
Dutch
125
Voordat U Begint
126
Uitleg Van de Gebruikte Titels en Symbolen
126
Belangrijke Veiligheidsinstructies
126
Mededelingen over Regelgevingen
127
Over Elektromagnetische Interferentie
127
Inhoud Van de Verpakking
128
Voorbereidingen
129
Batterijen Plaatsen in de Afstandsbediening
129
Opstellen
130
Uw Apparaten Aansluiten
131
De Netvoeding Inschakelen
132
De Voeding Aansluiten
132
De Neiging Van de Projector Instellen
133
Weergave Van Het Beeld
134
De Projector Uitzetten
135
De Lamp Vervangen
136
Vervanging Interne Klok Batterij
140
Gebruik Van de CD Handleiding
141
Technische Gegevens
142
Oplossingen Vinden - Garantie en Service
143
Werbung
Werbung
Verwandte Produkte
Christie LX400
Christie VIVID LX450
Christie LX500
Christie LX900
Christie LX750
Christie LX601i
Christie LX700
Christie LX55
Christie LX605
Christie LX1200
Christie Kategorien
Beamer
Monitore
Lautsprecher
Controller
Lichtanlage
Weitere Christie Anleitungen
Anmelden
Anmelden
ODER
Mit Facebook anmelden
Mit Google anmelden
Anleitung hochladen
Von PC hochladen
Von URL hochladen