Werbung
www.grepool.com
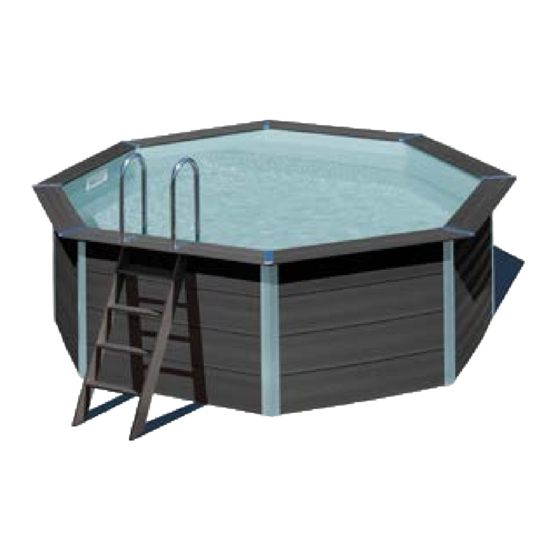
KPCO41
Ø4,10m
KPCOV52
5,24 x 3,86 H 1,24m
KPCOV66
6,64 x 3,86 H 1,24m
KPCOV80
8,04 x 3,86 H 1,24m
NON-CONTRACTUAL PHOTOS AND PICTURES. FOTOS E IMÁGENES NO CONTRACTUALES. PHOTOS ET IMAGES NON CONTRACTUELLES. PHOTOS UND BILDER SIND NICHT VERTRAGLICH.
LA FOTOGRAFIA O IL DISEGNO È SOLO A SCOPO ILLUSTRATIVO ED INFORMATIVO. FOTO'S EN AFBEELDINGEN HEBBEN GEEN CONTRACTUELE WAARDE. FOTOS E IMAGENS NAO CONTRATADA.
Instruction Manual
EN
Take the reference number of your pool into
account when you do the assembly
Manual de Instrucciones
ES
Tenga en cuenta la referencia y las medidas de
su piscina a la hora de realizar el montaje
Notice de Montage
FR
Considérez la référence et les mesures de
votre piscine avant de procéder au montage
Bedienungsanleitung
DE
Bitte beachten Sie die Referenz und die
Masse Ihres Schwimmbads, wenn Sie die
Montage ausführen
Manuale delle instruzioni
IT
Tener presente il riferimento della piscina al
momento del montaggio
Handleiding met instructies
NL
Op het moment van monteren dient u
rekening te houden met de referentie en de
afmetingen van uw zwembad
Manual de instruções
PT
Tenha em conta a referência da piscina momento
de realizar a montagem
Werbung
Inhaltsverzeichnis

Verwandte Anleitungen für GRE Avantgarde


Inhaltszusammenfassung für GRE Avantgarde
- Seite 1 Instruction Manual Manuale delle instruzioni Take the reference number of your pool into Tener presente il riferimento della piscina al account when you do the assembly momento del montaggio Manual de Instrucciones Handleiding met instructies Tenga en cuenta la referencia y las medidas de Op het moment van monteren dient u rekening te houden met de referentie en de su piscina a la hora de realizar el montaje...
- Seite 2 SUMARY: 1 - SAFETY PRECAUTIONS. 2 - COMPONENTS. 3 - PREPARATION OF THE SITE. 4 - INSTALLATION. 5 - MAINTENANCE AND USE. ÍNDICE: 1 - CONSEJOS DE SEGURIDAD. 2 - COMPONENTES. 3 - PREPARACIÓN DEL TERRENO. 4 - INSTALACIÓN. 5 - MANTENIMIENTO Y USO. SOMMAIRE: 1 - CONSEILS DE SECURITE.
- Seite 3 IMPORTANT - Read carefully the manual whole before mounting the pool. - Before starting installation, extend all the pool components and check that they coincides with that indicated in the page 23. - Be very careful when handling the swimming pool parts. They can break. - In case of failure to follow these instructions, the warranty will be completely invalidated.
- Seite 4 En su objetivo constante de mejorar sus productos, Manufacturas Gre se reserva el derecho a modificar en cualquier momento y sin previo aviso las características, los detalles técnicos, los equipamientos estandarizados y las opciones de sus productos.
- Seite 5 ATTENZIONE Leggere attentamente queste informazioni e e conservarle per farvi riferimento in futuro Congratulazioni per la tua scelta. Il modello che hai scelto è stato progettato in modo particolare per una installazione semplice e rapida, ma per un uso corretto della piscina sono necessarie alcune precauzioni. Prima di procedere con l’installazione e il montaggio della tua piscina, informati su quanto previsto dal piano regolatore.
- Seite 6 Any reclamation against guarantee should be made material over diverse surfaces. Deformation of the liner that has by an online declaration, via the www.service-gre.com been left without water for 24 hours (never completely empty the website, together with receipt of purchase.
-
Seite 7: Installation Suggestion
PROLOGUE SAFETY INSTRUCTIONS PACKAGING, CLASSIFICATION AND RECYCLING The filter kit (filter + pump) should be installed at least 3.5 metres • Some pool components are packed in plastic bags. To avoid all from the pool to avoid the risk of electrocution. risk of asphyxia, never allow babies or children to play with these. - Seite 8 • Portes de ENVÍO por cargo del cliente. disfunción, la sociedad Manufacturas Gre se reserva el derecho • Portes de RETORNO por cuenta de Manufacturas Gre (para de facturar los costes de portes y otros diversos al cliente. aquellas piezas comprendidas en el esquema de la garantía).
-
Seite 9: Antes Del Montaje
ANTES DEL MONTAJE INSTRUCCIONES DE SEGURIDAD EMBALAJE, CLASIFICACIÓN Y RECICLAJE Es obligatorio colocar el kit de filtración (filtro + bomba) a una • Algunos componentes de la piscina están embalados en bolsas distancia mínima de 3,5 metros de la piscina para evitar el riesgo de plástico. -
Seite 10: Garantie
Il est impératif de conserver l’étiquette du numéro de série www.service-gre.com, accompagnée de la preuve d’achat. du liner présent sur le produit et son emballage. Pour toute demande éventuelle de prise en garantie, un échantillon du Des photos pourront être demandées pour justificatif. -
Seite 11: Avant-Propos
AVANT-PROPOS CONSIGNES DE SECURITE EMBALLAGE, TRI ET RECYCLAGE Il est impératif de placer votre kit de filtration (filtre + pompe) à au • Certains composants de votre piscine sont emballés sous sacs moins 3,5 m. du bassin afin d’éviter tout risque de choc électrique. plastiques. - Seite 12 Abnutzung aufgrund der Reibung des Materials an verschiedenen Jegliche Garantieansprüche müssen online auf der Oberflächen, Verformungen des Liners, der länger als 24 Stunden Webseite www.service-gre.com, zusammen mit dem ohne Wasser zurückblieb (leeren Sie den Pool nie vollständig). Kaufbeleg, geltend gemacht werden.
-
Seite 13: Sicherheitshinweise
EINLEITUNG und leicht zugänglichen Ort sein. SICHERHEITSHINWEISE Die Position des Swimmingpools muss frei von Rohren oder elektrischen Anschlüssen sein. Es ist erforderlich, den Filtrationsbausatz (Filter + Pumpe) in einem Bitte berücksichtigen Sie, dass sich ein Pool am besten an einem Mindestabstand von 3,5 Metern zum Pool zu platzieren, um das sonnigen Tag aufstellen lässt und Tage mit viel Wind zu vermeiden Risiko eines Stromschlags zu vermeiden. -
Seite 14: Garanzia
24 ore (la piscina non deve mai Qualsiasi richiesta di garanzia deve essere inoltrata essere svuotata completamente). on line, tramite la pagina web www.service-gre.com, È obbligatorio conservare l’etichetta con il numero di serie allegando lo scontrino. - Seite 15 INTRODUZIONE ISTRUZIONI DI SICUREZZA IMBALLAGGIO, CLASSIFICAZIONE E RICICLO È obbligatorio collocare il kit di filtrazione (filtro + pompa) a una • Alcuni componenti della piscina hanno un imballaggio in distanza minima di 3,5 metri dalla piscina per evitare il rischio di plastica.
- Seite 16 Elke aanspraak op garantie zal onderwerp zijn van een van contact met oxidatiemiddelen, kleuronderhoud en slijtage online declaratie, via de website www.service-gre.com, ten gevolge van het vastzetten van het materiaal op verschillende tezamen met het aankoopbewijs.
-
Seite 17: Veiligheidsinstructies
WOORWOORD VEILIGHEIDSINSTRUCTIES VERPAKKING, AFVALSCHEIDING EN RECYCLING Het is verplicht om de filterkit (filter + pomp) op een minimum • Enkele componenten van het zwembad zijn verpakt in plastic afstand van 3,5 meter van het zwembad te plaatsen om het risico zakjes. - Seite 18 Qualquer reclamação de garantia deverá ser objeto superfícies, a deformação do liner que foi deixado mais de 24 de uma declaração online, no site www.service-gre.com, horas sem água (nunca esvazie a piscina por completo). juntamente com o comprovativo de compra.
-
Seite 19: Instruções De Segurança
PRELIMINAR INSTRUÇÕES DE SEGURANÇA EMBALAGEM, CLASSIFICAÇÃO E RECICLAGEM É obrigatório colocar o kit de filtração (filtro + bomba) a uma • Alguns componentes da piscina estão embalados em sacos de distância mínima de 3,5 metros da piscina para evitar o risco de plástico. - Seite 20 SAFETY PRECAUTIONS CONSEJOS DE SEGURIDAD CONSEILS DE SECURITE SICHERHEITSHINWEIS CONSIGLI DI SICUREZZA RAADGEVINGEN VOOR DE VEILIGHEID PLANO DE INSTALAÇÃO...
- Seite 21 30 mA.. situé au moins à 3,50 m du bord du bassin. L’appareil doit être branché sur une prise de cou- web: www.gre.es SI TIENE ALGÚN PROBLEMA, ..¡CONSÚLTENOS! rant avec prise de terre, protégé par un interrupteur SERVICIOS TÉCNICOS EN ESPAÑA: différentiel (RCD) avec un courant de fonctionne-...
- Seite 22 EM CASO DE PROBLEMA...¡CONSUL- Germany & Austria TELEFOONNUMMER VOOR ADVIES: TAR-NOS! Freie nummer: 0 800-952 49 72 web: www.gre.es Nederlands & Belgïe Tel: + 31 513 62 66 66 SERVIÇOS TECNICO EM PORTUGAL: e-mail: info-germany@gre.es e-mail: service@aqua-fun.info link web > inicio > serviço > serviço técnico > portugal web: www.gre.es...
- Seite 23 COMPONENTS COMPONENTES Saque y clasifique los componentes de la piscina antes de iniciar el montaje. Además es el momento de montar la escalera y la depuradora (vea sus respectivas instrucciones de montaje). La falta de piezas en el kit debe de ser informada al servicio postventa en un plazo máximo de 15 días desde la fecha de compra de la piscina, en caso contrario no estará...
- Seite 24 Locate the model of your swimming pool in the following table and verify that the number of UNITS within each box or container matches this table ( *for the kits ). Busque el modelo de su piscina en la siguiente tabla y verifique que el número de UNIDADES dentro de cada caja o envase coincide con esta tabla ( *para los kits ).
- Seite 25 IMAGE KPCO41 KPCOV52 KPCOV66 KPCOV80 COMPCOVER ETCOMP AR1174CO PV1185 PEU2 PEAO E ( 950 mm ) A ( 1440 mm ) KITENVCO41 KITENVCOV52 KITENVCOV66 KITENVCOV80 LINER FILTER SK101G SILEX MPROV...
- Seite 26 PREPARATION OF THE SITE PREPARACIÓN DEL TERRENO PRÈPARATION DU TERRAIN VORBEREITUNG DES BODENS PREPARAZIONE DEL TERRENO BEREIDING VAN HET TERREIN PREPARAÇÃO DO TERRENO...
- Seite 27 First level Above ground Semi in-ground In-ground This is a determining stage in the construction of your pool. Certain works performed in situ, like the preparation of the land, the concrete slab, the draining... can need the intervention of professionals that will propose the most adequate solutions. Select the ideal location, in the sunniest spot possible, taking into account the local regulations (distance from the paths, public rights of way, networks...) and the landscaping after installing the pool.
- Seite 28 Nivel de filtración Sobre el suelo Semienterrada Enterrada Es una etapa determinante en la construcción de su piscina. Determinados trabajos de puesta en marcha, como la preparación del terreno, la losa de hormigón, el drenaje... pueden precisar la intervención de profesionales que sabrán proponerle las soluciones adecuadas. Seleccione el emplazamiento ideal, lo más soleado posible, teniendo en cuenta la normativa local (distancia de la cerca, servidumbres públicas, redes...) y el paisajismo posterior a la instalación de la piscina.
- Seite 29 Niveau de la filtration Hors-sol Semi-enterrée Enterrée C’est une étape déterminante dans la réalisation de votre piscine. Certains travaux de mise en oeuvre tels que le terrassement, la dalle béton, le drainage,... peuvent nécessiter l’intervention de professionnels qui sauront proposer les solutions adéquates. Choisissez l’emplacement idéal, le plus ensoleillé...
- Seite 30 Filtrationshöhe An der oberfläche zur Hälfte eingelassen Ganz eingelassen Dies ist eine entscheidende Etappe beim Aufbau Ihres Pools. Bestimmte Arbeiten bei der Inbetriebnahme, wie etwa Geländevorbereitung, Betonplatte, Entwässerung… können den Einsatz von Fachleuten erforderlich machen, die in der Lage sind, Ihnen geeignete Lösungen vorzuschlagen. Wählen Sie den idealen Standort, d.
- Seite 31 Livello di filtrazione Fuori terra Seminterrata Interrata È un passaggio determinante nella costruzione della piscina. Determinati lavori di messa in funzione, come la preparazione del terreno, il basamento di calcestruzzo, il drenaggio... possono necessitare l’intervento di professionisti che proporranno le soluzioni adeguate. Scegliere la collocazione ideale, il più...
- Seite 32 Filterniveau Op de grond Half-verzonken Verzonken Dit is een bepalende fase tijdens de aanleg van uw zwembad. Er moet worden aangevangen met een aantal werkzaamheden, zoals de voorbereiding van het terrein, de betonvloer, de afvoer... dit kan vragen om de hulp van professionals die weten hoe ze de juiste oplossingen moeten uitvoeren. Kies een ideale plaats uit, zo zonnig mogelijk, maar houd daarbij rekening met de plaatselijke normen (afstand tot de grondscheiding, publieke erfdienstbaarheid, leidingnetwerken...) en de landschapsinrichting na installatie van het zwembad.
- Seite 33 Nível de filtração Em superficie Semienterrada Enterrada É uma etapa determinante na construção da sua piscina. Determinados trabalhos de colocação em funcionamento, como a preparação do terreno, a laje de betão, a drenagem... podem precisar da intervenção de profissionais que saberão propor-lhe as soluções adequadas. Selecione a localização ideal, o mais soalheira possível, tendo em conta o regulamento local (distância da vedação, servidões públicas, redes...) e o paisagismo posterior à...
- Seite 35 KPCO41 4,46 m 4,46 m KPCOV52 5,86 m 4,46 m KPCOV66 7,26 m 4,46 m KPCOV80 8,66 m 4,46 m Mark the installation area: Identify your pool model in this table for the dimensions needed for installation. To mark the ground, use wooden stakes, a screwdriver, funnel or plastic bottle and flour or lime. It is essential to level the total surface necessary before the marking to ensure correct pool installation.
- Seite 36 INSTALLATION INSTALACIÓN IMPLANTACIÓN MONTAGE INSTALLAZIONE INSTALLATIE INSTALAÇÃO...
- Seite 37 C’ C’ E’ E’ KPCOV52 KPCOV66 KPCO41 KPCOV80 F’ F’ D’ D’ C-C = D-D C-D = C’-D’ E-E’ = F-F’ KPCO41 1,50 m 1,50 m 1,50 m KPCOV52 2,90 m 3,40 m 4,80 m KPCOV66 4,30 m 3,40 m 6,20 m KPCOV80 5,70 m...
- Seite 38 OPTION 4A: INSTALLATION OF THE POOL ON THE GROUND. Finishing: On the cleaned and levelled ground, spread a light coat of sieved sand (max. 1cm). Water and compact it (with a garden roller). Check that is well levelled. Do not use the sand to level the ground. The finishing has to be perfect.
- Seite 39 2 - 3 REFS. Nº X - C D - G = D’ - G SIZES KPCOV52 +/- 150 cm 45,5 cm 444 x 15 x 15 cm KPCOV66 +/- 150 cm 45,5 cm 444 x 15 x 15 cm KPCOV80 +/- 150 cm 45,5 cm...
- Seite 40 PV1185 PV1185 ± 3470 mm PV1185 PEBP08 ± 4340 mm TM640x2 KPCOV52 KPCOV66 KPCOV80 1 PV1185 + 4 PEAO + 2 PEU2 Nº13 + 1 PEU Mounting of the columns (C) and the interior structure: 1º- Mount each column with the following parts: 1 PV1185 + 4PEAO + 1 PG + 2PEU2 + 1PEU with the “TV”...
- Seite 41 PV1185 Beam Assembly Perform all of these steps on firm, level ground. It is important to perform assembly of these parts in a wide and level space for greater convenience. 1-Place the “PEU2” piece so that the 4 holes in each one of the sides, coincides with the second and third row of holes of the PG (See photo 1b). The side with two holes must be on the top.
- Seite 42 KPCOV52 TM640 x 2 51 x 101,5 x 1,5 cm KPCOV52 KPCOV66 KPCOV80 Place and install crossbars in the trench. Before fitting the plates AP it is best to introduce the assembled beams in the ditch already prepared. Fill with soil, compact and level. Check the level of the columns (correctly leveled) (N).
- Seite 43 KPCO41 4,46 m 4,46 m KPCOV52 5,86 m 4,46 m KPCOV66 7,26 m 4,46 m KPCOV80 8,66 m 4,46 m OPTION 4B: INSTALLATION OF THE SWIMMING POOL IN CONCRETE SLAB - Prior to installing the pool, you need to create a reinforced concrete slab which is a minimum 150 Kg/m2 of 15 cm thick. It must be a perfectly flat and horizontal slab.
- Seite 44 KPCO41 1,69 m 0,99 m 0,70 m KPCO41: Once the floor or the ground are properly leveled, the ground will be marked with the lines where the inside face of the panels of the swimming pool will be supported. It is time to check the measurements. If not, the exercise needs to be performed again.
- Seite 45 KPCOV52: Once the floor or the ground are properly leveled, the ground will be marked with the lines where the inside face of the panels of the swimming pool will be supported. We start by marking the axis of the buried beam in the floor. We take as reference the center of the column and with a tape measure we draw a line to the other column.
- Seite 46 We start by marking the axis of the buried beams on the floor. ( Page 38 ). Empezamos marcando en la solera el eje de las vigas Si comincia col marcare sulla soletta l’asse dei traversini interrati. enterradas. ( Página 38 ). ( Pagina 38 ).
- Seite 47 PLACEMENT OF THE PANELS -All your pool’s panels are identical except the one that carries filtration. Place it in the center of one of the two longer areas of your swimming pool. -The inside face of the panels (smooth surface) must be above the polygon just marked in the previous paragraph. -Use the vertical profiles to join the panels together.
- Seite 48 PLACEMENT OF PANELS IN THE STRAIGHT AREA ( oval pools ) - The union of the panels must be in the center of the column. That way you can insert the profile ( photo 3 ). - In photo 4, it is possible to see how the panels are not centered in regards to the column. Avoiding this is very important in order not to encounter problems when filling with wáter.
- Seite 49 A = PLYCOMP90 B = PLYCOMP112SK C = PLYCOMP112 D = PLYCOM90112 E = PLYCOMP11290 PLACEMENT OF THE SHORES Now IS the time to remove the outer protection of the vertical aluminum profiles Octagonal Pool: All of the shores are the same shape, except for one, which has a flat surface (photo 7). This shore must be placed above the filtration.
- Seite 50 PLACEMENT OF THE SKIMMER - Completely mount the skimmer and screw it from the inside of the pool. - If you find it difficult to screw it to the wall, you can use a 2 mm drill bit and make a guide for the screw. This will make the work easier. - With the glue, place the seal facing inward.
- Seite 51 COVER PLACEMENT - It is recommended that duct tape be used to cover the rivets of the vertical profiles, which will be in contact with the swimming pool sleeve. This prevents the sleeve from being pricked. (Photo 11). - Before covering the ground, it is advisable to sweep and vacuum the concrete floor to remove dirt, such as pebbles, branches, leaves, etc. - Place the cover to protect the sleeve.
- Seite 52 PLACEMENT OF THE SLEEVE ( LINER ) - Remove the sleeve from the box with great care. Stretch and extend it in the shade so that it recovers its shape. Perform this step at least two hours before its placement. The ideal temperature for mounting the sleeve is 20 - 25ºC. -Do not use sharp objects would could prick the sleeve.
- Seite 53 INSTALATION OF SHORE TRIM - Look for the trims. All pools have 8 trims with an angular shape. Place them in the shore connections (photo 15) - Oval pools have trims for the straight area. The ends are different. Place the longest part on the inside of the pool. (photos 16 and 17). - Screws are not necessary.
- Seite 54 INSTALATION OF THE STRUCTURAL SYSTEM TRIM This step is only for oval pools. This is to cover the vertical posts (photo 18) to give the swimming pool a nicer aesthetic. The piece is for decoration only. Look for some brackets and screws (4 x 16 mm) that you will find in the bag KITENV. Screw the bracket as you prefer.
- Seite 55 FITTING THE RETURN VALVE (V): (IMPELLER NOZZLE: V) This valve is located at the bottom of the pool wall, and water is returned to the pool through it after treatment in the treatment unit. Start pouring water into the pool through a garden hose, and stop 4 cm below the bottom of the valve hole.
- Seite 56 The nozzle is inserted from the inside of the pool through the cut that is made, with a friction ring (F) and a gasket (J) already in place on the nozzle. This way, the gasket (J) is in contact with the liner. Cut the piece of liner that appears on the outside (Picture 22). The other gasket (J) is put into place from the outside, folding it and turning the panel, so that it is in contact with the liner and the panel (Photo 23).
- Seite 57 Insert the return hose (M) which goes from the outlet of the treatment unit to the return valve (V), and secure it with the clamp (A) (photo 27).When the filtering is working, the safety cover must be installed as in photo 28. Use the screws included in the kit. Tip: You can use a 2 mm drill bit to make a guide on the panel.
- Seite 58 ATTACHING THE SKIMMER BODY (S) TO THE OUTSIDE OF THE POOL: Fill the pool with water until the level is 4 cm from the bottom of the perforation for the skimmer. Affix the seal ring and position the skimmer frame. Screw it with a screwdriver.
- Seite 59 PLACEMENT OF THE INTERNAL STAIRCASE - Take out the ladder and follow the installation instructions. Think about where you want to have the entry for your swimming pool. To make it more real you can mount it and put it into pool without attaching the fastenings. Just support it on the shore. - Look for two metal plates.
- Seite 60 2 cm 1 cm PLACEMENT OF THE EXTERNAL STAIRCASE - Remove the ladder from the box with great care. Look for 8 screws (3.5 x 25 mm) and two hooks in the box: KITENVCO41 - KITENVCOV52 - KITENVCOV66 - KITENVCOV80. - Place the ladder against the pool wall (photo 37) and make a mark as shown (Photo 38).
- Seite 61 FILTER FILTRACIÓN FILTRATION FILTRATION FILTRAZIONE FILTERING FILTRAÇÃO ASSEMBLY SUGGESTIONS: • The filter should be located at least 3.50 m from the pool. The following diagrams explain the movement direction of the water. Check the manual that comes with the filter group for the assembly instruc- tions.
- Seite 62 All the threaded connections should be assembled with the watertight Teflon tape , except the connection with O rings. The Teflon should be wound round the thread in a counter clockwise direction. LAND-FILLING: Finish filling the pool The water level should be situated between the upper third part and the second half of the skimmer mouth. Todas las conexiones roscadas deben montarse con la cinta estanca de Teflón , excepto las conexiones con junta tórica.
- Seite 63 SAND FILTER FILTRO DE ARENA This is the oldest of filtering systems. The filtered water passes through the sand (calibrated FILTRE À SABLE silicon) that retains all impurities. This type of filter is equipped with a multi-directional flap that allows easy manipulations and cleaning. SANDFILTER DIFFERENT POSITIONS OF THE MULTI-DIRECTIONAL FLAP (4 OR 6)*: When you perform changes the position of the multi-directional flap that pump should always be stopped, without...
- Seite 64 2. WASHING POSITION (OR BACKWASH): Sand washing position. Allow the water to circulate in reverse direction in the filter. The water enters through the lower part of the filter elevates the filtering mass and therefore collects all its impurities and because they are lighter than sand, they area evacuated through the upper part of the filter towards the drain.
- Seite 65 4. EMPTYING POSITION / DRAIN (OR WASTE): Position to evacuate the water of for emptying the pool. In this case, the water does not pass through the filter, it goes directly to the drain. 4. POSICIÓN VACIADO / DESAGÜE (O WASTE): Posición para evacuar el agua o para vaciar el vaso. En este caso, el agua no pasa por el filtro, sale directamente por el desagüe.
- Seite 66 6. RECIRCULATION POSITION / CIRCULATION**: Position used so the water circulates through the hydraulic network without passing through the filter. This possibility is used to move the water if you want to add a product to the pool or if you should perform any operation in the filter, because in this case the filter is isolated and the water coming from the pump is directly expelled.
- Seite 67 MAINTENANCE AND USE MANTENIMIENTO Y USO ENTRETIENT ET UTILISATION WARTUNG UND GEBRAUCH MANUTENZIONE E USO ONDERHOUD EN GEBRAUCH MANUTENÇÃO E UTILIZAÇÃO...
- Seite 68 WATER RESPECT THE ENVIRONMENT DO NOT TAKE APART THE POOL UNLESS IT IS STRICTLY NECESSARY. IF YOU DO SO, PLEASE REUSE THE WATER. WATER IS A SCARCE GOOD. When your pool reaches the end of its useful life, it should be disassembled; the different materials (plastic and steel) should be separated and taken to the disposal point indicated by local authorities.
- Seite 69 AGUA RESPETA EL MEDIO AMBIENTE "NO DESMONTE LA PISCINA SI NO ES ESTRICTAMENTE NECESARIO. EN CASO DE HACERLO, LE ROGAMOS REUTILICE EL AGUA. EL AGUA ES UN BIEN ESCASO". Cuando su piscina alcance el final de su vida útil, debe ser desmontada, segregar los distintos materiales (plástico y acero) y llevarlos al punto limpio especificado por las autoridaes locales. MANTENIMIENTO Y USO: - Durante la temporada de uso de un kit de piscina ponga a funcionar el sistema de filtración una vez al día para asegurar un renovamiento completo del volumen de agua y siempre cuando no se esté...
- Seite 70 RECOMMANDATION POUR L ENVIRONNEMENT : «NE DÉMONTEZ PAS LA PISCINE SI CELA N EST PAS ABSOLUMENT NÉCESSAIRE. EN CAS DE DÉMONTAGE, NOUS VOUS PRIONS DE RÉUTILISER L EAU. IL N Y A PAS D EAU EN TROP». Lorsque votre piscine atteint la fin de sa vie utile, elle doit être démontée, puis il faudra séparer les différents matériaux (plastique et acier) et les déposer dans la déchetterie spécifiée par les autorités locales.
- Seite 71 WASSER UMWELTSCHUTZUNG DEMONTIEREN SIE NICHT DAS SCHWIMMBECKEN, WENN DAS NICHT UNBEDINGT NÖTIG IST. IM FALLE SIE DAS MACHEN, VERWENDEN SIE BITTE DAS WASSER. DAS WASSER IST EIN KNAUSERIGES GUTE. Wenn Ihr Pool das Ende seiner Nutzungsdauer erreicht hat, muss er auseinandergebaut werden. Die verschiedenen Materialien (Plastik und Stahl) müssen getrennt und zur Sammelstelle gebracht werden, die von den örtlichen Behörden bestimmt wird.
- Seite 72 ACQUA PRECAUZIONE PER L'ECOSISTEMA AMBIENTALE NON SMONTARE LA PISCINA SE NON E' STRETTAMENTE NECESSARIO.NEL CASO LO FOSSE VI PREGHIAMO DI RIUTILIZZARE L'ACQUA. L'ACQUA NON VA SPRECATA. Quando la piscina giunge al termine della sua vita utile, deve essere smontata, i vari materiali (plastica e acciaio) devono essere separati e trasportati presso il centro di raccolta indicato dalle autorità...
- Seite 73 ACQUA O MEIO AMBIENTE AGRADECE “DESMONTAR A PISCINA SE ABSOLUTAMENTE NECESSÁRIO. NESTE CASO, POR FAVOR REUTILIZE A ÁGUA. A ÁGUA É VIDA.” Quando a piscina atingir o final da sua vida útil, deverá ser desmontada e os distintos materiais (plástico e aço) segregados e transportados para o Ecoponto especificado pelas autoridades locais.
- Seite 74 MADE BY - FABRICADO POR - FABRIQUÉ PAR - HERGESTELLT DURCH PRODOTTO DA - GEPRODUCEERD DOOR - FABRICADO POR: MANUFACTURAS GRE, S.A. ARITZ BIDEA Nº 57 BELAKO INDUSTRIALDEA, APARTADO 69 - 48100 MUNGUIA (VIZCAYA) ESPAÑA Nº Reg. Ind. 48-06762 Made in Spain - Fabricado en España - Fabriqué en Espagne - Hergestellt in Spanien...