Inhaltsverzeichnis
Werbung
Verfügbare Sprachen
Verfügbare Sprachen
Quicklinks
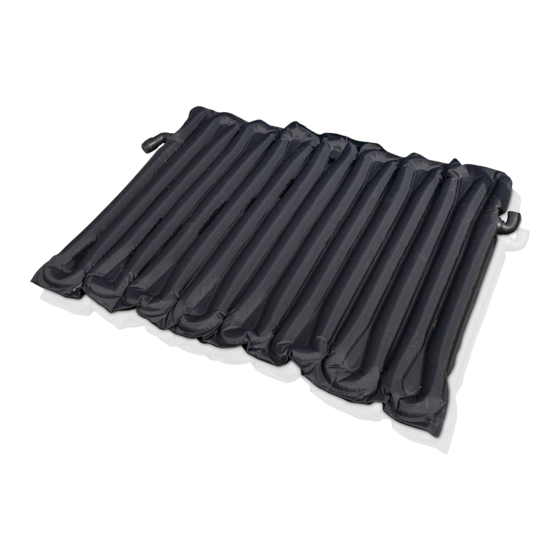
Pool Solar Heater-Bag
EN
Calentador solar para piscinas
ES
Panneau Chauffage solaire pour
FR
piscine
Schwimmbad-Heizgerät mit Son-
DE
nenkollektor
Tappetino a riscaldamento solare
IT
per piscina
Zwembad Zonne-verwarmerpa-
NL
neel
Aquecedor de Piscina Solar
PT
Manuale delle instruzioni - Handleiding met instructies
Nos reservamos el derecho de cambiar total o parcialmente las características de nuestros artículos o contenido de este documento sin previo aviso.
Nous nous réservons le droit de modifier totalement oru en partie les caracteristiques de nos articles ou le contenu de ce document san pré avis.
Wir behalten uns das recht vor die eigenschaften unserer produkte oder den inhalt diese prospektes teilweise oder wollstanding, ohne vorherige benachichtigung su andern.
Ci riservamo il diritto di cambiare totalemente o parzialmente le caratteristiche tecniche dei nostri prodotti ed il contenuto di questo documento senza nessum preavviso.
Wij behouden ons het recht voor geheel of gedeeltelijk de kenmerken van onze artikelen of de inhouk van deze handleiding zonder voorafgaand bericht te wijzigen.
Reservamo-nos no dereito de alterar, total ou parcialmente as caracteristicas os nossos artigos ou o conteúdo deste documento sem aviso prévio.
DISTRIBUIDO POR : MANUFACTURAS GRE S.A. ARITZ BIDEA Nº 57, BELAKO INDUSTRIALDEA, APARTADO 69 - 48100 MUNGUIA (VIZCAYA) ESPAÑA, Nº Reg. Ind. 48-06762 - MADE IN CHINA
Instruction Manual - Manual de Instrucciones
Manuel d´instructions - Bedienungsanleitung
Manual de instruções
We reserve to change all of part of the articles or contents of this document, without prior notice.
www.gre.es
Werbung
Inhaltsverzeichnis

Verwandte Anleitungen für GRE POOL EXPERT AR20693


Inhaltszusammenfassung für GRE POOL EXPERT AR20693
- Seite 1 Reservamo-nos no dereito de alterar, total ou parcialmente as caracteristicas os nossos artigos ou o conteúdo deste documento sem aviso prévio. DISTRIBUIDO POR : MANUFACTURAS GRE S.A. ARITZ BIDEA Nº 57, BELAKO INDUSTRIALDEA, APARTADO 69 - 48100 MUNGUIA (VIZCAYA) ESPAÑA, Nº Reg. Ind. 48-06762 - MADE IN CHINA...
-
Seite 2: General Information
Your Pool Heater has been engineered and manufactured to our highest standard for dependability, ease of operation and safety. With proper care, it will give you years of durable, trouble-free performance. Thank you for your purchase. 1. SAFETY WARNINGS READ ALL WARNINGS BELOW. FAILURE TO DO SO COULD RESULT IN SERIOUS PERSONAL INJURY OR DEATH. - Seite 3 Unpacking Your Solar Heater Carefully remove the product and all component parts from the box. Make certain all parts are present before beginning assembly. (see Section 2, Parts List/Reference). Refer to Appendix for a complete EXPLODED VIEW PARTS DIAGRAM. Tools & Equipment Required The following items are not included with your new solar heater, but will be required for proper installation and operation: •#2 Phillips screwdriver...
-
Seite 4: Installation Instructions
Hose Connector With O-Ring (2) Note:Some parts may be pre-installed at the factory. Parts not shown to scale. 4. INSTALLATION INSTRUCTIONS Heater – Filter – Pool Layout The system layouts below will help you install the solar heater(s) to your above ground pool. -
Seite 5: Initial Operation
Heater - Pool Connections These instructions assume that the pool and filter system are already assembled and there is a hose attached to the pool return (pool water inlet). Place the solar heater in a location where it will receive the greatest amount of sunlight and at least 3 Meter away from pool. - Seite 6 7. APPENDIX: EXPLODED PARTS DIAGRAM Part name Solar bag Hose connector with O-Ring Connector with O-Ring(2)&Gasket(2)
-
Seite 7: Advertencias De Seguridad
Su calentador para piscinas ha sido diseñado y fabricado cumpliendo los más altos estándares de fiabilidad, facilidad de uso y seguridad. Si el mantenimiento es el adecuado, disfrutará de un rendimiento duradero y sin problemas durante años. Gracias por su compra. 1. - Seite 8 introduce en el colector solar, viaja a través del serpentín donde el sol la calienta antes de ser devuelta a la piscina. Desempaquetar su calentador solar Saque con cuidado el producto y todas las piezas de la caja. Asegúrese de que tiene todas las piezas antes de empezar a montar (ver Capítulo 3, Lista/Referencia de piezas).
-
Seite 9: Instrucciones De Montaje
Conector de manguera con junta tórica (2) Nota: Algunas piezas pueden venir premontadas de fábrica. Las piezas no aparecen a escala. 4. INSTRUCCIONES DE MONTAJE Calentador - Filtro - Plano de la piscina Los planos del sistema que aparecen más abajo le ayudarán a instalar el/los calentador/es solar/es en su piscina elevada. -
Seite 10: Primer Uso
Calentador - Conexiones de la piscina Estas instrucciones asumen que la piscina y el sistema de filtración ya están montados y que hay una manguera montada en el retorno de la piscina (entrada de agua de la piscina). Sitúe el calentador en un lugar donde reciba la mayor cantidad de luz solar posible y al menos a 3 metros de la piscina. - Seite 11 Adaptación al invierno Saque el agua del calentador solar desconectando las manguera. ATENCIÓN NO deje que el agua que permanece dentro del calentador se congele. El agua se expande al congelarse y quiebra el serpentín del calentador. 7. APÉNDICE: PLANO DE DESPIECE Clave Nombre de la pieza Cantidad...
-
Seite 12: Avertissements De Sécurité
Votre chauffage solaire de piscine a été conçu et fabriqué avec fiabilité, simplicité de fonctionnement et de sécurité. Avec des soins appropriés, il vous donnera satisfaction durablement. Nous vous remercions pour votre achat. 1. AVERTISSEMENTS DE SÉCURITÉ LISEZ TOUTES LES INSTRUCTIONS AVANT D’ASSEMBLER ET D’UTILISER CE PRODUIT. - Seite 13 Déballage de votre chauffe-solaire Retirez soigneusement le produit et tous les composants de la boîte. Assurez-vous que toutes les pièces soient bien présentes avant de commencer le montage. (voir Page 7), Liste des pièces / références). Voir l’annexe pour une vue éclatée des différentes parties. Outils &...
-
Seite 14: Instructions D'installation
Tuyau connecteur avec joint torique (2) Note: Certaines parties sont déjà assemblés en usine. Les pièces visualisées ne sont pas à l'échelle. 4. INSTRUCTIONS D’INSTALLATION Chauffage - Filtre - plan de la piscine Les schémas ci-dessous vous aideront à installer le chauffe-eau solaire sur votre piscine hors-sol. -
Seite 15: Mise En Service
Connexion du chauffage à la piscine Ces instructions supposent que la piscine et le système de filtration sont déjà assemblés et qu’il y a un tuyau de refoulement vers la piscine (entrée d’eau de la piscine). Placez le chauffe-eau solaire à un endroit où il recevra la plus grande quantité de lumière solaire et à... -
Seite 16: Entretien
6. ENTRETIEN Pour prévenir des dommages, les bobines solaires doivent toujours être couvertes par le dôme en acrylique transparent inclus dans l’emballage. Le chauffe-eau solaire ne nécessite pas d’entretien autre que l’hivernage. Avant le premier gel, ou à la fin de votre saison de baignade, le chauffe-eau solaire doit être retiré... -
Seite 17: Allgemeine Informationen
Schwimmbad-Heizgerät wurde gemäß unserer hohen Standards für Zuverlässigkeit, einfache Benutzung und Sicherheit entworfen und hergestellt. Wenn Sie es ordnungsgemäß behandeln werden Sie es viele Jahre ohne Störung verwenden können. Vielen Dank für Ihren Kauf. 1. SICHERHEITSWARNUNG LESEN SIE ALLE WARNHINWEISE UNTEN WENN SIE DIES NICHT TUN, KÖNNEN SIE SICH VERLETZEN ODER STERBEN. - Seite 18 Auspacken des Sonnenkollektors Nehmen Sie das Produkt und alle Bestandteile vorsichtig aus der Schachtel. Überprüfen Sie, ob alle Teile vorhanden sind, bevor Sie mit der Installation beginnen. (s. Abschnitt 2, Teilliste/Referenzen) S. Anhang für eine DETAILANSICHT DER BESTANDTEILE Nötiges Werkzeug Folgendes Werkzeug wird nicht mit Ihrem neuen Sonnenkollektor mitgeliefert, ist aber für die Installation notwendig: •...
-
Seite 19: Vor Der Installation Des Sonnenkollektors
Schlauchanschluss mit O-Ring (2) Hinweis: Einige Teile können von Fabrik aus zusammengesetzt sein. Teile nicht gemäß Größenverhältnis 4. INSTALLATIONSHINWEISE Heizgerät - Filter - Poolaufbau Systemaufbau wird Ihnen beim Installieren Sonnenkollektors/der Sonnenkollektoren für Ihr Schwimmbad helfen. VOR DER INSTALLATION DES SONNENKOLLEKTORS Schwimmbad Skimmerschlauch Rückflussschlauch... -
Seite 20: Wartung
Heizgerät - Schwimmbadanschlüsse Im vorliegenden Handbuch wird davon ausgegangen, dass das Schwimmbad und das Filtersystem schon installiert sind und ein Schlauch am Wasserzufluss angeschlossen ist. Legen Sie den Kollektor an den Ort, an dem er am meisten von der Sonne bestrahlt wird, wobei er mindestens 3 Meter vom Pool entfernt sein muss. -
Seite 21: Anhang Detailansicht Der Bestandteile
von allen Verbindungen entfernen und zur Überwinterung an einem frostsicheren Ort aufbewahren. Lassen Sie alles Wasser aus dem Heizgerät fließen, indem Sie alle Schläuche entfernen. VORSICHT Lassen Sie KEIN Restwasser im Sonnenkollektor, da dies sonst gefriert. Wasser expandiert, wenn es gefriert und die Sonnenkollektorzellen zerbrechen. 7. -
Seite 22: Avvertenze Di Sicurezza
Il tappetino a riscaldamento solare per piscina è stato pensato e prodotto con i più alti standard di affidabilità, facilità operativa e sicurezza. Usato con cura, il suo corretto funzionamento è garantito per anni. Grazie per il vostro acquisto. 1. AVVERTENZE DI SICUREZZA LEGGERE TUTTE LE SEGUENTI AVVERTENZE. - Seite 23 attraversa le celle solari, dove l’acqua si riscalda grazie all’azione del sole, prima di venir trasportata nuovamente nella piscina. Imballaggio del tappetino solare Rimuovere con cura l’imballaggio del prodotto e delle sue componenti. Accertarsi che tutte le parti siano presenti prima di iniziare ad assemblarle. (vedi Sezione 2, Lista componenti/riferimento).
-
Seite 24: Istruzioni Per L'installazione
3. LISTA COMPONENTI/RIFERIMENTO Componenti primarie Unità principale (1) Raccordo con O-Ring(2)&guarnizione(2) Raccordo per tubo con O-Ring (2) Nota: alcune componenti devono essere pre-installate in fabbrica. Le componenti non sono mostrate in scala. 4. ISTRUZIONI PER L’INSTALLAZIONE Layout Tappetino a riscaldamento solare - Filtro - Piscina I layout di sistema qui riportati vi aiuteranno a installare il tappetino solare/i tappetini... - Seite 25 DOPO AVER INSTALLATO IL TAPPETINO A RISCALDAMENTO SOLARE PISCINA Tubo Skimmer Tubo di riflusso in piscina Tappetino solare Pompa Filtro Nota: dimensioni non in scala. Collegamenti Tappetino a riscaldamento solare - Piscina Le presenti istruzioni partono dal presupposto che la piscina e il sistema di filtrazione siano già...
-
Seite 26: Manutenzione
5. OPERAZIONE INIZIALE Una volta che il tappettino a riscaldamento solare è stato assemblato e i tubi sono collegati alla pompa di filtrazione e al riflusso, aprire il flusso dell’acqua nel tubo di riflusso alla piscina e accendere la pompa e il sistema di filtrazione. Inizialmente usciranno bollicine dalla bocca del tubo di riflusso in quanto l’acqua sta spingendo fuori dal tappetino solare l’aria in esso presente. -
Seite 27: Algemene Informatie
Uw zwembad-verwarmer is ontwikkeld en gemaakt volgens onze hoogste standaard normen , betrouwbaarheid, bedieningsgemak en veiligheid. Met de juiste zorg zal het u jaren van duurzaam en probleemloze prestaties opleveren. Bedankt voor uw aankoop. 1. VEILIGHEIDSVOORSCHRIFTEN LEES ALLE WAARSCHUWINGEN HIERONDER, ZONIET RISKEERT VERWONDINGEN EN/ OF DE DOOD... - Seite 28 Uitpakken van het materiaal Haal voorzichtig de onderdelen uit de doos. Kijk na of alle delen aanwezig zijn alvorens uw installatie te starten. (zie Punt 3). Bekijk eveneens het onderdelen diagram op Tools & Equipment Required De volgende items zijn niet inbegrepen in het pakket, maar zijn noodzakelijk voor de montage : •#2 Phillips schroevendraaier •¼"...
-
Seite 29: Installatie-Instructies
Slang aansluiter met O-Ring (2) Note:Sommige delen zijn reeds samengesteld in de fabriek. Onderdelen zijn niet op schaal getoond 4. INSTALLATIE INSTRUCTIES Verwarmer – Filter – Zwembad uitgang De onderstaande schema(s) zullen u helpen om het zonnepaneel te installeren op uw bovengrond zwembad. - Seite 30 Verwarmer - Zwembad connecties Deze instructies gaan er van uit dat het zwembad en het filtersysteem reed geinstalleert zijn en er een darm vastgemaakt werd aan de zwembad-ingang. Plaats het zonnepaneel op een plaats waar het meeste zonlicht kan opgevangen worden en minstens 3 meter weg van het zwembad.
- Seite 31 ONDERDELEN DIAGRAM Part name Solar bag Hose connector with O-Ring Connector with O-Ring(2)&Gasket(2)
-
Seite 32: Advertências De Segurança
O seu Aquecedor de Piscina Solar foi concebido e fabricado segundo os mais exigentes standards de fiabilidade, facilidade de operação e segurança. Com uma manutenção adequada, assegurar-lhe-á anos de utilização sem quaisquer problemas. Obrigado pela sua preferência. 1. ADVERTÊNCIAS DE SEGURANÇA POR FAVOR, LEIA ATENTAMENTE TODAS AS ADVERTÊNCIAS. - Seite 33 piscina proveniente da sua bomba para uma das entradas do aquecedor solar. A outra mangueira descarregará a água aquecida através da outra entrada do aquecedor para a sua piscina através da entrada de retorno da mesma. Quando a água fria entra no aquecedor, percorre o circuito e é aquecida pelo sol, antes de ser devolvida à...
-
Seite 34: Instruções De Instalação
3. LISTA DE COMPONENTES/REFERÊNCIA Componentes básicos Unidade Principal (1) Conector com anel O (2) e Casquilho (2) Conector de mangueira com anel O (2) Nota:Alguns components podem ser pré-instalados na fábrica. Os components não se mostram à escala real. INSTRUÇÕES DE INSTALAÇÃO Aquecedor - Filtro - Distribuição na piscina O esquema de distribuição abaixo ajudar-lhe-á... - Seite 35 DEPOIS DE INSTALAR O AQUECEDOR SOLAR PISCINA Manguera de succión Manguera de retorno de la piscina Aquecedor Solar Filtro Bomba NOTA: A escala não corresponde à escala real Ligações Aquecedor - Piscina Estas instruções partem da premissa de que o sistema de filtragem e a piscina se encontram já...
- Seite 36 5. OPERAÇÃO INICIAL Depois de montar o aquecedor solar, e de conectar as mangueiras à bomba de filtragem e ao retorno da piscina, desbloqueie o fluxo da água da mangueira de retorno da piscina, e ligue os sistemas de bomba e de filtragem. Inicialmente sairão algumas bolhas da boca de retorno para a piscina, enquanto o ar é...
- Seite 37 EN - GUARANTEE CERTIFICATE 1 GENERAL TERMS 1.1 In accordance with these provisions, the seller guarantees that the product corresponding to this guarantee (“the Product”) is in perfect condition at the time of delivery. 1.2 The Guarantee Term for the Product is two (2) years from the time it is delivered to the purchaser. 1.3 In the event of any defect in the Product that is notified by the purchaser to the seller during the Guarantee Term, the seller will be obliged to repair or replace the Product, at his own cost and wherever he deems suitable, unless this is impossible or unreasonable.
- Seite 38 3.2 No se otorga ninguna garantía respecto del normal desgaste por uso del producto. En relación con las piezas, componentes y/o materiales fungibles o consumibles como pilas, bombillas etc., se estará a lo dispuesto en la documentación que acompañe al Producto, en su caso. 3.3 La garantía no cubre aquellos casos en que el Producto: (I) haya sido objeto de un trato incorrecto;...
- Seite 39 2.1 Die vorliegende Garantie gilt für die Produkte, auf die sich dieses Handbuch bezieht. 2.2 Das vorliegende Garantiezertifikat ist nur in den Ländern der Europäischen Gemeinschaft anwendbar. 2.3 Diese Garantie gilt nur, wenn der Käufer alle Anweisungen des Herstellers, die in der produktbegleitenden Dokumentation enthalten und für die jeweilige Produktlinie und Modell anwendbar ist, streng einhält.
- Seite 40 1.5 Die delen van het Produkt die onder deze Garantie vervangen of gerepareerd zijn, kunnen de duur van de Garantieperiode voor het oorspronkelijke Produkt niet verlengen, maar zullen beschikken over een eigen garantie. 1.6 Voor de toepassing van deze garantie moet de koper de aankoopdatum en de levering van het Produkt kunnen aantonen. 1.7 Indien er meer dan zes maanden verlopen zijn sinds de levering van het Produkt aan de koper, en deze plotseling aangeeft dat het Produkt niet aan de eisen voldoet, dan zal de koper de oorsprong en het bestaan van de volgens hem bestaande defekten moeten kunnen aantonen.
- Seite 41 Nederlands 0800 022 33 04 Belgie 800 10 211 EM CASO DE PROBLEMA, ¡CONSULTAR‐NOS! +34 946 741 844 DISTRIBUIDO POR: MANUFACTURAS GRE. S.A. ARITZ BIDEA Nº57, BELAKO INDUSTRIALDEA 48100 MUNGIA (BIZKAIA)· ESPAÑA TEL. +34 946 74 11 16 · FAX. 34 946 74 17 08 http://www.gre.es Nº REG. IND.: 48-06762 ...