Werbung
Quicklinks
TAB: 40195
Base da tavolo TAB 7
La base da tavolo 40195, puè essere utilizzata con i
seguenti videocitofoni:
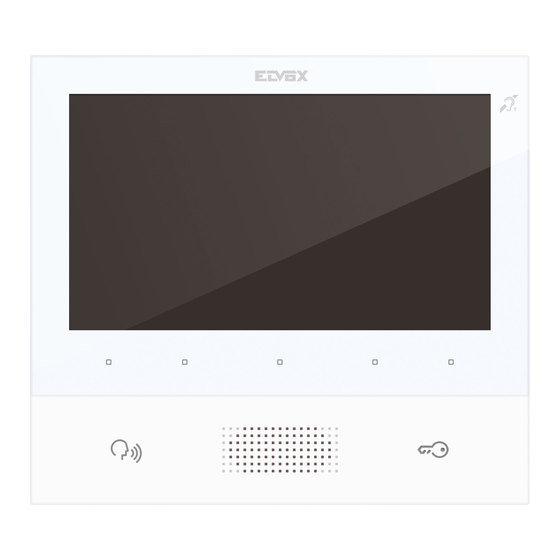
- 40505, 40505.04 Videocitofono Tab 7 Due Fili Plus
- 40507, 40507.04 Videocitofono Tab 7S Due Fili Plus
- 40605, 40605.04 Videocitofono Tab 7 IP
- 40607, 40607.04 Videocitofono Tab 7S IP
Contenuto della confezione:
- base da tavolo.
- 4 viti per il fissaggio della piastra di supporto del
videocitofono.
- 2 piastrine posteriori: una da utilizzare per installazioni
IP, con foro di passaggio per connessione RJ45 e una
piastrina senza foro, da utilizzare per installazione Due
Fili Plus.
- 4 viti per il fissaggio della piastrina posteriore.
Indicazioni installative:
1) Sguainare il cavo (tipo 732H.E,732I.E per installazioni
Due Fili Plus) per una lunghezza di circa125mm (Fig.
1).
2)
Passare i conduttori sulla
piastrina (Fig. 2).
3) Cablare la morsettiera estraibile del videocitofono (Fig.
3).
4) Fissare
la
piastra
metallica
videocitofono), alla base da tavolo utilizzando le viti
fornite con la base stessa (Fig. 4).
5) Connettere la morsettiera estraibile al videocitofono
(Fig. 5).
6) Alloggiare il videocitofono nel seguente modo:
posizionare il videocitofono sulla piastra tenendolo
leggermente sollevato, a questo punto tenendo
premuto il frontale fare una leggera pressione verso il
basso fino all'aggancio (Fig. 6).
7) Fissare la piastrina posteriore con le relative 4 viti
fornite in dotazione alla base da tavolo (Fig. 7).
Fare attenzione al posizionamento del cavo (in
particolare evitare che il cavo vada a posizionarsi sopra
l'eventuale connettore RJ45).
8) Collegare il connettore RJ45 (Fig. 8), solo nel caso di
videocitofono IP.
Utilizzare cordone di permutazione tipo 03017.xx,
03018.xx, 03019.xx, 03020.xx, 03022.xx.
Nota: per il collegamento all'impianto videocitofonico fare
riferimento al manuale installatore del videocitofono.
Regole di installazione
L'installazione deve essere effettuata con l'osservanza
delle disposizioni regolanti l'installazione del materiale elet-
trico in vigore nel Paese dove i prodotti sono installati.
Conformità normativa
Direttiva EMC
Norme EN 61000-6-1 e EN 61000-6-3.
RAEE - Informazione agli utilizzatori
Il simbolo del cassonetto barrato riportato sull'ap-
parecchiatura o sulla sua confezione indica che il
prodotto alla fine della propria vita utile deve esse-
re raccolto separatamente dagli altri rifiuti. L'utente dovrà,
pertanto, conferire l'apparecchiatura giunta a fine vita agli
idonei centri comunali di raccolta differenziata dei rifiuti
elettrotecnici ed elettronici. In alternativa alla gestione au-
tonoma è possibile consegnare l'apparecchiatura che si
desidera smaltire al rivenditore, al momento dell'acquisto
di una nuova apparecchiatura di tipo equivalente. Presso i
rivenditori di prodotti elettronici con superficie di vendita di
almeno 400 m
è inoltre possibile consegnare gratuitamen-
2
te, senza obbligo di acquisto, i prodotti elettronici da smal-
tire con dimensioni inferiori a 25 cm. L'adeguata raccolta
differenziata per l'avvio successivo dell'apparecchiatura
dismessa al riciclaggio, al trattamento e allo smaltimento
ambientalmente compatibile contribuisce ad evitare possi-
bili effetti negativi sull'ambiente e sulla salute e favorisce
il reimpiego e/o riciclo dei materiali di cui è composta l'ap-
parecchiatura.
Il manuale istruzioni è scaricabile dal sito www.vimar.
com
49401074A0 00 1709
TAB 7 desktop base
The desktop base 40195 can be used with the following
video entryphones:
- 40505, 40505.04 Tab 7 Due Fili Plus video entryphone
- 40507, 40507.04 Tab 7S Due Fili Plus video entryphone
- 40605, 40605.04 Tab 7 IP video entryphone
- 40607, 40607.04 Tab 7S IP video entryphone
Package contents:
- desktop base.
- 4 screws for fixing the video entryphone mounting frame
plate.
- 2 rear plates: one to be used for IP installations, with
through hole for RJ45 connection, and one plate with no
hole to be used for Due Fili Plus installation.
- 4 screws for fixing the rear plate.
Installation guidelines:
1) Strip the cable (type 732H.E,732I.E for Due Fili Plus
installations) for a length of approx. 125mm (Fig. 1).
2)
Pass the wires onto the
3) Wire the removable terminal block of the video
entryphone (Fig. 3).
4) Secure the metal plate (supplied with the video
entryphone) to the desktop base using the screws
(in
dotazione
al
supplied with the base itself (Fig. 4).
5) Connect the removable terminal block to the video
entryphone (Fig. 5).
6) Install the video entryphone as follows: position the
video entryphone on the plate keeping it slightly raised.
While keeping the front panel pressed, apply a light
downward pressure until it clicks into place (Fig. 6).
7) Secure the rear plate to the desktop base using the 4
screws provided (Fig. 7).
Pay attention to the positioning of the cable (in particular
avoid the cable from getting placed above an RJ45
connector).
8) Connect the RJ45 connector only for an IP video
entryphone (Fig. 8).
Use a patch cord type 03017.xx, 03018.xx, 03019.xx,
03020.xx, 03022.xx.
Note: For the connection to the video entryphone system,
please refer to the video entryphone installer's manual.
Installation rules
Installation should be carried out observing current installa-
tion regulations for electrical systems in the Country where
the products are installed.
Conformity
EMC directive
Standards EN 61000-6-1 and EN 61000-6-3.
WEEE - Information for users
If the crossed-out bin symbol appears on the
equipment or packaging, this means the product
must not be included with other general waste at
the end of its working life. The user must take the worn
product to a sorted waste center, or return it to the retail-
er when purchasing a new one. Products for disposal can
be consigned free of charge (without any new purchase
obligation) to retailers with a sales area of at least 400m
if they measure less than 25cm. An efficient sorted waste
collection for the environmentally friendly disposal of the
used device, or its subsequent recycling, helps avoid the
potential negative effects on the environment and people's
health, and encourages the re-use and/or recycling of the
construction materials.
The instruction manual is downloadable from the site
www.vimar.com
Base de table TAB 7
La base de table 40195 peut être utilisée avec les portiers-
vidéo suivants :
- 40505, 40505.04 Portier-vidéo Tab 7
- 40507, 40507.04 Portier-vidéo Tab 7S
- 40605, 40605.04 Portier-vidéo Tab 7 IP
- 40607, 40607.04 Portier-vidéo Tab 7S IP
Contenu de l'emballage :
- base pour installation de table.
- 4 vis pour la fixation de la plaque de support du portier-
vidéo.
- 2 plaquettes arrière : une à utiliser pour les installations
IP, avec orifice de passage pour la connexion RJ45 et
une plaquette sans orifice, à utiliser pour l'installation
Due Fili Plus.
- 4 vis pour la fixation de la plaquette arrière.
Consignes pour l'installation :
1) Dégainer le câble (type 732H.E,732I.E pour les
plate (Fig. 2).
2)
3) Câbler le bornier amovible du portier- vidéo (Fig. 3).
4) Fixer le soubassement métallique (fourni avec le portier-
5) Connecter le bornier amovible au portier- vidéo (Fig. 5).
6) Positionner le portier-vidéo de la manière suivante
7) Fixer la plaquette arrière à l'aide des 4 vis fournies avec
8) Brancher le connecteur RJ45, uniquement en cas de
Remarque : pour la connexion au système portier-vidéo,
consulter le manuel installateur de l'appareil.
Règles d'installation
L'installation doit être effectuée dans le respect des dispo-
sitions régulant l'installation du matériel électrique en vi-
gueur dans le Pays d'installation des produits.
Conformité aux normes
Directive EMC
Normes EN 61000-6-1 et EN 61000-6-3.
fin de vie doit etre collecte separement des autres dechets.
Au terme de la duree de vie du produit, l'utilisateur devra
se charger de le remettre a un centre de collecte separee
,
2
ou bien au revendeur lors de l'achat d'un nouveau produit.
Il est possible de remettre gratuitement, sans obligation
d'achat, les produits a eliminer de dimensions inferieures
a 25 cm aux revendeurs dont la surface de vente est d'au
moins 400 m
successif de l'appareil en fin de vie au recyclage, au traite-
ment et a l'elimination dans le respect de l'environnement
contribue a eviter les effets negatifs sur l'environnement et
sur la sante et favorise le reemploi et/ou le recyclage des
materiaux dont l'appareil est compose.
Télécharger le manuel d'instructions sur le site www.
vimar.com
installations Due Fili Plus) sur une longueur de 125 mm
environ (Fig. 1).
Passer les conducteurs sur la
plaquette (Fig. 2).
vidéo) sur la base de table à l'aide des vis fournies avec
la base (Fig. 4).
: placer le portier-vidéo sur la plaque en le soulevant
légèrement. En appuyant sur la façade, exercer une
légère pression vers le bas jusqu'à l'enclenchement
(Fig. 6).
la base de table (Fig. 7).
Faire attention à la position du câble (éviter
éventuellement qu'il ne chevauche le connecteur
RJ45).
portier-vidéo IP (Fig. 8).
Utiliser un cordon de permutation type 03017.xx,
03018.xx, 03019.xx, 03020.xx, 03022.xx.
DEEE - Informations pour les utilisa-
teurs
Le symbole du caisson barre, la ou il est reporte sur
l'appareil ou l'emballage, indique que le produit en
. La collecte separee appropriee pour l'envoi
2
Viale Vicenza, 14
36063 Marostica VI - Italy
www.vimar.com
Werbung

Verwandte Anleitungen für Vimar ELVOX TAB 7


Inhaltszusammenfassung für Vimar ELVOX TAB 7
- Seite 1 Télécharger le manuel d’instructions sur le site www. parecchiatura. vimar.com Il manuale istruzioni è scaricabile dal sito www.vimar. Viale Vicenza, 14 36063 Marostica VI - Italy www.vimar.com 49401074A0 00 1709...
- Seite 2 Die Bedienungsanleitung ist auf der Website www. vimar.com zum Download verfügbar El manual de instrucciones se puede descargar en la página web www.vimar.com Viale Vicenza, 14 36063 Marostica VI - Italy www.vimar.com...
- Seite 3 σίας και περιβαλλοντικά συμβατής διάθεσης της συσκευής, συμβάλλει στην αποφυγή αρνητικών επιπτώσεων για το περιβάλλον και την υγεία και προωθεί την επαναχρησι- μοποίηση ή/και ανακύ- κλωση των υλικών από τα οποία αποτελείται η συσκευή. Το εγχειρίδιο οδηγιών είναι διαθέσιμο για λήψη από την ιστοσελίδα www.vimar.com Viale Vicenza, 14 36063 Marostica VI - Italy www.vimar.com 49401074A0 00 1709...
- Seite 4 TAB: 40195 Fig. • Abb. • Εικ. 5 Fig. • Abb. • Εικ. 6 Fig. • Abb. • Εικ. 7 Fig. • Abb. • Εικ. 8 Viale Vicenza, 14 36063 Marostica VI - Italy www.vimar.com 49401074A0 00 1709...