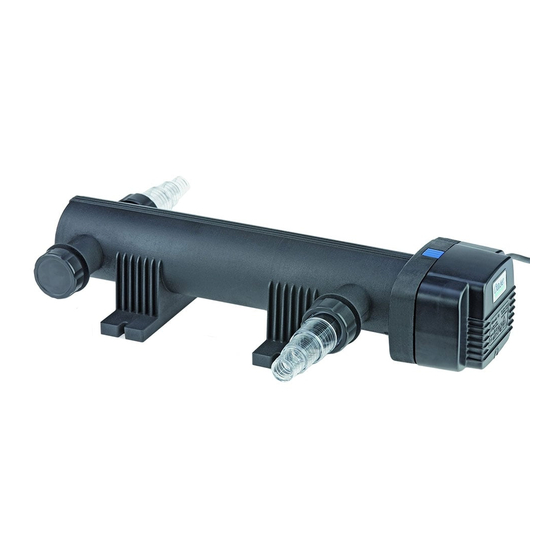
Oase Vitronic 11W Gebrauchsanleitung
Vorschau ausblenden
Andere Handbücher für Vitronic 11W:
- Gebrauchsanleitung (295 Seiten) ,
- Inbetriebnahme (144 Seiten) ,
- Gebrauchsanleitung (143 Seiten)
Inhaltsverzeichnis
Werbung
Verfügbare Sprachen
Verfügbare Sprachen
Werbung
Inhaltsverzeichnis

Inhaltszusammenfassung für Oase Vitronic 11W
- Seite 1 11W/18W/36W/55W Vitronic...
-
Seite 5: Bestimmungsgemäße Verwendung
Original Gebrauchsanleitung Hinweise zu dieser Gebrauchsanleitung Willkommen bei OASE Living Water. Mit dem Kauf des Produkts Vitronic 11, 18, 36, 55 haben Sie eine gute Wahl getroffen. Lesen Sie vor der ersten Benutzung des Gerätes die Anleitung sorgfältig und machen Sie sich mit dem Gerät vertraut. -
Seite 6: Aufstellen Und Anschließen
− Verwenden Sie nur Original-Ersatzteile und -Zubehör für das Gerät. − Nehmen Sie niemals technische Änderungen am Gerät vor. − Lassen Sie Reparaturen nur von OASE-autorisierten Kundendienststellen durchführen. − Die Anschlussleitungen können nicht ersetzt werden. Bei einer beschädigten Leitung muss das Gerät bzw. die Komponente entsorgt werden. - Seite 7 - DE - Anschlüsse herstellen Bild D-E: Oase empfiehlt Schläuche, die für mindestens 1 bar Druck geeignet sind. − Stufenschlauchtüllen (4) entsprechend dem Schlauchdurchmesser kürzen. − Die Überwurfmutter über die Stufenschlauchtülle (4) schieben, den Schlauch auf die Stufenschlauchtülle (4) stecken und mit Schlauchschellen (5) sichern.
-
Seite 8: Reinigung Und Wartung, Wechseln Der Uvc-Lampe
- DE - Bild L: Wichtig: Erst die Pumpe, dann das UVC-Vorklärgerät einschalten. Gerät nicht ohne Wasserdurchfluss betreiben. Das Gerät schaltet sich automatisch ein, wenn die Stromverbindung hergestellt ist. Einschalten: Netzstecker in die Steckdose stecken. Vitronic 11: Die Kontroll-LED (13) zeigt an, ob die UVC-Lampe leuchtet. Vitronic 18, 36, 55: Am Kontrollfenster (14) und anhand der durchsichtigen Stufenschlauchtülle (15) ist erkennbar, ob die UVC-Lampe blau leuchtet. -
Seite 9: Intended Use
Information about these operating instructions Welcome to OASE Living Water. You made a good choice with the purchase of the product Vitronic 11, 18, 36, 55. Prior to commissioning the unit, please read the instructions of use carefully and fully familiarise yourself with the unit. -
Seite 10: Installation And Connection
− Never carry out technical modifications to the unit. − Only have repairs carried out by customer service points authorised by OASE. − The power connection cables cannot be replaced. When the cable is damaged, the unit or the component needs to be disposed of. - Seite 11 Connect the unit Figure D-E: Oase recommends hoses suitable for a minimum pressure of 1 bar. − Cut the stepped hose connectors (4) to suit the hose diameter. − Slide the union nut over the stepped hose connector (4), fit the hose on the stepped hose connector (4) and secure with hose clips (5).
- Seite 12 - GB - Figure L: Important: Switch the pump on first, then the UVC clarifying unit. Do not operate the unit without water flowing through. The unit switches on automatically when power connection is established. Switching on: Connect power plug to the socket. Vitronic 11: The control LED (13) indicates whether or not the UVC lamp is lit.
-
Seite 13: Utilisation Conforme À La Finalité
Remarques relatives à cette notice d'emploi Bienvenue chez OASE Living Water. Avec l'acquisition du produit, Vitronic 11, 18, 36, 55 vous avez fait le bon choix. Avant la première utilisation de l'appareil, lire attentivement cette notice d'emploi et se familiariser avec l'appareil. Tous les travaux effectués avec cet appareil doivent être exécutés conformément à... -
Seite 14: Mis En Place Et Raccordement
− Ne jamais procéder à des modifications techniques sur l'appareil. − Ne faire effectuer les réparations que par des SAV autorisés par OASE. − Les câbles de raccordement ne sont pas interchangeables. Au cas où un câble de raccordement serait endommagé, l'appareil ou le composant doit être éliminé. -
Seite 15: Mise En Service
Établir les branchements Figures D-E : Oase recommande l'utilisation de tuyaux conçus pour une pression d'au moins 1 bar. − Raccourcir les embouts à étages (4) en fonction du diamètre du tuyau. − Glisser l'écrou-raccord sur l'embout à étages (4) ouvert, enfoncer le tuyau sur l'embout à étages (4) et le bloquer avec des colliers de serrage (5). -
Seite 16: Stockage/Entreposage Pour L'hiver
- FR - Figure L : Important : mettre tout d'abord la pompe en circuit, puis l'appareil de préclarification à UVC. Ne pas utiliser l'appareil sans débit d'eau. L'appareil se met automatiquement en marche dès que la connexion avec le réseau est établie. Mise en circuit : Brancher la prise de secteur dans la prise de courant.


