GRAUPNER GR-18 Gebrauchsanleitung
Hott empfänger gr-18 mit copterfirmware
Vorschau ausblenden
Andere Handbücher für GR-18:
- Handbuch (80 Seiten) ,
- Anleitung (24 Seiten) ,
- Gebrauchsanleitung (16 Seiten)
Inhaltsverzeichnis
Werbung
Verfügbare Sprachen
Verfügbare Sprachen
Werbung
Kapitel
Inhaltsverzeichnis

Verwandte Anleitungen für GRAUPNER GR-18


Inhaltszusammenfassung für GRAUPNER GR-18
- Seite 1 Gebrauchsanleitung HoTT Empfänger GR-18 mit Copterfirmware No. 33579...
-
Seite 2: Inhaltsverzeichnis
Inhaltsverzeichnis Einführung ................3 Lieferumfang ..............3 Bestimungsgemäße Verwendung ........4 Technische Daten ............... 4 Einbau im Modell (Copter) ........... 6 Binding ................7 Anschlüsse ................. 7 Empfängereinstellmenü ............8 Initialisierung des Kreisel ............ 9 Voreinstellungen am Sender ..........9 Grundeinstellung .............. -
Seite 3: Einführung
Ihrem Empfänger zu erzielen und vor allem um Ihre Modelle sicher zu steuern. Sollten beim Betrieb irgendwelche Schwierigkeiten auftauchen, nehmen Sie die Anleitung zu Hil- fe oder fragen Sie Ihren Händler oder das Graupner Service Center. Aufgrund technischer Änderungen können die Informa tionen in dieser Anleitung ohne vorherige Ankündigung geändert... -
Seite 4: Bestimungsgemäße Verwendung
Haftung übernommen. Lesen Sie vorab die gesamte Anleitung bevor Sie versuchen, den Empfänger zu installieren bzw. einzusetzen. Graupner/SJ arbeitet ständig an der Weiterentwicklung sämtli- cher Produkte; Änderungen des Lieferumfangs in Form, Tech- nik und Ausstattung müssen wir uns deshalb vorbehalten. -
Seite 5: Symbolbeschreibung
INNOVATION & TECHNOLOGIE Symbolbeschreibung Beachten Sie immer die Informationen, die durch VORSICHT oder WARNUNG mit Warnpiktogramm gekennzeichnet sind. Das Signalwort WARNUNG weist Sie auf mögliche, schwe- Verletzungen hin, das Signalwort VORSICHT auf mögliche, leichte Verletzungen. Der HINWEIS ist eine wichtige Information die Sie vor mögli- chen Sachschäden warnen soll Sicherheitshinweise WARNUNG... -
Seite 6: Einbau Im Modell (Copter)
Empfängerplattform ausgerichtet werden. Es muss immer die untere Fläche des Empfängers parallel zu einer Co- pterachse liegen. Entfernen Sie vor der Montage den Aufkle- ber auf der Empfängerrückseite und verwenden Sie optional die Doppelklebepads S8376 für Gr-18, S8377 für Gr-24 PRO. GR-18_Copter_jh_V1... -
Seite 7: Binding
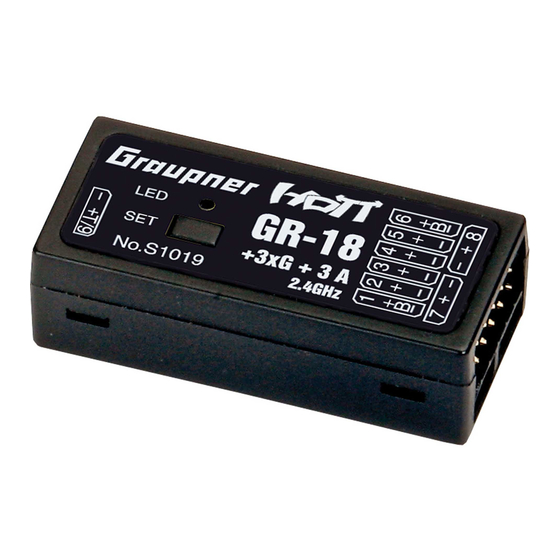
Fall Gewalt an, der Stecker sollte leicht einrasten. Die Buchsen sind entsprechend beschriftet, die braune Litze (-), rot (+) und orange (Signal). Die Servoanschlüsse der Graupner HoTT 2.4-Empfänger sind nummeriert. Der Anschluss Kanal 8 (K6 bei GR 18) kann auch für das (digitale) Summensignal programmiert werden (siehe folgendes Kapitel). -
Seite 8: Empfängereinstellmenü
Telemetrie oder Kanal (T/9) Buchse An die Buchse mit der Bezeichnung „T“ (T/9)- Telemetrie werden die optionalen Telemetriesensoren oder Module an- geschlossen. Außerdem wird über diese Buchse das Update durchgeführt. Die Buchse kann auch optional für Kanal 9 ge- nutzt werden. (siehe folgendes Kapitel) Empfängereinstellmenü... -
Seite 9: Initialisierung Des Kreisel
INNOVATION & TECHNOLOGIE vom Sender ein digitales Summensignal und stellt dieses am empfängerspezifisch festgelegten Servoanschluss bereit. Ein solches Signal wird zum Zeitpunkt der Überarbeitung dieser Anleitung von einigen der neuesten elektronischen Entwick- lungen im Bereich von Power-Stromversorgungen usw. ge- nutzt. (Sensor an K9): Telemetrie Sensor Diese Buchse können Sie entweder für die Telemetrie oder für einen zusätzlichen Kanal (9) verwenden. -
Seite 10: Grundeinstellung
Grundeinstellung Schritt 2: Grundeinstellungen Type Quadro x, Quadro +, Hexa I, Hexa V,Tri L, Tri R Multikopter Basis<v> Kanalbelegung am Empfänger für die verschiedenen Copter- >Type Quadro X Mode NORMAL typen, Motor- und Fahrtregleranschlüsse von oben gesehen. Minpower % Logging Bei Tricoptern nur Digitalservos für Servo 4 verwenden! Kalibr. -
Seite 11: Kreiselzuordnung
INNOVATION & TECHNOLOGIE Logging Wert 1 ist die allgemeine Lagesteuerung, Rest bei Bedarf loggt die entsprechende Servofunktion auf SD-Karte für spä- tere Auswertung und Fehleranalyse. Einstellbare Werte: 0 = kein logging, Telemetrienzeige von Euler- und Gierwinkel 1 = Roll und Nick logging Wir empfehlen immer mindestens eine Funktion zu loggen. -
Seite 12: Roll- Nickeinstellungen
Wert auf 100. Wenn der Copter, auf Grund der Gewichtsver- teilung, in seiner Rollachse agiler als in der Nickachse ist, dann kann hier die Empfindlichkeit der Rollachse verändert werden. Beim Graupner ALPHA RACE 250 Q wird hier zum Beispiel circa 65% eingestellt. EMPFINDL. ANPASS.: Bei sehr starken Antrieben kann es bei Vollgas zum Auf- schwingen kommen. -
Seite 13: Multicopter Gier Einstellungen
Best.-Nr. 7168.6A oder 7168.S. Die dazu benötigten Programme und Dateien finden Sie bei den entsprechenden Produkten jeweils unter Download auf www.graupner.de. Verbinden Sie das Adapterkabel mit der USB Schnittstelle Best.-Nr. 7168.6. Das Stecksystem ist verpolungssicher, ach- ten Sie auf die kleinen seitlichen Nasen. Wenden Sie auf kei- nen Fall Gewalt an, der Stecker sollte leicht einrasten. - Seite 14 Der Fortschrittsbalken zeigt die ordnungsgemäße Übertra- gung an. Die Empfänger-LED leuchtet während- dessen rot und grün, sie blinkt abwechselnd rot und grün so- bald die Übertragung beendet ist. Bitte beachten Sie hierzu die ausführliche Updateanleitung unter www.graupner.de im Downloadbereich des jeweiligen Artikels. GR-18_Copter_jh_V1...
-
Seite 15: Konformitätserklärung
Henriettenstraße 96 D-73230 Kirchheim/Teck erklärt, dass das Produkt: GR-24 PRO +3xG + 3A + 3M+Vario HoTT - No. 33583 GR-18 +3xG + 3A+Vario HoTT - No. 33579 declares that the product Geräteklasse: Equipment class den grundlegenden Anforderungen des § 3 und den übrigen einschlägigen Bestimmungen des FTEG (Artikel 3 der R&TTE) entspricht. -
Seite 16: Hinweise Zum Umweltschutz
Die vorliegende Bau- bzw. Bedienungsanleitung dient ausschließlich Infor mations zwecken und kann ohne Vorankündigung geändert werden. Die jeweils aktuelle Version finden Sie im Internet unter www.graupner. de auf der entsprechenden Produktseite. Darüber hinaus übernimmt die Firma Graupner|SJ GmbH keinerlei Verantwortung oder Haftung für Fehler oder Ungenauigkeiten, die in Bau- bzw. - Seite 17 User manual HoTT GR-18 receiver with Copterfirmware No. 33579...
- Seite 18 Index Index .................. 2 Introduction ................ 3 Service centre ..............3 Package content ..............3 Intended use ..............4 Technical Data ..............4 Installation in the model (Copter) ......... 6 Binding ................6 Connections ............... 7 Receiver setting menu ............7 Gyro initialization ..............
-
Seite 19: Introduction
INNOVATION & TECHNOLOGIE Introduction Thank you very much for choosing a Graupner HOTT GYRO RECEIVER. This receiver is extremely versatile. Read this manual carefully to achieve the best results with your receiver and first of all to control safely your model. If you experience any trouble during operation, take the instructions to help or ask your dealer or Graupner Service Centre. -
Seite 20: Intended Use
For any improper use no warranty or liability is ac- cepted. Read through this entire manual before you attempt to program or set the receiver. Graupner/SJ constantly works on the development of all prod- ucts; we reserve the right to change the item, its technology and equipment. -
Seite 21: Symbols Explication
/ or modification of the product is not permitted. Ð They may only be used our recommended components and accessories. Use only genuine matching Graupner con- nectors of the same design and the same material. Ð Make sure that all connections are secure. Do not pull on the cables when you unplug the connector. -
Seite 22: Installation In The Model (Copter)
The lower surface of the receiver must always be parallel to one of the copter sides. Put some double-sided tape on the bottom of the receiver and use the optimal double taped pads S8376 for Gr-18, S8377 for Gr-24 PRO. Binding The binding is only possible if the receiver has not yet been binded to another transmitter (red LED blinks). -
Seite 23: Connections
negative wire (-) is brown, the positive (+) red and the signal orange. The servo sockets of Graupner HoTT 2.4 receivers are numbered sequentially. The socket for channel 8 (K6 in GR 18) can also be programmed to deliver a (digital) sum signal (see next section). -
Seite 24: Gyro Initialization
Maximum altitude (Max. altitude) At this point you can enter a maximum altitude, at which an alarm is triggered, either via the transmitter’s RF module in the form of the “general alarm tone”: a regular beeping at a rate of about one per second;... -
Seite 25: Transmitter Pre-Setting
INNOVATION & TECHNOLOGIE Transmitter pre-setting Step 1: Setting the flight mode - Attitude or In the transmitter it must be selected a free model memory, Rate mode the model type must be “surface model“ and the channel 1 direction must be set so that in “motor off“ position the power indicator must show -100%. -
Seite 26: Axis Assignment
sequence this parameter has to gas curve, will be explained in next section. MINPOWER % The setting is principally used to prevent the motors shut down in flight. Adjust so that the motors are running straight. Under no circumstances unnecessarily high set, this would limit the controller possibilities. -
Seite 27: Roll And Nick Setting
Copter is more agile on the Roll axis than on the Nick axis, then you can change here the roll factor. In the Graupner ALPHA RACE 250 Q this value is set about 65%. POWER2SENS.: Very strong drives can lead to oscillating at full throttle. This parameter allows you to set a kind of gyro suppression. -
Seite 28: Multicopter Yaw Settings
AGILITY: Agility determines at what speed (yaw rate) a new position is occupied. Only for Rate mode: R/N RATE I: Sets the I component of the rotation in rate mode. At too low values of Copter swings slowly. However, it stops after a roll or pitch command and “oscillates”, the value must be reduced. -
Seite 29: Firmware Update
(order no. 7168.6A or 7168.S), which are available separately. The programs and files required can be found in the Down- load area for the corresponding products at www.graupner.de. Connect the adapter lead to the USB interface (order no. 7168.6). The connectors are reverse polarity protected: note the small chamfers on the sides. - Seite 30 The receiver LED lights up red and green during this pro- cess and flashes red and green alternately once the transfer is complete. Please refer to the detailed update instructions for the item in question in the Download area at www.graupner.de. GR-18_Copter_jh_V1...
-
Seite 31: Declaration Of Conformity
Henriettenstraße 96 D-73230 Kirchheim/Teck erklärt, dass das Produkt: GR-24 PRO +3xG + 3A + 3M+Vario HoTT - No. 33583 GR-18 +3xG + 3A+Vario HoTT - No. 33579 declares that the product Geräteklasse: Equipment class den grundlegenden Anforderungen des § 3 und den übrigen einschlägigen Bestimmungen des FTEG (Artikel 3 der R&TTE) entspricht. -
Seite 32: Notes For Environmental Protection
The current version can be found on the Internet at www. graupner.de on the relevant product page. In addition, the company Graupner/SJ GmbH has no responsibility or liability for any errors or inaccuracies that may appear in construction or operation manuals. - Seite 33 Notice HoTT GR-18 récepteur avec Copterfirmware No. 33579...
- Seite 34 Index Introduction ................ 3 Centre de service ............... 3 Contenu de la livraison ............4 Utilisation propre ..............4 Données techniques ............4 Explication des symboles ........... 5 Montage dans le modèle (copter) ........6 Binding ................6 Connexions ................ 7 Menu réglage récepteur ............
-
Seite 35: Introduction
INNOVATION & TECHNOLOGIE Introduction Merci d’avoir choisi un récepteur GYRO HoTT Graupner. Ce récepteur est extrêmement polyvalent. Lire attentivement ce manuel pour obtenir une performance maximale de votre récepteur pour contrôler en sécurité vos modèles. Si vous rencontrez des problèmes lors de l’utilisa- tion, reportez-vous à... -
Seite 36: Contenu De La Livraison
Assurez-vous de lire le manuel en entier avant de tenter de programmer ou d’utiliser le récepteur. Graupner/SJ travaille dans le développement de tous les pro- duits; nous nous réservons le droit de modifier les produits, les technologies et le contenu. -
Seite 37: Explication Des Symboles
Ð On recommande l’utilisation seulement de produits et pièces de rechange originales. Utilisez uniquement des connecteurs Graupner originaux de la même taille et type. Ð Assurez-vous que tous les contacts sont sans danger. Ne tirez pas sur les câbles pour débrancher les connecteurs. -
Seite 38: Montage Dans Le Modèle (Copter)
être parallèle à un côté du copter. Fixez le ruban adhésif double face au fond du récepteur et utiliser les tampons S8376 pour Gr-18, S8377 pour Gr-24 PRO. Binding Le binding est possible seulement si après avoir allumé le ré- cepteur, il n’a pas encore été... -
Seite 39: Connexions
Les fiches sont également repérées en conséquence, fil brun (-), fil rouge (+), fil orange (signal). Les sorties des récepteurs Graupner HoTT 2.4 sont numérotées. La sortie 8 peut également être programmée pour un signal cumulé (digital) (voir paragraphe successif) Alimentation Il n’y a pas de sorties réservées au branchement de l’accu. -
Seite 40: Initialisation Du Gyroscope
Seuil de l’alarme pour température trop élevée (ALARM TEMP) Si la température du récepteur dépasse le seuil de tempé- rature enregistré, le module HF de l’émetteur déclenche une alarme soit sous la forme d’un bip sonore régulier à chaque seconde, soit sous la forme d’une annonce vocale « Tempé- rature récepteur ». -
Seite 41: Pre-Réglage De L'émetteur
INNOVATION & TECHNOLOGIE tion et de l’étalonnage. Attendez la fin de l’étalonnage après chaque allumage avant d’utiliser votre récepteur! Les moteurs ne tournent pas jusqu’à ce que le calibrage est terminé. Pre-réglage de l’émetteur Etape 1: Dans l’émetteur il doit être choisi le mode «Avion» dans une Réglage du mode de vol - Attitude ou Rate mémoire et libre et le canal 1 doit être réglé... - Seite 42 Mode Réglage régulateur pour la régulation des régulateurs le signal du CH1 du récepteur sera transmise directement au régula- teur. Normal est réglé pour copters «normales» (sans rotation dans le sens horaire). Note: Pour des raisons de sécurité, les changements dans le type et le mode prennent effet après que vous avez arrêté...
-
Seite 43: Attribution Des Axes Du Gyroscope
INNOVATION & TECHNOLOGIE Attribution des axes du gyroscope Etape 3 Attribution des axes du gyroscope Nouveau régl.: Nouveau régl. : oui/non Attribution des axes< Attribution du gyroscope et sens de fonctionnement du >Nouveau regl. ROLL gyroscope. NICK Accéder au menu du récepteur « Axes Design » et à la rubrique Nouveau régl., indiquer Oui. -
Seite 44: Réglage Roll Et Nick
Nick, vous pouvez changer ici le facteur de Roll. Pour le Graupner ALPHA RACE 250 Q cette valeur est réglée à 65%. POWER2SENS.: Avec manœuvres très pointues on peut avoir des oscillations. -
Seite 45: Réglage Yaw Copter
No. 7168.6A ou 7168.S. Vous trouverez les programmes et fichiers nécessaires pour les produits en question dans la rubrique Download sous www.graupner.de. Branchez le cordon adaptateur sur la prise USB No. 7168.6. Les prises sont équipées de détrompeurs. Il s’agit des petites arêtes latérales. - Seite 46 La barre de progression indique que le chargement se fait correctement. Pendant ce temps, la LED du récepteur est éteinte, et clignotera dès que la transmission sera terminée. Consultez la notice détaillée des mises à jour sous www. graupner.de dans la rubrique Download de l’article en ques- tion.. GR-18_Copter_jh_V1...
-
Seite 47: Déclaration De Conformité
Henriettenstraße 96 D-73230 Kirchheim/Teck erklärt, dass das Produkt: GR-24 PRO +3xG + 3A + 3M+Vario HoTT - No. 33583 GR-18 +3xG + 3A+Vario HoTT - No. 33579 declares that the product Geräteklasse: Equipment class den grundlegenden Anforderungen des § 3 und den übrigen einschlägigen Bestimmungen des FTEG (Artikel 3 der R&TTE) entspricht. -
Seite 48: Notes Pour La Protection De L'environnement
être modifiées à tout moment. La dernière version est disponible sur le site www.graupner.de dans la page du produit. En outre, la société Graupner/SJ GmbH a aucune responsabilité pour les erreurs, les incohérences, im- précisions ou inexactitudes dans cette notice. - Seite 49 Manuale d’uso HoTT GR-18 ricevente con Copterfirmware No. 33579...
- Seite 50 Indice Introduzione ................ 3 Centro assistenza ............... 3 Contenuto della confezione ..........4 Uso proprio ................ 4 Dati tecnici ................. 4 Installazione nel modello (multirotore) ........6 Binding ................6 Connessioni ................ 7 Menu impostazioni della ricevente ........7 Inizializzazione del giroscopio ..........8 Pre-impostazioni del trasmettitore ........
-
Seite 51: Introduzione
INNOVATION & TECHNOLOGIE Introduzione Grazie per aver scelto una ricevente GYRO HoTT Graupner. Questa ricevente è estremamente versatile. Leggete attentamente questo manuale per ottenere i migliori risultati dalla vostra ricevente e soprattutto per pilotare i vostri modelli in sicurezza. Se incorrete in problemi durante l’uso, fate riferimento a questo manuale o rivolgetevi a un rivenditore o al centro assistenza Graupner. -
Seite 52: Contenuto Della Confezione
è ammessa garanzia o responsabilità. Leggere attentamente l’intero manuale prima di provare a programmare o ad utilizzare la ricevente. Graupner/SJ lavora costantemente allo sviluppo di tutti i pro- dotti; ci riserviamo il diritto di cambiare i prodotti, le tecnologie e i contenuti. -
Seite 53: Spiegazione Dei Simboli
Ð Per la sicurezza e la conformità (CE) non sono ammesse modifiche o sostituzioni. Ð Devono essere usati solo i nostri prodotti e ricambi consi- gliati. Usate solo connettori Graupner originali delle stesse dimensioni e tipo. Ð Accertatevi che tutti i contatti siano sicuri. Non tirate i cavi per scollegare i connettori. -
Seite 54: Installazione Nel Modello (Multirotore)
Apponete del nastro biadesivo alla parte inferiore della ricevente e usate i tamponi specifici No. S8376 per Gr-18, o No. S8377 per Gr-24 PRO. Binding Il binding è possibile solo se dal momento dell’accensione, la ricevente non è... -
Seite 55: Connessioni
rosso e il segnale è arancione. Le porte dei servi delle riceventi Graupner HoTT 2.4 sono numerate. La porta per il canale 8 (CH6 nella GR 18) può anche essere programmata per fornire un segnale (digitale) di somma (vedere prossima sezione). -
Seite 56: Inizializzazione Del Giroscopio
Altitudine massima (Altitudine max.): Qui può essere indicata un’altitudine massima, al cui raggiun- gimento viene emesso un allarme, o tramite il modulo HF del trasmettitore in forma di “segnale acustico generale”, un bip uniforme con un ritmo di circa un secondo o l’emissione vo- cale “altitudine”. -
Seite 57: Impostazioni Base
INNOVATION & TECHNOLOGIE servi deve indicare -100%. Il modo di volo deve essere associato al canale 5. Quindi assegnate al canale 5 un interruttore a due posizioni: Attitude: Canale 5 = -100% fino a 0%. La posizione dello stick determina il movimento del Roll e del Nick. L’inclinazione massima del modello è... -
Seite 58: Assegnazione Degli Assi
questo parametro). Quali conseguenze ha questo parametro sulla curva del gas, sarà spiegato nella prossima sezione. MINPOWER % L’impostazione è concepita principalmente per evitare lo spe- gnimento dei motori in volo. Regolatela in modo che i motori girino adeguatamente. Non impostate valori eccessivamen- te elevati, questo limiterebbe le possibilità... -
Seite 59: Impostazioni Roll E Nick
Per i multirotori simmetrici il valore può essere 100. Se, a causa del baricentro, il multirotore è più agile sull’asse del Roll che su quello del Nick, potete modificare qui il fattore del Roll. Nel Graupner ALPHA RACE 250 Q questo valore è regolato al 65%. POWER2SENS.: Con manovre molto brusche può... -
Seite 60: Impostazione Yaw Multirotore
il valore deve essere ridotto. AGILITÀ: L’agilità determina con quale velocità (valore yaw) è occupata una nuova posizione. Solo per modalità Rateo: R/N RATEO I: Impostare la componente I nella modalità rateo. Con valori troppo bassi il Copter ondeggia lentamente. Se dopo un co- mando di roll o nick il modello oscilla un po’... -
Seite 61: Aggiornamento Firmware
No. 7168.6A o No. 7168.S. I programmi ed i dati necessari sono riportati, per i rispettivi prodotti, nell’area download del sito www.graupner.de. Collegare il cavo dell’adattatore con l’interfaccia USB n. ord. 7168.6. I connettori sono sicuri contro le inversioni di polarità, prestare attenzione ai piccoli naselli laterali. - Seite 62 La barra di avanzamento mostra il corretto trasferimento. Il LED del ricevitore si illumina intanto in rosso e verde, lampeg- gia alternativamente in rosso e verde non appena è concluso il trasferimento. Osservare allo scopo le istruzioni per l’aggiornamento al sito www.graupner.de nell’area download del rispettivo articolo. GR-18_Copter_jh_V1...
-
Seite 63: Dichiarazione Di Conformità
Henriettenstraße 96 D-73230 Kirchheim/Teck erklärt, dass das Produkt: GR-24 PRO +3xG + 3A + 3M+Vario HoTT - No. 33583 GR-18 +3xG + 3A+Vario HoTT - No. 33579 declares that the product Geräteklasse: Equipment class den grundlegenden Anforderungen des § 3 und den übrigen einschlägigen Bestimmungen des FTEG (Artikel 3 der R&TTE) entspricht. -
Seite 64: Note Per La Protezione Ambientale
La versione più recente è disponibile sul sito internet www.graupner.de nella pagina relativa al prodotto. In oltre la società Graupner/SJ GmbH non ha responsabilità per even- tuali errori, discordanze, inesattezze o imprecisioni presenti in questo manuale.