Sirius SLT950 EM Bedienungsanleitung Mit Montageanweisungen
Vorschau ausblenden
Andere Handbücher für SLT950 EM:
- Bedienungsanleitung mit montageanweisungen (40 Seiten) ,
- Bedienungsanleitung mit montageanweisungen (65 Seiten)
Inhaltsverzeichnis
Werbung
Verfügbare Sprachen
Verfügbare Sprachen
INFORMAZIONI COMMERCIALI PER I CONSUMATORI
COMMERCIAL INFORMATION FOR THE CONSUMER
INFORMATIONS COMMERCIALES POUR LE CLIENT
INFORMACIONES COMERCIALES PARA EL CLIENTE
HANDELSINFORMATIONEN FÜR DEN KUNDEN
COMMERCIËLE INFORMATIES VOOR DE KLANT
ISTRUZIONI PER INSTALLAZIONE USO E MANUTENZIONE
IT
INSTALLATION, USE AND MAINTENANCE INSTRUCTION
GB
INSTRUCTIONS D'UTILISATION ET AVIS DE MONTAGE
F
INSTRUCCIONES DE USO Y DE MONTAJE
E
BEDIENUNGSANLEITUNG MIT MONTAGEANWEISUNGEN
D
GEBRUIKSAANWIJZIGING
NL
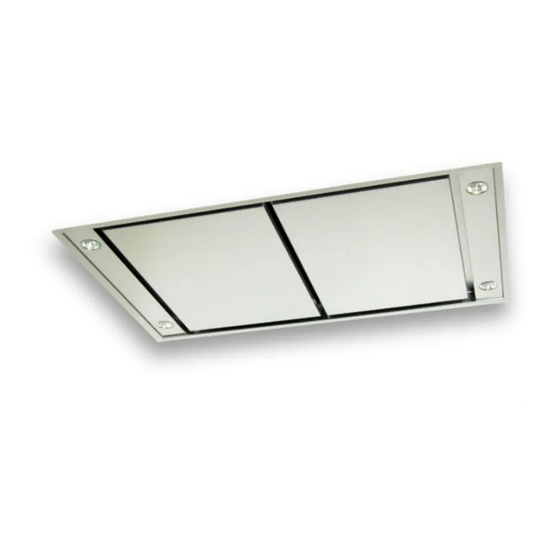
SLT950 EM - SLT951 EM - SLT952 EM
SLT953 EM - SLT950.1 - SLT951.1 - SLT950.1 EM
SLT951.1 EM
SLT958 EM - SLT958.1
INFORMAZIONI TECNICHE
TECHNICAL INFORMATION
INFORMATION TECHNIQUES
INFORMACIONES TÉCNICAS
TECHNISCHE INFORMATIONEN
TECHNISCHE INFORMATIES
TYPE: FSED - FSEB - FSEA
Werbung
Inhaltsverzeichnis

Verwandte Anleitungen für Sirius SLT950 EM


Inhaltszusammenfassung für Sirius SLT950 EM
- Seite 1 INFORMAZIONI COMMERCIALI PER I CONSUMATORI COMMERCIAL INFORMATION FOR THE CONSUMER INFORMATIONS COMMERCIALES POUR LE CLIENT INFORMACIONES COMERCIALES PARA EL CLIENTE HANDELSINFORMATIONEN FÜR DEN KUNDEN COMMERCIËLE INFORMATIES VOOR DE KLANT ISTRUZIONI PER INSTALLAZIONE USO E MANUTENZIONE INSTALLATION, USE AND MAINTENANCE INSTRUCTION INSTRUCTIONS D’UTILISATION ET AVIS DE MONTAGE INSTRUCCIONES DE USO Y DE MONTAJE BEDIENUNGSANLEITUNG MIT MONTAGEANWEISUNGEN...
- Seite 3 Il simbolo sul prodotto o sulla confezione indica che il prodotto non deve essere considerato come un normale rifiuto domestico, ma deve essere portato nel punto di raccolta appropriato per il riciclaggio di apparecchiature elettriche ed elettroni- che. Provvedendo a smaltire questo prodotto in modo appropriato, si contribuisce a evitare potenziali conseguenze negative per l’ambiente e per la salute, che po- trebbero derivare da uno smaltimento inadeguato del prodotto.
- Seite 4 Das Symbol auf dem Produkt oder seiner Verpackung weist darauf hin, dass dieses Produkt nicht als normaler Haushaltsabfall zu behandeln ist, sondern an einem Sam- melpunkt für das Recycling von elektrischen und elektronischen Geräten abgegeben werden muss. Durch Ihren Beitrag zum korrekten Entsorgen dieses Produkts schützen Sie die Umwelt und die Gesundheit Ihrer Mitmenschen.
- Seite 5 INDICE Avvertenze Sistema d’uso Installazione Funzionamento Manutenzione...
- Seite 6 Quando l’etichetta dati tecnici interna alla cappa mostra il simbolo , l’apparecchio APERTURA PANNELLI è in classe II°, quindi non necessita di colle- Nei modelli SLT950 EM, SLT951 EM, SLT953 gamento a terra. SLT958 SLT950.1, SLT951.1, SLT950.1 EM, SLT958.1 e SLT951.1 EM è...
- Seite 7 - Utilizzare un tubo di evacuazione aria che abbia la lunghezza massima non superiore a 5 metri. SLT950 EM – SLT951 EM – SLT952 EM – SLT953 - Limitare il numero di curve nella canalizza- EM - SLT958EM zione poiché ogni curva riduce l’efficienza di Realizzare un controsoffitto con una apertura aspirazione equiparata a 1 metro lineare.
- Seite 8 In dotazione al gruppo aspirante sono fornite Proseguire nell’installazione come indica- delle barre filettate lunghe 400 mm. to per la versione SLT950 EM, SLT951 EM e SLT958 EM. Rimuovere il tappo di chiusura nella parte su- periore e posizionarvi il motore di aspirazio- ne (vedi dis.12).
- Seite 9 Alla prima accensione mantenere premuto il FUNZIONAMENTO tasto luce per 5 secondi. Il led più a destra inizierà a lampeggiare (ogni 5 secondi), la cappa rimane accesa per un tempo di 10 min alla velocità selezionata per Radiocomando per il comando a distanza di poi spegnersi automaticamente.
- Seite 10 Per la pulizia di apparecchi in acciaio viene consigliato l’uso di prodotti specializzati, se- guendo le istruzioni indicate sul prodotto. Per sostituire la lampada, (SLT950 EM, SLT951 EM, SLT950.1, SLT951.1, SLT953 ) sfilare la lampada (dis. 9) e sostituire con una lampada...
- Seite 11 CONTENTS Warnings Uses Installation Working Maintenance...
- Seite 12 II° and it does not need any earth connec- tion. PANELS OPENING If the rating lable in the cooker-hood does In SLT950 EM, SLT951 EM, SLT953 EM, SLT958 not show the symbol , the appliance is EM, SLT950.1, SLT951.1, SLT950.1, SLT958.1 built in class I°...
- Seite 13 Before starting the appliance installation, please check that all components are not da- maged, SLT950 EM – SLT951 EM-SLT 952 EM – SLT953 in such a case contact your retailer and do not EM - SLT958 EM. carry out installation.
- Seite 14 Carry out the installation following the pro- Remove the plug in the upper part of the cedure shown for SLT950 EM, SLT951 EM and appliance and fit the suctioning unit. (see SLT958 EM models. fig.12).
- Seite 15 Combinations: 4096 Max. consumption: 25mA Carry out the installation following the pro- Operating temperature: -20° : +55°C cedure shown for SLT950 EM and SLT951 EM models. - To light the cooker hood on or to light it off press the button:...
- Seite 16 To replace the exhausted battery, take the plastic lid off, remove the To replace the lamp, (SLT950 EM- SLT951 battery and replace it with a new one, ob- EM , SLT950.1, SLT953 ) remove the lamp serving the correct battery polarities. Used (Fig. 9) and replace it with a lamp of the same batteries should be discarded in special kind.
- Seite 17 INDEX Attention Version de l’appareil Installation Fonctionnement Entretien...
-
Seite 18: Ouverture Des Panneaux
être évaqués. Il est donc nécessaire d’équiper la pièce de prises d’air alimentant un flux d’air frais constant. Les modèles SLT950 EM, SLT951 EM, SLT952 Quand l’ètiquette des caractéristiques te- EM, SLT958 EM, SLT953 EM et SLT950.1 EM chniques, qui se trouve dans la hotte mon- et SLT951.1 EM External Motor) peuvent être... - Seite 19 Pour obtenir la pleine ouverture des pan- INSTALLATION neaux, libérer les chaînes de sécurité en détachant les mousquetons. Pour un fonctionnement correcte on conseil d’installer la hotte à une distance du niveau du sol de 2000 - 2100 mm. SLT950 EM – SLT951 EM – SLT952 EM – Avant de commencer l’installation de l’ap- SLT953 EM - SLT958 EM.
- Seite 20 Procéder l’installation comme indiqué pour la plafond d’au moins 470mm pour les modèles version SLT950 EM, SLT951 EM et SLT98 EM. SLT950, SLT951 et SLT953. Le modèle SLT952 nécessite d’une distance entre le plafond et SLT950.1 EM – SLT951.1 EM (External...
- Seite 21 5 secondes. Procéder l’installation comme indiqué pour la Le voyant lumineux à l’extrême droitese met version SLT950 EM et SLT951 EM. à clignoter (toutes les 5 secondes), la hot- te reste allumée pendant 10 mn à la vitesse sélectionnée puis s’éteint automatiquement.
- Seite 22 Pour le nettoyage des appareils en acier nous conseillons d’utiliser des produits spéciaux, en suivant les instructions sur le produit. Pour remplacer la lampe, (SLT950 EM, SLT951 EM, SLT950.1, SLT951.1, SLT953) enlever la lampe (fig.9) et la remplacer avec une aux mêmes caractéristiques.
- Seite 23 ÍNDICE Advertencias Versiones de uso Instalación Funcionamiento Mantenimiento...
- Seite 24 , por lo tanto no ne- integrado. cesita de conexión a tierra. APERTURA PANELES Cuando la etiqueta datos técnicos interna de En los modelos SLT950 EM, SLT951 EM, la campana no muestra el símbolo , el SLT953 EM, SLT958EM, SLT950.1, SLT951.1, aparato está en clase I , por lo tanto necesita SLT950.1 EM, SLT958.1 y SLT951.1 EM se...
- Seite 25 Para un correcto funcionamiento se aconseja INSTALACIÓN instalar el producto a una distancia de 2000- 2100 mm del suelo. Antes de instalar el equipo, comprobar que todos los componentes no esten dañados, de lo contrario póngase en contacto con el ven- SLT950 EM – SLT951 EM – SLT952 EM –...
- Seite 26 Junto al bloque extractor se suministran las barras roscadas de 400 mm de longitud. Continuar con la instalación como se indi- ca para la versión SLT950 EM, SLT951 EM y En el caso de uso del bloque extractor con SLT958 EM.
- Seite 27 El led más a la derecha empezará a parpa- FUNCIONAMIENTO dear (cada 5 segundos), la campana per- manece encendida durante 10 min a la ve- locidad seleccionada para después apagarse automáticamente. Si se aumenta o se disminuye la velocidad Radio mando 6 canales para el mando a di- mientras el temporizador está...
- Seite 28 Para la limpieza de aparatos de acero se aconseja el uso de productos especializados, siguiendo las instrucciones indicadas en el producto. Para sustituir la lámpara, (SLT950 EM, SLT951 EM, SLT950.1, SLT951.1, SLT953) sacar la lámpara (fig.9) y sustituirla con una lámpara de las mismas características.
-
Seite 29: Inhaltsverzeichnis
INHALTSVERZEICHNIS Allgemeine Sicherheitshinweise Allgemeine Montagehinweise Geräteausführung Installation und Montage Schaltung des Geräts Wartung... -
Seite 30: Allgemeine Sicherheitshinweise
Absaugen der Luft dur- ch die Dunstabzugshaube dem Auf-stellraum die Luft entnommen wird, die die Feuerstätte Die Modelle SLT950 EM, SLT951 EM, SLT952 zur Verbrennung benötigt. Ein gefahrloser EM, SLT958 EM, SLT953 EM, SLT950.1 EM Betrieb ist möglich, wenn bei gleichzeitigem und SLT951.1 EM (External Motor) können... -
Seite 31: Geräteausführung
Es ist eine Hängedecke mit einer Öffnung fol- werden 2 Rohrbögen 90° verwendet, muss gender Größe zu realisieren: die maximale Länge des Abluftkanals nicht SLT950 EM: 1465x965mm mit einem Minde- mehr als 3 Meter betragen). - Drastische Richtungsänderungen vermei- stabstand von 270mm zwischen Decke und Hängedecke;... - Seite 32 1500m3/h muss der Minde- Abdeckung schließen. stabstand zwischen Decke und Hängedecke für die Modelle SLT950, SLT951 und SLT953 Die Installation wie bei Modell SLT950 EM , 470mm betragen. SLT951 EM und SLT958 EM fortsetzen. Für das Modell SLT952 muss der Mindesta- bstand zwischen Decke und Hängedecke...
-
Seite 33: Schaltung Des Geräts
Voraus abgedeckten Seite einsetzen. Sie die Taste: Die nicht genutzte Abzugsöffnung mit der Abdeckung schließen. Die Installation wie bei Modell SLT950 EM und SLT951 EM fortsetzen. Zur este Zündung, die Beleuchtungstaste für 5 Sekunden gedrückt halten. Die äußerste rechte Led beginnt zu blinken (alle 5 Sekunden), die Abzughaube läuft 10... -
Seite 34: Wartung
Verwenden Sie für Edelstahlgeräte Spezial- produkte zur Edelstahlpflege. Die jeweilige Gebrauchsanweisung des verwendeten Produktes ist unbedingt zu beachten. Beim Lampenwechsel(SLT950 EM, SLT951 EM, SLT950.1, SLT951.1, SLT953), die Lampe ent- fernen (Abb. 9) und mit einer ähnlichen Lam- pe ersetzten. Für die Ersetzung der Leuchtstofflampen (SLT952 e SLT952EM) muss das Gerät vom... - Seite 35 INHOUDSOPGAVE Waarschuwingen Gebruiksversies Installatie Werking Onderhoud...
-
Seite 36: Waarschuwingen
GEBRUIKSVERSIES * De voorschriften respecteren van de be- voegde autoriteiten wat de afvoer van de te evacueren lucht betreft. De modellen SLT950 EM, SLT951 EM, SLT952 * Het is belangrijk een aangepaste verluchting EM, SLT958 EM, SLT953 EM SLT950.1 EM en van de ruimte te voorzien indien een dampkap SLT951.1 EM(Esternal Motor) kunnen alleen... - Seite 37 Lees bovendien aandachtig alle hierna vol- INSTALLATIE gende instructies. - Gebruik voor de luchtafvoer een buis die niet langer is dan 5 meter. - Beperk het aantal bochten in de buisleiding want elke bocht vermindert de afzuigefficiën- SLT950 EM – SLT951 EM – SLT952 EM – tie met een waarde gelijk aan een strekkende SLT953 EM - SLT958 EM meter pijp.
- Seite 38 470 mm voor de modellen SLT950, SLT951 en SLT953. Installeer volgens de aanwijzingen voor de uitvoeringen SLT950 EM, SLT951 EM en Voor het model SLT952 dient u minstens 520 SLT958 EM mm afstand te laten tussen het plafond en het verlaagde plafond.
-
Seite 39: Technische Kenmerken
5 seconden in. bruikt. Installeer volgens de aanwijzingen voor de uitvoeringen SLT950 EM en SLT951 EM. De led aan de rechter kant begint te knippe- ren (iedere 5 minuten), de afzuigkap blijft 10 minuten aanstaan op de gekozen snelheid en gaat vervolgens automatisch uit. - Seite 40 Reinig stalen apparaten met speciale pro- ducten voor staal volgens de instructies die op de producten zelf staan. Trek de lamp (SLT950 EM, SLT951 EM, SLT950.1, SLT951.1, SLT953) (afb. 9) eruit en vervang hem met een gelijkwaardige nieuwe lamp.
- Seite 44 90001100023 - GM 05/14...