Inhaltsverzeichnis

Verwandte Anleitungen für aqua metro CALEC MB


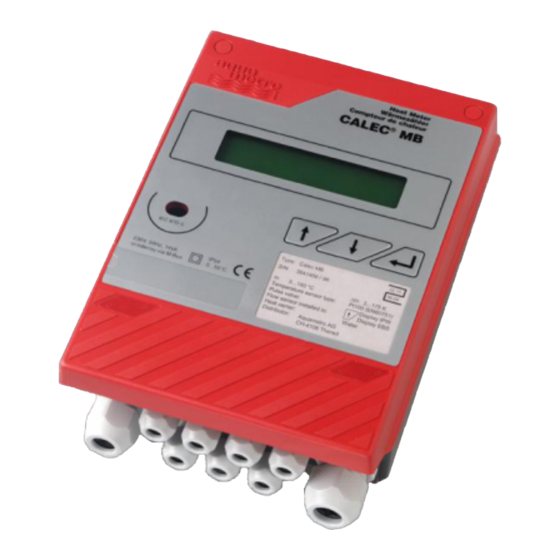
Inhaltszusammenfassung für aqua metro CALEC MB
- Seite 1 Montage- und Bedienungsanleitung VD 3-168 DEF 06.2005 Mounting and operating instructions Instructions de montage et mode d'emploi ® CALEC Wärmerechner Heat meter calculator Calculateur d'énergie thermique...
-
Seite 2: Massbilder
79,5 Elektronikbaugruppe mit Klemmenbezeichnungen OPT 1 OPT 2 OPT 3 OPT 4 Netzanschluss 230V/50Hz Steckbrücke für Eingang 1 Phase Steckbrücke für Eingang 2 Nulleiter Steckbrücken für Eingangsvarianten: 25 61 65 51 53 71 73 75 77 79 81 57 11 4 8 2 6 DIN-Schienenmontage: 2 Befestigungsschrauben Ø5 mm Ausschnitt in Schalttafel Dreilochmontage: 3 Befestigungsschrauben Ø5 mm... -
Seite 3: Electronic Sub-Assembly With Terminal Designations
Electronic sub-assembly with terminal designations Module électronique avec désignation des bornes OPT 1 OPT 1 OPT 2 OPT 2 OPT 3 OPT 3 OPT 4 OPT 4 Mains connection 230V/50Hz Raccordement au réseau 230V/50Hz Jumper connections for input 1 Cavaliers pour entrée 1 Live Phase Jumper connections for input 2... -
Seite 4: Inhaltsverzeichnis
Inhaltsverzeichnis/Contents/Table des matières Massbilder 8. Inbetriebnahme, Funktionskontrolle 14-15 Elektronikbaugruppe mit Klemmenbezeichnungen 9. Fehlermeldungen 15-16 1. Produktvorstellung und Verpackung 10. Technische Daten 17-18 2. Anschlussvorschrift 11. Hinweis auf Eichpflicht 3. Anschlussschemas 12. Einsatzdauer und Wartung 4. Anschluss des Temperaturfühlerpaares 13. Garantie und Haftung 5. -
Seite 5: Produktvorstellung Und Verpackung
1. Produktvorstellung und Verpackung Montageort ® Das CALEC MB Wärmerechenwerk dient als Teilgerät einer Wärmezäh- lermesseinrichtung zur exakten Energieverbrauchserfassung. • Gut zugänglich für Montage, Ablesung und Service Wir, die Mitarbeiter von Aquametro, haben dieses Produkt mit grösster • Geschützten, möglichst trockenen Platz wählen Sorgfalt hergestellt und geprüft. - Seite 6 vom Geräteboden (Grundprint) getrennt und bis zur Beendi- gung der Anschlussarbeiten Sicherstellung der Schutzklasse weggelegt werden. Dazu Bandkabelstecker mög- Die Umgebungsschutzklasse IP54 ist nur bei unausgebrochenen lichst parallel durch beidseiti- Befestigungslöchern gewährleistet. Die Einhaltung des verlangten ges Fassen am Kabel heraus- Schutzgrades ist durch den Betreiber mit einer einwandfreien Montage ziehen! Vor dem Einschalten der sicherzustellen.
-
Seite 7: Anschlussvorschrift
schraubungen ist der Einsatz eines geschlitzten Steckschlüssels von Netzspannung möglichst an einer separaten Sicherung oder am 15 mm Schlüsselweite erforderlich (Foto). Heizungsstromkreis anschliessen. Nichtbenützte Kabeleinführungen sind mit den beigelegten Verschluss- Das Gerät ist schutzisoliert und benötigt keinen Schutzleiteranschluss. kappen abzudichten! Der Netzanschluss erfolgt an den mit L + N bezeichneten Klemmen. -
Seite 8: Anschlussschemas
18 V DC / 100mA Eingang 2 OUT 3 OUT 4 (IN 2) AM066103.4 64 65 56 57 50 51 52 53 Wärmerechner Heat calculator CALEC MB Source - Calculateur de chaleur Sense - Sense + Anschlüsse Source + Connections Netzanschluss Connexions AM066117ed1... -
Seite 9: Anschlussvarianten Der Analogausgänge
Anschlussvarianten der Analogausgänge Passive Analogausgänge (Steckbrücke auf passiv) Aktive Analogausgänge (Steckbrücke auf aktiv) Achtung: Polarität vertauscht! Steckkarte 1 Steckkarte 2 (2AOU) (2AOU) Hilfsspannung OUT 1 OUT 2 Steckkarte 1 Steckkarte 2 18 V DC / 100mA OUT 3 OUT 4 (2AOU) (2AOU) Hilfsspannung... -
Seite 10: Anschluss Des Temperaturfühlerpaares
4. Anschluss des Temperaturfühlerpaares Direktanschluss (Anschlussbild a): Geeignet für Kabelfühler mit ungekürztem Originalkabel! Wichtig: Die Originalan- Empfohlene Anschlussarten Vorsicht! schlusskabel von Kabel- Kabelfühler direkt Kabelfühler mit Kabelfühler mit fühlern dürfen nicht gekürzt Kopffühler mit angeschlossen 4-Drahtverbindung 2-Drahtverbindung 4-Drahtverbindung werden, da der vorhandene Leitungswiderstand immer zum Temperatur-Messwider- stand addiert wird! -
Seite 11: Anschluss Des Durchflussgebers
IN 1 OPTION IN 2 Durchfluss Fühlereinbau Die Temperaturfühler werden nach der geltenden EN 1434-Norm ent- weder direkt via Kugelhahn oder mit Tauchhülsen in die Rohrleitung eingebaut. Der Einbau ist mit grösster Sorgfalt vorzunehmen, da dieser die Messgenauigkeit entscheidend beeinflussen kann! 2. -
Seite 12: Ausgangssignale
50+52 6. Ausgangssignale 50+52 70+72 70+72 74+76 74+76 Relaisausgang Analogausgang 78+80 78+80 max.100mA/50V 0/4 .. 20 mA ® CALEC MB sind serienmässig mit der genormten M-Bus-Schnittstelle Quelle nach EN 1434-3 versehen, mit welcher sich alle relevanten Parameter auslesen, sowie alle Ausgangsfunktionen programmieren lassen. Der 51+53 51+53 OUT 1...8... - Seite 13 RS232-Kommunikationsschnittstelle RS485-Kommunikationsschnittstelle Die Schnittstelle wird von der Hilfsspeisung gespeist und ist somit vom Die Schnittstelle wird von der Hilfsspeisung gespeist und ist somit vom Grundgerät galvanisch getrennt. Grundgerät galvanisch getrennt. Die Signale für GND, TXD und RXD sind an den Anschlussklemmen Die Kommunikationsschnittstelle verwendet das M-Bus-Protokoll nach verfügbar.
-
Seite 14: Deckel Aufsetzen Und Verschliessen
7. Deckel aufsetzen und verschliessen ausgeführt werden. Bei vorhandener AMBUS ® FA/ZS-Vernetzung, können alle angeschlossenen Zähler gleichzeitig eingestellt werden. Nach dem Anschluss aller Verbindungen, im spannungslosen Zustand Durchflusskontrolle den Bandkabelstecker wieder vorsichtig einstecken und dessen siche- -Anzeige im Totalisatorfeld, blinkt bei Durchfluss. Die Blinkfrequenz ren Halt kontrollieren. -
Seite 15: Fehlermeldungen
Inbetriebnahme-Checkliste i r ö u l f : k r i e r u l f ü l f h t s I h ä g i t l f h i r s i r l i ü u t i t l ü... - Seite 16 g ö c i l ) d l t l a e t i ü r l i e t i e ü r ö i l g h ü e l r u t i h ü e l r u t i h ü...
-
Seite 17: Technische Daten
10. Technische Daten r ä h ä i e r T ° . . . °C i d r e f f i e r ∆ ..l t ä l i e r T ° . . . °C i d r e f f... - Seite 18 l f h r ü ≥ l l o r o t ≥ ≥ i t k b ü ≥ 0 5 µ . . . ≥ r e i i t r t i e . . . ö l f l f h o i t .
-
Seite 19: Hinweis Auf Eichpflicht
11. Hinweis auf Eichpflicht 13. Garantie und Haftung Wärmezähler, welche zur direkten Verrechnung einer physikalischen Aquametro garantiert im Rahmen der allgemeinen Verkaufs- und Liefer- Menge dienen, sind in den meisten Ländern eichpflichtig, d.h. der bedingungen für die Qualität dieses Produktes. Aquametro ist qualitäts- amtlichen Kontrolle durch Beglaubigung (Eichung) unterstellt. -
Seite 20: Menue-Übersicht
Menue-Übersicht h ü e t i Ü - e t i 2 . . i e z o r t ) . t . . . t l a e t i t l a e t i e f t i e z r e l i e z... -
Seite 21: Bedienungsanleitung
14. Bedienungsanleitung dazu, um aus der Grundstellung in den hochauflösenden Anzeigemodus zu schalten. Das Geräte wird über 3-Tasten an der Frontplatte bedient. Eine Orientierung zur Auffindung der Anzeigewerte finden Sie im beilie- Mit den zwei (Auf) (Ab) -Pfeiltasten wird vorwärts oder rückwärts genden Menueübersichtsplan. - Seite 22 14.2 14.4 Feldprogrammierbare Daten eingeben Zählerablesung über die Infrarotschnittstelle Alle feldprogrammierbaren Einstellungen, welche den Gebrauch der Die Zählerauslesung über die eingebaute Optionen erlauben, können mit Hilfe der ”CALTOOL”-Programmiersoft- Infrarotschnittstelle erfolgt durch Anlegen ware von Aquametro über eine der Kommunikations-Schnittstellen eines Infrarot-Datenkopfes (z.B. Aqua- eingegeben oder verändert werden.
-
Seite 23: Konformitätserklärung
15. Konformitätserklärung 14.5 Sprachwechsel vornehmen Das Gerät wird grundsätzlich viersprachig geliefert. Die Umschaltung zwischen den Sprachen kann über die Bedientasten vorgenommen werden. Vorgehen Mit den Tasten das Menü ”Feldkonfiguration” anwählen und von dort bis zur Sprachanzeige weiterschalten. Jetzt kann mit der oder Taste, die Sprache eingestellt und jeweils mit der -Taste übernommen... -
Seite 24: Anhang: Menu-Übersicht Softwareoptionen
16. Anhang: Menu-Übersicht Softwareoptionen i e z o r t ) . t . . . t l a e t i t l a e t i e f t i e z r e l i e z r e l i e z r e l... - Seite 25 i e z o r t ) . t . . . t l a e t i t l a e t i e f t i e z r e l i e z r e l i e z r e l i e z r e l...
- Seite 26 i e z o r t ) . t . . . t l a e t i t l a e t i e f t i e z r e l i e z r e l i e z r e l i e z r e l...
- Seite 27 i e z o r t ) . t . . . t l a e t i t l a e t i e f t i e z r e l i e z r e l i e z r e l i e z r e l...
-
Seite 28: Product Description And Packaging
1. Product description and packaging Point of installation The CALEC ® MB heat calculator is a component of a heat meter which • easily accessible for installation, reading and servicing allows precise measurement of heat energy consumption. Designed, • well protected and dry as possible manufactured and tested with great care by Aquametro engineers, this •... - Seite 29 cable plug squarely by holding it on both sides). Be sure to reinsert the plug before apply- Cable inserts ing the mains supply! Snap the housing base onto the For correct installation 9 cable ports are provided as follows: 35mm-DIN rail, or fix it to the wall with the three panhead Pos.
-
Seite 30: Connecting The Power Supply
2. Connecting the power supply Insert the mains cable (Ø 5...10mm) through the left hand (Pos.A) PG11 cable port and tighten firmly. For practical reasons the power cables must not be looped. If no power The unit can be operated either with a 230VAC power supply or with the cable is introduced, fit the cover cap (included in the accessory pouch) AMBUS ®... -
Seite 31: Wiring Diagrams
OUT 3 OUT 4 (IN 2) 56 57 64 65 50 51 52 53 AM066103.4 Wärmerechner Heat calculator CALEC MB Source - Calculateur de chaleur Sense - Sense + Mains connection Anschlüsse Source + AM066117ee1 230 V / 50 HZ... - Seite 32 Connection variants of the analogue outputs Passive analogue outputs (jumper on passive) Active analogue outputs (jumper on active) Option card 1 Option card 2 Warning: Inverted polarity! (2AOU) (2AOU) Aux. voltage OUT 1 OUT 2 Option card 1 Option card 2 18 V DC / 100mA OUT 3 OUT 4...
-
Seite 33: Connecting The Temperature Sensor Pair
4. Connecting the temperature sensor pair Direct connection ( Fig. a). Suitable for the original uncut sensor cable! Recommanded connections Attention Important: The original ca- ble lengths must never be cable sensor cable sensor with head sensor with cable sensor with shortened because the wire directly connected 4- wire connection... -
Seite 34: Sensor Installation
OPTION Flow Sensor installation IN 1 IN 2 The temperature sensors are installed in compliance with EN1434 either directly immersed (inside a ball valve), or contained within sleeves in the supply and return pipes. The installation must be done with the maxi- mum care since it is the most important criterium for attaining the required accuracy. -
Seite 35: Output Signals
50+52 50+52 70+72 70+72 6. Output signals 74+76 Relay output Analogue output 74+76 78+80 78+80 max.100mA/50V 0/4 .. 20 mA Source ® The standard CALEC MB is fitted with an M-Bus-interface in compliance 51+53 51+53 with EN1434-3. This allows all relevant parameters to be selected and all OUT 1 to 8 71+73 OUT 1 to 8... - Seite 36 RS232 Communications interface RS485Communications interface The interface is powered by the auxiliary supply and it is galvanically The interface is powered by the auxiliary supply and it is galvanically isolated from the calculator. The signals for GND, TXD and RXD are isolated from the calculator.
-
Seite 37: Replacing And Fixing Cover
Time adjustments are possible with the keypads (see operating manual) 7. Replacing and fixing cover or via the communication interface. If an M-Bus network with central access is present, all connected meters can be time adjusted by a single broadcast command. •... -
Seite 38: Commissioning Check-List
Commissioning check-list o l f t t i t a l : r o r o ( i r u e t t o l f t t i t a l o l f h t i i r u t t i o l f t t i... - Seite 39 ) d l e r i i t c i r i c r i t i u i r i ) s ( h t i . r e h t i t s i : e l ) t o a t l e f f l a i...
-
Seite 40: Technical Data
10. Technical data i t a T ° . . . °C f i d r e f ∆ . . . i t a T ° . . . °C f i d r e f ∆ . . . i t c i d r e r i... - Seite 41 r o f i t a ≥ l l o r o t i t a ≥ i t a ≥ i t c i t a ≥ 0 5 µ . . . ≥ . . . h t i i t u r o f o l f...
-
Seite 42: Validity Of Calibration
11. Validity of calibration 13. Guarantee and liability In most countries heat meters used for invoicing physical quantities are Aquametro guarantees this product within the framework of its general subject to compulsory recalibration. After the initial period of validity has conditions of sale and delivery. -
Seite 43: Menu Overview
Menu-Overview 4 . . e r r ) . t . . . e i f r o r r o r r o r r o r t l u ) t o i t p o l f t i x t i x t i x... -
Seite 44: Operating Instructions
14. Operating instructions Tip for fast return to main display: Press the keys simultaneously. This combination is also used for The device is operated using three buttons (keypad) on the front panel. switching to the high resolution display mode from the basic setting. Moving up and down through the menu is achieved with the up down arrow keys. -
Seite 45: Communication Parameters
14.2 14.4 Entering field programmable data Meter reading via an optical interface All field programmable settings, which allow the use of the various options, can be entered or changed via the M-Bus interface using the Meter reading via an optical interface is ”CALTOOL”-software. -
Seite 46: Declaration Of Conformity
15. Declaration of conformity 14.5 Language selection The unit is delivered with four language options. Language selection can be made with the keypad. Procedure Use the keypad to select the language display from the ”Field configu- ration” menu. Select the desired language with the keys. -
Seite 47: Annexe: Menu-Overview Software Options
16. Annexe: Menu-overview software options e r r ) . t . . . e i f r o r r o r r o r r o r t l u ) t o i t p o l f t i x t i x t i x... - Seite 48 e r r ) . t . . . e i f r o r r o r r o r r o r t l u ) t o i t p o l f t i x t i x t i x t i x t i x...
- Seite 49 ) . t . . . e i f r o r r o r r o r r o r t l u ) t o i t p o l f t i x t i x t i x t i x t i x i l l i...
- Seite 50 ) . t . . . e i f r o r r o r r o r r o r t l u ) t o i t p o l f t i x t i x t i x t i x t i x i l l i...
-
Seite 51: Présentation Du Produit Et Emballage
1. Présentation du produit et emballage Emplacement de montage Le calculateur CALEC ® MB est l’une des composantes d’un système de • bonne accessibilité pour montage, relevé et entretien mesure de chaleur; c’est lui qui se charge du calcul précis de la •... - Seite 52 Instructions de montage Maintien de la classe de protection Enlever le couvercle (face avant) du calculateur après avoir desserré les La classe de protection IP 54 n’est assurée que si les trous de fixation 4 vis de fixation. Il peut être entière- ne sont pas perforés.
-
Seite 53: Prescriptions De Branchement
Les entrées non utilisées sont à fermer avec les obturateurs borgnes Amener, si possible, la tension du secteur sur un fusible séparé contenus dans le sachet d’accessoires. ou brancher sur l’alimentation du circuit de chauffage. Le calculateur est entièrement isolé et ne nécessite pas de mise à la terre. Le branchement au secteur s’effectue aux bornes marquées L + N. -
Seite 54: Schémas De Connexion
18 V DC / 100mA entrée 2 OUT 3 OUT 4 (IN 2) AM066103.4 64 65 56 57 50 51 52 53 Wärmerechner Heat calculator CALEC MB Source - Calculateur de chaleur Sense - Sense + Anschlüsse Source + Connections raccordement-secteur Connexions AM066117ef1... - Seite 55 Variantes de connexion des sorties analogiques Sorties analogiques passives (strap enfichable sur passif) Sorties analogiques actives (strap enfichable sur actif) Attention: polarité inversée! carte-option 1 carte-option 2 (2AOU) (2AOU) tension auxiliaire OUT 1 OUT 2 carte-option 1 carte-option 2 18 V DC / 100mA OUT 3 OUT 4 (2AOU)
-
Seite 56: Raccordement Des Thermosondes
4. Raccordement des thermosondes Raccordement direct (schéma a) uniquement sondes avec câbles d’origine non raccourcis! Modes de raccordement conseillés Attention! Important: les câbles d’ori- gine des thermosondes à câ- Sondes à câbles Sondes à câbles en Sondes à câbles avec Sondes à... -
Seite 57: Raccordement Du Débitmètre
OPTION Débit IN 1 IN 2 Montage des thermosondes Conformément aux prescriptions de la norme EN-1434, les thermosondes sont à installer soit en contact direct avec le caloporteur par l’intermé- diaire d’un robinet à boisseau sphérique, soit dans des doigts de gant montés dans la tuyauterie. -
Seite 58: Signaux De Sortie
50+52 50+52 70+72 70+72 74+76 74+76 Sortie à relais Sortie analogique 78+80 78+80 6. Signaux de sortie max.100mA/50V 0/4 .. 20 mA source 51+53 ® Le CALEC MB est équipé d’origine de l’interface M-Bus selon EN 1434-3, 51+53 OUT 1 à 8 OUT 1 à... - Seite 59 RS232 Interface de communication RS485 Interface de communication L'interface est alimentée par l'alimentation auxiliaire et elle est ainsi L'interface est alimentée par l'alimentation auxiliaire et elle est ainsi séparée galvaniquement de l'appareil. Les signaux pour GND, TXD et séparée galvaniquement de l'appareil. Le protocole utilisé est identique RXD sont disponibles aux bornes de connexion.
-
Seite 60: Remise En Place Du Couvercle Et Fermeture
jour de référence déterminé” sont appelées à être utilisées, il convient 7. Remise en place du couvercle et ferme- de programmer la date et l’heure exactes lors de la mise en service via l’interface. Doté d’une carte-option avec horloge temps réel, le calcula- ture teur affichera la date réelle. -
Seite 61: Messages D'erreur
Check-list de mise en service i t a l i b é t i é d t i b t a l i s l à i u l i t c é d è à é d t i b v é... - Seite 62 à ) d l é p ô c é t e r t é h é p c r i t i u é D r e t i a i i r é e i f i t c é...
-
Seite 63: Caractéristiques Techniques
10. Caractéristiques techniques é ' é p i v r T ° . . . °C r é f é p ∆ . . . e é T ° . . . °C r é f é p e é . - Seite 64 e é d " b é " t i e é é i r t é t t e é à " t " c e é i s l ≥ é t t e à l l o t r e e é...
-
Seite 65: Étalonnage Officiel
11. Obligation d’étalonnage officiel 13. Garantie et responsabilité Les compteurs de chaleur utilisés pour la facturation directe d’une Aquametro se porte garante de la qualité de ce produit dans le cadre de quantité physique sont soumis dans la plupart des pays à l’obligation ses conditions générales de vente et de livraison. -
Seite 66: Aperçu Du Menu
Aperçu du menu 6 . . c i f i t p c i f i t p " e é i s l " s " e é ( " ) . t . . . ô c é t ô... -
Seite 67: Mode D'emploi
14. Mode d’emploi Appuyer sur jusqu’à ce que l’information désirée apparaisse. Appuyer sur pour mettre d’autres informations du sous-menu à l’affichage. L'appareil se manipule à l'aide des trois touches sur la plaque frontale. Les deux touches (vers le haut) et (vers le bas) permettent Truc: retour rapide à... -
Seite 68: Paramètres De Communication
14.4 correction minute par minute est possible à l’aide des touches Mise en mémoire à l’aide de . Cette opération peut être renouvelée à Relevé du calculateur via l’interface de lecture optique volonté durant le même jour. Dès qu’un changement de date aura eu lieu, aucune modification manuelle de l’heure ne sera plus possible au Le relevé... -
Seite 69: Déclaration De Conformité
15. Déclaration de conformité 14.5 Modification de langue Le calculateur est fourni avec possibilité d’affichage en quatre langues. La sélection de la langue à utiliser se fait à l’aide des touches de la plaque frontale. Procédure A l’aide des touches, mettre à l’affichage ”configuration sur site”, jusqu’à... -
Seite 70: Annexe: Aperçu Des Menus, Options "Software
16. Annexe: aperçu des menus, options "software" c i f i t p c i f i t p " e é i s l " s " e é " t . . . ô c é t ô c é... - Seite 71 c i f i t p c i f i t p " e é i s l " s " e é " t . . . ô c é t ô c é t c i f s i v c i f s i v c i f...
- Seite 72 c i f i t p c i f i t p " e é i s l " s " e é " t . . . ô c é t ô c é t c i f s i v c i f s i v c i f...
- Seite 73 c i f i t p c i f i t p " e é i s l " s " e é " t . . . ô c é t ô c é t c i f s i v c i f s i v c i f...
- Seite 74 VD 3-168 DEF Aquametro AG...
- Seite 75 Aquametro AG VD 3-168 DEF...
- Seite 76 AQUAMETRO AG AQUAMETRO SA AQUAMETRO AQUAMETRO AQUAMETRO s.r.o. MESSTECHNIK GmbH BELGIUM SPRL Ringstrasse 75 Rue du Jura 10 Zum Panrepel 24 Bd. Lambermont 131 Prosecká 811 / 76a CH-4106 Therwil CH-1800 Vevey D-28307 Bremen B-1030 Bruxelles CZ-190 00 Praha 9 Tel.