
Verwandte Anleitungen für COMENDA AC2 Serie


Inhaltszusammenfassung für COMENDA AC2 Serie
- Seite 1 AC2 series Use and maintenance instructions Instructions d’utilisation et d’entretien Anweisungen für Gebrauch und Wartung Instrucciones de uso y mantenimiento Istruzioni per l’uso e la manutenzione Ed.05-2023...
- Seite 2 Thank you for choosing us and for placing your trust in us Nous vous remercions de nous avoir choisis et de nous avoir fait confiance Danke, dass Sie sich für uns entschieden haben und uns Ihr Vertrauen schenken Gracias por elegirnos y por confiar en nosotros Grazie per averci scelto e per aver riposto in noi la Vostra fiducia...
- Seite 3 DICHIARAZIONE DI CONFORMITÀ CE DECLARATION OF CONFORMITY CE Via Galileo Galilei, 8 CE DECLARACION DE CONFORMIDAD 20051 Cassina de’ Pecchi DECLARATION DE CONFORMITÉ CE Milano (Italy) KONFORMITÄTSERKLÄRUNG CE CE CONFORMITEITSVERKLARING CE KONFORMITETSERKLÆRING CE DEKLARATION Noi dichiariamo sotto la nostra esclusiva responsabilità che il prodotto: The undersigned hereby declares under full responsability that the following product: Declaramos bajo nuestra responsabilidad que el produeto: Nous soussignées attestons sous notre entière responsabilité...
- Seite 4 EN................INFORMATION FOR USERS Pursuant to Directive 2012/19/EU on waste electrical and electronic equipment (WEEE) The crossed-out “wheelie-bin” symbol on the dishwasher's serial number plate indicates that the product must be collected separately from .other waste at the end of its useful life. The separate collection of the dishwasher, at the end of its life, is organised and managed by the manufacturer.
- Seite 5 In caso di guasto o cattivo funzionamento della macchina rivolgersi esclusivamente ad un centro tecnico autorizzato o direttamente alla ditta COMENDA Ali Group srl. The manufacturer reserves the right to make chang- es that will be useful to their products without com- promising their essential characteristics.
- Seite 6 Space left blank intentionally Espace laissé en blanc intentionnellement Absichtlich leer gelassener Freiraum Espacio dejado en blanco intencionalmente Spazio lasciato bianco intenzionalmente...
- Seite 7 CONTENTS INDEX-INHALT-ÍNDICE-INDICE ENGLISH........PAGE 9 FRANÇAIS.......PAGE 39 DEUTSCH........SEITE 69 ESPAÑOL......PÁGINA 99 ITALIANO......PAGINA 129...
- Seite 8 Space left blank intentionally Espace laissé en blanc intentionnellement Absichtlich leer gelassener Freiraum Espacio dejado en blanco intencionalmente Spazio lasciato bianco intenzionalmente...
- Seite 9 TRANSLATION OF ORIGINAL INSTRUCTIONS ENGLISH ENGLISH...
- Seite 10 Space intentionally left blank...
- Seite 11 TABLE OF CONTENTS SPECIAL WARNINGS FOR THE OPERATOR ..............12 1.1 General description ......................13 1.2 Type of use and contraindications for use ..............13 1.3 Transportation, shipping and storage. (Fig. 2) .............13 1.4 Checks upon receipt ....................13 1.5 Unpacking (fig. 2-3-4) ....................14 1.6 Machine identification (fig.
- Seite 12 SPECIAL • Do not use your hands or unsuitable instruments to locate leaks from the various hoses. Pressurised or irritating air WARNINGS FOR THE OPERATOR could cause serious harm to persons and/or property. Do not immerse your bare hands in the hot, detergent water •...
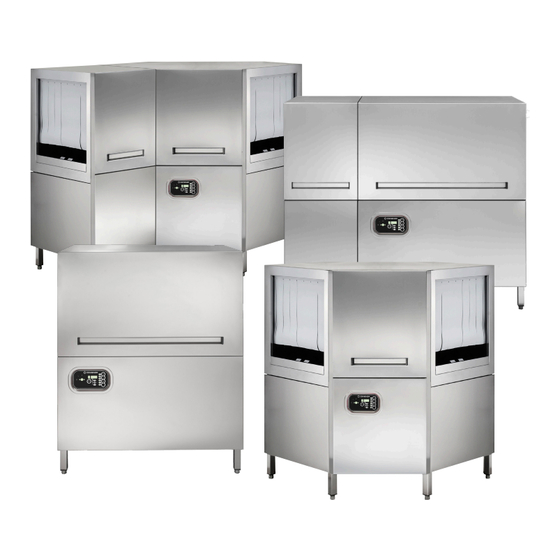
- Seite 13 1.1 GENERAL DESCRIPTION Modular execution in stainless steel with the possibility of linear and single angle configuration. Colour code that identifies each module. Insulated doors counterbalanced and equipped with safety hooks integrated in the guides. Moulded tank bottom with multiple filtration (collection filter and pump suction microfilter). Wash and rinse manifolds in stainless steel.
- Seite 14 1.6 MACHINE IDENTIFICATION (Fig. 5) • The serial number and the data relating to the machine are written on the plate (3) positioned on the right side of the electrical box. IMPORTANT To request technical support or to order spare parts, always include the model and serial number of the machine. 1.7 DESCRIPTION OF THE SAFETY DEVICES •...
- Seite 15 USER INSTRUCTIONS USER INSTRUCTIONS...
- Seite 18 BEFORE COMMISSIONING Before use make sure that: • the wall switch is on; • the water and steam (*) gate valves are open; • there is no water or steam (*) shortage; • the tank and pump suction filters are in place; •...
- Seite 19 2.2.b Dishwashing 1. First remove solid leftovers and any oily mas- ses. This operation is not necessary for machines equipped with DHM2+. 2. Perform prior soaking of the cutlery and also of the dishes when they are being washed a long time after use.
- Seite 20 2.2.b.1 Machines equipped with automatic reverse osmosis rinsing (Optional) The machines equipped with automatic reverse osmosis rinsing are fitted with various sensors which are used to detect the stainless steel dish racks. When one of these dish racks enters the machine, the pre-wash is deactivated and the rinse with osmotic water is activated.
- Seite 21 2.2.e Self-cleaning (Optional) It is essential to perform a thorough cleaning of the machine at least once a week. A specific detergent- disinfectant product is recommended for this operation. Use of the above mentioned product essentially gives the following advantages: •...
- Seite 22 2.2.g DHM2+ module with R.e.d. External debris recovery (Optional) Self-cleaning and drain (cycle duration 1') 1. Machine on and stopped. Selector “Q2” in position “I” and button “S1” off. 2. Remove the filters as in the images. Press the "S26" button. The “H26”...
- Seite 23 It also keeps track of the alarm conditions that occur over time, counting the repetitions of similar alarms (HPS EASY PLUS): • total alarms "insufficient rinse water temperature"; • total alarms "insufficient rinse water flow"; • total alarms "insufficient washing water temperature". 2.2.h.2 Buttons The keyboard consists of 2 buttons called “MENU”...
- Seite 24 2.2.l Display of consumption and ignition time Press to display the following parameters: • Total water consumption (m³) • Partial water consumption (l) • Total ignition time (h) 2.2.m Partial counter reset procedure (to be carried out for each individual counter) With the machine on, press for 25"...
- Seite 25 2.2.o Shutdown and cleaning at the end of the day 1. Press the "S1" button to stop the machine and turn the "Q2" switch to the "O" position to turn off the machine. 2. Deactivate the appliance by removing the volta- ge using the wall switch and close the water and steam supply valve (only for machines with steam heating).
- Seite 26 2.3 CLEANING (Fig.8) Strict observance of the maintenance rules in this section guarantees good preservation and satisfactory machine operation and greatly reduces the need for repairs. ATTENTION In the event of irregularities or failure of any component of the machine, FIRST OF ALL, CHECK that the instructions given in the previous paragraphs have been followed when using it.
- Seite 27 2.4.d. Tips to obtain an optimal washing result (Fig.8) Any unsatisfactory washing result is visible when traces of dirt remain on the dishes or objects. Possible streaks can be caused by insufficient rinsing. In this case, check that the rinsing nozzles (18) are clean and that there is sufficient pressure in the water mains. In the event of traces of dirt, check that: •...
- Seite 28 Emergency stop button The machine is equipped with a red mushroom button on a yellow field (within the operator's reach) which, if pressed, stops all the motors of the machine. Once the problem has been eliminated, restarting will only be possible after turning and releasing the button by pressing the start button "S1"...
- Seite 29 TROUBLESHOOTING FAULT CAUSE SOLUTION Main switch disconnected Turn switch on. The machine or the light H01 does not come on Other possible causes Contact the assistance service. Water valve closed Open the valve. It does not load water or light The door is open.
- Seite 30 Space intentionally left blank...
- Seite 31 INSTALLATION INSTALLATION AND MAINTENANCE INSTRUCTIONS AND MAINTENANCE INSTRUCTIONS The following instructions are intended for qualified personnel, i.e. the only party authorised to carry out the checks and any repairs. The Company declines any liability if operations are carried out by unqualified personnel and/or if non- original spare parts are used.
- Seite 32 IMPORTANT Any installation, electric or hydraulic connection, programming, maintenance operation etc. must be carried out by SUITABLE qualified personnel authorised by the manufacturer. Operations carried out by UNQUALIFIED personnel can jeopardise the safety of the operator as well as other personnel (user, etc.) or the system connected to the dishwasher.
- Seite 33 3.1.b Drain pipe connection • Insert the drain hose into the drain sump. IMPORTANT Provide a floor drain with a drain trap and connect the machine to the drain using the hose supplied, so that it is sloping towards the drain. Also make sure that there are no bottlenecks along it.
- Seite 34 ATTENTION Wherever sand is found in the water supply circuit, a filter must be applied between the water circuit and the machine. The operating pressure must not be less than 2 bar and more than 4 bar (200-400 kPa). If the pressure is lower, it is recommended to install a pressure booster pump. If the pressure is higher, it is recommended to install a pressure reducer.
- Seite 35 3.1.g Steam extraction For machines equipped with a splash guard hood with collar or machines with heat recovery unit, connect as in the image 3.1.h Electrical connection DANGER • Before performing the electrical connection, make sure that the data on the power line correspond to those indicated on the rating plate and that the main electric power switch upstream of the machine is disconnected “...
- Seite 36 For connecting the rinse aid dispenser, the machine has two terminals in the electrical panel marked with the letters "BB" which are live when rinsing is in operation. Remember that the voltage at the terminals corresponds to the mains voltage. To avoid damage to the electrical components of the machine, it is essential to use these terminals, avoiding loose connections in other points of the system.
- Seite 37 3.4 DEMOLITION and DISPOSAL When you intend to scrap the machine, drain the water from the tank and the boiler, as indicated in the previous points, and disconnect the machine from the water and electric mains. Then dismantle the components following that prescribed in the relevant standards in force in compliance with the national and local ecological- environmental regulations, taking care to separate the parts as follows: - metal parts: body, surfaces, panels, filters;...
- Seite 38 Space intentionally left blank...
- Seite 39 TRADUCTION DES INSTRUCTIONS ORIGINALES FRANÇAIS FRANÇAIS...
- Seite 40 Espace laissé en blanc intentionnellement...
- Seite 41 TABLE DES MATIÈRES MISES EN GARDE DÉTAILS POUR L'OPÉRATEUR ............42 1.1 Description générale ....................43 1.2 Type d'utilisation et contre-indications d’utilisation............43 1.3 Transport, expédition et stockage. (Fig. 2) ..............43 1.4 Contrôle à la réception ....................43 1.5 Déballage (fig. 2-3-4) ....................44 1.6 Identification de la machine (fig. 5) ................44 1.7 Description des dispositifs de sécurité...
- Seite 42 MISES EN GARDE • Ne jamais se servir des mains ou d’instruments inadéquats pour localiser d’éventuelles fuites des différents tuyaux. L'air, DÉTAILS POUR L'OPÉRATEUR les fluides sous pression ou les irritants peuvent provoquer des blessures graves et/ou des dommages matériels. •...
- Seite 43 1.1 DESCRIPTION GÉNÉRALE Exécution modulaire en acier inoxydable avec possibilité de configuration linéaire, à angle simple. Code couleur qui identifie chaque module. Portes isolées contrebalancées et dotées de crochets de sécurité intégrés dans les guides. Fond de cuve moulé avec filtration multiple (filtre de collecte et microfiltre d'aspiration de la pompe). Collecteurs de lavage et rinçage en acier INOX.
- Seite 44 ATTENTION Après avoir déballé la machine, ne JAMAIS soulever la machine par la caisse des composants électriques. Placer la machine dans un endroit approprié (comme décrit ci-dessus) et régler les pieds de support (Fig. 4) pour éviter d'éventuelles oscillations et s'assurer que la machine est parfaitement nivelé (utiliser un niveau à bulle). Soulever la machine par la partie inférieure de la carcasse ;...
- Seite 45 INSTRUCTIONS POUR INSTRUCTIONS POUR L ’UTILISATEUR L ’UTILISATEUR...
- Seite 48 2.1 AVANT LA MISE EN SERVICE Avant de l'utiliser, s’assurer que : • l'interrupteur mural est enclenché ; • les robinets à vanne de l'eau et de la vapeur (*) sont ouverts ; • il ne manque pas d'eau ou de vapeur (*) d’alimentation ; •...
- Seite 49 2.2.b Lavage vaisselle Enlever au préalable les déchets solides et les éventuelles masses huileuses. Cette opération n'est pas nécessaire pour les machines équipées de DHM2+. 1. Pré-tremper les couverts et également la vaisselle lorsqu'ils sont lavés longtemps après leur utilisation. 2.
- Seite 50 2.2.b.1 Machines équipées d'un système de rinçage automatique par osmose inverse (en option) Les machines équipées d'un système de rinçage automatique par osmose inverse sont dotées de plusieurs capteurs qui permettent de détecter les paniers en acier inoxydable. Lorsque l'un de ces paniers entre dans la machine, le prélavage est désactivé...
- Seite 51 2.2.e Lavage automatique (En option) Il est indispensable d'effectuer au moins une fois par semaine un nettoyage minutieux de la machine. Un produit détergent-désinfectant spécifique est recommandé pour cette opération. L’utilisation du produit susmentionné présente essentiellement les avantages suivants : • garantie d'hygiène en tant que formellement constitué...
- Seite 52 2.2.g Module DHM2+ avec R.e.d. Récupération extérieure des déchets (En option) Lavage automatique et vidange (Durée cycle 1’) 1. Machine allumée et à l'arrêt. Sélecteur « Q2 » en position « I » et bouton « S1 » éteint. 2. Extraire les filtres comme illustré dans les images. Appuyer sur le bouton « S26 ».
- Seite 53 Il garde également la trace des conditions d'alarme qui se produisent dans le temps en comptant les répétitions d'alarmes similaires (HPS EASY PLUS) : • total alarmes « température eau de rinçage insuffisant » ; • total alarmes « débit eau de rinçage insuffisant » ; • total alarmes « température eau de lavage insuffisant ».
- Seite 54 2.2.l Affichage des consommations et temps d’allumage Appuyer pour afficher les paramètres suivants : • Consommation eau totale (m³) • Consommation eau partielle (l) • Temps total d’allumage (h) 2.2.m Procédure de réinitialisation des compteurs partiels (à effectuer pour chaque compteur) Avec la machine allumée, appuyer sur pendant 25”...
- Seite 55 2.2.o Arrêt et nettoyage en fin de journée 1. Appuyer sur le bouton « S1 » pour arrêter la ma- chine et tourner l'interrupteur « Q2 » sur la posi- tion "O" pour éteindre la machine. 2. Désactiver l’équipement en coupant l'alimentation à l’aide de l'interrupteur mural et fermer le robi- net d’alimentation en eau et vapeur (uniquement pour les machines avec chauffage à...
- Seite 56 NETTOYAGE (Fig.8) Le respect scrupuleux des règles d'entretien, contenues dans ce paragraphe, garantit la bonne conservation et le fonctionnement satisfaisant de la machine, et diminue de loin la nécessité d'effectuer des réparations. ATTENTION En cas d'irrégularités ou de mauvais fonctionnement d'un composant quelconque de la machine, VÉRIFIER D'ABORD que les instructions données dans les paragraphes précédents aient été...
- Seite 57 2.4.d. Conseils pour obtenir un résultat de lavage optimal (Fig.8) Un éventuel résultat de lavage insatisfaisant est visible quand sur la vaisselle et les objets subsistent des traces de saleté. Les éventuelles auréoles peuvent être causées par un rinçage insuffisant. Dans ce cas, contrôler que les buses de rinçage (18) soient propres et qu'il y ait de la pression dans le réseau d’eau.
- Seite 58 Bouton d'arrêt d'urgence La machine est équipée d'un bouton coup de poing rouge sur champ jaune (à portée de main de l'opérateur) qui, lorsqu'il est actionné, arrête tous les moteurs de la machine. Une fois éliminée la défaillance, la remise en marche ne sera possible qu'après avoir tourné...
- Seite 59 INCONVÉNIENTS ÉVENTUELS - CAUSES - SOLUTIONS ANOMALIE CAUSE SOLUTION Interrupteur principal désinséré Insérer l'interrupteur. La machine ou le voyant H01 ne s’allument pas Autres causes possibles Contacter le service après-vente. Robinet d'eau fermé Ouvrir le robinet. Ne charge pas l'eau ou voyant La porte est ouverte.
- Seite 60 Espace laissé en blanc intentionnellement...
- Seite 61 INSTRUCTIONS D’INSTALLATION INSTRUCTIONS D’INSTALLATION ET D'ENTRETIEN ET D'ENTRETIEN Les instructions suivantes sont destinées au personnel qualifié, qui est le seul habilité à effectuer les contrôles et les réparations. La Société décline toute responsabilité en cas d'interventions effectuées par du personnel non qualifié et/ou d'utilisation de pièces de rechange non originales.
- Seite 62 IMPORTANT Toute opération d'installation, de raccordement électrique ou hydraulique, de programmation, d'entretien, etc. doit être effectuée par du personnel qualifié et autorisé par le fabricant ; les opérations effectuées par du personnel INAPPROPRIÉ peuvent compromettre la sécurité de l'opérateur lui-même ainsi que des autres personnes (utilisateur, etc.) ou du système connecté...
- Seite 63 3.1.b Raccordement du tuyau de vidange • Insérer le tuyau de vidange dans le puits de vidange prévu à cet effet. IMPORTANT Prévoir une vidange au sol avec cloche renversée et la raccorder à la machine avec le tuyau flexible fourni, en veillant à...
- Seite 64 ATTENTION Lorsque du sable a été trouvé dans le réseau d'eau d'alimentation, un filtre doit être inséré entre le réseau d'eau et la machine. La pression de fonctionnement ne doit pas être inférieure à 2 bar et supérieure à 4 bar (200-400 kPa). Si la pression est inférieure, l'installation d'une pompe de surpression est recommandée ;...
- Seite 65 3.1.g Aspiration vapeurs Pour les machines équipées d'une protection anti-éclaboussures avec collier ou pour les machines avec récupérateur de chaleur, se raccorder comme indiqué sur l'image. 3.1.h Raccordement électrique DANGER • Avant d'effectuer le raccordement électrique, s’assurer que les données de la ligne d'alimentation correspondent à...
- Seite 66 Pour le raccordement du doseur du liquide de rinçage, la machine est dotée de deux bornes sur le tableau électrique sous tension qui se distinguent par les lettres « BB » quand le rinçage est en cours. Veuillez noter que la tension aux bornes correspond à la tension du réseau. Afin d'éviter d'endommager les composants électriques de la machine, il est impératif d'utiliser ces bornes et d'éviter les connexions lâches ailleurs dans le système.
- Seite 67 3.4 DÉMOLITION et ÉLIMINATION Si l’on souhaite mettre la machine à la casse, vider l'eau de la cuve et du chauffe-eau, comme indiqué aux points précédents et déconnecter la machine des réseaux d'alimentation en eau et en électricité, puis procéder à...
- Seite 68 Espace laissé en blanc intentionnellement...
- Seite 69 ÜBERSETZUNG DER ORIGINALANLEITUNG DEUTSCH DEUTSCH...
- Seite 70 Absichtlich leer gelassene Seite...
- Seite 71 INHALT WARNHINWEISE DETAILS FÜR DEN BETREIBER ............72 1.1 ALLGEMEINE BESCHREIBUNG ................73 1.2 VERWENDUNG UND GEGENANZEIGEN FÜR DIE VERWENDUNG .......73 1.3 TRANSPORT, VERSAND UND LAGERUNG. (Abb. 2) ..........73 1.4 KONTROLLE BEI ERHALT..................73 1.5 AUSPACKEN (Abb. 2-3-4) ...................74 1.6 IDENTIFIZIERUNG DER MASCHINE (Abb. 5) ............74 1.7 BESCHREIBUNG DER SICHERHEITSEINRICHTUNGEN ........74 1.8 REFERENZNORMEN ....................74 ANWEISUNGEN FÜR DEN BENUTZER ................75...
- Seite 72 WARNHINWEISE • Niemals die Hände oder ungeeignete Geräte benutzen, um eventuelle Lecks an den verschiedenen Rohren/ DETAILS FÜR DEN BETREIBER Schläuchen festzustellen. Luft, unter Druck stehende oder reizende Flüssigkeiten können schwere Personen- und/ • Vor der Inbetriebnahme der Maschine muss der oder Sachschäden verursachen.
- Seite 73 1.1 ALLGEMEINE BESCHREIBUNG Modulare Ausführung aus rostfreiem Stahl mit der Möglichkeit einer linearen, einwinkligen Konfiguration. Farbcode zur Identifizierung jedes Moduls. Isolierte, ausbalancierte Türen mit in die Führungen integrierten Sicherheitsha- ken. Formgepresster Tankboden mit Mehrfachfilterung (Sammelfilter und Mikrofilter an der Pumpenansaugung). Spül- und Klarsabpülsammler aus Edelstahl.
- Seite 74 ACHTUNG Nach dem Auspacken der Maschine zum Heben NIEMALS den Kasten der elektrischen Bauteile benutzen. Stellen Sie die Maschine an einem geeigneten Ort auf (wie oben beschrieben) und justieren Sie die Stützfüße (Abb. 4), um ein mögliches Wackeln zu vermeiden, und stellen Sie sicher, dass die Maschine vollkommen waa- gerecht steht (verwenden Sie eine Wasserwaage).
- Seite 75 ANWEISUNGEN FÜR DEN ANWEISUNGEN FÜR DEN BENUTZER BENUTZER...
- Seite 78 2.1 VOR DER INBETRIEBNAHME Vor der Verwendung sicherstellten, dass: • der Wandschalter eingeschaltet ist; • Die Schiebehähne für Wasser und Dampf (*) müssen offen sein; • Wasser oder Dampf (*) dürfen im Versorgungsnetz nicht fehlen; • die Tanksfilter und die Ansaugung der Pumpe an ihrem Platz sind; •...
- Seite 79 2.2.b Geschirrspülen 1. Entfernen Sie vorher feste Reste und ölige Massen. Dieser Vorgang ist bei Maschinen mit DHM2+ nicht erforderlich. 2. Weichen Sie Besteck und auch Geschirr ins Wasser vor, wenn es nach längerem Gebrauch gespült wird. 3. Legen Geschirr dafür vorgesehenen Körbe.
- Seite 80 2.2.b.1 Maschinen mit automatischer Umkehrosmose-Spülung (optional) Maschinen mit automatischer Umkehrosmose-Spülung sind mit verschiedenen Sensoren zur Erkennung der Edelstahlkörbe ausgestattet. Wenn einer dieser Körbe in die Maschine gelangt, wird die Vorwäsche deaktiviert und die Osmose-Wasserspülung aktiviert. 2.2.c EOR-Funktion (Übertragung der Steuerung im Falle eines Fehlers auf der Elektronikkarte) Bei einem Ausfall der Elektronikkarte ist es möglich, den Spülvorgang über die EOR-Funktion...
- Seite 81 2.2.e Innenreinigung (optional) Es ist unabdinglich mindestens einmal pro Woche eine sorgfältige Reinigung der Maschine durchzuführen. Für diese Vorgänge wird ein spezifischen reinigendes und desinfizierendes Produkt empfohlen. Die Verwendung des oben genannten Produkt bringt grundsätzlich folgende Vorteile mit sich: • Gewährleistung der Hygiene, da es sowohl aus waschaktiven als auch aus desinfizierenden Wirkstoffen besteht;...
- Seite 82 2.2.g DHM2+-Modul mit R.E.D. Externe Rückgewinnung (Optional) Innenreinigung und Abpumpen (Zyklusdauer 1‘) 1. Die Maschine ist eingeschaltet und steht. Wahlschalter “Q2” in Position “I” und Taste “S1” ausgeschaltet. 2. Ziehen Sie die Filter wie auf den Abbildungen heraus. 3. Drücken Sie die Taste "S26". Die „H26“-Lampe leuchtet auf, um ihre Aktivierung anzuzeigen.
- Seite 83 Außerdem werden die im Laufe der Zeit aufgetretenen Alarmzustände erfasst, indem die Wiederholungen ähnlicher Alarme gezählt werden (HPS EASY PLUS): • Summe der Alarme „Unzureichende Spülwassertemperatur“; • Summe der Alarme „Unzureichende Durchflussmenge des Spülwassers“; • Gesamtzahl der Alarme „Unzureichende Temperatur des Spülwassers“. 2.2.h.2 Tasten Das Tastenfeld besteht aus 2 Tasten mit den Bezeichnungen "MENÜ“...
- Seite 84 2.2.l Verbrauchsanzeige und Einschaltzeit Drücken Sie , um die folgenden Parameter anzuzeigen: • Gesamter Wasserverbrauch (m³) • Teilweiser Wasserverbrauch (l) • Gesamte Einschaltdauer (h) 2.2.m Verfahren zum Zurücksetzen des Teilzählers (für jeden einzelnen Zähler auszuführen) Drücken Sie bei eingeschalteter Maschine für 25"...
- Seite 85 2.2.o Ausschalten und Reinigung am Ende des Tages 1. Drücken Sie die Taste "S1", um die Maschine an- zuhalten und drehen Sie den Schalter "Q2" in die Position "STOPP", um die Maschine auszuschal- ten. 2. Schalten Sie die Maschine aus, indem Sie den Strom vom Wandschalter abziehen und den Was- ser- und Dampfzufuhrhahn schließen (nur bei Maschinen mit Dampfheizung).
- Seite 86 REINIGUNG (Abb. 8) Die strikte Beachtung der in diesem Abschnitt enthaltenen Wartungsvorschriften gewährleistet die gute Erhaltung und den zufriedenstellenden Betrieb der Maschine und vermindert die Notwendigkeit von Reparaturen. ACHTUNG Im Falle einer Unregelmäßigkeit oder eines Ausfalls eines beliebigen Bauteils der Maschine ist VOR ALLEN DINGEN zu überprüfen, ob die in den vorhergehenden Absätzen gegebenen Anweisungen zur Verwendung der Maschine eingehalten wurden.Beim ersten Auftreten von Störungen muss unverzüglich eingegriffen werden, um eine Verschlimmerung des Problems und Schäden an anderen Teilen zu vermeiden.
- Seite 87 2.4.d. Tipps für optimale Spülgergebnisse (Abb.8) Ein unbefriedigendes Spülergebnis ist sichtbar, wenn Spuren von Schmutz auf dem Geschirr oder den Gegenständen zurückbleiben. Mögliche Lichthöfe können durch unzureichendes Spülen verursacht werden. In diesem Fall kontrollieren, ob die Spüldüsen (18) sauber sind und ob im Wasserversorgungsnetz ausreichend Druck vorhanden ist.
- Seite 88 Notaustaste Die Maschine ist mit einer roten Pilztaste auf einem gelben Feld (in Reichweite des Bedieners) ausgestattet, die, wenn sie gedrückt wird, alle Motoren der Maschine stoppt. Nach dem Ausschalten ist ein Neustart nur nach Drehen und Loslassen des Knopfes durch erneutes Drücken der Lauftaste "S1" möglich. Bei komplexen Anlagen können mehrere Drucktasten in der Nähe der Bedienerplätze erforderlich sein.
- Seite 89 MÖGLICHE STÖRUNGEN - URSACHEN - ABHILFEN STÖRUNG URSACHE ABHILFE Hauptschalter ausgeschaltet Hauptschalter einschalten. Maschine oder Lampe H01 lässt sich nicht einschalten Andere mögliche Ursachen Kundendienst kontaktieren. Wasserhahn geschlossen Hahn aufdrehen. Wasser oder Lampe Die Tür ist offen. Tür schließen. schaltet sich nicht ein Notaustaste aktiviert.
- Seite 90 Absichtlich leer gelassene Seite...
- Seite 91 INSTALLATIONS- INSTALLATIONS- UND WARTUNGSANWEISUNGEN UND WARTUNGSANWEISUNGEN UND WARTUNG UND WARTUNG Die folgenden Anweisungen sind für qualifiziertes Personal bestimmt, das allein berechtigt ist, Kontrollen und Reparaturen durchzuführen. Bei Eingriffen durch unqualifiziertes Personal und/oder Verwendung von Nicht-Original-Ersatzteilen lehnt die Firma jede Verantwortung ab.
- Seite 92 WICHTIG Jegliche Installationsarbeiten, Elektro- oder Sanitäranschlüsse, Programmierung, Wartung usw..müssen von qualifiziertem und von GEEIGNETEM und vom Hersteller autorisiertem Personal durchgeführt werden; die von UNGEEIGNETEM Personal ausgeführten Arbeiten können die Sicherheit des Bedieners sowie anderer Personen (Benutzer usw...) oder des an den Geschirrspüler angeschlossenen Systems gefährden. Der Hersteller übernimmt keine Haftung für Personen- oder Sachschäden, die durch die Nichteinhaltung der oben angeführten Vorschriften verursacht werden.
- Seite 93 3.1.b Anschluss der Abpumpleitung • Das Ablassrohr in den dafür vorgesehenen Ablassschacht einführen. WICHTIG Einen Bodenablauf mit Siphon vorsehen und mit dem mitgelieferten Schlauch an das Gerät anschließen, wobei darauf zu achten ist, dass dieser zum Ablass hin geneigt ist. Sicherstellen, dass dieser keine Engstellen aufweist.
- Seite 94 ACHTUNG Wo Sand im Wasserversorgungsnetz gefunden wurde, ist es notwendig, einen Filter zwischen dem Wasserversorgungsnetz und der Maschine einzusetzen. Der Betriebsdruck darf nicht weniger als 2 bar und nicht mehr als 4 bar (200-400 kPa) betragen. Bei niedrigerem Druck empfehlen wir die Installation einer Druckerhöhungspumpe, bei höherem Druck den Einsatz eines Druckminderers.
- Seite 95 3.1.g Dampfabsaugung Bei Maschinen, die mit einem Spritzschutz mit Kragen ausgestattet sind, oder bei Maschinen mit Wärmerückgewinnungseinheit, schließen Sie diese wie auf dem Bild an 3.1.h Elektroanschluss GEFAHR • Vergewissern Sie sich vor dem elektrischen Anschluss, dass die Daten der Versorgungsleitung mit den Angaben auf dem Typenschild übereinstimmen und dass der vor der Maschine befindliche Hauptstromversorgungsschalter ausgeschaltet ist "O"...
- Seite 96 Für den Anschluss des Klarspülers verfügt die Maschine über zwei mit "BB" gekennzeichnete Klemmen im Bedienfeld, die bei Betrieb der Spülung unter Spannung stehen. Bitte beachten Sie, dass die Spannung an den Klemmen mit der Netzspannung übereinstimmt. Um Schäden an den elektrischen Komponenten des Geräts zu vermeiden, müssen Sie unbedingt diese Klemmen verwenden und lose Verbindungen an anderen Stellen im System vermeiden.
- Seite 97 3.4 DEMONTAGE und ENTSORGUNG Wenn Sie beabsichtigen, die Maschine zu verschrotten, ist es notwendig, das Wasser aus der Tank und dem Boiler abzulassen, wie in den vorhergehenden Punkten angegeben ist und die Maschine vom Wasser- und Stromnetz zu trennen, dann mit der Entsorgung der Bauteile gemäß den einschlägigen nationalen und lokalen Vorschriften zur Umweltschonung fortzufahren, wobei die Teile wie folgt zu unterscheiden sind: - Metallteile: Karosserie, Flächen, Verkleidungen, Filter;...
- Seite 98 Absichtlich leer gelassene Seite...
- Seite 99 TRADUCCIÓN DE LAS INSTRUCCIONES ORIGINALES ESPAÑOL ESPAÑOL...
- Seite 100 Espacio dejado en blanco intencionalmente...
- Seite 101 ÍNDICE ADVERTENCIAS DETALLES PARA EL OPERADOR .............102 1.1 Descripción general ....................103 1.2 Tipo de uso y contraindicaciones de uso ..............103 1.3 Transporte, envío y almacenamiento. (Fig. 2) ............103 1.4 Control en la recepción ....................103 1.5 Desembalaje (fig. 2-3-4) ....................104 1.6 Identificación de la máquina (fig. 5) ................104 1.7 Descripción de dispositivos de seguridad ..............104 1.8 Referencias normativas .....................104 INSTRUCCIONES PARA EL USUARIO ................105...
- Seite 102 ADVERTENCIAS • No utilice nunca las manos ni herramientas inadecuadas para localizar las fugas de las distintas tuberías. El aire, DETALLES PARA EL OPERADOR los fluidos a presión o los agentes irritantes podrían causar graves lesiones personales y/o daños materiales. •...
- Seite 103 1.1 DESCRIPCIÓN GENERAL Ejecución modular en acero INOX con posibilidad de configuración lineal, simple ángulo. Código color que identifica cada módulo. Puertas contrapesadas aisladas con ganchos de seguridad integrados en las guías. Fondo de la tina moldeado con filtración múltiple (filtro de recogida y microfiltro de aspiración de la bomba). Colec- tores de lavado y enjuague en acero INOX.
- Seite 104 ATENCIÓN Una vez desembalada la máquina, NUNCA utilice la caja de componentes eléctricos para levantarla. Coloque la máquina en un lugar adecuado (como se ha descrito anteriormente) y ajuste las patas de apoyo (Fig. 4) para evitar posibles oscilaciones y asegurarse de que la máquina está completamente nivelada (utilice un nivel de burbuja).
- Seite 105 INSTRUCCIONES PARA EL INSTRUCCIONES PARA EL USUARIO USUARIO...
- Seite 108 2.1 ANTES DE LA PUESTA EN MARCHA Antes de utilizarlo, asegúrese de que: • el interruptor de la pared está encendido; • las válvulas de compuerta del agua y del vapor (*) se tienen que abrir; • no tiene que faltar agua o vapor (*) en la red; •...
- Seite 109 2.2.b Lavado de vajillas Retire previamente los restos sólidos y cual- quier masa aceitosa. Esta operación no es necesaria para máquinas equipadas con DHM2+. 1. Remoje previamente los cubiertos y también la vajilla cuando se lave después de mucho tiempo de uso.
- Seite 110 2.2.b.1 Máquina equipadas con enjuague automático de ósmosis inversa (Opcional) Las máquinas con enjuague automático por ósmosis inversa están equipadas con varios sensores para detectar las cestas de acero inoxidable. Cuando una de estas cestas entra en la máquina, se desconecta el prelavado y se activa el enjuague con agua osmotizada.
- Seite 111 2.2.e Autolavado (Opcional) Es indispensable realizar al menos una vez a la semana una limpieza a fondo de la máquina. Es recomendable utilizar un producto detergente-desinfectante específico para esta operación. El uso del producto mencionado aporta básicamente las siguientes ventajas: •...
- Seite 112 2.2.g Modulo DHM2+ con R.e.d. Recuperación externa de detritos (Opcional) Autolavado y descarga (Duración ciclo 1’) 1. Máquina encendida y detenida. Selector “Q2” en posición “I” y botón “S1” apagado. 2. Extraiga los filtros como se muestra en las imágenes. 3.
- Seite 113 También realiza un seguimiento de las condiciones de alarma que se producen a lo largo del tiempo contando las repeticiones de alarmas similares (HPS EASY PLUS): • total alarmas “temperatura agua de enjuague insuficiente”; • total alarmas “caudal agua de enjuague insuficiente”; •...
- Seite 114 2.2.l Visualización consumos y tiempo de encendido Pulse para visualizar los siguientes parámetros: • Consumo agua total (m³) • Consumo agua parcial (l) • Tiempo total de encendido (h) 2.2.m Procedimiento de restablecimiento de los contadores parciales (para cada contador individual) Con la máquina encendida, pulse durante 25”...
- Seite 115 2.2.o Apagado y limpieza al final del día 1. Pulse el botón “S1” para detener la máquina y gire el interruptor “Q2” a posición “O” para apa- garla. 2. Desactive el aparato desconectando la corriente mediante el interruptor de pared y cierre la válv- ula de alimentación hídrica y vapor (sólo para máquinas con calentamiento por vapor).
- Seite 116 LIMPIEZA (Fig.8) El cumplimiento escrupuloso de las normas de mantenimiento contenidas en esta sección garantiza la buena conservación y el funcionamiento satisfactorio de la máquina y reduce en gran medida la necesidad de reparaciones. ATENCIÓN En caso de irregularidades o mal funcionamiento de algún componente de la máquina, COMPROBAR PRIMERO que se han seguido las instrucciones dadas en los párrafos anteriores al utilizarla. ...
- Seite 117 2.4.d. Consejos para lograr un resultado de lavado óptimo (Fig.8) Un posible resultado insatisfactorio en el lavado es visible cuando en las vajillas o en los objetos quedan restos de suciedad. Los posibles halos pueden deberse a un enjuague insuficiente. En este caso, compruebe que las boquillas de enjuague (18) están limpias y que hay presión suficiente en el suministro de agua.
- Seite 118 Botón de parada de emergencia La máquina está equipada con un botón en forma de hongo sobre un campo amarillo (al alcance del operador) que, al pulsarlo, detiene todos los motores de la máquina. Una vez eliminado esto, el reinicio sólo será posible tras girar y soltar el botón pulsando de nuevo el botón de marcha “S1”.
- Seite 119 POSIBLES INCONVENIENTES - CAUSAS - SOLUCIONES ANOMALÍA CAUSA SOLUCIÓN Interruptor principal apagado Inserte el interruptor. No se enciende la máquina o la Por favor, contacte con el servicio de lámpara H01 Otras posibles causas asistencia. Grifo de agua cerrado Abra el grifo. No carga agua o la lámpara La puerta está...
- Seite 120 Espacio dejado en blanco intencionalmente...
- Seite 121 INSTRUCCIONES DE INSTALACIÓN INSTRUCCIONES DE INSTALACIÓN Y DE MANTENIMIENTO Y DE MANTENIMIENTO Las siguientes instrucciones están destinadas al personal cualificado, que es el único autorizado a realizar las comprobaciones y reparaciones. La empresa declina toda responsabilidad en caso de intervenciones realizadas por personal no cualificado y/o utilización de piezas de recambio no originales.
- Seite 122 IMPORTANTE Cualquier operación de instalación, conexión eléctrica o hidráulica, programación, mantenimiento, etc... debe ser realizada por personal cualificado y autorizado por el fabricante; las operaciones realizadas por personal NO IDENTIFICADO pueden comprometer la seguridad del propio operador así como de otro personal (usuario, etc...) o sistema conectado al lavavajillas.
- Seite 123 3.1.b Conexión tubo de descarga • Introduzca el tubo de descarga en el pozo de drenaje preparado. IMPORTANTE Prevea una descarga en el suelo con sifón y conéctelo a la máquina con el tubo flexible suministrado, asegurándose de que se inclina hacia la descarga. Asegúrese también de que no hay estrangulamientos a lo largo del mismo.
- Seite 124 ATENCIÓN En caso de que se encuentre arena en la red de agua de suministro, se debe insertar un filtro entre la red de agua y la máquina. La presión de funcionamiento no debe ser inferior a 2 bar ni superior a 4 bar (200-400 kPa). Si la presión es menor, se recomienda la instalación de una bomba de refuerzo;...
- Seite 125 3.1.g Aspiración vapores Para máquinas equipadas con una protección contra salpicaduras con collar o máquinas con recuperador de calor, conecte como en la imagen 3.1.h Conexión eléctrica PELIGRO • Antes de realizar la conexión eléctrica, asegúrese de que los datos de la línea de alimentación corresponden a los indicados en la placa de identificación y de que el interruptor general situado delante de la máquina esté...
- Seite 126 Para la conexión del dosificador de abrillantador, la máquina dispone de dos terminales en el cuadro eléctrico marcados como “BB” que están bajo tensión cuando el enjuague está en funcionamiento. Tenga en cuenta que la tensión en los bornes corresponde a la tensión de red. Para evitar daños en los componentes eléctricos de la máquina, es imprescindible utilizar estos terminales y evitar conexiones sueltas en otros puntos del sistema.
- Seite 127 3.4 DEMOLICIÓN y ELIMINACIÓN Cuando pretenda desguazar la máquina, vacíe el agua del tanque y del calentador como se indica en los puntos anteriores y desconecte la máquina de las redes de suministro de agua y electricidad, luego proceda a desechar los componentes como lo prescriben las normas vigentes en la materia en cumplimiento de las normas nacionales, locales, ecológicas-ambientales vigentes, cuidando de diferenciar las piezas de la siguiente manera: - piezas metálicas: carrocería, suelos, paneles, filtros;...
- Seite 128 Espacio dejado en blanco intencionalmente...
- Seite 129 ISTRUZIONI ORIGINALI ITALIANO ITALIANO...
- Seite 130 Spazio lasciato bianco intenzionalmente...
- Seite 131 INDICE AVVERTENZE PARTICOLARI PER L'OPERATORE ............132 1.1 Descrizione generale ....................133 1.2 Tipo d'utilizzo e controindicazioni d'uso ..............133 1.3 Trasporto, spedizione e stoccaggio. (Fig. 2) ..............133 1.4 Controllo al ricevimento .....................133 1.5 Disimballaggio (fig. 2-3-4) ..................134 1.6 Identificazione della macchina (fig. 5) ................134 1.7 Descrizione sicurezze ....................134 1.8 Riferimenti normativi ....................134 ISTRUZIONI PER L’UTENTE ....................135...
- Seite 132 AVVERTENZE • Non usare mai le mani o strumenti non adatti per localizzare eventuali perdite dai vari tubi. Aria, quidi in pressione od PARTICOLARI PER L'OPERATORE irritanti potrebbero causare danni gravi alle persone e/o alle cose. Non immergere le mani nude nell’acqua detersivata •...
- Seite 133 1.1 DESCRIZIONE GENERALE Esecuzione modulare in acciao INOX con possibilità di configurazione lineare ed a singolo angolo. Codice colore che identifica ogni modulo. Porte isolate controbilanciate e dotate di ganci di sicurezza integrati nelle guide. Fondo vasca stampato con filtraggio multiplo (filtro di raccolta e microfiltro di aspirazione pompa). Collettori di lavaggio e risciacquo in acciaio INOX.
- Seite 134 ATTENZIONE Una volta disimballata la macchina non utilizzare MAI per il sollevamento la cassetta componenti elettrici. Posizionare la macchina in un luogo adatto (come descritto in precedenza) e regolare i piedini di supporto (Fig. 4) per evitare possibili oscillazioni e assicurarsi che la macchina sia completamente a livello (utilizzare una livella a bolla d’aria). Sollevare la macchina alzandola dalla parte inferiore della carcassa,per il trasporto, posizionarla sulle forche di un carrello.
- Seite 135 ISTRUZIONI PER L ’UTENTE ISTRUZIONI PER L ’UTENTE...
- Seite 138 2.1 PRIMA DELLA MESSA IN FUNZIONE Prima dell’uso assicurarsi che: • l’interruttore a muro sia inserito; • i rubinetti a saracinesca dell’acqua e del vapore (*) siano aperti; • non manchi acqua o vapore (*) in rete; • i filtri vasca e aspirazione pompa siano nella loro sede; •...
- Seite 139 2.2.b Lavaggio stoviglie 1. Asportare preventivamente gli avanzi solidi ed eventuali masse oleose. Questa operazone non è necessaria per mac- china equipaggiate di DHM2+. 2. Fare un ammollo preventivo alle posate ed anche ai piatti quando vengono lavati dopo lungo tempo dall’utilizzo. 3.
- Seite 140 2.2.b.1 Macchine dotate di risciacquo automatico ad osmosi inversa (Optional) Le macchine dotate di risciacquo automatico ad osmosi inversa, sono equipaggiate di diversi sensori che consentono di rilevare i cestelli in acciaio inossidabile. Quando uno di questi cestelli entra nella macchina,il prelavaggio viene disattivato e viene attivato il risciacquo con acqua osmotizzata.
- Seite 141 2.2.e Autolavaggio (Optional) E’ indispensabile eseguire almeno settimanalmente un’accurata pulizia della macchina. E’ consigliabile per tale operazione un prodotto detergente-disinfettante specifico. L’uso del prodotto sopra citato dà sostanzialmente i seguenti vantaggi: • garanzia di igiene in quanto formativamente costituito sia da attivi detergenti che da un attivo disinfettante; •...
- Seite 142 2.2.g Modulo DHM2+ con R.e.d. Recupero esterno dei detriti (Optional) Autolavaggio e scarico (Durata ciclo 1’) 1. Macchina accesa e ferma. Selettore “Q2” in posizione “I” e pulsante “S1” spento. 2. Estrarre i filtri come nelle immagini. Premere il pulsante “S26”. L’accensione della lampada “H26”...
- Seite 143 Inoltre tiene traccia delle condizioni di allarme che si verificano nel tempo, effettuando un conteggio delle ripetizioni degli allarmi simili (HPS EASY PLUS): • totale allarmi “temperatura acqua di risciacquo insufficiente”; • totale allarmi “portata acqua di risciacquo insufficiente”; • totale allarmi “temperatura acqua di lavaggio insufficiente”.
- Seite 144 2.2.l Visualizzazione consumi e tempo di accensione Premere per visualizzare i seguenti paramentri: • Consumo acqua totale (m³) • Consumo acqua parziale (l) • Tempo totale di accensione (h) 2.2.m Procedura di reset dei contatori parziali (da effettuare per ogni singolo contatore) Con macchina accesa, premere per per 25”...
- Seite 145 2.2.o Spegnimento e pulizia a fine giornata 1. Premere il pulsante “S1” per fermare la macchina e ruotare l’interruttore “Q2” in posizione “O” per spe- gnere la macchina. 2. Disattivare l’apparecchiatura togliendo la tensio- ne mediante l’interruttore a muro e chiudere il ru- binetto di alimentazione idrica e vapore (solo per macchine con riscaldamento a vapore).
- Seite 146 2.3 PULIZIA (Fig.8) La scrupolosa osservanza delle norme di manutenzione contenute in questa sezione garantisce la buona conservazione ed il soddisfacente funzionamento della macchina e diminuisce di gran lunga la necessità di effettuare riparazioni. ATTENZIONE In caso di irregolarità o di mancato funzionamento di qualsiasi componente della macchina INNANZITUTTO CONTROLLARE che nel suo impiego siano state osservate le istruzioni fornite nei paragrafi precedenti.Gli interventi devono essere eseguiti tempestivamente al primo insorgere di anomalie al fine di evitare il peggioramento dell’...
- Seite 147 2.4.d. Consigli per ottenere un risultato di lavaggio ottimale (Fig.8) Un eventuale risultato insoddisfacente nel lavaggio è visibile quando sulle stoviglie o sugli oggetti rimangono tracce di sporco. Eventuali aloni possono essere causati da un risciacquo insufficiente. In tal caso controllare che gli ugelli di risciacquo (18) siano puliti e che vi sia pressione sufficiente nella rete idrica.
- Seite 148 Pulsante arresto di emergenza La macchina è munita di un pulsante rosso a fungo su campo giallo (a portata dell’operatore) che, se premuto, arresta tutti i motori della macchina. Eliminato l’inconveniente la rimessa in funzione sarà possibile solo dopo aver ruotato e sganciato il pulsante ripremendo il pulsante di marcia “S1”. Nel caso di impianti complessi, possono essere necessari più...
- Seite 149 INCONVENIENTI POSSIBILI - CAUSE - RIMEDI ANOMALIA CAUSA RIMEDIO Interruttore generale disinserito Inserire interruttore. Non si accende la macchina o la lampada H01 Altre possibili cause Rivolgersi al servizio assistenza. Rubinetto dell’acqua chiuso Aprire il rubinetto. Non carica acqua o lampada Lo sportello è...
- Seite 150 Spazio lasciato bianco intenzionalmente...
- Seite 151 ISTRUZIONI PER L ’INSTALLAZIONE ISTRUZIONI PER L ’INSTALLAZIONE E LA MANUTENZIONE E LA MANUTENZIONE Le istruzioni che seguono, sono rivolte a personale qualificato, il solo autorizzato ad attuare le verifiche e le eventuali riparazioni. La Ditta declina ogni responsabilità nel caso di interventi effettuati da personale non qualificato e/o utilizzo di ricambi non originali.
- Seite 152 IMPORTANTE Qualsiasi operazione di installazione, collegamento elettrico o idraulico, programmazione, manutenzione, ecc... deve essere effettuata da personale IDONEO qualificato ed autorizzato dalla casa costruttrice; manovre effettuate da personale NON IDONEO possono compromettere la sicurezza dell’operatore stesso nonchè di altro personale (utilizzatore, ecc...) o impianto collegato alla lavastoviglie. Si declina ogni responsabilità...
- Seite 153 3.1.b Collegamento tubo di scarico • Inserire il tubo di scarico nell’apposito pozzetto di scarico predisposto. IMPORTANTE Prevedere uno scarico a pavimento con sifoide e raccordarsi alla macchina con il tubo flessibile a corredo facendo in modo che lo stesso sia in pendenza verso lo scarico. Assicurarsi inoltre che lungo lo stesso non vi siano strozzature.
- Seite 154 ATTENZIONE Dove si è riscontrato della presenza di sabbia nella rete idrica di alimentazione è necessario inserire un filtro tra la rete idrica e la macchina. La pressione di esercizio non dovrà essere inferiore ai 2 bar e superiore ai 4 bar (200-400 kPa). Se la pressione è...
- Seite 155 3.1.g Aspirazione vapori Per macchine dotate di capottina paraspruzzi con collare o macchine con recuperatore di calore, raccordarsi come nell’immagine 3.1.h Collegamento elettrico PERICOLO • Prima di effettuare il collegamento elettrico accertarsi che i dati relativi alla linea di alimentazione corrispondano a quelli indicati sulla targhetta di identificazione e che l’interruttore generale di alimentazione elettrica posizionato a monte della macchina sia disinserito “...
- Seite 156 Per il collegamento del dosatore brillantante, la macchina dispone di due morsetti nel quadro elettrico contraddistinti con le lettere “BB” in tensione quando è in funzione il risciacquo. Si rammenta che la tensione ai morsetti corrisponde alla tensione di rete. Per evitare danni ai componenti elettrici della macchina è tassativo l’uso di questi morsetti evitando collegamenti volanti in altri punti dell’impianto.
- Seite 157 3.4 DEMOLIZIONE e SMALTIMENTO Nel momento in cui si intende procedere alla rottamazione della macchina, occorre scaricare l’acqua dalla vasca e dal boiler, come indicato nei punti precedenti e scollegare la macchina dalle reti di alimentazione idrica e elettrica, quindi procedere allo smaltimento dei componenti seguendo quanto prescritto dalle normative vigenti in materia nel rispetto dei regolamenti nazionali, locali, vigenti in materia di ecologia-ambiente, avendo cura di differenziare le parti come segue: - parti metalliche: carrozzeria,pianali, pannelli, filtri;...
- Seite 158 Fig. 2 Fig. 3 Fig. 4 Fig. 5...
- Seite 159 Fig. 7 Fig. 6 Fig. 8...
- Seite 160 NOTE ........................................................................................................................................................................................................................................................................................................................................................................................................................................................................................................................................................................................................................................................................................................................................................................................................................................................................................................................................................................................................................................................................................................................................................................................................................................................................................................................................................................................................................................................
- Seite 161 CONTATTI Comenda Via Galileo Galilei 8 20051 Cassina de’ Pecchi (MI) Italia T +39 02 952281 sales@comenda.eu www.comenda.eu Azienda con sistema di gestione qualità/ ambiente certificato secondo le norme ISO9001 e ISO14001:2015.
- Seite 162 901112 - 05/2023...