TrekStor DataStation maxi z.ul Handbuch
Vorschau ausblenden
Andere Handbücher für DataStation maxi z.ul:
- Schnellstartanleitung (92 Seiten) ,
- Handbuch (56 Seiten) ,
- Schnellstartanleitung (92 Seiten)
Inhaltsverzeichnis
Werbung
Verfügbare Sprachen
Verfügbare Sprachen
Werbung
Kapitel
Inhaltsverzeichnis

Verwandte Anleitungen für TrekStor DataStation maxi z.ul


Inhaltszusammenfassung für TrekStor DataStation maxi z.ul
- Seite 1 HANDBUCH / MANUAL DataStation maxi z.ul...
-
Seite 2: Inhaltsverzeichnis
2.1) Die NDAS-Netzwerk-Technologie 2.2) Anschließen im Netzwerkmodus 2.3) Installation der Software für den Netzwerkmodus 3) Der NDAS-Geräte-Manager 3.1) Registrieren und Mounten einer neuen TrekStor DataStation maxi z.ul über den Assistenten (Wizard) 8 3.2) Funktionen und Optionen des NDAS-Geräte-Managers 3.3) Modi des NDAS-Geräte-Managers DataStation maxi z.ul... -
Seite 3: Datastation Maxi Z.ul
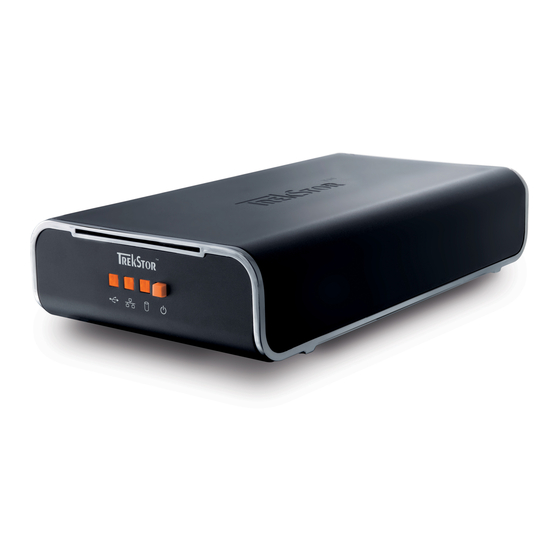
BEDIENUNGSANLEITUNG der TrekStor DataStation maxi z.ul Lieferumfang: DataStation maxi z.ul • TrekStor • Praktische Multifunktionshalterung • Hochwertiges Netzwerkkabel • Hi-Speed USB 2.0 Kabel • Netzteil (100 V – 240 V) • Software-CD • Handbuch System-Voraussetzungen: • Windows® 98 SE / ME (nur im USB-Modus benutzbar) •... -
Seite 4: Datastation Maxi Z.ul
1) USB-Modus: Verbinden der TrekStor DataStation maxi z.ul mit einem PC über USB Vorgehensweise unter Windows® ME / 2000 / XP und Mac® OS X ab 10.3 Hinweis für Benutzer von Windows® ME, 2000, XP, Mac® OS X 10.3: Für diese Betriebssysteme sind keine Treiber nötig. -
Seite 5: Einem Oder Mehreren Pcs
"A " als lokalen Datenträger ("L ") hinzu. RBEITSPLATZ OKALES AUFWERK 2) Netzwerk-Modus: Verbinden der TrekStor DataStation maxi z.ul über das Netzwerk mit einem oder mehreren PCs 2.1) Die NDAS-Netzwerk-Technologie Die Netzwerkverbindung basiert auf der NDAS-Technologie. NDAS (Net- work Direct Attached Storage) ist eine von XIMETA patentierte Technologie, die es erlaubt, digitale Medien direkt in ein Netzwerk einzubinden. -
Seite 6: Anschließen Im Netzwerkmodus
" auf Ihr CD / DVD-Laufwerk zugreifen und im RBEISTPLATZ Hauptverzeichnis der CD das Programm "M " starten. • In einem Dialogfenster erscheint das TrekStor-Menü. • Klicken Sie auf "NDAS-S " und folgen Sie den Installationsanweisungen. OFTWARE Hinweis: Falls eine Windows®-Sicherheitsabfrage erscheint wählen Sie "I... -
Seite 7: Datastation Maxi Z.ul Vornehmen
• Nach dem Abschluss der Installation müssen Sie Ihren PC neu starten, DataStation maxi z.ul um Einstellungen an der vornehmen zu können. Vorgehensweise unter Mac® OS X ab 10.3 • Legen Sie die mitgelieferte CD in das CD / DVD-Laufwerk Ihres Rechners ein. -
Seite 8: Der Ndas-Geräte-Manager
3) Der NDAS-Geräte-Manager 3.1) Registrieren und Mounten einer neuen TrekStor DataStation maxi z.ul über den Assistenten (Wizard) Vorgehensweise unter Windows® 2000 / XP • Nach dem Neustart Ihres Betriebssystems, erscheint ein weiteres Symbol im Infobereich der Taskleiste mit einem Ballontipp. Klicken DataStation maxi z.ul... -
Seite 9: Datastation Maxi Z.ul Erfolgreich
DataStation maxi z.ul • Wenn Sie auch schreibend auf die zugreifend möchten, müssen Sie zusätzlich den Schreibschlüssel (KEY) eintragen. DataStation maxi z.ul • Nachdem Sie die erfolgreich registriert haben, können Sie diese noch mounten, d. h. in Ihr Betriebssystem einbinden. -
Seite 10: Ihre Datastation Maxi Z.ul
DataStation maxi z.ul • Ihre ist nun als Festplatte im Arbeitsplatz gemountet • Bestätigen Sie den Abschluss der Installation nochmals im Assistenten, durch Drücken der Schaltfläche "F ". ERTIG STELLEN DataStation maxi z.ul • Ihr Betriebssystem fügt die auf dem "A... - Seite 11 DataStation maxi z.ul • Die ist nun erfolgreich in Ihrem System registriert. DataStation maxi z.ul • Nachdem Sie die erfolgreich registriert haben, können Sie diese noch mounten, d. h. in Ihr Betriebssystem einbinden. DataStation maxi z.ul • Klicken Sie dazu einmal auf die in der eingebauten Festplatte in Ihrem NDAS Dienstprogramm.
-
Seite 12: Funktionen Und Optionen Des Ndas-Geräte-Managers
SSISTENTEN 3.3) Modi des NDAS-Geräte-Managers Wenn Sie mit der rechten Maustaste im Infobereich der Taskleiste auf das Symbol des "NDAS-Geräte-Manager" klicken, wird der Status der DataStation maxi z.ul durch verschieden farbige Symbole dargestellt. DataStation maxi z.ul Eine kann sich in verschiedenen Modi befinden. -
Seite 13: Modus Der Trekstor Ndas-Geräte-Manager Ändern
Deaktiviert / Aktiv Weiß DataStation maxi z.ul ist auf Ihrem PC deaktiviert, jedoch auf anderen PCs im Netzwerk aktiviert. Keine Verbindung Schwarz DataStation maxi z.ul ist nicht angeschlossen. Hinweis: Stellen Sie sicher, dass alle Kabel richtig angeschlossen sind und/oder Ihre Antivirus- / Firewall-Software die Verbindung nicht stört. -
Seite 14: Benutzen Der Trekstor
Hinweis: Falls Sie die im reinen Lese-Modus gemountet haben, ist der Datenträger schreibgeschützt. 3.6) Datenaustausch mit der TrekStor DataStation maxi z.ul • Markieren Sie die gewünschten Dateien bzw. Ordner mit der Maus. Kopieren Sie diese durch Drücken der rechten Maustaste und Auswahl des Punktes "K... - Seite 15 • Ändern Sie nun die Einstellung der "K " von "A ONFIGURATION KTIVIEREN ALS " auf "D ". ESEN CHREIBEN EAKTIVIEREN DataStation maxi z.ul • Ihre ist nun nicht mehr in Ihrem System gemountet. – 15 – – 15 –...
-
Seite 16: Der Ndas-Kopplungsmanager
Laufwerk zusammen- gefasst. Diese Eigenschaft ist bei großem Bedarf an Speicherkapazität nützlich. (Beispiel: 1x DataStation maxi z.ul 160 GB + 1x DataStation maxi z.ul 250 GB = 1x DataStation maxi z.ul 410 GB im Aggregations-Modus) "Stripe" (RAID0) Im Kopplungsmodus "S... - Seite 17 DataStation ausschließlich zum Sichern der Daten der primären maxi z.ul vorhanden ist. (Beispiel: 1x DataStation maxi z.ul 160 GB + 1x DataStation maxi z.ul 250 GB = 1x DataStation 160 GB im Spiegelungsystem) – 17 – – 17 –...
-
Seite 18: Voraussetzungen
4.2) Voraussetzungen Hinweis: Die Kopplungsmodi "Aggregation" und "Spiegelung" werden nur unter Windows® 2000 / XP und Mac® OS X ab 10.3 unterstützt. DataStation maxi z.ul • Damit Sie bei den einen der 3 Kopplungsmodi einrichten können, müssen Sie bei allen betreffenden Laufwerken den Schreibschlüssel (KEY) eingetragen haben. - Seite 19 DataStation maxi z.ul • Im folgenden Fenster wählen Sie die die Sie koppeln möchten, aus der linken Box aus. • Klicken Sie solange auf die Schaltfläche "H ", bis sich alle zu INZUFÜGEN koppelnden Laufwerke auf der rechten Seite befinden.
-
Seite 20: Mounten
Verbund - nur mounten, wenn Sie auch die sekundären DataStation maxi z.ul an Ihrem PC registriert haben. 4.5) Auflösen eines Verbundes gekoppelter TrekStor DataStation maxi z.ul Hinweis: Um einen Verbund zu entkoppeln muss dieser auf allen PCs ungemountet sein. -
Seite 21: Allgemeine Dateisystemoperationen
DataStation maxi z.ul 4.6) Entkoppeln einer TrekStor aus einem Verbund ACHTUNG: Sichern Sie alle Daten, bevor Sie eine Kopplung lösen. Beim Entkoppeln gehen ALLE Daten auf ALLEN beteiligten Festplatten unwiderruflich verloren. Wenn Sie ein Laufwerk entkoppeln, können Sie die Laufwerke, welche sich noch in der Kopplung befinden, nicht verwenden. -
Seite 22: Formatieren Der Trekstor
ARTITIONEN Hinweis für Benutzer von Windows® 2000: Folgen Sie nun den Anweisungen des "Assistent zum Erstellen von Datenträgern". • Im Anschluss daran wird Ihr neues Laufwerk automatisch formatiert. DataStation maxi z.ul 5.2) Formatieren der TrekStor DataStation maxi z.ul Da die direkt ins System eingebunden ist, kann diese wie jede andere Festplatte in Windows®... - Seite 23 Welche Betriebssysteme werden von der DataStation maxi z.ul unterstützt? DataStation maxi z.ul unterstützt derzeit Windows® XP, Windows® 2000, Mac® OS X und Linux® 9. (ab Kernel 2.6) 9. Windows® 98 SE und ME werden nur im USB-Modus unterstützt. Können mehrere Benutzer gleichzeitig auf die...
-
Seite 24: Fehlersuche Und -Behebung
Warum bleibt die Schaltfläche "W " im Fenster "NDAS-G EITER ERÄTE " der DataStation maxi z.ul grau? DENTIFIKATIONSNUMMER Wahrscheinlich haben Sie nicht alle Zeichen korrekt eingegeben. Diese enthalten niemals den Buchstaben "O". Überprüfen Sie, dass Sie die Ziffer "0" (Null) verwendet haben. - Seite 25 Ich erhalte die Fehlermeldung: "D TATION MAXI Z UL NICHT ." ANGESCHLOSSEN DataStation maxi z.ul • Die könnte nicht richtig angeschlossen sein. Überprüfen Sie bitte alle Anschlüsse. DataStation maxi z.ul • Versuchen Sie auch, Ihre oder Ihren PC an einem anderen Port Ihres Switches anzuschließen.
-
Seite 26: Datastation Maxi Z.ul Im Usb-Modus
IE DEN ORGANG SPÄTER • Schließen Sie alle Programme und Fenster, die eventuell auf die DataStation maxi z.ul zugreifen. Unter bestimmen Um- ständen, z. B. beim Kopieren großer Datenmengen, kann Windows® z. B. den Kopiervorgang als beendet melden, obwohl im Hintergrund noch Dateien vom Arbeitsspeicher kopiert werden. - Seite 27 Hersteller nicht für Beschädigungen oder Verlust von Daten und deren Folgeschäden verantwortlich. Copyright © 2006 TrekStor GmbH & Co. KG. Alle Rechte vorbehalten. Bei weiteren erwähnten Produkt- oder Firmenbezeichnungen handelt es sich möglicherweise um Warenzeichen oder Markennamen der jeweiligen Inhaber.
- Seite 28 2.2) Connecting in network mode 2.3) Installation of software for the network mode 3) The NDAS device manager DataStation 3.1) Registering and mounting a new TrekStor maxi z.ul using the assistant (Wizard) 3.2) Functions and options of the NDAS device manager 3.3) Modes of the NDAS device manager...
-
Seite 29: Datastation Maxi Z.ul
OPERATING INSTRUCTIONS for the TrekStor DataStation maxi z.ul Included in the delivery: DataStation maxi z.ul • TrekStor • Convenient multifunctional mount • High-quality network cable • Hi-Speed USB 2.0 cable • Power supply (100 V – 240 V) • Software CD •... -
Seite 30: To A Pc Via Usb
DataStation 1) USB mode: Connecting the TrekStor maxi z.ul to a PC via USB Procedure using Windows® ME / 2000 / XP and Mac® OS X from version 10.3 Note for users of Windows® ME, 2000, XP, Mac® OS X 10.3: Drivers are not necessary for these operating systems. -
Seite 31: Datastation Maxi Z.ul
OCAL OCAL RIVE under "M ". OMPUTER 2) Network mode: Connect the TrekStor DataStation maxi z.ul to one or more PCs via the network. 2.1) The NDAS network technology The network connection is based on NDAS technology. NDAS (Network Direct Attached Storage) is a patented technology from XIMETA, which allows digital media to be integrated directly into the network. -
Seite 32: Connecting In Network Mode
" and start the program "M " in the OMPUTER main directory of the CD. • The TrekStor menu appears in a dialog window. • Click "NDAS S " and follow the installation instructions. OFTWARE Note: If a Windows® security prompt appears, select "... - Seite 33 • When installation is complete, you must restart your PC in order to DataStation maxi z.ul make settings on the Procedure using Mac® OS X from version 10.3 • Insert the provided CD into the CD / DVD drive of your computer.
-
Seite 34: The Ndas Device Manager
3) The NDAS device manager DataStation 3.1) Registering and mounting a new TrekStor maxi z.ul using the assistant (Wizard) Procedure using Windows® 2000 / XP • After restarting your operating system, another symbol appears in the DataStation Info area of the task bar with a balloon tip. To set up a maxi z.ul... - Seite 35 UTOMATICALLY INSTALL " and follow the software instructions. SOFTWARE Note: If a Windows® security prompt appears, select " ". CONTINUE ANYWAY DataStation maxi z.ul • Your is now mounted as a hard disk under "M ". OMPUTER • Reconfirm that the installation is complete in the Assistant by pressing the "F...
- Seite 36 The identification number (ID) and the write key (KEY), which you will need to gain write access to DataStation maxi z.ul , can be found both on the reverse DataStation maxi z.ul side of the quick guide and on the DataStation maxi z.ul...
-
Seite 37: Functions And Options Of The Ndas Device Manager
• To do so, click once on the hard disk installed in the DataStation maxi z.ul in your NDAS utility. • Select the "U " register. EVICE • Next, change the setting of the "C " from "U " to... -
Seite 38: Modes Of The Ndas Device Manager
If you right-click on the "NDAS D " symbol in the Info area EVICE ANAGER DataStation maxi z.ul of the task bar, the status of the is shown by means of different colored symbols. DataStation maxi z.ul can be in various modes. The table below gives you an overview of the different modes. -
Seite 39: Datastation Maxi Z.ul
DataStation 3.4) Change the mode of the TrekStor maxi z.ul in the NDAS Device Manager. A menu opens if you right-click on the symbol for the "NDAS D EVICE "- in the Info area of the task bar. To change the status of a ANAGER DataStation maxi z.ul... -
Seite 40: Exchanging Data With The Trekstor
DataStation 3.6) Exchanging data with the TrekStor maxi z.ul • Select the desired files or folders with your mouse. Copy these files by clicking them with your right mouse button and then selecting "C ". • Under "M ", select the local disk "T ". -
Seite 41: The Ndas Coupling Manager
This property is useful if there is a large demand for memory. (Example: 1x DataStation maxi z.ul 160 GB + 1x DataStation maxi z.ul 250 GB = 1x DataStation maxi z.ul 410 GB in the Aggregation mode) –... - Seite 42 Stripe system. This is a specified characteristic of the Stripe system, so as to ensure continuous parallel writing. Example: 1x DataStation maxi z.ul 160 GB + 1x DataStation maxi z.ul 250 GB = 1x DataStation maxi z.ul 320 GB in the Stripe mode)
-
Seite 43: Requirements
Windows® 2000 / XP and Mac® OS X from version 10.3. • In order to set up one of the 3 coupling modes for the DataStation maxi z.ul , you must have entered the write key (KEY) for all of the affected drives. You can do this in the "NDAS D EVICE "... - Seite 44 DataStation maxi z.ul • In the following window, select the that you would like to couple from the left-hand box. • Click on the "A " button until all of the drives to be coupled are located on the right-hand side.
-
Seite 45: Datastation Maxi Z.ul
DataStation maxi z.ul 4.4) Mounting a coupled TrekStor DataStation maxi z.ul • To mount a coupled to a combination, DataStation maxi z.ul the primary must be mounted. DataStation maxi z.ul • The secondary is automatically mounted as soon as the primary one is mounted. -
Seite 46: Datastation Maxi Z.ul
DataStation maxi z.ul 4.6) Uncoupling a TrekStor from a combination NOTE: Back up all data before canceling a coupling. When uncoupling, ALL data on ALL associated hard disks is irrevocably lost. When you uncouple a drive, you cannot use the drives that are still in the coupling. - Seite 47 Note for users of Windows® 2000: Next, follow the instructions of the "A ". SSISTANT FOR CREATING DISKS • Following this, your new drive will be formatted automatically. DataStation maxi z.ul 5.2) Formatting the TrekStor DataStation maxi z.ul Since the is integrated directly into the system, it can be formatted just as every other hard disk in Windows®.
-
Seite 48: Datastation Maxi Z.ul Datastation Maxi Z.ul
6) FAQ Which operating systems are supported by the DataStation maxi z.ul DataStation maxi z.ul currently supports Windows® XP, Windows® 2000, Mac® OS X and Linux® (from kernel 2.6). Windows® 98 and ME are only supported in the USB mode. -
Seite 49: Troubleshooting And Correction
" DEVICE IDENTIFICATION NUMBER window of the DataStation maxi z.ul remain gray? It is likely that you have not entered all of the characters correctly. The letter "O" is never included. Check to be sure you have used the "0" (zero) digit. - Seite 50 I am getting the following error message: "D ." TATION MAXI Z UL NOT CONNECTED DataStation maxi z.ul • The could be incorrectly connected. Please check all connections. DataStation maxi z.ul • Try also to connect your or your PC to another port of your switch.
- Seite 51 Copyright © 2006 TrekStor GmbH & Co. KG. All rights retained. Other cited product or company names may be trademarks or brand names of the respective owner.