Sony PCS-G50 Bedienanleitung
Vorschau ausblenden
Andere Handbücher für PCS-G50:
- Bedienungsanleitung (316 Seiten) ,
- Vor verwendung dieses geräts (59 Seiten)
Inhaltsverzeichnis
Werbung
Quicklinks
Supplement for Video
Communication System
操作ガイド
最初にお読みください!
Operation Guide
Please read this before proceeding!
Guide d'utilisation
Lisez-le avant de continuer!
Bedienanleitung
Lesen Sie sie bitte, bevor Sie fortfahren!
Gu
a de functionamiento
í
éalo antes de continuar
L
Guida per l'uso
Leggere attentamente prima di procedere!
Guia de Operação
Leia antes de continuar!
PCS-G50/G50P
© 2005 Sony Corporation
3-872-303-11 (1)
!
JP
GB
FR
DE
ES
IT
CS
PT
Werbung
Kapitel
Inhaltsverzeichnis

Verwandte Anleitungen für Sony PCS-G50


Inhaltszusammenfassung für Sony PCS-G50
- Seite 1 Lisez-le avant de continuer! Bedienanleitung Lesen Sie sie bitte, bevor Sie fortfahren! a de functionamiento í éalo antes de continuar Guida per l’uso Leggere attentamente prima di procedere! Guia de Operação Leia antes de continuar! PCS-G50/G50P © 2005 Sony Corporation...
- Seite 2 警告表示の意味 安全のために 取扱説明書および製品 では、次のような表示 ソニー製品は安全に充分配慮して設計されていま をしています。表示の す。しかし、電気製品は、まちがった使いかたをす 内容をよく理解してか ると、火災や感電などにより死亡や大けがなど人身 ら本文をお読みくださ 事故につながることがあり、危険です。 い。 事故を防ぐために次のことを必ずお守りください。 安全のための注意事項を守る この表示の注意事項を 6 ~ 9 ページの注意事項をよくお読みください。 守らないと、火災や感 電などにより死亡や大 定期点検をする けがなど人身事故につ な が る こ と が あ り ま 長期間、安全にお使いいただくために、定期点検を す。 することをおすすめします。 点検の内容や費用については、お買い上げ店または ソニーのサービス窓口にご相談ください。 この表示の注意事項を 守らないと、感電やそ 故障したら使わない の他の事故によりけが...
- Seite 3 CD-ROM 内の説明書を読むには 付属の説明書につい 付属の CD-ROM には、本機の説明書 て が PDF 形式で入っています。CD- ROM 内の説明書をお読みになるに 本機には、この操作ガイドをはじめと は、Adobe ® Acrobat ®* Reader また して、次の説明書が付属しています。 は Acrobat Reader が必要です。 目的に応じてお読みください。 パソコンに Adobe Reader がインス 操作ガイド(本書) トールされていない場合は、4 ページ 2 地点間のビデオ会議で日常の会議を に示したホームページからダウンロー 始めるところから終了するまでの操作 ドしてください。 や、システムの接続方法などを簡単に 取扱説明書の見かた 説明しています。(付属の CD-ROM にも同じ操作ガイドが収録されていま...
- Seite 4 Adobe Reader のインストール Adobe Reader をインストールするた めに必要なハードウェア、ソフトウェ アは以下のとおりです。 ・ Intel ® Pentium ® プロセッサ ・ Microsoft ® Windows ® ** 2000 Service Pack 2、Windows XP Professional または Home Edition、Windows XP Tablet PC Edition ・ 128 MB 以上の RAM ・ ハードディスクに最大 90 MB (言語に依存)の空き容量が必要...
-
Seite 5: Inhaltsverzeichnis
目次 警告...........6 注意...........7 電池についての安全上のご注意 ..9 電源を入れる ......10 相手を呼び出す ......11 映像や音声を調節する ....14 カメラアングルとズームを 調節する ......14 音量を調節する ...... 15 会議を終了する ......16 回線を切る ......16 システムをスタンバイ 状態にする ....... 16 ヘルプを表示する ....... 18 システムの構成 ......19 基本システムを 構成する機器 ....19 別売り機器の一覧... - Seite 6 火災 感電 下記の注意を守らないと、 や により 死亡 大けが や につながることがあります。 AC 電源コードや DC 電源接続コー ドを傷つけない AC 電源コードや DC 電源 接続コードを傷つけると、 火 災や感電の原因となること があります。 ・ コードを加工したり、 傷 つけたりしない。 ・ 重いものをのせたり、 引っ張ったりしない。 ・ 熱器具に近づけたり、 加 熱したりしない。 ・ コードを抜くときは、 必 ずプラグを持って抜く。 万一、 コードが傷んだら、 ソ ニーのサービス窓口に交換...
- Seite 7 けが 物品 下記の注意を守らないと、 をしたり周辺の に 損害を与えることがあります 不安定な場所に設置しない ぬれた手で電源プラグにさわらない ぐらついた台の上や傾いた ぬれた手で電源プラグの抜 ところに設置すると、 倒れた き差しをすると、 感電の原因 り落ちたりしてけがの原因 となることがあります。 となることがあります。 ま た、 設置 ・ 取り付け場所の強 度を充分にお確かめくださ い。 ぬれた手で AC アダプターにさわら ない 通気孔をふさがない 感電の原因となることがあ 通気孔をふさぐと、 本機内部 ります。 に熱がこもり、 発煙、 発火な どが起こり、 やけどの原因に なることがあります。 分解や改造をしない 接続の際は電源を切る...
- Seite 8 けが 物品 下記の注意を守らないと、 をしたり周辺の に 損害を与えることがあります 直射日光に当たる場所、熱器具の近 くには置かない 変形したり、 故障したりする だけでなく、 レンズの特性に より火災の原因となります。 特に窓際に置くときなどは ご注意ください。 内部に水や異物を入れない 水や異物が入ると火災や感 電の原因となることがあり ます。 万一、 水や異物が入ったとき は、 すぐに電源を切り、 電源 コードや接続コードを抜い て、 お買い上げ店またはソ ニーのサービス窓口にご相 談ください 電源コードや接続ケーブルに足を 引っかけない 電源コードや接続ケーブル は、 足に引っかけると本機の 落下や転倒などによりけが の原因となることがありま す。 十分注意して接続 ・ 配置して ください。...
-
Seite 9: 電池についての安全上のご注意
電池についての安全 上のご注意 漏液、発熱、発火、破裂などを避ける ため、下記の注意事項を必ずお守りく ださい。 ・ 火の中に入れない。ショートさせた り、分解、加熱しない。 ・ 充電しない。 ・ 指定された種類の電池を使用する。 ・ +と-の向きを正しく入れる。 ・ 電池を使い切ったとき、長時間使用 しないときは、取り出しておく。 ・ 新しい電池と使用した電池、種類の 違う電池を混ぜて使わない。 もし電池の液が漏れたときは、電池入 れの液をよくふきとってから、新しい 電池を入れてください。万一、液が身 体についたときは、水でよく洗い流し てください。 本機を廃棄する場合は、内蔵の電池 を小型化学廃棄物として処理する必 要がありますので、ソニーのサービ ス窓口にご相談ください。 電池についての安全上のご注意... -
Seite 10: 電源を入れる
電源を入れる モニター用テレビの電源を入れる。 会議で使用するその他の機器の電源を入れる。 コミュニケーションターミナルの前面パネルを開けて、右側の電 源スイッチをオン(" 側)にする。 カメラ コミュニケーション ターミナル POWER ランプ (緑に点灯) 電源スイッチ コミュニケーションターミナルの電源が入ります。 コミュニケーションターミナル前面の 3 つのランプとカメラの POWER ランプがいったんすべて点灯し、その後、POWER ランプ だけが緑色に点灯します。 モニター用テレビにはランチャーメニューが表示され、自分側のカメ ラが写している映像も表示されます。 電源を入れる... -
Seite 11: 相手を呼び出す
相手を呼び出す ここでは、ランチャーメニューで電話番号や IP アドレスを入力して 相手を呼び出す方法を説明します。 ランチャーメニュー下部のドロップダウンリストから回線イン ターフェースを選ぶ。 リモコンの V/v/B/b ボタンでランチャーメニュー下部の「回線種 別」を選び、決定ボタンを押すとドロップダウンリストが表示されま す。V または v ボタンで使用する回線インターフェースを選び、決定 ボタンを押してください。 回線インターフェースは、ISDN 回線に接続している場合に選びま す。ISDN 回線に接続していない場合には、「IP」と表示されます。 回線種別 番号入力欄 ダイヤル 上に移動 左に 右に 移動 移動 下に移動 AUTO: 番号入力欄に入力した内容に応じて本機が自動的に回線種別 を切り替えます。 IP: LAN を使ってビデオ会議システムと接続する場合に選びます。 ISDN: ISDN 回線でビデオ会議システムと接続する場合に選びま す。 相手を呼び出す... - Seite 12 TEL: ISDN 回線で音声のみの電話と接続する場合に選びます。 (ボイスミーティング) 相手の IP アドレス(IP のとき)または電話番号(ISDN または TEL のとき)を番号入力欄に入力する。 リモコンの V/v/B/b ボタンで番号入力欄を選び、決定ボタンを押し ます。その後、リモコンの数字ボタンで数字を入力します。 1 消去ボタン 2 後退ボタン ボタン 4 数字ボタン 1 消去ボタン:一行すべて消去します。 2 後退ボタン:一文字消去します。 ボタン:IP の場合、「.」(ピリオド)を入力します。 4 数字ボタン:電話番号や IP アドレスを入力します。 ご注意 番号入力欄には 0 発信などの発信番号 (プリフィックス)を入力し ないでください。プリフィックスは、発信設定メニューの 2 ページ目 で設定できます。詳しくは、取扱説明書をご覧ください。...
- Seite 13 ダイヤルボタンを押すか、またはリモコンの接続 / 切断( )ボタンを押して相手を呼び出す。 リモコンの V/v/B/b ボタンを押して、「ダイヤル」を選び、決定ボ タンを押す。またはリモコンの接続 / 切断( )ボタンを押す とダイヤルが始まり、「発信中」と表示されます。相手とつながると 「ミーティングを始めます。」と表示され、以下のような画面になり ます。 自分側の映像 相手側の映像 手順 3 で下記のダイヤログが表示されたら TOKYO 192.168.1.57 呼び出しを中止します。 相手を呼び出します。 通信モードに関する詳細な設定ができ ます。 発信設定メニューの「詳細設定」が「オン」のときは、上記のダイア ログが表示されます。 相手を呼び出す...
-
Seite 14: 映像や音声を調節する
映像や音声を調節する カメラアングルとズームを調節する 通信していないとき リモコンの V/v/B/b ボタンを押してランチャーメニューの映像を選 び、決定ボタンを押します。その後、V/v/B/b ボタンを押してカメ ラアングルを調節し、ズームボタンを押してズームを調節します。調 節し終ったら決定ボタンを押します。 アングルの調節 上に移動 左に 右に 移動 移動 下に移動 ズームの調整 映像が大きくなる 映像が小さくなる 通信していないときは… 通信中は… 自分側の映像 相手側の映像 映像や音声を調節する... -
Seite 15: 音量を調節する
通信しているとき リモコンの V/v/B/b ボタンとズームボタンで、自分側の映像のカメ ラアングルとズームを調節できます。 相手側の映像のカメラアングルを調整する場合は、取扱説明書をご覧 ください。 音量を調節する 相手から送られてくる音声を調節するには リモコンの音量+ / -ボタンを押します。 自分側から相手に送られる音声を一時的に消すには リモコンのマイクオン / オフボタンを押します。 モニター画面に「MIC OFF」と表示されます。もう一度押すと音声 が再び送られます。 押すと音声が送られなくなる 音量が大きくなる 音量が小さくなる 映像や音声を調節する... -
Seite 16: 会議を終了する
会議を終了する 回線を切る リモコンの接続/切断( )ボタンを押す。 モニター画面に「切断しますか?」と表示されます。 リモコンの B または b ボタンを押して「OK」を選び、決定ボタン を押す。または、リモコンの接続/切断( )ボタンをもう 一度押す。 これで相手との回線が切れ、ランチャーメニューに戻ります。 システムをスタンバイ状態にする リモコンの @/1 ボタンを押す。 モニター画面に「電源を切りますか?」と表示されます。 会議を終了する... - Seite 17 リモコンの B または b ボタンを押して「OK」を選び、決定ボタン を押す。または、リモコンの @/1 ボタンをもう一度押す。 スタンバイ状態になり、コミュニケーションターミナルの POWER ランプがオレンジ色に点灯します。 POWER ランプ(消灯) POWER ランプ (オレンジに点灯) `/1 ボタン B/b ボタンと決定 ボタン この状態にしておくと、リモコンの @/1 ボタンで電源を入れること ができます。 相手から呼び出しを受けると、スタンバイモードは解除されて着信し ます。 電源を切るには コミュニケーションターミナルの前面パネルを開けて、右側の電源ス イッチをオフ(○側)にし、会議に使用したその他の機器の電源を切 ります。 会議を終了する...
-
Seite 18: ヘルプを表示する
ヘルプを表示する リモコンのヘルプボタンを押すと、操作案内用のバルーンヘルプまた はヘルプ画面が表示されます。 ヘルプ画面を消すには、もう一度ヘルプボタンを押します。 ヘルプを表示する... -
Seite 19: システムの構成
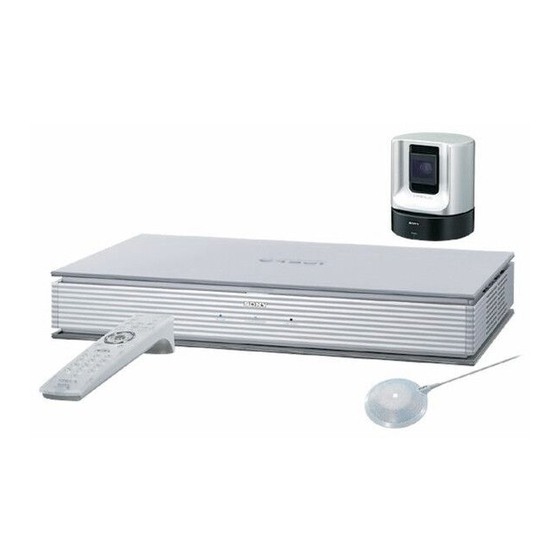
システムの構成 PCS-G50 は、テレビ会議をするために必要な基本システムと、より 充実した会議を行うための別売り機器で構成されます。 基本システムを構成する機器 ビデオコミュニケーションシステム PCS-G50 は、PCS-G50 テレビ 会議システムの中心をなす基本システムです。ビデオコミュニケー ションシステム PCS-G50 は以下の機器で構成されています。 機器 説明 コミュニケーションターミ 映像、音声信号を処理して送受信するコーデッ ナル ク部、音声のエコーをカットするエコーキャン PCS-PG50 セラーおよび通信回線とのインターフェース 部、システム制御部からなります。 カメラユニット 会議を撮影するカメラです。 PCSA-CG70 リモコン コミュニケーションターミナルとカメラを操 PCS-RG70 作します。 AC アダプター コミュニケーションターミナルに電源を供給 PCS-AC19V6 します。 システムの構成... -
Seite 20: 別売り機器の一覧
機器 説明 マイクロホン どの方向からの音でも拾える無指向性のマイ PCS-A1 クです。静かな部屋での会議におすすめしま す。 IR リピーター モニター用テレビの電源をコミュニケーショ ンターミナルと連動させます。 受光ユニット コミュニケーションターミナルに接続し、 リモコンの信号を受信します。 別売り機器の一覧 テレビ 会議を行うには、映像モニター用のテレビが必要です。 機器 説明 映像モニター用テレビ、プロ 映像モニター、スピーカーとして使用します。 ジェクターなど システムの構成... - Seite 21 専用別売り機器 会議を充実させるために、以下の別売り機器が用意されています。 機器 説明 スタンド コミュニケーションターミナルを立てて設置 PCSA-STMG70 できるスタンドです。 カメラスタンド カメラユニット用のスタンドです。 PCSA-STCG70 ISDN ユニット ISDN 回線に接続します。最大 3 回線、6B PCSA-B384S チャンネルでの接続が可能です。 ISDN ユニット ISDN 回線に接続します。最大 6 回線、12B PCSA-B768S チャンネルでの接続が可能です。 データソリューションボッ コンピューターやプロジェクターを接続して、 クス データ会議ができます。 PCSA-DSB1S システムの構成...
- Seite 22 機器 説明 マイクロホン 指向性のマイクです。 PCSA-A3 マイクに向き合った人の音声だけを拾いたい 場合におすすめします。 マイクロホン 狭指向性のマイクです。エコーキャンセラー PCSA-A7 を内蔵しており、高音質です。また、音質劣 化なしに多数のマイクをカスケード接続でき ます。マイクを多数使用する場合におすすめ します。 ドキュメントスタンド 書画用カメラです。赤外線映像伝送機能を PCS-DS150 使って、撮影した画像をコミュニケーション ターミナルにワイヤレスで送信することがで きます。 コミュニケーション マイクとスピーカーが一体化されたユニット トランスデューサー です。 CTE-600 話している人の方位を自動的に検出してマイ クを選択するため、雑音の少ない明瞭な音声 が集音できます。また、全方位スピーカーの 搭載により、鮮明な音声を均等に伝えること ができます。 H.323 MCU ソフトウェア LAN を使って多地点会議をするためのソフト PCSA-M3G50 ウェアです。 H.320 MCU ソフトウェア ISDN 回線を使って多地点会議をするための...
- Seite 23 接続コード 下記のコードやケーブルを使用して各機器を接続します。 PCS-G50 ビデオコミュニケーションシステム コード / ケーブル 型番 個数 カメラケーブル (3 m) 1-830-186-11 S 映像接続コード (1.5 m ) 1-776-078-42 音声接続コード (1 m) 1-765-258-31 映像変換コード (15 cm ) 1-757-517-11 カメラケーブル S 映像接続コード 音声接続コード 映像変換コード システムの構成...
-
Seite 24: システムの接続
システムの接続 ここでは、代表的なシステムの接続のしかたを説明します。 接続するときは、必ず各機器の電源を切ってから行ってください。 ・ ・ カメラユニットやコミュニケーションターミナルが壊れますので、 電源を入れたままカメラケーブルを抜き差ししないでください。 安全のために、100BASE-TX/10BASE-T 端子を過電圧が加わる ・ おそれのあるネットワークなどに接続しないでください。 接続例(LAN 接続) カメラユニット PCSA-CG70 マイクロホン PCS-A1 TERMINAL ヘ カメラケーブル(付属) MIC 1 へ VIDEO IN ヘ コミュニケーションターミナル PCS-PG50 AUDIO VIDEO 100BASE-TX/ OUT ヘ 10BASE-T へ MONITOR 1 ヘ 電源コード(付属) DC 19.5V へ 電源コンセント... -
Seite 25: 接続例(Isdn 接続
接続例(ISDN 接続) ・ カメラユニットやコミュニケーションターミナル、ISDN ユニットが壊れますので、 電源を入れたままカメラケーブルやインターフェースケーブルを抜き差ししないでく ださい。 ・ ISDN ユニットを初めてコミュニケーションターミナルに接続して使用するとき、コ ミュニケーションターミナルが自動的に ISDN ユニットのソフトウェアをバージョン アップすることがあります。画面にバージョンアップ中のメッセージが表示されてい る間は故障の原因となりますので、絶対に電源を切らないでください。 カメラユニット PCSA-CG70 ISDN ユニット (別売り) TERMINAL ヘ PCSA-B384S(別売り) ISDN 1 ~ 3 へ インター TERMINAL ヘ カメラ フェース ケーブル ケーブル (付属) (ISDN PCSA-B768S(別売り) マイクロホン PCS-A1 ユニット... - Seite 26 音声 仕様 周波数帯域 14 kHz (MPEG4 Audio) 7 kHz(G.722/G.722.1 本機は ITU-T 勧告 H.320 と H.323 ITU-T 勧告準拠) に準拠しています。 3.4 kHz(G.711/G.728/ G.723.1/G.729 ITU-T コミュニケーションターミナル 勧告準拠) PCS-PG50 伝送レート 56 Kbps、64 Kbps 動画 (G.711 ITU-T 勧告準拠) 動作帯域 64 Kbps ~ 4 Mbps 48 Kbps、56 Kbps、 (標準、LAN による接続)...
- Seite 27 データ伝送レート 映像変換コード(15 cm) (1) LSD 1.2 Kbps、4.8 Kbps、 AC アダプター PCS-AC19V6 6.4 Kbps (1) MLP 6.4 Kbps、24 Kbps、 電源コード(1) CD-ROM(1) 32 Kbps HMLP 62.4 Kbps、64 操作ガイド(1) Kbps、128 Kbps 接続シート(1) サポート LAN プロトコル 簡単接続ガイド / リモコン HTTP 操作ガイド(1) B&P ワランティブックレット Telnet (1)...
- Seite 28 74 × 16 × 93 mm (幅 / 高さ / 奥行き) (幅 / 高さ / 奥行き) 質量 約 130 g 質量 約 170 g 電源電圧 12 V PCS-G50 本体、また 電源 プラグインパワータイプ は付属 AC アダプターより 給電 消費電力 2.5 W 以下(1台あたり) リモコン PCS-RG70 動作温度...
- Seite 29 外形寸法 166 × 34 × 128 mm 外形寸法 240 × 37 × 180 mm (幅 / 高さ / 奥行き) (幅 / 高さ / 奥行き) (突起部含まず) (突起部含まず) 質量 約 400 g 質量 約 1.1 Kg 付属品 インターフェースケーブル 付属品 インターフェースケーブル (5 m) (1) (8 m)...
- Seite 30 この装置は、 情報処理装置等電波障害自 主規制協議会 (VCCI) の基準に基づくク ラス A 情報技術装置です。 この装置を家 庭環境で使用すると電波妨害を引き起こ すことがあります。 この場合には使用者 が適切な対策を講ずるよう要求されるこ とがあります。 仕様...
- Seite 31 For the customers in the USA to these numbers whenever you call upon WARNING your Sony dealer regarding this product. Using this unit at a voltage other than 120 V may require the use of a different line cord or Model No.
- Seite 32 In the case that interference should occur, covers non-ISDN lines. If you use ISDN consult your nearest authorized Sony service lines, consult your Sony dealer for more facility. information. • The ISDN service may not be available in some areas.
-
Seite 33: About The Supplied Manuals
Various manuals of the system are stored in the supplied CD-ROM in PDF format. You ® ®* The PCS-G50/G50P Video Communication are prompted to use Adobe Acrobat System is supplied with the following Reader or Adobe Reader to read them. - Seite 34 ..............................“IPELA” and are trademarks of Sony Corporation. * Adobe and Acrobat are trademarks of Adobe Systems, Incorporated. ** Windows is registered trademarks of the U.S. Microsoft Corporation in the U.S. and other countries. About the Supplied Manuals...
- Seite 35 Table of Contents Turning the System On ......7 Calling a Remote Party ......8 Adjusting the Picture and Sound ..11 Adjusting the Camera Angle and Zoom .......11 Adjusting the Volume ....12 Ending the Conference .....13 Disconnecting the Line ....13 Setting the System to Standby Mode .......13 Displaying the Help ......15 System Components ......16...
-
Seite 36: Turning The System On
Turning the System On Turn on the TV monitor. Turn on the power of any other equipment to be used for the videoconference. Open the front panel of the Communication Terminal, and set the power switch on the right side to the on position ( Camera Unit Communication Terminal POWER indicators... -
Seite 37: Calling A Remote Party
Calling a Remote Party This guide shows you how to enter a phone number or IP address in the launcher menu and call a remote party. Select a line interface from the drop-down list at the lower part of the launcher menu. - Seite 38 AUTO: The line type is automatically selected, based on the number entered in the number text box. IP: Connects to a videoconferencing system on the remote site via a LAN. ISDN: Connects to a videoconferencing system on the remote site via an ISDN line.
- Seite 39 Select “Dial”, or press the CONNECT/DISCONNECT ( ) button on the Remote Commander to call the remote party. Use the V, v, B or b button on the Remote Commander to select “Dial”, then press the PUSH ENTER button. Or press the CONNECT/DISCONNECT button on the Remote Commander and the system begins dialing and “Dialing”...
-
Seite 40: Adjusting The Picture And Sound
Adjusting the Picture and Sound Adjusting the Camera Angle and Zoom To adjust when not in communication Use the button on the Remote Commander to select the picture in V, v, B or b the launcher menu, then press the PUSH ENTER button. Press the V, v, B or b button to adjust the camera angle and the ZOOM T/W... -
Seite 41: Adjusting The Volume
To adjust when in communication You can adjust the angle of the picture and zoom on the local site with the V/v/B/b and ZOOM T/W buttons on the Remote Commander. Refer to the Operating Instructions to adjust the camera angle of the picture and zoom on the remote site. -
Seite 42: Ending The Conference
Ending the Conference Disconnecting the Line Press the CONNECT/DISCONNECT ( ) button on the Remote Commander. The message “Disconnect?” appears on the monitor screen. Press the button on the Remote Commander to select “OK”, then press the PUSH ENTER button, or press the CONNECT/DISCONNECT ) button. - Seite 43 Press the button on the Remote Commander to select “OK”, then press the PUSH ENTER button, or press the button. The System enters standby mode, and the POWER indicator on the Communication Terminal lights in orange. POWER indicator (Not lit.) POWER indicator (Lights in orange.) button and PUSH ENTER buttons...
-
Seite 44: Displaying The Help
Displaying the Help Pressing the HELP button on the Remote Commander displays a help balloon or a help screen to guide most operations on the monitor screen. To hide the help guide, press the HELP button again. Displaying the Help... -
Seite 45: System Components
The PCS-G50/G50P Video Communication System is composed of basic system components for a basic videoconference, and optional equipment for an enhanced videoconference. Basic System Components The PCS-G50/G50P Video Communication System is the basic system of the PCS-G50/G50P Videoconferencing System. It contains the following components: Unit... -
Seite 46: Optional Equipment
Unit Description PCS-A1 Microphone Omni-directional microphone that picks up sound relatively from all directions, allowing participants to speak from any location. It is recommended to use in a quiet situation. IR repeater Allows you to simultaneously turn on and off the Communication Terminal and the TV that is being used as a monitor. - Seite 47 Optional equipment especially designed for use with the PCS-G50/G50P The following optional devices are used to enhance your videoconference. Unit Description PCSA-STMG70 Stand This stand can be used to place the Communication Terminal on end. PCSA-STCG70 Camera Stand for the Camera Unit.
- Seite 48 Unit Description PCSA-A7 Narrow coverage microphone that features high Microphone sound quality and a built-in echo canceller. Several PCSA-A7 Microphones can be connected in cascade, without losing sound quality. Recommended when using several microphones. PCS-DS150/DS150P Document camera. Document Stand Allows transmission of pictures to the Communication Terminal by infrared signals without connecting a cable.
-
Seite 49: Connecting Cables
Connecting cables Use the following connecting cables to connect devices in this system. PCS-G50/G50P Video Communication System Cable Part No. Number Camera cable (3 m (9.8 feet)) 1-830-186-11 S-video cable (1.5 m (4.9 feet)) 1-776-078-42 Audio cable (1 m (3.3 feet)) 1-765-258-31 Video converter cable (15 cm (0.5 feet)) -
Seite 50: System Connections
System Connections This section describes the typical system connections. Notes • Be sure to turn off all the equipment before making any connections. • Do not connect/disconnect the camera cable with the power on. Doing so may damage the Camera Unit or Communication Terminal. •... -
Seite 51: System Connection Via An Isdn
System Connection via an ISDN Notes • Do not connect/disconnect the camera cable or the interface cable with the power on. Doing so may damage the Camera Unit, Communication Terminal or ISDN Unit. • Used with the PCSA-B768S ISDN Unit for the first time, the Communication Terminal may upgrade the software of the ISDN Unit. -
Seite 52: Specifications
PAL (PCS-G50P) Kbps Capable of connection between LAN protocol supported both color systems HTTP Still Picture Telnet Pixels 704 pixels × 480 lines (PCS-G50) RTP/RTCP 704 pixels × 576 lines TCP/UDP (PCS-G50P) SNMP Encoding H.261 (ITU-T Recommendation) Annex. D (4CIF) Remote control H.263 (special format of this... - Seite 53 General Focal distance 100 (WIDE) to 600 (TELE) mm Power requirements Minimum illumination 19.5 V 3.5 lux at F 1.8/50 IRE Current Illumination range Operating temperature 3.5 lux to 100 000 lux 5°C to 35°C (41°F to 94°F) Horizontal resolution Operating humidity 470 TV lines (PCSA-CG70) 20% to 80%...
- Seite 54 5°C to 35°C (41°F to 94°F) Mass Approx. 130 g (4.6 oz) Operating humidity Power requirements 20% to 80% 12 V, powered by PCS-G50/G50P Storage temperature Communication Terminal or –20°C to +60°C (–4°F to +140°F) AC adaptor Storage humidity Power consumption 20% to 80% (no condensation) less than 2.5 W (per microphone)
- Seite 55 PCSA-M0G50 H.320 MCU Software (optional) Dimensions 50 × 2.8 × 21.5 mm (w/h/d) (2 × × inches) Mass Approx. 4 g (0.1 oz) Supplied accessories Serial Number seal (1) Operating Instructions (1) PCSA-M3G50 H.323 MCU Software (optional) Dimensions 50 × 2.8 × 21.5 mm (w/h/d) (2 ×...
- Seite 56 à proximité de l’appareil. Si vous vous débarrassez de l’appareil, En cas d’anomalie pendant le consultez votre revendeur Sony le plus fonctionnement de l’appareil, mettez proche. La batterie intégrée doit être traitée l’appareil hors tension au moyen du comme un déchet de l’industrie chimique.
-
Seite 57: A Propos Des Manuels Fournis
Lecture des manuels sur le A propos des CD-ROM manuels fournis Les divers manuels du système sont enregistrés au format PDF dans le CD-ROM ® Le système de communication vidéo PCS- fourni. Vous êtes invité à utiliser Adobe ®* G50/G50P est fourni avec les manuels Acrobat Reader ou Adobe Reader pour suivants en plus du présent guide. - Seite 58 ..............................« IPELA » et sont des marques commerciales d’Sony Corporation. * Adobe et Acrobat sont des marques commerciales d’Adobe Systems, Incorporated. ** Windows est des marques commerciales d’U.S. Microsoft Corporation aux Etats-Unis et dans les autres pays.
- Seite 59 Table de matières Activation du système ......6 Pour appeler un correspondant ...7 Réglage de l’image et du son ...10 Réglage de l’angle de la caméra et du zoom .......10 Réglage du volume .....11 Pour terminer la conférence .....12 Déconnexion de la ligne .....12 Réglage du système en mode de veille ......12 Affichage de l’aide ......14...
-
Seite 60: Activation Du Système
Activation du système Mettez sous tension le moniteur de télévision. Mettez sous tension le ou les autres appareils à utiliser pour la vidéoconférence. Placez le commutateur d’alimentation sur le côté droit du terminal de communication sur la position de marche ( Caméra Terminal de communication... -
Seite 61: Pour Appeler Un Correspondant
Pour appeler un correspondant Cette section vous montre comment entrer un numéro de téléphone ou une adresse IP dans le menu de démarrage et comment appeler un correspondant. Sélectionnez une interface de ligne dans la liste déroulante dans la partie inférieure du menu de démarrage. - Seite 62 Automatique : La ligne de connexion est automatiquement sélectionnée en fonction du numéro entré dans la zone de texte du numéro de téléphone. IP : Autorise la connexion à un système de visioconférence du site distant via un réseau LAN. RNIS : Autorise la connexion à...
- Seite 63 Sélectionnez « Appel » ou appuyez sur la touche CONNECT/ DISCONNECT ( ) de la télécommande pour appeler le correspondant. Utilisez la touche V, de la télécommande pour sélectionner « Appel », puis appuyez sur PUSH ENTER. Vous pouvez également appuyer sur la touche CONNECT/DISCONNECT de la télécommande.
-
Seite 64: Réglage De L'image Et Du Son
Réglage de l’image et du son Réglage de l’angle de la caméra et du zoom Réglages en dehors d’une communication Utilisez la touche b de la télécommande pour sélectionner l’image dans le menu de démarrage, puis appuyez sur la touche PUSH ENTER. Appuyez sur la touche b pour régler l’angle de la caméra et la touche ZOOM T/W pour faire un zoom avant ou arrière. -
Seite 65: Réglage Du Volume
Réglage pendant une communication Vous pouvez régler l’angle de l’image et le zoom sur le site local à l’aide des touches b et ZOOM T/W de la télécommande. Reportez-vous au mode d’emploi pour régler l’angle de prise de vue et le zoom sur le site distant. -
Seite 66: Pour Terminer La Conférence
Pour terminer la conférence Déconnexion de la ligne Appuyez sur la touche CONNECT/DISCONNECT ( ) de la télécommande. Le message « Déconnexion ? » s’affiche sur l’écran du moniteur. Appuyez sur la touche de la télécommande pour sélectionner « OK », puis sur la touche PUSH ENTER, ou appuyez sur la touche CONNECT/DISCONNECT ( La ligne est débranchée et le menu de démarrage est rétabli. - Seite 67 Appuyez sur la touche de la télécommande pour sélectionner « OK », puis sur la touche PUSH ENTER, ou appuyez sur la touche Le système passe en mode de veille et l’indicateur POWER sur le terminal de communication s’allume en orange. Indicateur POWER (éteint) Indicateur POWER (allumé...
-
Seite 68: Affichage De L'aide
Affichage de l’aide Appuyez sur la touche HELP de la télécommande pour afficher une bulle ou un écran d’aide afin d’obtenir des instructions de guidage concernant la plupart des opérations sur l’écran du moniteur. Pour cacher le guide d’aide, appuyez une nouvelle fois sur la touche HELP. Affichage de l’aide... -
Seite 69: Composants Du Système
Composants du système de base Le système de communication vidéo PCS-G50/G50P est le système de base du système de vidéoconférence PCS-G50/G50P. Il est constitué des éléments suivants : Unité... -
Seite 70: Equipement En Option
Unité Description Microphone PCS-A1 Microphone omnidirectionnel (capable de capter le son dans toutes les directions) permettant aux participants de parler à partir de n’importe quel endroit. Il est recommandé de l’utiliser dans un environnement calme. Répétiteur IR Permet de mettre sous ou hors tension simultanément le terminal de communication et le téléviseur utilisé... - Seite 71 Equipement en option conçu spécialement pour être utilisé avec le PCS- G50/G50P Les périphériques en option suivants vous permettent d’améliorer vos visioconférences. Unité Description Support PCSA-STMG70 Permet de placer le terminal de communication en position verticale. Support de caméra PCSA- Support pour la caméra.
-
Seite 72: Câbles De Connexion
Permet d’organiser des vidéoconférences multipoint PCSA-M0G50 H.320 MCU via une connexion RNIS. Câbles de connexion Utilisez les câbles de connexion suivants pour connecter les appareils au système. PCS-G50/G50P Video Communication System Câble Référence de pièce Quantité Câble de caméra (3 m (9,8 pieds)) 1-830-186-11 Câble de connexion S-vidéo (1,5 m (4,9 pieds)) 1-776-078-42... - Seite 73 Câble de caméra Câble de connexion S-vidéo Câble de connexion audio Câble de conversion vidéo Composants du système...
-
Seite 74: Connexions Système
Connexions système Cette section décrit les connexions système types. Remarques • Mettez tous les appareils hors tension avant d’établir quelque connexion que ce soit. • Ne branchez/débranchez pas le câble de caméra lorsque le système est sous tension. Risque d’endommager la caméra ou le terminal de communication. •... -
Seite 75: Connexion Système Via Un Réseau Rnis
Connexion système via un réseau RNIS Remarques • Ne branchez/débranchez pas le câble de caméra ou le câble d’interface lorsque le système est sous tension. Risque d’endommager la caméra, le terminal de communication ou l’unité RNIS. • Lorsque vous utilisez l’unité PCSA-B768S pour la première fois, le terminal de communication peut effectuer une mise à... -
Seite 76: Spécifications
QCIF: 176 pixels × 144 lignes Vitesse de transfert des données Système couleur LSD 1,2 Kbps, 4,8 Kbps, 6,4 Kbps NTSC (PCS-G50) MLP 6,4 Kbps, 24 Kbps, 32 Kbps PAL (PCS-G50P) HMLP 62,4 Kbps, 64 Kbps, Capacité de connexion avec les 128 Kbps deux systèmes de couleur... - Seite 77 Humidité de fonctionnement Plage d’éclairement 20% à 80% 3,5 lux à 100 000 lux Température de stockage Résolution horizontale –20°C à +60°C (–4°F à +140°F) 470 lignes de télévision Humidité de stockage (PCSA-CG70) 20% à 80% (sans condensation) 450 lignes de télévision Dimensions 420 ×...
- Seite 78 Environ 130 g Alimentation Puissance requise 19,5 V 12 V, alimenté par un terminal de Consommation électrique communication PCS-G50/ 0,5 A G50P ou un adaptateur secteur Température d’utilisation Consommation électrique 5°C à 35°C (41°F à 94°F) moins de 2,5 W (pour chaque Humidité...
- Seite 79 Accessoires fournis Câble d’interface (8 m, 26,2 ft) (1) Mode d’emploi (1) Certificat de garantie (1) Logiciel PCSA-M0G50 H.320 MCU (en option) Dimensions 50 × 2,8 × 21,5 mm (l/h/p) (2 × × pouces) Poids approx. 4 g (0,1 oz) Accessoires fournis Etiquette de numéro de série (1) Mode d’emploi (1)
- Seite 80 Um einen elektrischen Schlag zu vermeiden, darf das Gehäuse nicht geöffnet werden. Wenn Sie das Gerät entsorgen wollen, Überlassen Sie Wartungsarbeiten wenden Sie sich bitte an das nächste Sony- stets nur einem Fachmann. Kundendienstzentrum. Der eingebaute Akku muß als chemischer Sondermüll VORSICHT entsorgt werden.
- Seite 81 ® ® * eingeblendet, Adobe Acrobat Reader Zum Lieferumfang des PCS-G50/G50P oder Adobe Reader zu verwenden. Wenn Video Communication System gehören Adobe Reader auf Ihrem Computer nicht in- außer dieser Bedienanleitung noch die fol- stalliert ist, können Sie die neueste Version genden Handbücher: Hier sollten Sie alle In-...
- Seite 82 ..............................„IPELA“ und sind Marken von Sony Corporation. * Adobe und Acrobat sind Marken von Adobe Systems, Incorporated. ** Windows ist in den USA und anderen Ländern eingetragene Marken der U.S. Microsoft Corporation. Info zu den mitgelieferten Handbüchern...
- Seite 83 Inhaltsverzeichnis Einschalten des Systems ....6 Anrufen einer anderen Teilnehmergruppe ......7 Einstellen von Bild und Ton ....10 Einstellen von Kamerawinkel und Zoom .......10 Einstellen der Lautstärke ....11 Beenden der Konferenz ....12 Unterbrechen der Verbindung ..12 Aktivieren des Bereitschaftsmodus ..12 Aufrufen der Hilfe ......14 Systemanschlüsse ......15 Systemanschluss über ein lokales Netzwerk ......15...
-
Seite 84: Einschalten Des Systems
Einschalten des Systems Schalten Sie den Fernsehmonitor ein. Schalten Sie alle anderen für die Videokonferenz benötigten Geräte ein. Bringen Sie den Netzschalter rechts am Kommunikationsterminal in die Stellung „Ein“ ( Kamera Kommunikationsterminal POWER-Anzeigen (Grünes Licht) Netzschalter Schaltet sich das Kommunikationsterminal ein. Die drei Anzeigen an der Vorderseite des Kommunikationsterminals und die POWER-Anzeige an der Kamera leuchten auf, dann leuchten nur die POWER-Anzeigen an beiden Geräten weiter grün. -
Seite 85: Anrufen Einer Anderen Teilnehmergruppe
Anrufen einer anderen Teilnehmergruppe In dieser Anleitung wird erläutert, wie Sie im Startmenü eine Telefonnummer oder IP-Adresse eingeben und eine andere Teilnehmergruppe anrufen. Wählen Sie aus der Dropdown-Liste im unteren Bereich des Startmenüs eine Netz-Schnittstelle aus. Wählen Sie mit der Taste V, v, B oder b auf der Fernbedienung „Netz- Schnittstelle“... - Seite 86 AUTO: Die Leitung für die Verbindung wird anhand der Nummer im Zahleneingabefeld automatisch ausgewählt. IP: Herstellen einer Verbindung zu einem Videokonferenzsystem an einem fernen Standort über ein LAN. ISDN: Herstellen einer Verbindung zu einem Videokonferenzsystem an einem fernen Standort über eine ISDN-Leitung. TEL: Herstellen einer Verbindung zu einem Telefon der anderen Teilnehmergruppe, um über die ISDN-Verbindung eine Telefonkonferenz abzuhalten.
-
Seite 87: Wenn Nach Schritt 3 Das Folgende Dialogfeld Angezeigt Wird
Wählen Sie „Wählen“ oder drücken Sie die Taste CONNECT/ DISCONNECT ( ) auf der Fernbedienung, um die andere Teilnehmergruppe anzurufen. Wählen Sie mit der Taste V, oder auf der Fernbedienung die Option „Wählen“ und drücken Sie dann die Taste PUSH ENTER. Oder drücken Sie die Taste CONNECT/DISCONNECT ( ) auf der Fernbedienung. -
Seite 88: Einstellen Von Bild Und Ton
Einstellen von Bild und Ton Einstellen von Kamerawinkel und Zoom Bei nicht stattfindender Kommunikation einstellen Drücken Sie die Taste b auf der Fernbedienung zur Auswahl des oder Bildes im Startmenü, und drücken Sie dann die Taste PUSH ENTER. Stellen Sie mit der Taste b den Kamerawinkel und mit der Taste oder ZOOM T/W den Zoomfaktor ein. -
Seite 89: Einstellen Der Lautstärke
Während der Kommunikation einstellen Sie können den Winkel des Bildes und den Zoomfaktor am eigenen Standort mit den Tasten b und ZOOM T/W auf der Fernbedienung einstellen. Wie Kamerawinkel des Bildes und Zoomfaktor am anderen Standort eingestellt werden, entnehmen Sie bitte der Bedienungsanleitung. Einstellen der Lautstärke Lautstärke des von einer anderen Teilnehmergruppe eingehenden Tons einstellen... -
Seite 90: Beenden Der Konferenz
Beenden der Konferenz Unterbrechen der Verbindung Drücken Sie die Taste CONNECT/DISCONNECT ( ) auf der Fernbedienung. Auf dem Bildschirm wird „Verbindung trennen?“ angezeigt. Wählen Sie mit der Taste oder auf der Fernbedienung „OK“ und drücken Sie dann die Taste PUSH ENTER, oder drücken Sie die Taste CONNECT/DISCONNECT( Die Verbindung wird unterbrochen, und das Startmenü... - Seite 91 Wählen Sie mit der Taste oder auf der Fernbedienung „OK“, und drücken Sie dann die Taste PUSH ENTER, oder drücken Sie die Taste Das System schaltet in den Bereitschaftsmodus, und die Anzeige POWER am Kommunikationsterminal leuchtet orange. Anzeige POWER (leuchtet nicht) Anzeige POWER (leuchtet orange) Taste Tasten...
-
Seite 92: Aufrufen Der Hilfe
Aufrufen der Hilfe Drücken Sie die Taste HELP auf der Fernbedienung, um eine Sprechblasenhilfe oder einen Hilfebildschirm für die meisten Funktionen auf dem Monitor aufzurufen. Um die Hilfeinformationen auszublenden, Taste HELP erneut drücken. Aufrufen der Hilfe... -
Seite 93: Systemanschlüsse
Systemanschlüsse In diesem Abschnitt werden die typischen Systemanschlüsse beschrieben. Hinweise • Schalten Sie alle Geräte aus, bevor Sie Verbindungen herstellen. • Schließen Sie das Kamerakabel nicht an bzw. trennen Sie es nicht, wenn das Gerät eingeschaltet ist, da dies zu Beschädigungen der Kamera oder des Kommunikationsterminals führen kann. -
Seite 94: Systemkonfiguration Mit Isdn
Systemkonfiguration mit ISDN Hinweise • Schließen Sie das Kamerakabel nicht an bzw. trennen Sie es nicht, wenn das Gerät eingeschaltet ist, da dies zu Beschädigungen der Kamera, des Kommunikationsterminals oder des ISDN-Geräts führen kann. • Bei der ersten Verwendung des ISDN-Geräts PCSA-B768S aktualisiert der Kommunikationsterminal möglicherweise die Software des ISDN-Geräts. -
Seite 95: Technische Daten
PAL (PCS-G50P) Unterstützte LAN-Protokolle Verbindung zwischen beiden HTTP Farbsystemen Telnet Standbild RTP/RTCP Pixel 704 Pixel × 480 Zeilen (PCS-G50) TCP/UDP 704 Pixel × 576 Zeilen (PCS-G50P) SNMP Codierung H.261 (ITU-T Empfehlung) Anhang D (4CIF) Fernbedienung H.263 (Sonderformat dieses Steuerung der Kamera am fernen Standort Systems) H.281 (entspricht der ITU-T-... - Seite 96 Luftfeuchtigkeit bei Lagerung Mitgeliefertes Zubehör 20 % bis 80 % Kamerakabel (3 m) (1) (nicht kondensierend) VISCA-Kabel (15 cm) (1) Abmessungen 420 × 66 × 254 mm (B/H/T) (ohne Projektteile) Mikrofon PCS-A1 Gewicht Ca. 4,8 kg Bandbreite 13 kHz Zubehör (mitgeliefert) Direktionale Eigenschaften Microphone PCS-A1 (1) Rundgerichtet...
- Seite 97 Stromversorgung 5 °C bis 35 °C 12 V, über Luftfeuchtigkeit bei Betrieb Kommunikationsterminal 20 % bis 80 % PCS-G50/G50P oder Netzteil Lagertemperatur –20 °C bis +60 °C Leistungsaufnahme Luftfeuchtigkeit bei Lagerung unter 2,5 W (pro Mikrofon) 20 % bis 80 %...
- Seite 98 MCU-Software PCSA-M3G50 H.323 (optional) Abmessungen 50 × 2,8 × 21,5 mm (B/H/T) Gewicht Ca. 4 g Zubehör (mitgeliefert) Aufkleber mit Seriennummer (1) Bedienungsanleitung (1) Design und Spezifikationen können ohne Vorankündigung geändert werden. Technische Daten...
- Seite 99 Si utiliza líneas RDSI, En el caso de producirse interferencias, consulte con su proveedor Sony para más póngase en contacto con el centro de información. servicio técnico Sony autorizado más •...
-
Seite 100: Acerca De Los Manuales Suministrados
Acrobat Reader o Adobe El Sistema de comunicaciones de vídeo Reader para leerlos. Si no tiene Adobe PCS-G50/G50P se suministra con los Reader instalado en su ordenador, puede manuales que se indican a continuación, descargar la última versión del programa además de con esta Guía de funcionamiento. - Seite 101 ..............................“IPELA” y son marcas registradas de Sony Corporation. * Adobe y Acrobat son marcas registradas de Adobe Systems, Incorporated. ** Windows es marcas registradas de Microsoft Corporation en EE.UU. y demás países. Acerca de los manuales suministrados...
- Seite 102 Contenido Puesta en marcha del sistema .....6 Llamada a una ubicación remota ..7 Ajuste de imagen y sonido ....10 Ajuste de ángulo y zoom de la cámara ......10 Ajuste del volumen .....11 Finalización de la conferencia ..12 Desconexión de la línea ....12 Ajuste del sistema en modo en espera ......12 Ayuda en pantalla ......14...
-
Seite 103: Puesta En Marcha Del Sistema
Puesta en marcha del sistema Encienda el monitor de TV. Encienda las demás unidades del equipo que se va utilizar para la videoconferencia. Accione el interruptor de alimentación situado a la derecha del terminal de comunicaciones ( Cámara Terminal de comunicaciones Indicadores POWER (Se iluminan en color verde) Interruptor de alimentación... -
Seite 104: Llamada A Una Ubicación Remota
Llamada a una ubicación remota En esta guía se describen los pasos necesarios para introducir un número telefónico o una dirección IP en el menú de inicio y llamar a una ubicación remota. Seleccione una interfaz de línea de la lista desplegable de la parte inferior del menú... - Seite 105 AUTO: La línea de conexión se selecciona de forma automática a partir del número introducido en el cuadro de texto para el número. IP: Conecta con un sistema de videoconferencia en la ubicación remota a través de una red de área local (LAN). RDSI: Conecta con un sistema de videoconferencia en la ubicación remota a través de una línea RDSI.
- Seite 106 Seleccione “Marcar” o pulse el botón CONNECT/DISCONNECT ( ) en el mando a distancia para llamar a la ubicación remota. Utilice los botones V, v, B del del mando a distancia para seleccionar “Marcar” y, a continuación, pulse el botón PUSH ENTER. También puede hacerlo pulsando el botón CONNECT/DISCONNECT ( ) del mando a distancia.
-
Seite 107: Ajuste De Imagen Y Sonido
Ajuste de imagen y sonido Ajuste de ángulo y zoom de la cámara Ajuste sin comunicación Utilice los botones b del mando a distancia para seleccionar la imagen en el menú de inicio, a continuación pulse el botón PUSH ENTER. Pulse los botones b para ajustar el ángulo de la cámara y el botón ZOOM T/W para ampliar o reducir la imagen. -
Seite 108: Ajuste Del Volumen
Ajuste en comunicación Es posible ajustar el ángulo de la cámara y ampliar la imagen local con los botones b y ZOOM T/W del mando a distancia. Para ajustar el ángulo de la cámara y ampliar/reducir la imagen remota, remítase al Manual de instrucciones. Ajuste del volumen Ajuste del volumen del sonido que se recibe de la ubicación remota... -
Seite 109: Finalización De La Conferencia
Finalización de la conferencia Desconexión de la línea Pulse el botón CONNECT/DISCONNECT ( ) del mando a distancia. Aparece el mensaje “¿Desconectar?” en la pantalla del monitor. Pulse el botón del mando a distancia para seleccionar “OK”, a continuación, pulse el botón PUSH ENTER, o bien pulse el botón CONNECT/DISCONNECT ( A continuación, se desconecta la línea y se restablece el menú... - Seite 110 Pulse el botón del mando a distancia para seleccionar “OK”, a continuación, pulse el botón PUSH ENTER, o bien pulse el botón El sistema pasa a modo de espera, y el indicador POWER del terminal de comunicaciones se enciende en naranja. Indicador POWER (apagado) Indicador POWER (encendido en naranja.)
-
Seite 111: Ayuda En Pantalla
Ayuda en pantalla Pulsando el botón HELP del mando a distancia aparece un globo de texto de ayuda o una pantalla de ayuda para guiar al usuario en la mayor parte de las operaciones desde la pantalla del monitor. Para ocultar el manual de ayuda, pulse otra vez el botón HELP. Ayuda en pantalla... -
Seite 112: Conexiones Del Sistema
Conexiones del sistema Esta sección describe las conexiones características del sistema. Notas • Asegúrese de desactivar el suministro de alimentación de todos los equipos antes de realizar cualquier conexión. • No enchufe ni desenchufe el cable de la cámara con la alimentación conectada. Si lo hace, la cámara o el terminal de comunicaciones pueden resultar dañados. -
Seite 113: Conexión Del Sistema A Través De Una
Conexión del sistema a través de una RDSI Notas • No enchufe ni desenchufe el cable de la cámara o el cable de interfaz con la alimentación conectada. Si lo hace, la cámara, el terminal de comunicaciones o la unidad RDSI pueden resultar dañados. •... -
Seite 114: Rdsi
LAN (estándar), de 64 Kbps a 4 QCIF: 176 píxeles × 144 líneas Mbps Sistema de color RDSI (BRI), máximo 6 líneas (al NTSC (PCS-G50) instalar la unidad PCSA- PAL (PCS-G50P) B768S), máximo 3 líneas (al Capacidad de conexión entre... - Seite 115 Generales aproximadamente 440.000 píxeles) (PCSA-CG70P) Alimentación eléctrica Objetivo f = 3,1 a 31 mm, F 1,8 a 2,9, 19,5 V Ángulo horizontal 6,6° a 65° Corriente Distancia focal Temperatura de funcionamiento 100 (GRAN ANGULAR) a 600 5 a 35°C (41 a 94ºF) (TELEOBJETIVO) mm Humedad de funcionamiento Iluminación mínima...
- Seite 116 Alimentación eléctrica 12 V, recibe alimentación 19,5 V mediante el terminal de Corriente 0,5 A comunicaciones PCS-G50/ Temperatura de funcionamiento G50P o el adaptador de CA 5 a 35°C (41 a 94ºF) Consumo de energía Humedad de funcionamiento menos de 2,5 W (por micrófono)
- Seite 117 Software MCU PCSA-M0G50 H.320 (opcional) Dimensiones 50 × 2,8 × 21,5 mm (an/al/prof) (2 × × pulgadas) Peso Aprox. 4 g (0,1 oz) Accesorios suministrados Precinto de número de serie (1) Manual de instrucciones (1) Software PCSA-M3G50 H.323 MCU (opcional) Dimensiones 50 ×...
- Seite 118 Per le modalità di smaltimento accessibile. dell’apparecchio, consultare il centro di Qualora si verifichi un guasto durante il assistenza Sony più vicino. La batteria funzionamento dell’apparecchio, azionare il incorporata deve venire smaltita come dispositivo di scollegamento in modo che rifiuto chimico.
-
Seite 119: Informazioni Sui Manuali In Dotazione
Lettura dei manuali nel Informazioni sui CD-ROM manuali in dotazione I vari manuali del sistema sono contenuti nel CD-ROM in dotazione e sono presentati in Il sistema di comunicazione video PCS- formato PDF. Per leggerli, è necessario ® ®* G50/G50P viene fornito unitamente ai l'utilizzo di Adobe Acrobat Reader o... - Seite 120 ..............................“IPELA” e sono marchi di fabbrica di Sony Corporation. * Adobe e Acrobat sono marchi di fabbrica di Adobe Systems, Incorporated. ** Windows é marchi di fabbrica registrata di Microsoft Corporation U.S. negli Stati Uniti e in altri paesi.
- Seite 121 Sommario Attivazione del sistema ......6 Chiamata di un sito remoto ....7 Regolazione dell’immagine e dell’audio .........10 Regolazione dell’angolatura della videocamera e dello zoom ....10 Regolazione del volume .....11 Termine della conferenza ....12 Scollegamento della linea ...12 Impostazione della modalità standby del sistema ..12 Visualizzazione della Guida .....14 Connessioni del sistema ....15 Configurazione del sistema tramite...
-
Seite 122: Attivazione Del Sistema
Attivazione del sistema Accendere il monitor TV. Inserire l’alimentazione di qualsiasi altro apparecchio necessario per la videoconferenza. Impostare l’interruttore di accensione situato sul lato destro del terminale di comunicazione sulla posizione di inserimento ( Videocamera Terminale di comunicazione Indicatori POWER (Si illuminano di verde) Interruttore di accensione Il terminale di comunicazione si accende. -
Seite 123: Chiamata Di Un Sito Remoto
Chiamata di un sito remoto La presente guida illustra le modalità di immissione di un numero telefonico o un indirizzo IP nel menu di avvio e di effettuare una chiamata ad un sito remoto. Dall’elenco a discesa nella parte inferiore del menu di avvio, selezionare un’interfaccia di linea. - Seite 124 AUTO: Consente di selezionare automaticamente la linea di connessione, in base al numero immesso nella casella di testo del numero. IP: Consente di effettuare la connessione ad un sistema di videoconferenza remoto tramite una LAN. ISDN: Consente di effettuare la connessione ad un sistema di videoconferenza remoto tramite una linea ISDN.
- Seite 125 Selezionare “Componi” oppure premere il pulsante CONNECT/ DISCONNECT ( ) del telecomando per effettuare la chiamata al sito remoto. Utilizzare i pulsanti V, v, B or b del telecomando per selezionare “Componi”, quindi premere il tasto PUSH ENTER. In alternativa, premere il pulsante CONNECT/DISCONNECT ( ) del telecomando.
-
Seite 126: Regolazione Dell'immagine E Dell'audio
Regolazione dell’immagine e dell’audio Regolazione dell’angolatura della videocamera e dello zoom Per regolare quando non si è in comunicazione Utilizzare il pulsante b sul telecomando per selezionare l’immagine dal menu di avvio, quindi premere il pulsante PUSH ENTER. Premere il pulsante b per regolare l’angolatura della videocamera e il pulsante ZOOM T/W per lo zoom avanti o indietro. -
Seite 127: Regolazione Del Volume
Per regolare quando si è in comunicazione È possibile regolare l’inquadratura dell’immagine e lo zoom sul sito locale utilizzando i pulsanti b e ZOOM T/W sul telecomando. Fare riferimento alle Istruzioni per l’uso per maggiori informazioni sulla regolazione dell’inquadratura dell’immagine e dello zoom della videocamera sul sito remoto. -
Seite 128: Termine Della Conferenza
Termine della conferenza Scollegamento della linea Premere il pulsante CONNECT/DISCONNECT ( ) sul telecomando. Compare il messaggio “Disconnetti?” sullo schermo del monitor. Premere il pulsante sul telecomando per selezionare “OK”, quindi premere il pulsante PUSH ENTER oppure premere il pulsante CONNECT/DISCONNECT ( La linea viene scollegata e ricompare il menu di avvio. - Seite 129 Il sistema entra nella modalità di standby e l’indicatore POWER sul terminale di comunicazione si illumina di arancione. Indicatore POWER (spento) Indicatore POWER (si illumina di arancione) pulstante pulsanti e PUSH ENTER Quando il sistema è in questa modalità, è possibile attivarlo mediante il pulsante @/1 sul telecomando.
-
Seite 130: Visualizzazione Della Guida
Visualizzazione della Guida Premendo il pulsante HELP sul telecomando viene visualizzata una nuvoletta con il testo di guida oppure una schermata di guida per gran parte delle operazioni sullo schermo del monitor. Per nascondere la guida, premere nuovamente il pulsante HELP. Visualizzazione della Guida... -
Seite 131: Connessioni Del Sistema
Connessioni del sistema La presente sezione descrive le connessioni tipiche del sistema. Note • Accertarsi di disinserire tutte le apparecchiature prima di effettuare eventuali connessioni. • Non collegare/scollegare il cavo della videocamera con l’alimentazione inserita. L’inosservanza di queste istruzioni potrebbe danneggiare l’unità videocamera o il terminale di comunicazione. -
Seite 132: Connessione Del Sistema Tramite
Connessione del sistema tramite ISDN Note • Non collegare/scollegare il cavo della videocamera o il cavo dell’interfaccia con l’alimentazione inserita. L’inosservanza di queste istruzioni potrebbe danneggiare l’unità videocamera, il terminale di comunicazione o l’unità ISDN. • Quando si effettua il collegamento per utilizzare l’unità ISDN PCSA-B768S per la prima volta, il terminale di comunicazione potrebbe aggiornare il software dell’unità... -
Seite 133: Isdn
È possibile il collegamento tra i HTTP due sistemi di coloreo Telnet Fermo immagine RTP/RTCP Pixel 704 pixel × 480 linee (PCS-G50) TCP/UDP 704 pixel × 576 linee (PCS-G50P) SNMP Codifica H.261 (Raccomandazione ITU-T) Annex. D (4CIF) Controllo a distanza H.263 (formato speciale di questo... - Seite 134 Umidità di funzionamento Orizzontale ±100° da 20% a 80% Verticale ±25° Temperatura di deposito Dimensione 130 × 141 × 130 mm (l/a/p) Da –20°C a +60°C (escluse le parti sporgenti) Umidità di deposito Peso Circa 1,0 kg da 20% a 80% (senza condensa) Accessorio in dotazione Dimensioni 420 ×...
- Seite 135 Circa 130 g Requisiti di alimentazione Alimentazione 12 V, alimentato mediante 19,5V terminale di comunicazione Corrente PCS-G50/G50P o alimentatore 0,5A Temperatura di utilizzo Consumo energetico Da 5°C a 35°C Inferiore a 2,5 W (per microfono) Umidità di funzionamento Temperatura di utilizzo Da 20% a 80% Da 5°C a 35°C...
- Seite 136 Software PCSA-M0G50 H.320 MCU (opzionale) Dimensioni 50 × 2,8 × 21,5 mm (l/a/p) Peso Circa 4 g Accessori in dotazione Sigillo numero di serie (1) Istruzioni per l’uso (1) Software PCSA-M3G50 H.323 MCU (opzionale) Dimensioni 50 × 2,8 × 21,5 mm (l/a/p) Peso Circa 4 g Accessori in dotazione...
- Seite 137 线与电气插座连接,此电气插座必须靠 近该设备并且易于使用。 在操作设备时如果发生故障,可以切断 断电设备的电源以断开设备电源,或者 断开电源线。 重要 设备铭牌位于底部。 本说明书主要说明使用 ISDN 线 路 实 现 视 频 会 议 的 方 法,但 也 包括对非 ISDN 线路的说明。如果 您使用 ISDN 线路,请咨询 Sony 经销商,获取更多信息。 • 在某些地区,可能不提供 ISDN 服务。 如果您将本机弃置不用,请联系 临近的 Sony 维修中心。 其中内置的电 池必须作为化学废弃品处理。 警告...
- Seite 138 Reader 或 Adobe Reader 来阅 http://www.adobe.co.jp/products/acrobat/ 读。如果您的计算机上没有安装 Adobe readstep.html Reader,您可以从以下网站下载最新的 版本。 如何阅读操作说明 将标有 “Manuals for Video Communication System”的 CD- ..............................“ ” IPELA 和 为 Sony Corporation 的商标。 Adobe 和 Acrobat 为 Adobe Systems Incorporated 的商标。 Windows 为美国 Microsoft Corporation 在美国和其它国家的注册商标。 关于随机手册...
- Seite 139 目录 打开系统 ..........5 呼叫远程会议参加者 ......6 调整图像和声音 ........9 调整摄像机角度和缩放 ....9 调整音量 ........10 结束会议 ..........11 断开线路 ........11 设置系统到待机模式 ....11 显示帮助 ..........13 系统连接 ..........14 通过 LAN 的系统连接 ....14 通过 ISDN 的系统连接 .....15 规格说明 ..........16 附带的 CD-ROM 中含有对此系统进行 了详细介绍的操作说明。请仔细阅读 操作说明和操作指南。 目录...
-
Seite 140: 打开系统
打开系统 打开电视监视器。 打开电视会议需要使用的其它设备电源。 打开会议电视终端处理器的前面板,并将右侧的电源开关设置到 “开”的位置 ( 。 @) 会议电视终端摄像机 会议电视终端处理器 POWER 指示灯 (绿色) 电源开关 会议电视终端处理器打开。会议电视终端处理器前面的 3 个指示灯和会 议电视终端摄像机上的 POWER 指示灯变亮,随后只有两台设备上的 POWER 指示灯一直显示为绿色。此时监视器屏幕上会出现启动菜单, 启动菜单中会显示本地会议电视终端摄像机拍摄的图像。 打开系统... -
Seite 141: 呼叫远程会议参加者
呼叫远程会议参加者 本指南说明如何在启动菜单中输入电话号码或 IP 地址并呼叫远程会议 参加者。 从启动菜单的下方的下拉菜单中选择线路接口。 、 或 使用遥控器上的 b 按钮从启动菜单的下方选择 V、 “线路接口” ,然后按操纵杆。此时出现一下拉菜单。 按 或 按钮选择要使用的线路种类,然后按操纵杆。 选择通过 ISDN 线路连接时的线路种类。当没有连接 ISDN 线路时,只 能使用 “IP” 。 线路种类 数字文本框 拨号 上移 右移 左移 下移 AUTO:根据数字文本框中输入的号码,自动选择连接线路。 IP:通过局域网连接到远程网站上的视频会议系统。 ISDN:通过 ISDN 线路连接到远程网站上的视频会议系统。 TEL:通过 ISDN 线路连接到远程会议的电话上,进行语音会议。 呼叫远程会议参加者... - Seite 142 在数字文本框中输入远程会议参加者的 IP 地址 (用于 “IP” )或电 话号码 (用于 “ISDN”或 “ISDN (电话) ” ) 。 用遥控器上的 V、 v、 B 或 b 按钮选择数字文本框,并按操纵杆。然后 使用遥控器上的数字按钮输入号码。 1 CLEAR 按钮 2 BACK SPACE 按钮 按钮 4 数字按钮 1CLEAR 按钮:删除一行里所有字符。 2BACK SPACE 按钮:删除一个字符。 按钮:输入一个 IP 地址的点 (.) 。 4数字按钮:用于输入远程会议参加者的电话号码或...
- Seite 143 选择 “拨号”或按遥控器上的 CONNECT/DISCONNECT ( 按钮呼叫远程会议参加者。 使用遥控器上的 V、 v、 B 或 b 按钮选择 “拨号” ,然后按操纵杆。或 者按遥控器上的 CONNECT/DISCONNECT 按钮,系统开始拨 号且屏幕上出现 “正在拨号” 。 当系统连接对方时,出现 “开始会议。 ”消息且显示下列画面。 本地图像 远端图像 如果在步骤 3 后显示以下对话 TOKYO 192.168.1.57 取消呼叫。 呼叫远程会议参加者。 您可以改变通讯设置。 当拨号设置菜单中的 “详细设置”设为 “开”时,出现上述对话。 呼叫远程会议参加者...
-
Seite 144: 调整图像和声音
调整图像和声音 调整摄像机角度和缩放 未进行通讯时调整 使用遥控器上的 b 按钮在启动菜单中选择图像,然后按操 、 或 V、 纵杆。 b 按钮调整会议电视终端摄像机角度,使用 ZOOM T/W 按 、 或 V、 按钮调整缩放。 调整完成后,按操纵杆。 调整角度 上 右 左 下 放大 / 缩小 放大图像 缩小图像 未通讯时 通讯时 本地图像 远端图像 调整图像和声音... -
Seite 145: 调整音量
通讯时调整 您可以使用 b 和遥控器上的 ZOOM T/W 按钮调整本地图像的角度和缩放 图像。 请参见操作说明调整远端图像角度和缩放比例。 调整音量 调节接收到的对方声音音量 按遥控器上的 VOLUME +/– 按钮。 要关闭本地会议参加者发送到远程会议参加者的声音 按遥控器上的 MIC ON/OFF 按钮。 监视器屏幕上将出现 “MIC OFF”指示器。要恢复声音,再次按 MIC ON/OFF 按钮。 要关闭本地的声音 增加音量 减小音量 调整图像和声音... -
Seite 146: 结束会议
结束会议 断开线路 按遥控器上的 CONNECT/DISCONNECT ( ) 按钮。 监视器屏幕上将显示消息 “是否切断连接?” 。 按遥控器上的 或 按钮选择 “OK” ,然后按操纵杆,或者按 CONNECT/DISCONNECT ( ) 按钮。 线路断开并恢复启动菜单。 设置系统到待机模式 按遥控器上的 按钮。 监视器屏幕上将显示一条消息 “是否关闭电源?” 。 结束会议... - Seite 147 按遥控器上的 或 按钮选择 “OK” ,然后按操纵杆,或者按 按钮。 系统进入待机模式,此时会议电视终端处理器上的 POWER 指示灯显示 为橙色。 POWER 指示灯 (未亮) POWER 指示灯 (橙色) 按钮 b 和操纵杆 当系统处于待机状态时,您可以使用遥控器上的 @/1 按钮将其打开。 如果系统接收到呼叫,待机模式将自动取消,系统将自动连接。 要关闭电源 打开通讯终端的前面板,将电源开关置于右侧的关闭位置 ( 。然后 a) 关闭视频会议其它设备的电源。 结束会议...
-
Seite 148: 显示帮助
显示帮助 按遥控器上的 HELP 按钮,屏幕上将显示帮助或帮助画面,这些帮助可 以指导您在监视器屏幕上进行大部分的操作。 要隐藏帮助指南,再次按 HELP 按钮。 显示帮助... -
Seite 149: 系统连接
系统连接 本节内容介绍了典型的系统连接。 注意 • 在开始任何连接之前,请确保关闭了所有设备。 • 在电源打开时不要连接 / 拔下会议电视终端摄像机电缆。这样做会严重损坏会 议电视终端摄像机或者会议电视终端处理器。 • 考虑到安全性,请不要将 100BASE-TX/10BASE-T 接口与电压超过额定值的 网络连接。 通过 LAN 的系统连接 PCSA-CG70/CG70P 会议电视终端摄像机 PCS-A1 外置麦克风 到 TERMINAL 会议电视终端摄像机电缆 * 到 MIC 1 到 VIDEO IN PCS-PG50/PG50P 会议电视终端处理器 到 到 100BASE-TX/ 到 VIDEO AUDIO 10BASE-T MONITOR PCS-AC19V6... -
Seite 150: 通过 Isdn 的系统连接
通过 ISDN 的系统连接 注意 • 在电源打开时不要连接 / 拔下会议电视终端摄像机电缆或者连接电缆。这样做 会严重损坏会议电视终端摄像机、会议电视终端处理器或者 ISDN 模块。 • 当您第一次连接并使用 PCSA-B768S ISDN 模块时,会议电视终端处理器可能 会升级 ISDN 模块的软件。当监视器屏幕中显示升级信息时,请不要关闭会议 电视终端处理器。否则会导致系统出现故障。 PCSA-CG70/CG70P 会议电视终端摄像机 ISDN 设备 到 TERMINAL PCSA-B384S 到 ISDN 1-3 接口电缆 到 TERMINAL ( 随 ISDN 设备附带 ) 会议电 视终端 摄像机... -
Seite 151: 规格说明
SNMP PAL (PCS-G50P) 可以连接两种彩色制式 遥控 远程摄像机控制 静止图片 H.281 ( 符合 ITU-T 的建议 ) 像素 704 像素× 480 行 (PCS-G50) 数据传输 T.120 ( 符合 ITU-T 的建议 ) 704 像素× 576 行 (PCS-G50P) H.261 ( 建议 ITU-T) Annex. D 编码 一般参数 (4CIF) 19.5 V... - Seite 152 水平角度 6.6° 到 65° 大约 130 克 重量 100 ( 广角 ) 到 600 ( 远距 ) 毫米 拍摄距离 电源要求 12 V,由 PCS-G50/G50P 会议电 最小照明度 F 1.8/50 IRE 条件下 3.5 lux 视终端处理器或交流适配器 照明范围 3.5 lux 到 100 000 lux 提供...
- Seite 153 PCSA-B768S ISDN 模块 (可选) PCSA-M3G50 H.323 MCU 软件 (可选) 电源要求 19.5 V 0.5 A 电流 50 × 2.8 × 21.5 毫米 尺寸 5°C 到 35°C 工作温度 ( 宽 / 高 / 厚 ) 工作湿度 20% 到 80% 大约 4 克 重量...
- Seite 154 Se se verificarem interferências, entre em contacto com os serviços técnicos autorizados da Sony da sua zona. ADVERTÊNCIA...
-
Seite 155: Sobre Os Manuais Fornecidos
Leitura dos Manuais em Sobre os Manuais CD-ROM Fornecidos Vários manuais do sistema estão armazenados em formato PDF no CD-ROM PCS-G50/G50P Video Communication fornecido. Você será solicitado a usar o ® ®* System é fornecido com os seguintes Adobe Acrobat Reader ou o Adobe manuais, além deste Guia de Operação. - Seite 156 ..............................“IPELA” e são marcas comerciais da Sony Corporation. * Adobe e Acrobat são marcas comerciais da Adobe Systems, Incorporated. ** Windows é Windows NT são marcas comerciais registradas da U.S. Microsoft Corporation nos E.U.A. e em outros países.
- Seite 157 Índice Ligando o sistema ......6 Chamando uma parte remota .....7 Ajustando a imagem e o som ...10 Ajustando o zoom e o ângulo da câmera ......10 Ajustando o volume ....11 Encerrando a conferência ....12 Desconectando a linha ....12 Configurando o sistema para o modo de espera ....12 Exibindo a Ajuda ......14 Conexões do sistema ......15...
-
Seite 158: Ligando O Sistema
Ligando o sistema Ligue o monitor do TV. Ligue os outros equipamentos a serem usados para a videoconferência. Coloque o interruptor de alimentação no lado direito do Terminal de Comunicação na posição ligado ( Unidade de Câmera Terminal de Comunicação Indicadores POWER (Luz verde) Interruptor de alimentação... -
Seite 159: Chamando Uma Parte Remota
Chamando uma parte remota Este guia mostra a você como inserir um número de telefone ou endereço IP no menu Ativador e chamar uma parte remota. Selecione uma interface de linha na lista drop-down (suspensa) na parte inferior do menu Ativador. Utilize o V, v, B ou o botão b no controle remoto para selecionar “Linha I/F”... - Seite 160 AUTO: A linha para conexão é automaticamente selecionada, baseada no número inserido na caixa de texto. IP: Conecta-se a um sistema de videoconferência no local remoto através de uma LAN. ISDN: Conecta-se a um sistema de videoconferência no local remoto através de uma linha ISDN.
- Seite 161 Selecione “Discar”, ou pressione o botão CONNECT/DISCONNECT ) no controle remoto para chamar a parte remota. Utilize o botão V, no controle remoto para selecionar “Discar”, a seguir pressione o botão PUSH ENTER. Ou pressione o botão CONNECT/ DISCONNECT ( ) no controle remoto e o sistema inicia a discagem sendo exibido “Discando ”.
-
Seite 162: Ajustando A Imagem E O Som
Ajustando a imagem e o som Ajustando o zoom e o ângulo da câmera Para ajustar quando não estiver em comunicação Use o botão b no Controle Remoto para selecionar a imagem no menu de inicialização, em seguida, pressione o botão PUSH ENTER. Pressione o botão b para ajustar o ângulo da câmera e o botão ZOOM T/W para ajustar o zoom. -
Seite 163: Ajustando O Volume
Para ajustar quando estiver em comunicação Ajuste o ângulo da imagem e do zoom no ambiente local com os botões b e ZOOM T/W no Controle Remoto. Consulte as Instruções de Operação para ajustar o ângulo da câmera da imagem e ajustar o zoom no local remoto. Ajustando o volume Para ajustar o volume do som recebido do local remoto Pressione o botão VOLUME +/–... -
Seite 164: Encerrando A Conferência
Encerrando a conferência Desconectando a linha Pressione o botão CONNECT/DISCONNECT ( ) no Controle Remoto. A mensagem “Desconectar?” é exibida na tela do monitor. Pressione o botão no Controle Remoto para selecionar “OK”, em seguida, pressione o botão PUSH ENTER ou o botão CONNECT/ DISCONNECT ( A linha é... - Seite 165 Pressione o botão no Controle Remoto para selecionar “OK”, em seguida, pressione o botão PUSH ENTER ou o botão O sistema entra no modo de espera e o indicador POWER no Terminal de Comunicação acende em laranja. Indicador POWER (apagado.) Indicador POWER (aceso em laranja.) botão botões...
-
Seite 166: Exibindo A Ajuda
Exibindo a Ajuda Pressionar o botão HELP no Controle Remoto exibe um balão ou uma tela de ajuda para orientar a maioria das operações na tela do monitor. Para ocultar a guia da ajuda, pressione o botão HELP novamente. Exibindo a Ajuda... -
Seite 167: Conexões Do Sistema
Conexões do sistema Esta seção descreve as conexões de sistema típicas. Notas • Desligue todo o equipamento antes de fazer conexões. • Não conecte/desconecte o cabo da câmera com a energia ligada. Caso contrário, a Unidade de Câmera ou o Terminal de Comunicação poderão ser danificados. •... -
Seite 168: Conexão Do Sistema Via Isdn
Conexão do sistema via ISDN Notas • Não conecte/desconecte o cabo da câmera ou o cabo da interface com a energia ligada. Caso contrário, a Unidade de Câmera, o Terminal de Comunicação ou a Unidade ISDN poderão ser danificados. • Usado com a Unidade ISDN PCSA-B768S pela primeira vez, o Terminal de Comunicação talvez atualize o software da Unidade ISDN. -
Seite 169: Características Técnicas
LSD 1,2 Kbps, 4,8 Kbps, 6,4 Kbps MLP 6,4 Kbps, 24 Kbps, 32 Kbps Imagem congelada HMLP 62,4 Kbps, 64 Kbps, Pixels 704 pixels × 480 linhas (PCS-G50) 128 Kbps 704 pixels × 576 linhas (PCS-G50P) Suporte ao protocolo LAN Codificação Anexo H.261 (Recomendação... - Seite 170 Geral Distância focal 100 (WIDE) a 600 (TELE) mm Requisitos de energia Iluminação mínima 19,5 V 3,5 lux a F 1,8/50 IRE Atuais Alcance da iluminação Temperatura de operação 3,5 lux a 100 000 lux 5°C a 35°C Resolução horizontal Umidade de operação 470 linhas de TV (PCSA-CG70) 20% a 80%...
- Seite 171 Atuais 0,5 A Requisitos de energia Temperatura de operação 12 V, equipado com o Terminal de 5°C a 35°C comunicação PCS-G50/G50P Umidade de operação ou adaptador AC 20% a 80% Consumo de energia Temperatura de armazenamento menos de 2,5 W (por microfone) –20°C a +60°C...
- Seite 172 Software PCSA-M0G50 H.320 MCU (opcional) Dimensões 50 × 2,8 × 21,5 mm (l/a/p) Peso Aprox. 4 g Acessórios fornecidos Selo do número de série (1) Instruções de operação (1) Software PCSA-M3G50 H.323 MCU (opcional) Dimensões 50 × 2,8 × 21,5 mm (l/a/p) Peso Aprox.
- Seite 173 Sony Corporation...