Inhaltsverzeichnis
Werbung
Verfügbare Sprachen
Verfügbare Sprachen
Quicklinks
Werbung
Kapitel
Inhaltsverzeichnis

Inhaltszusammenfassung für Lovibond Aqualytic AL10Con
- Seite 1 AL10Con Conductivity Meter - Instruction Manual...
-
Seite 2: Inhaltsverzeichnis
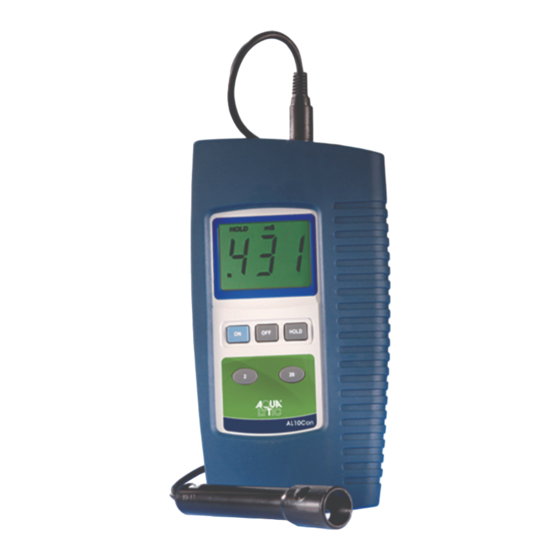
Qualitativ hochwertiges, kompaktes Gerät für einfachste Handhabung. Spritzwasser geschützte Folientastatur, einfach abzulesendes LC-Display und abriebfeste Funktionstasten. Lieferumfang Bitte überprüfen Sie direkt nach dem Auspacken den Lieferumfang. Es sollten folgende Bestandteile enthalten sein: • Lovibond AL Con10 ® • Lovibond AL Leitfähigkeits-Elektrode ®... -
Seite 3: Technische Daten
2. Technische Daten Anzeige LCD, 21,5 mm, Höhe der Digitalanzeige höchster Anzeigewert 1999 Messbereich 2 Bereiche 0 - 1,999 mS/cm ; 0 - 19,99 mS/cm Auflösung 0,001 bei 0 - 1,999 mS/cm 0,01 bei 0 - 19,99 mS/cm Genauigkeit 3 % F.S. ± 1 digit, 23 ± 5°C Messbereichs- Anzeige zeigt „1“... -
Seite 4: Messungen Durchführen
Messungen durchführen 1. Leitfähigkeits-Elektrode (Figure 1, 12) mit dem Elektrodenanschluss verbinden (Abb. 1, 7). 2. Gerät mit der ON-Taste einschalten. 3. Bereich 2 mS/cm oder 20 mS/cm mit der entsprechenden Taste auswählen (Abb. 1, 5 oder 6). 4. Leitfähigkeits-Elektrode (Abb. 1, 11) in die Probe eintauchen. Elektrode mehrere Male hin und her bewegen um Luftbläschen von der Elektrode zu entfernen. -
Seite 5: Zubehör
den Batteriefachdeckel an der Rückseite des Gerätes lösen (Abb. 1, 9). 3. Batterie entfernen und Ersatzbatterie einsetzen (006P DC 9V.) Anschließend Batteriefach- deckel wieder einsetzen. 7. Zubehör 722250 Kalibrier-Lösung 1413 μS/cm, 500 mL, rückführbar auf N.I.S.T. 724400 Leitfähigkeitselektrode (K = 1,0), 2-Pol. Graphit AL 10... -
Seite 6: General Description
• High quality, compact unit with a separate electrode that is designed for easy operation • Water resistant front panel with easy to read LCD display and rubberised function keys Unpacking Please check that the shipment includes the following items: • Lovibond AL Con10 ® • Lovibond AL Conductivity Sensor ®... -
Seite 7: Specification
2. Specification Display LCD, 21.5 mm (0.7“) digit height Maximum display count no. 1999 Measurement Range 2 ranges: 0 - 1.999 mS/cm, 0 - 19.99 mS/cm Resolution 0.001 mS/cm for 0 - 1.999 mS/cm range 0.01 mS/cm for 0 - 19.99 mS/cm range Accuracy (23 ±... -
Seite 8: Taking Measurements
Taking Measurements 1. Connect the Conductivity Electrode (Figure 1, 12) to the Electrode. Input Socket (Figure 1, 7). 2. Power on the instrument by pressing the Power ON Button. 3. Select the 2 mS/cm or 20 mS/cm range by pressing the appropriate range button (Figure 1, 5 or 6). -
Seite 9: Accessories
However, accurate measurements may still be made for several hours after the “Low Bat- tery” indicator first appears. 2. Remove the protective cover before replacing the battery. To replace the battery, remove the Battery Compartment Cover (Figure 1, 9) on the rear of the meter. 3. -
Seite 10: Description De L'appareil
Contenu de la livraison Veuillez vérifier le contenu directement après avoir déballé l’appareil Vous devez y trouver les éléments suivants: • AL Con10 Lovibond ® • Electrode de conductivité Lovibond ® • Pile 9V • Boîtier de protection • 7 visses •... -
Seite 11: Données Techniques
2. Données techniques Affichage : LCD, hauteur de l’écran digital : 21,5 mm, valeur maximale affichable : 1999 Plage de mesure : 2 plages 0 – 1,999 mS/cm ; 0 – 19,99 mS/cm Résolution: 0,001 pour 0 – 1,999 mS/cm 0,01 pour 0 –... -
Seite 12: Mesure
Mesure Relier l’électrode de conductivité (schéma 1, 12) au raccordement (schéma 1, 7). Mettre l’appareil en marche avec la touche ON. Choisir la plage 2 mS/cm ou 20 mS/cm avec la touche correspondante. Plonger l’électrode de conductivité (schéma 1, 11) dans l’échantillon. Faire des mouvements de va et vient avec l’électrode de façon à... -
Seite 13: Accessories
pendant effectuer des mesures exactes encore pendant plusieurs heures après l’apparition de ce signe. 2. Enlever le boîtier de protection avant de changer la pile. Ouvrir leprotège-pile derrière l’appareil pour changer la pile (schéma 1, 9). 3. Enlever la pile, la remplacer par la pile de rechange (006P DC 9V) et remettre le protège-pile. Accessoires 722250 Solution de calibrage 1413 μS/cm, 500 ml, selon N.I.S.T. - Seite 14 AL 10...
- Seite 15 AL 10...
- Seite 16 Tintometer GmbH, Division Aqualytic ® Schleefstraße 8-12 44287 Dortmund Tel.: (+49) (0)2 31 / 9 45 10-755 Fax: (+49) (0)2 31 / 9 45 10-750 sales@aqualytic.de Technical changes without notice www.aqualytic.de Printed in Germany 08/19 Germany No.: 00 38 59 15...


