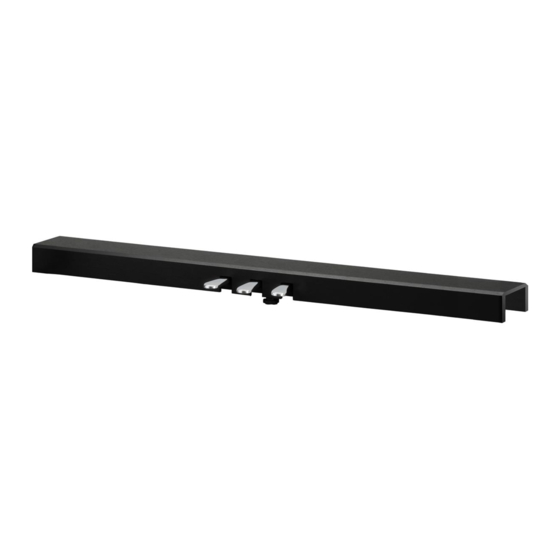
Werbung
Verfügbare Sprachen
Verfügbare Sprachen
Quicklinks
English
Deutsch
Français
F-302 Assembly Instructions
F-302 Aufbauanleitung
Español
Instructions d'assemblage du F-302
Instrucciones de montaje del F-302
Istruzioni di assemblaggio F-302
Italiano
Инструкция по сборке педального F-302
F-302
ペダルユニッ ト組立説明書
РУССКИЙ Я3ЫК
日本語
Werbung

Inhaltszusammenfassung für Kawai F-302
- Seite 1 English Deutsch Français F-302 Assembly Instructions F-302 Aufbauanleitung Español Instructions d’assemblage du F-302 Instrucciones de montaje del F-302 Istruzioni di assemblaggio F-302 Italiano Инструкция по сборке педального F-302 F-302 ペダルユニッ ト組立説明書 РУССКИЙ Я3ЫК 日本語...
- Seite 2 F-302 Assembly Instructions • Do not use this product for any purpose other than its intended use as a piano pedal unit. • At the fi nal stage of assembly, ensure that all screws are fi rmly tightened. • Do not drop this product or subject it to strong impact.
- Seite 3 3. Mounting the digital piano onto the stand 4. Attaching the digital piano to the stand (HM-5) (HM-5) Place the digital piano so that the screw holes on the Firmly tighten and fi x the four knobs attached to the HM-5 bottom of the digital piano and the holes on the brackets of stand.
- Seite 4 F-302 Aufbauanleitung • Benutzen Sie dieses Produkt ausschließlich als Pedaleinheit für das Digitalpiano. • Nach dem Zusammenbau aller Teile prüfen Sie bitte erneut, ob alle Schrauben und Verbindungen fest sind. • Lassen Sie dieses Produkt nicht fallen und setzen Sie es nicht starken Stößen aus.
- Seite 5 3. Positionierung des Digitalpianos auf dem 4. Befestigung des Digitalpianos auf dem Ständer (HM-5) Ständer (HM-5) Positionieren Sie das Digitalpiano so, dass die Schraubenlöcher Ziehen Sie die vier Drehregler, die am Ständer HM-5 befestigt auf der Unterseite des Digitalpianos und die Löcher an den sind, fest an und fi xieren Sie sie.
- Seite 6 Instructions d’assemblage du F-302 • N’utilisez pas ce produit à des fi ns autres que celles spécifi ées pour les pédaliers de piano. • À la fi n du montage, veillez à ce que toutes les vis soient fermement serrées.
- Seite 7 3. Montage du piano numérique sur le stand 4. Fixation du piano numérique au stand (HM-5) (HM-5) Placez le piano numérique de sorte que les trous de vis au Serrez fermement et fi xez les quatre boutons rotatifs au bas du piano numérique correspondent aux trous sur les stand HM-5.
- Seite 8 Instrucciones de montaje del F-302 • No utilice este producto para ningún otro fi n además del previsto como una unidad de pedal de piano. • En la etapa fi nal de montaje, asegúrese de que todos los tornillos estén bien apretados.
- Seite 9 3. Colocación del piano digital en el soporte 4. Conexión del piano digital a la base (HM-5) (HM-5) Coloque el piano digital de modo que los orifi cios de Fije y apriete con fi rmeza las cuatro perillas en el soporte tornillos en la parte inferior del piano digital y los orifi cios HM-5.
- Seite 10 Istruzioni di assemblaggio F-302 • Questo prodotto deve essere utilizzato unicamente come pedale per pianoforte. • Alla fi ne dell’assemblaggio assicurarsi che tutte le viti siano ben fi ssate. • Non lasciare cadere questo prodotto né sottoporlo a forti impatti.
- Seite 11 3. Montare il pianoforte digitale sul 4. Fissare il pianoforte digitale al supporto supporto (HM-5) (HM-5) Collocare il piano digitale in modo tale che i fori delle viti Stringere saldamente e fi ssare le quattro manopole apposte nella parte inferiore del piano digitale e i fori sulle staff e del sul supporto HM-5.
-
Seite 12: Комплект Поставки
• Перемещая пианино, не двигайте его по полу, а приподнимайте. Комплект поставки Перед сборкой педального блока F-302 убедитесь в наличии всех перечисленных деталей. Для сборки педального блока вам понадобится крестовая отвертка (в комплект не входит). Винт (6 x 60 мм) x 4 шт. - Seite 13 3. Установка цифрового пианино на 4. Закрепление цифрового пианино на стойку (HM-5) стойке (HM-5) Разместите цифровое пианино таким образом, чтобы Плотно заверните и зафиксируйте пианино на стойке крепежные отверстия на его нижней стороне совпали с HM-5 четырьмя фиксаторами с ручкой. отверстиями...
- Seite 14 F-302ペダルユニッ ト組立説明書 ・ 本製品を、 ピア ノペダルユニッ トと しての使用以外の目的で使用しないでく ださい。 ・ 組み立て終わったら、 すべてのねじがしっかり締まっているかを確認してく ださい。 ・ 本製品を落と したり、 強い衝撃を加えたり しないでく ださい。 ・ 本製品に乗ったり、 無理な力をかけたり しないでく ださい。 ・ 組立ねじは、 ゆるみを定期的に点検し、 必要に応じて締め直してく ださい。 ・ アジャスターをしっかり床につけないとペダル土台が破損する恐れがあります。 ・ ピア ノを移動させる際には引きずらないよう、 必ず持ち上げて移動させてく ださい。 同梱されている部品 組み立てる前に、 部品がそろっていることを確認してください。 また、 プラスドライバーをご用意ください。...
- Seite 15 3. デジタルピア ノをスタンド (HM-5) に載せる 4. デジタルピア ノをスタンド (HM-5) に取り付ける デジタルピア ノ底面のネジ穴とスタンド (HM-5) の金具の スタンド (HM-5) に付属している4本のノブをきつく締め 穴の位置が合うように載せます。 て固定してください。 5. ペダルケーブルを接続する 5- 1 ペダルボードの背面から伸ばしたペダルケーブルを、 デジタルピア ノのペダル端子に接続します。 5- 2 スタンド (HM-5) に付いているケーブル固定金具でケ ーブルを固定します。 6. アジャスターを調節する アジャスターを床にぴったり付く まで回します。 * 床の材質、 状態によってはペダル踏み込み時に床と の間で摩擦音が発生することがあります。 その際は フェルトやカーペットなどを床とアジャスターの間...
- Seite 16 F-302 Assembly Instructions 3000003389 SP00000375 R101 OW1137-S2009 Copyright © 2020 Kawai Musical Instruments Mfg. Co.,Ltd. All Rights Reserved. Printed in Indonesia...


