Inhaltsverzeichnis
Werbung
Verfügbare Sprachen
Verfügbare Sprachen
Quicklinks
Werbung
Kapitel
Inhaltsverzeichnis
Fehlerbehebung

Verwandte Anleitungen für Progress PBD34102B


Inhaltszusammenfassung für Progress PBD34102B
- Seite 1 User Manual Benutzerinformation Oven Backofen PBD34102B PBD34102X...
-
Seite 2: Inhaltsverzeichnis
2 Progress CONTENTS Safety information Clock functions Safety instructions Using the accessories Installation Additional functions Product description Hints and tips Control panel Care and cleaning Before first use Troubleshooting Daily use Energy efficiency Subject to change without notice. SAFETY INFORMATION Before the installation and use of the appliance, carefully read the supplied instructions. -
Seite 3: General Safety
Progress 3 Children shall not carry out cleaning and user maintenance • of the appliance without supervision. General Safety Only a qualified person must install this appliance and • replace the cable. WARNING: The appliance and its accessible parts •... -
Seite 4: Electrical Connection
4 Progress Electrical connection • Install the appliance in a safe and suitable place that meets installation WARNING! Risk of fire and requirements. electric shock. • Keep the minimum distance from other appliances and units. • All electrical connections should be •... - Seite 5 Progress 5 • Do not let sparks or open flames to come in contact with the appliance Cable types applicable for installation or when you open the door. replacement for Europe: • Do not put flammable products or items H07 RN-F, H05 RN-F, H05 RRF, H05 VV-...
-
Seite 6: Internal Lighting
6 Progress • Make sure the appliance is cold. There appliances only. Do not use it for house is the risk that the glass panels can lighting. break. • Before replacing the lamp, disconnect • Replace immediately the door glass the appliance from the power supply. - Seite 7 Progress 7 Building In min. 550 min. 560 min. 550 min. 560 Securing the oven to the cabinet...
-
Seite 8: Product Description
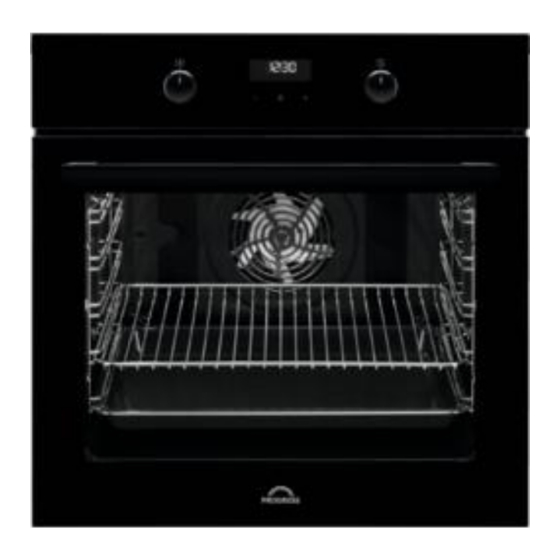
8 Progress PRODUCT DESCRIPTION General overview Control panel Knob for the heating functions Power lamp / symbol Display Control knob (for the temperature) Temperature indicator / symbol Heating element Lamp Cavity embossment - Aqua cleaning container Shelf support, removable Shelf positions Accessories For cakes and biscuits. -
Seite 9: Before First Use
Progress 9 BEFORE FIRST USE WARNING! Refer to Safety For function: True Fan Cooking chapters. PLUS refer to "Daily use" chapter, Setting the function: To set the Time of day refer to True Fan Cooking PLUS". "Clock functions" chapter. 1. Set the function . - Seite 10 10 Progress Oven func‐ Application Oven func‐ Application tion tion This function is designed To bake pizza. To make to save energy during intensive browning and a cooking. For the cooking crispy bottom. Moist Fan Pizza Func‐ instructions refer to...
-
Seite 11: Clock Functions
Progress 11 Do not open the oven door during WARNING! Make sure that cooking. the oven is cold before you 6. Turn the knob for the heating functions remove the remaining water to the off position to turn off the oven. -
Seite 12: Using The Accessories
12 Progress Setting the TIME DELAY 2. Press to set the necessary time. 1. Set an oven function and temperature. The Minute Minder starts automatically 2. Press again and again until after 5 seconds. starts to flash. 3. When the set time ends, an acoustic 3. -
Seite 13: Additional Functions
Progress 13 Small indentation at the top increase safety. The indentations are also anti-tip devices. The high rim around the shelf prevents cookware from slipping of the shelf. ADDITIONAL FUNCTIONS Cooling fan dangerous overheating. To prevent this, the oven has a safety thermostat which When the oven operates, the cooling fan interrupts the power supply. - Seite 14 14 Progress condensation, add water each time after it setting, cooking time, etc.) for your dries up. cookware, recipes and quantities when you use this appliance. Cooking times Cooking times depend on the type of food, True Fan Cooking PLUS its consistency, and volume.
-
Seite 15: Baking And Roasting
Progress 15 Use a glass baking dish. ROASTING ROASTING (°C) (min) (°C) (min) Chicken 60 - 80 Roast beef 50 - 60 Roast pork 65 - 80 Baking and roasting CAKES Conventional True Fan Cooking Cooking (min) (°C) (°C) Whisked rec‐... - Seite 16 16 Progress CAKES Conventional True Fan Cooking Cooking (min) (°C) (°C) Muffins, two 140 - 2 and 4 25 - 35 Baking levels tray Muffins, three 140 - 1, 3 and 5 30 - 45 Baking levels tray Biscuits 140 -...
- Seite 17 Progress 17 BREAD AND PIZZA Conventional Cook‐ True Fan Cooking (min) (°C) (°C) White bread, 1 - 60 - 70 2 pieces, 0.5 kg each Rye bread, pre‐ 30 - 45 Bread tin heating is not needed Bread rolls, 6 - 8...
- Seite 18 18 Progress MEAT Conventional True Fan Cooking Cooking (min) (°C) (°C) Beef 50 - 70 Pork 90 - 120 Veal 90 - 120 English roast beef, rare 50 - 60 English roast beef, medium 60 - 70 English roast beef, well done...
- Seite 19 Progress 19 FISH Conventional True Fan Cook‐ Cooking (min) (°C) (°C) Trout / Sea bream, 3 - 4 fish 40 - 55 Tuna / Salmon, 4 - 6 fillets 35 - 60 Grill Preheat the empty oven. Use the fourth shelf position.
- Seite 20 20 Progress BEEF LAMB (°C) (min) (°C) (min) Roast beef or fil‐ 190 - 5 - 6 Lamb leg / Roast 150 - 100 - let, rare lamb, 1 - 1.5 kg Roast beef or fil‐ 180 - 6 - 8...
- Seite 21 Progress 21 Dehydrating - True Fan Cooking Cover trays with grease proof paper or baking parchment. VEGETABLES For a better result, stop the oven halfway through the drying time, open the door and let it cool down for one night to (°C)
- Seite 22 22 Progress (°C) (min) Sweet rolls, 12 baking tray or dripping 40 - 50 pieces Rolls, 9 pieces baking tray or dripping 35 - 45 Pizza, frozen, wire shelf 45 - 55 0.35 kg Swiss roll baking tray or dripping...
- Seite 23 Progress 23 (°C) (min) Tartlets, 8 baking tray or dripping 30 - 40 pieces Vegetables, baking tray or dripping 35 - 45 poached, 0.4 kg Vegetarian pizza pan on wire shelf 35 - 45 omelette Mediterranean baking tray or dripping 35 - 45 vegetables, 0.7...
- Seite 24 24 Progress (°C) (min) Sponge Conven‐ Wire 40 - 50 Preheat the oven cake, tional shelf for 10 minutes. cake Cooking mould Ø26 cm Sponge True Fan Wire 40 - 50 Preheat the oven cake, Cooking shelf for 10 minutes.
-
Seite 25: Care And Cleaning
Progress 25 CARE AND CLEANING WARNING! Refer to Safety chapters. Notes on cleaning Clean the front of the oven with a soft cloth with warm water and a mild cleaning agent. To clean metal surfaces, use a dedicated cleaning agent. -
Seite 26: Aqua Clean
26 Progress the oven cavity. Do not use the oven if the WARNING! Make sure that door gasket is damaged. Contact an the oven is cold before you Authorised Service Centre. touch it. There is a risk of burns. To clean the door gasket, refer to the general information about cleaning. -
Seite 27: Replacing The Lamp
Progress 27 7. Hold the door glass panel by its top edge and carefully pull it out. Make sure the glass slides out of the supports completely. 8. Clean the glass panels with water and soap. Dry the glass panels carefully. -
Seite 28: Troubleshooting
28 Progress 3. Replace the lamp with a suitable 300 The back lamp °C heat-resistant lamp. 4. Install the glass cover. 1. Turn the lamp glass cover to remove it. 2. Clean the glass cover. TROUBLESHOOTING WARNING! Refer to Safety chapters. -
Seite 29: Service Data
Product number (PNC) ......... Serial number (S.N.) ......... ENERGY EFFICIENCY Product Information and Product Information Sheet* Supplier's name Progress PBD34102B 949499317 Model identification PBD34102X 949499316 Energy Efficiency Index 95.3 Energy efficiency class Energy consumption with a standard load, conventional 0.93 kWh/cycle... -
Seite 30: Energy Saving
30 Progress Number of cavities Heat source Electricity Volume 72 l Type of oven Built-In Oven PBD34102B 28.1 kg Mass PBD34102X 28.2 kg * For European Union according to EU Regulations 65/2014 and 66/2014. For Republic of Belarus according to STB 2478-2017, Appendix G; STB 2477-2017, Annexes A and B. -
Seite 31: Sicherheit Von Kindern Und Schutzbedürftigen Personen
Progress 31 INHALTSVERZEICHNIS Sicherheitshinweise Uhrfunktionen Sicherheitsanweisungen Verwendung des Zubehörs Montage Zusatzfunktionen Gerätebeschreibung Tipps und Hinweise Bedienfeld Reinigung und Pflege Vor der ersten Inbetriebnahme Fehlersuche Täglicher Gebrauch Energieeffizienz Änderungen vorbehalten. SICHERHEITSHINWEISE Lesen Sie vor der Montage und dem Gebrauch des Geräts zuerst die Bedienungsanleitung. -
Seite 32: Allgemeine Sicherheit
32 Progress Halten Sie Kinder und Haustiere während des Betriebs • oder der Abkühlphase vom Gerät fern. Die zugänglichen Geräteteile werden beim Betrieb sehr heiß. Falls Ihr Gerät mit einer Kindersicherung ausgestattet ist, • empfehlen wir, diese einzuschalten. Kinder dürfen keine Reinigung und Wartung ohne •... -
Seite 33: Sicherheitsanweisungen
Progress 33 SICHERHEITSANWEISUNGEN Montage Breite der Gerätevor‐ 595 mm WARNUNG! Die Montage des derseite Geräts darf nur von einer Breite der Geräte‐ 559 mm qualifizierten Fachkraft durchgeführt werden. rückseite Gerätetiefe 569 mm • Entfernen Sie das gesamte Verpackungsmaterial. Geräteeinbautiefe 548 mm •... -
Seite 34: Verwendung
34 Progress • Achten Sie darauf, dass das Netzkabel die Gerätetür oder die Nische unter Gesamtleistung Kabelquerschnitt dem Gerät nicht berührt oder in ihre (mm²) Nähe gelangt, insbesondere wenn das Maximal 1380 3 x 0.75 Gerät eingeschaltet oder die Tür heiß... -
Seite 35: Innenbeleuchtung
Progress 35 in das Gerät und stellen Sie solche Steckdose, bevor Reinigungsarbeiten nicht in die Nähe oder auf das Gerät. durchgeführt werden. • Vergewissern Sie sich, dass das Gerät WARNUNG! Risiko von abgekühlt ist. Es besteht die Gefahr, Schäden am Gerät. -
Seite 36: Entsorgung
36 Progress Entsorgung • Entfernen Sie das Türschloss, um zu verhindern, dass sich Kinder oder WARNUNG! Verletzungs- und Haustiere im Gerät einschließen. Erstickungsgefahr. • Trennen Sie das Gerät von der Stromversorgung. • Schneiden Sie das Netzkabel in der Nähe des Geräts ab, und entsorgen Sie es. -
Seite 37: Befestigung Des Ofens Am Möbel
Progress 37 min. 550 min. 560 Befestigung des Ofens am Möbel... -
Seite 38: Gerätebeschreibung
38 Progress GERÄTEBESCHREIBUNG Gesamtansicht Bedienfeld Einstellknopf für die Ofenfunktionen Betriebskontrolllampe/-symbol Display Einstellknopf (für die Temperatur) Temperaturanzeige/-symbol Heizelement Backofenbeleuchtung Ventilator Garraumvertiefung - Behälter für die Aqua-Reinigungsfunktion Einhängegitter, herausnehmbar Einschubebenen Zubehör Für Kuchen und Plätzchen. Zum Backen und Braten oder zum • Kombirost Auffangen von austretendem Fett. -
Seite 39: Vor Der Ersten Inbetriebnahme
Progress 39 VOR DER ERSTEN INBETRIEBNAHME 1. Stellen Sie die Funktion ein. Stellen WARNUNG! Siehe Kapitel Sie die Höchsttemperatur ein. Sicherheitshinweise. 2. Lassen Sie den Backofen 1 Stunde Einstellen der Tageszeit siehe lang eingeschaltet. Kapitel „Uhrfunktionen“. 3. Stellen Sie die Funktion ein. - Seite 40 40 Progress Ofenfunkti‐ Anwendung Ofenfunkti‐ Anwendung Zum Einschalten der Diese Funktion ist entwi‐ Backofenlampe ohne ckelt worden, um wäh‐ Garfunktion. rend des Garvorgangs Backofenbe‐ Feuchte Um‐ Energie zu sparen. Die leuchtung luft Kochanleitungen finden Zum Hinzufügen von Sie im Kapitel „Hinweise Feuchtigkeit beim Garen.
-
Seite 41: Einstellen Der Funktion:heißluft Mit Dampf
Progress 41 Ofenfunkti‐ Anwendung Zum Braten größerer Fleischstücke oder von Geflügel mit Knochen auf Heißluftgrillen einer Einschubebene. Die maximale Kapazität der Zum Gratinieren und Garraumvertiefung beträgt 250 ml. Überbacken. Füllen Sie die Garraumvertiefung nur Zum Grillen flacher Le‐ bei kaltem Backofen mit Wasser. -
Seite 42: Einstellen Der Zeitvorwahl
42 Progress Uhrfunktion Anwendung ENDE Einstellen, wann das Gerät ausgeschaltet werden soll. ZEITVORWAHL Kombinieren der Funktionen DAUER und ENDE. KURZZEIT-WE‐ Zum Einstellen einer Countdown-Zeit. Diese Funktion hat kei‐ CKER ne Auswirkung auf den Gerätebetrieb. Sie können den KURZZEIT-WECKER jederzeit einstellen, auch wenn das Gerät ausgeschaltet ist. -
Seite 43: Einstellen Des Kurzzeit
Progress 43 7. Das Gerät wird automatisch 3. Nach Ablauf der eingestellten Zeit ausgeschaltet. Drücken Sie eine ertönt ein akustisches Signal. Drücken beliebige Taste, um das Signal Sie eine beliebige Taste, um das abzustellen. akustische Signal abzustellen. 8. Drehen Sie den Backofen- 4. -
Seite 44: Zusatzfunktionen
44 Progress Die kleine Einkerbung auf der Oberseite erhöht die Sicherheit. Diese Einkerbungen dienen auch als Kippsicherung. Durch den umlaufend erhöhten Rand des Rosts ist das Kochgeschirr gegen Abrutschen vom Rost gesichert. ZUSATZFUNKTIONEN Kühlgebläse gefährlichen Überhitzung führen. Um dies zu verhindern, ist der Backofen mit einem... -
Seite 45: Heißluft Mit Dampf
Progress 45 Lassen Sie das Fleisch vor dem Beobachten Sie den Garfortschritt. Finden Anschneiden etwa 15 Minuten ruhen, Sie heraus, welche Geräteeinstellungen damit der Fleischsaft nicht ausläuft. (Garstufe, Gardauer, usw.) für Ihr Kochgeschirr, Ihre Rezepte und die von Um die Rauchbildung beim Braten im... -
Seite 46: Backen Und Braten
46 Progress 200 ml Wasser verwenden. Verwenden Sie eine Backform aus Glas. SPEISEN AUFWÄRMEN BRATEN (Min.) Brot/Brötchen 10 - 20 (°C) (Min.) Brot 15 - 25 Roastbeef 50 - 60 Focaccia 15 - 25 Hähnchen 60 - 80 Fleisch 15 - 25 Schweine‐... - Seite 47 Progress 47 KUCHEN Ober-/Unterhitze Heißluft (Min.) (°C) (°C) Christstollen, 90 - Kuchen‐ Heizen Sie form, Ø den leeren 20 cm Backofen vor Rosinenku‐ 50 - 60 Brotform chen, Heizen Sie den lee‐ ren Backofen Muffins 140 - 20 - 30 Back‐...
- Seite 48 48 Progress KUCHEN Ober-/Unterhitze Heißluft (Min.) (°C) (°C) Eclairs, zwei 2 und 4 35 - 45 Back‐ Ebenen blech Törtchen 45 - 70 Kuchen‐ form, Ø 20 cm Üppiger 110 - Kuchen‐ Obstkuchen form, Ø 24 cm Leeren Backofen vorheizen.
- Seite 49 Progress 49 FLANS Ober-/Unterhitze Heißluft (Min.) (°C) (°C) Nudelauflauf, Vorheizen 40 - 50 ist nicht erforderlich Gemüseauflauf, Vorhei‐ 45 - 60 zen ist nicht erforderlich Quiche 50 - 60 Lasagne 180 - 190 180 - 190 25 - 40 Cannelloni...
- Seite 50 50 Progress FLEISCH Ober-/Unterhitze Heißluft (Min.) (°C) (°C) Schweineschulter, mit 120 - 150 Schwarte Schweinshaxe, 2 Stück 100 - 120 Lammkeule 110 - 130 Hähnchen, ganz 70 - 85 Pute, ganz 210 - 240 Ente, ganz 120 - 150 Gans, ganz 150 - 200 Kaninchen, in Stücke ge‐...
-
Seite 51: Heißluftgrillen
Progress 51 GRILL (kg) (Min.) (Min.) Erste Seite Zweite Seite Filetsteaks, 4 Stück 12 - 15 12 - 14 Rindersteak, 4 Stück 10 - 12 6 - 8 Würstchen, 8 12 - 15 10 - 12 Schweinekoteletts, 4 Stück 12 - 16 12 - 14 Hähnchen, halbiert, 2... -
Seite 52: Dörren - Heißluft
52 Progress SCHWEINEFLEISCH GEFLÜGEL (°C) (Min.) (°C) (Min.) Hackbraten, 0,75 160 - 50 - 60 Hähnchen, hal‐ 190 - 35 - 50 - 1 kg biert, je 0,4 - 0,5 Schweinshaxe, 150 - 90 - 120 vorgegart, 0,75 - Hähnchen, Pou‐... -
Seite 53: Feuchte Umluft - Empfohlenes Zubehör
Progress 53 GEMÜSE OBST (°C) (Std. (Std.) Aprikosen 8 - 10 Bohnen 60 - 70 6 - 8 Apfelscheiben 6 - 8 Paprika 60 - 70 5 - 6 Birnen 6 - 9 Suppengemüse 60 - 70 5 - 6... - Seite 54 54 Progress (°C) (Min.) Brötchen, süß, Backblech oder tiefes 40 - 50 12 Stück Blech Brötchen, 9 Backblech oder tiefes 35 - 45 Stück Blech Pizza, gefroren, Kombirost 45 - 55 0,35 kg Biskuitrolle Backblech oder tiefes 30 - 40...
-
Seite 55: Informationen Für Prüfinstitute
Progress 55 (°C) (Min.) Mürbeteigplätz‐ Backblech oder tiefes 40 - 50 chen, 20 Stück Blech Törtchen, 8 Backblech oder tiefes 30 - 40 Stück Blech Gemüse, po‐ Backblech oder tiefes 35 - 45 chiert, 0,4 kg Blech Vegetarisches Pizzapfanne auf Kom‐... - Seite 56 56 Progress (°C) (Min.) Apfelku‐ Heißluft Kombi‐ 70 - 90 chen, 2 rost Formen à Ø 20 Biskuit, Ober-/ Kombi‐ 40 - 50 Backofen 10 Ku‐ Unterhitze rost Min. vorheizen. chen‐ form Ø 26 cm Biskuit, Heißluft Kombi‐ 40 - 50 Backofen 10 Ku‐...
-
Seite 57: Reinigung Und Pflege
Progress 57 (°C) (Min.) Ham‐ Grill Kombi‐ Max. 20 - 30 Kombirost in die burger rost und vierte und Fett‐ Fett‐ pfanne in die Rind‐ pfanne dritte Einschub‐ fleisch, ebene des Back‐ 6 Stück, ofens einschie‐ 0,6 kg ben. Wenden Sie das Gargut nach der Hälfte der... -
Seite 58: Öfen Mit Edelstahl- Oder Aluminiumfront
58 Progress Öfen mit Edelstahl- oder Entfernen: Einhängegitter Aluminiumfront Nehmen Sie die Einhängegitter. Reinigen Sie die Backofentür nur mit VORSICHT! Vorsicht beim einem feuchten Tuch oder Schwamm. Herausnehmen der Trocknen Sie sie mit einem weichen Tuch Einhängegitter. 1. Ziehen Sie das Einhängegitter vorne Verwenden Sie keine Stahlwolle, Säuren... -
Seite 59: Aus- Und Einbauen Der Tür
Progress 59 WARNUNG! Vergewissern Sie sich, dass der Backofen kalt ist, bevor Sie ihn anfassen. Es besteht das Risiko von Verbrennungen. Aus- und Einbauen der Tür Die Backofentür ist mit zwei Glasscheiben ausgestattet. Die Backofentür und die innere Glasscheibe können zur Reinigung ausgebaut werden. -
Seite 60: Ersetzen Der Lampe
60 Progress 6. Ziehen Sie die Türabdeckung nach vorne, um sie abzunehmen. Ersetzen der Lampe 7. Halten Sie die Oberkante der Türglasscheibe fest und ziehen Sie sie WARNUNG! vorsichtig heraus. Achten Sie darauf, Stromschlaggefahr. dass die Glasscheiben vollständig aus Die Lampe kann heiß sein. - Seite 61 Progress 61 Was tun, wenn... Störung Mögliche Ursache Abhilfe Der Backofen heizt nicht. Der Backofen ist ausge‐ Schalten Sie den Backofen schaltet. ein. Der Backofen heizt nicht. Die Uhr ist nicht eingestellt. Stellen Sie die Uhr ein. Der Backofen heizt nicht.
-
Seite 62: Servicedaten
Wir empfehlen, hier folgende Daten zu notieren: Modell (MOD.) ......... Produktnummer (PNC) ......... Seriennummer (S.N.) ......... ENERGIEEFFIZIENZ Produktinformationen und Produktdatenblatt* Herstellername Progress PBD34102B 949499317 Modellidentifikation PBD34102X 949499316 Energieeffizienzindex 95.3 Energieeffizienzklasse Energieverbrauch bei Standardbeladung, Ober-/Unter‐ 0.93 kWh/Programm hitze Energieverbrauch bei Standardbeladung, Umluft 0.81 kWh/Programm Anzahl der Garräume... -
Seite 63: Energie Sparen
Progress 63 Fassungsvermögen 72 l Backofentyp Einbau-Backofen PBD34102B 28.1 kg Gewicht PBD34102X 28.2 kg * Für die Europäische Union gemäß EU-Richtlinien 65/2014 und 66/2014. Für die Republik Weißrussland gemäß STB 2478-2017, Anhang G; STB 2477-2017, Anlagen A und B Für die Ukraine gemäß 568/32020. - Seite 64 64 Progress Ihrer örtlichen Sammelstelle oder wenden Geräte mit diesem Symbol nicht mit Sie sich an Ihr Gemeindeamt. dem Hausmüll. Bringen Sie das Gerät zu...
- Seite 65 Progress 65...
- Seite 66 66 Progress...
- Seite 67 Progress 67...
- Seite 68 867355683-D-322019...