König+Neurath TALO.S Bedienungs- Und Montageanleitung
Vorschau ausblenden
Andere Handbücher für TALO.S:
- Montage- und bedienungsanleitung (24 Seiten) ,
- Montageanleitung (28 Seiten)
Inhaltsverzeichnis
Werbung
Verfügbare Sprachen
Verfügbare Sprachen
Werbung
Inhaltsverzeichnis

Verwandte Anleitungen für König+Neurath TALO.S


Inhaltszusammenfassung für König+Neurath TALO.S
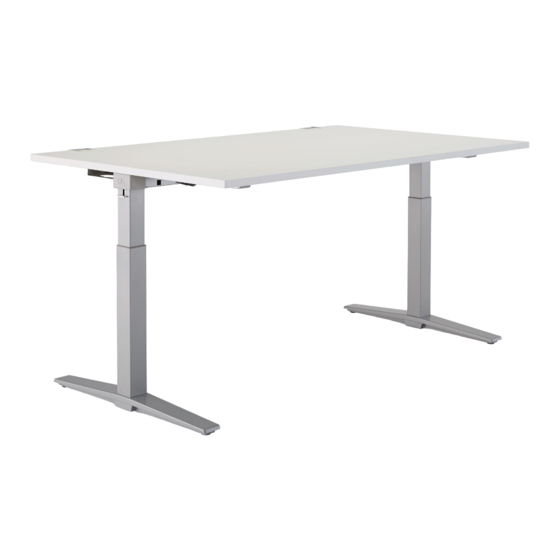
- Seite 1 TALO.S Motorisch höhenverstellbare Tische Vor Inbetriebnahme unbedingt lesen! Motorized height-adjustable desks Please read the following instructions carefully! Bedienungs- und Montageanleitung Operating and assembly instructions...
-
Seite 3: Inhaltsverzeichnis
Inhalt Vorwort Produktumfang, Anwendungsbereich, Transport Sicherheitshinweise Legende Technische Daten, Maße, Zubehör Schiebeplatte Platte mit Tischklappe Vertikale Kabelführung Steuerung, Montage des Handschalters 13-14 Montage Druckerablage Montage CPU-Halterung Montage Rückwandverblendung Montage Plattenansteckelement Montage Fly By-Paneel Montage Tischpaneel (in Aufbau– und Klemmadapter) Montage Reling Montage Anbauelemente (werkzeuglos) Montage Steckdosenbox Belastbarkeit Anbauelemente... -
Seite 5: Vorwort
Vorwort Sehr geehrte Kundin, sehr geehrter Kunde! Sie haben sich für ein Markenprodukt aus dem Hause König + Neurath ent- schieden. Damit dieses Möbel zu Ihrer Zufriedenheit funktioniert, lesen Sie bitte diese Anweisungen vor Inbetriebnahme aufmerksam durch und beach- ten Sie die angegebenen Sicherheitshinweise. -
Seite 6: Produktumfang, Anwendungsbereich, Transport
Produktumfang Diese Anleitung gilt für TALO.S Arbeitstische mit elektro- motorischer Höhenverstellung. Eine darstellende Auflis- tung finden Sie unter der Überschrift „Maße“. Anwendungsbereich Die TALO.S Motor-Tische sind Arbeitstische, bzw. Bild- schirmarbeitstische für sitzende und stehende Tätigkeit im Büro. Sie sind nicht für den Einsatz in Werkstatt oder Lagerbe- reich geeignet. -
Seite 7: Sicherheitshinweise
Sicherheitshinweise Sollte den Anweisungen, die mit einem Warnsymbol markiert sind nicht entsprochen werden, kann dies zu Unfällen mit ernsthaften Personenschäden führen. Bitte lesen Sie die folgenden Sicherheitshinweise sorgfältig durch. Es ist wichtig für jeden, der die Sys- teme einbaut oder benutzt, die notwendigen Informati- onen zu besitzen und auf diese Gebrauchsanweisung zugreifen zu können. - Seite 8 Sicherheitshinweise Legen Sie Ihre nicht mit der Steuerung des Tisches befass- te Hand auf die Tischplatte „Zweihand-Steuerung“. Achten Sie darauf, dass sich während des Hubbetriebs kei- ne weiteren Personen am oder unter dem Tisch befinden. Achten Sie darauf, dass sich während des Absenkens keine Gegenstände - z.B.
- Seite 9 Sicherheitshinweise Der Tisch kann von Kindern ab 8 Jahren und älter so- wie von Personen mit verringerten, physischen, senso- rischen oder mentalen Fähigkeiten oder Mangel an Er- fahrung und Wissen benutzt werden, wenn sie beauf- sichtigt oder bezüglich des sicheren Gebrauchs des Gerätes unterwiesen wurden und die daraus resultie- renden Gefahren verstehen.
-
Seite 10: Legende
Legende Plattenrahmen Gestellseite mit motorischen Hubsäulen Kabelwanne Vertikale Kabelblende und Kabelkette Bedienelement Schiebeplattenentriegelung... -
Seite 11: Technische Daten, Maße, Zubehör
Technische Daten Hubkraft: max.80 kg, Last symmetrisch verteilt (Rahmen- und Tischplattengewicht berücksichtigen) Hubgeschwindigkeit: max.50 mm/sec. Geräuschentwicklung: < 50 dB Versorgungsspannung: 230 Volt / 50 Hz Leistungsaufnahme: 280 W (280 VA) Leistungsaufnahme (Standby): 0,3 W Betriebsart: S2 10%, max.2 min. Kurzbetrieb Maße... - Seite 12 Maße Zubehör Druckerablage CPU-Halterung Rückwandverblendung Plattenansteckelement Tischpaneel Reling 7 6 6...
-
Seite 13: Schiebeplatte
(a) Zum Entriegeln der Schiebeplatte, Griff nach unten ziehen und Platte nach vorne schieben. (b) Der Kabelkanal wird sichtbar. Die TALO.S Motor-Tische werden verkabelt ausgeliefert. Es ist darauf zu achten, dass die Zuleitungen zum Bedienmanual und die Verbin- dungskabel von Steuerung zu Hubsäulen nicht durchhängen, sondern Überlängen ohne Schlaufen im Kabelkanal untergebracht werden. -
Seite 14: Platte Mit Tischklappe
Platte mit Tischklappe (optional) (a) Durch leichten Druck auf die vordere Oberfläche lässt sich die Tischklappe öffnen (push to open-Funktion). (b) Die Steckdose wird sichtbar. -
Seite 15: Vertikale Kabelführung
Vertikale Kabelführung (a) Kabelblende von innen an Außenrohr des Seitenteils festkleben. (Unterkante Kabelblende sitzt auf Ausleger) (b) Kabelkette von unten in Kabelkanal des Tisches einhängen. (c) Kabelkettenanschluss auf Ausnehmung in Kabelblende stecken. Abschlussteil von unten an Tischplatte schrauben und Kabelkette einclipsen. Hinweis: Vor dem Ankleben, Oberfläche reinigen... -
Seite 16: Steuerung, Montage Des Handschalters
Steuerung (Ohne Memory-Funktion) Handschalter von unten an die Tischplatte montieren. Die Pfeile deuten die damit in Gang gesetzte Hubrichtung AUF/AB an. Die Tischplatte bewegt sich solange nach oben/unten, bis Sie die Taste loslassen oder die unterste Tischplattenposition erreicht ist. nach oben nach unten Bevor Sie den Tisch nun in Betrieb nehmen, sollten Sie das Kapitel „Inbetriebnahme“,... - Seite 17 Steuerung (Mit Memory-Funktion) Handschalter von unten an die Tischplatte montieren. Zur Bedienung, den zuvor angeschraubten Handschalter Bild (1) zum Benutzer hin herausschieben Bild (2). Die Pfeile (a) deuten die damit in Gang gesetzte Hubrichtung AUF/AB an. Die Tischplatte bewegt sich solange nach oben/unten, bis Sie die Taste loslassen oder die unterste Tischplattenposition erreicht ist.
-
Seite 18: Montage Druckerablage
Montage Druckerablage (a) Konsole an Halteblech montieren (SW 4), Druckerplatte auf Konsole befestigen. (b) Vierkant in Plattenrahmen stecken. Verbindungsklammer von unten durch Rahmen mit Vierkant verschrauben (SW 5). (c) Halteblech an Verbindungsklammer schrauben (SW 4). (d) Tische mit Tischklappe: Vor Montage, Unterteil des Plattenbeschlags entfernen. -
Seite 19: Montage Cpu-Halterung
Montage CPU-Halterung (a) CPU-Halterung an Halteblech montieren (SW 3). (b) Vierkant in Plattenrahmen stecken. Verbindungsklammer von unten durch Rahmen mit Vierkant verschrauben (SW 5). (c) Halteblech an Verbindungsklammer montieren (SW 4). Montage von Druckerablage und CPU-Halterung durch versetztes Anschrauben möglich. (d) Tische mit Tischklappe: Vor Montage, Unterteil des Plattenbeschlags entfernen. -
Seite 20: Montage Rückwandverblendung
Montage Rückwandverblendung (a) Abdeckstopfen aus Rahmenkonsole ziehen. Gewindeplatte in Konsole einlegen. (b) Rückwandhalter von unten durch Konsole mit Gewindeplatte verschrauben (SW 5). Rückwandverblendung an Rückwand- halter montieren (SW 4). Abdeckstopfen in Konsole setzen. Sicherheitshinweis : Achten Sie bitte darauf, dass die Anbauteile einen Mindestabstand von 25 mm in allen Fahrpositionen des Tisches aufweisen. -
Seite 21: Montage Plattenansteckelement
Montage Plattenansteckelement (a) Abdeckstopfen entfernen, Konsolen in Rahmenkonsolen schieben. (b) Seitlich verschrauben (SW 5). (c) Platte 1 auf Konsolen positionieren und zur Tischplatte aus- richten, von unten leicht anschrauben (ohne Abb.). Mit Gewindestiften 2 (SW 4) kann das Element zur Tischplatte justiert werden, Gewindestift 3 (SW 3) dient zur Neigungsver- stellung. -
Seite 22: Montage Fly By-Paneel
Montage Fly By-Paneel (a) Abdeckstopfen entfernen. (b) Halteblech des Fly By-Paneels in Rahmenkonsole stecken. (c) Seitlich mit je drei Schrauben (SW 5) befestigen. innen Sicherheitshinweis : Achten Sie bitte darauf, dass der Tisch und seine Anbauteile einen Mindestabstand von 25 mm zu anderen Objekten in allen Fahrpositionen des Tisches aufweist. -
Seite 23: Montage Tischpaneel (In Aufbau- Und Klemmadapter)
Montage Tischpaneel (a) Abdeckung des Adapters entfernen und Fenster freimachen. (b) Abdeckung auf Tischadapter setzen und Klemmadapter in Tischadapter stecken, Gewindestift (SW 3) festziehen. (c) Paneel einsetzen und seitlich ausrichten, Schraube auf Adap- terrückseite anziehen (SW 4). (d) Klemmadapter auf Tischplatte schieben (bei Tischen ohne Adapterausschnitte) und untere Stellschraube (SW 4) fest- drehen. -
Seite 24: Montage Reling
Montage Reling (a) Abdeckung entfernen. Relingprofil mit Adapter verschrauben (SW 5). Achtung: Vormontierte Adapter müssen demontiert werden! (b) Konsolenabdeckung entfernen. Adapter auf Konsole montieren (SW 5). (c) Kabelclip in Profilnut der Reling eindrehen. Sicherheitshinweis : Achten Sie bitte darauf, dass die Anbau- teile einen Mindestabstand von 25 mm in allen Fahrpositionen des Tisches aufweisen. -
Seite 25: Montage Anbauelemente (Werkzeuglos)
Montage Anbauelemente (a) Anbauelement in Organisationsnut einhängen. (b) Aufsatz-Anbauelement auf Tischpaneel stecken. Belastbarkeitsangaben auf Seite 24 beachten! (c) Bei Tischpaneelen mit ein- oder beidseitiger Organisations- nut ist das Aufstecken eines Aufsatz-Anbauelementes nicht möglich. -
Seite 26: Montage Steckdosenbox
Montage Steckdosenbox (a) Abdeckung des Adapters entfernen und Fenster freimachen. (b) Abdeckung auf Tischadapter setzen und Steckdosenbox in Tischadapter stecken, Gewindestift (SW 3) festziehen. (c) Steckdosenzwinge auf Tischplatte schieben und untere Ge- windestifte (SW 4) festziehen. Steckdosenbox auf Zwinge schieben und einklipsen. (d) Tischpaneel: Nutensteine in Organisationsnut einsetzen und Adapterblech montieren (SW 4). -
Seite 27: Belastbarkeit Anbauelemente
Sicherheitshinweise Belastbarkeit der Anbauelemente: Ordnerablage einseitig Achtung: Maximale Belastbarkeit der Organisationsnut = 25 kg max. 10 kg Halterung mit Ablageschale Ordnerablage Ablageschale max. 10 kg max. 5 kg max. 5 kg/Ablageschale Monitorarm: Belastung max. 8 kg Max. 3 Monitorarme pro Monitorarm pro Reling möglich! Max. -
Seite 28: Inbetriebnahme, Ergonomie
Inbetriebnahme Stellen Sie sicher, dass der Tisch ordnungsgemäß aufgestellt und aus- gerichtet ist, dass alle Stecker zur Steuereinheit fest sitzen, sowie die Leitungen Ihrer Bürotechnik und des Computers in den dafür vorgesehe- nen Kanälen liegen. Schließen Sie den Tisch an das Versorgungsnetz an. -
Seite 29: Speicherfunktionen (Memory), Manueller Reset
Speicherfunktionen (bei Memory) Bewegen Sie die Tischplatte in die gewünschte Höhe, am Display wird diese Tischplattenposition angezeigt. Drücken Sie die Taste S. Am Display wird S angezeigt. Drücken Sie die gewünschte Memorytaste (z.B. 2). Am Display wird S 2 angezeigt. Nun wird die eingestellte Tischplattenposition unter der gewählten Memorytaste gespeichert. -
Seite 30: Störungen Und Deren Behebung
Störungen und deren Behebung Antriebe funktionieren nicht Mögliche Ursache Behebung Stromversorgungskabel ist Stecken Sie das Stromversorgungskabel nicht angesteckt der Motorsteuerung an Antriebe sind nicht ange- Stecken Sie die Motorkabel an der Motor- steckt steuerung an Schlechter Steckerkontakt Stecken Sie Motorkabel, Stromver- sorgungskabel und Handschalter ord- nungsgemäß... -
Seite 31: Fehlercodes
Fehlercodes Am Display wird HOT eingezeigt. Ursache Behebung Die Motorsteuerung ist mit einem Warten Sie bis die Motorsteuerung Überhitzungsschutz ausgestattet. abgekühlt ist und die Meldung HOT Aufgrund von Überhitzung wurde am Display erlischt. Dann ist die dieser Überhitzungsschutz aktiviert. Motorsteuerung wieder betriebs- bereit. - Seite 32 Beschreibung Behebung Plug detection an Mo- Stecken Sie an der betroffenen Buch- torbuchse M1 se den korrekten Motor an. Führen Sie einen Reset durch. Plug detection an Mo- torbuchse M2 Plug detection an Mo- torbuchse M3 Motor getauscht Synchronisierung der Entfernen Sie Last vom Tisch.
- Seite 33 Klick-Codes Sobald die Motorsteuerung mit Strom versorgt wird, nutzt die Steuer- ung die eingebauten Relais um den Benutzer akustisch über den System-Status zu informieren. Die nachfolgende Tabelle zeigt, wie die Anzahl der Klicks mit verschiedenen Informationen zusammen- hängt. Anzahl der Klicks Status-Information Tastensperre aktiv: Dieses Signal wird immer dann ausgegeben,...
-
Seite 34: Eg-Konformitätserklärung
EG-Konformitätserklärung... -
Seite 35: Pflege- Und Reinigungshinweise
Pflege- und Reinigungshinweise Kunststoff- und Metalloberflächen: Oberfläche mit einem Staubtuch reinigen. Bei Verschmutzungen warmes Wasser verwenden und / oder einen milden Reiniger, danach trocken wischen. Achtung : Keine scheuernden Reinigungsmittel verwenden ! Diese können zu blei- benden, optischen Schäden führen. Echtholzoberflächen: Oberfläche mit einem Staubtuch reinigen. -
Seite 36: Anhang
Um Fehlfunktionen zu vermeiden, dürfen alle Reparaturen an den Hubsäulen nur von Fachpersonal durchgeführt werden. Informieren Sie bitte den K+N Kundendienst ! Wartung Die Hubsäulen sind wartungsfrei. Entsorgung Die motorisch höhenverstellbaren Tische der Serie TALO.S sind nach gültigen Richtlinien und Vorschriften umweltgerecht zu entsorgen. Kundendienst : Telefon 06039/483-0... -
Seite 38: Introduction
Introduction Dear customer, You have chosen a quality product from König + Neurath. To ensure that your furniture performs to your complete satisfaction, please read the following instructions carefully, and take note of the safety guidelines. -
Seite 39: Product Range, Area Of Application, Transport
Product range These instructions apply to all TALO.S desks with mo- torized height adjustment. Please refer to the “Dimensi- ons” section for an illustrated list. Area of application The TALO.S desks are workplace desks or monitor desks suited to working while sitting and standing in the office area. -
Seite 40: Safety Instructions
Safety instructions Failure to follow the instructions marked with a warning symbol can lead to accidents with serious personal injury. Please read the following safety instructions carefully. It is crucial that any person installing or using the system has the necessary information and has access to the user instructions. - Seite 41 Safety instructions Lay the hand that is not operating the desk on the table top „two-handed operation”. Make sure that no-one is at or under the desk when lifting and lowering. During lowering make sure that no objects such as waste bins or pedestals become wedged under the desk.
- Seite 42 Safety instructions This device can be used by children aged 8 years and above and persons with reduced physical, sensory or mental capabilities or lack of experience and knowledge if they have been given supervision or instruction con- cerning the safe use of the device and when they under- stand the potential risks.
-
Seite 43: Key
Desk top frame Leg frame with motorised lift column Cable tray Vertical cable trim and cable chain Control panel Sliding top release... -
Seite 44: Technical Data, Dimensions, Accessories
Technical data Lifting capacity: max.80 kg, load symmetrically distributed (Weight of frame and tabletop must be taken into account) Lifting speed: max.50 mm/sec. Noise emission: < 50 dB Supply voltage: 230 Volt / 50 Hz Power input: 280 W (280 VA) Power input (standby): 0,3 W Mode of operation:... - Seite 45 Dimensions Accessories Printer shelf CPU holder Modesty panel Briefcase extension Desk screen Railing 35 39...
-
Seite 46: Sliding Top
Sliding top All Talo.S motorised height-adjustable desks have a sliding top. (a) To unlock the sliding top, push the handle down and pull the desk top to the front. (b) The cable tray is now visible. The desks are delivered pre-wired. Ensure that the supply lines to... -
Seite 47: Using The Desk Flap
Using the desk flap (a) The push to open-function is activated by a soft touch. (b) Now enables access to the socket and the desk can be supplied with power. -
Seite 48: Vertical Cable Management With Cable Chain
Vertical cable management with cable chain (a) Stick the cable trim to the inside of the leg. (Lower edge of cable trim rests on the base.) (b) Hook the cable chain into the desk’s cable tray from under- neath. (c) Insert cable chain connector into notch at the top of the cable trim. -
Seite 49: Fitting And Using The Control Panel
Control panel (without memory function) Screw control panel from below to the desk top. The arrows indicate the direction – UP / DOWN. The desk top will move up or down until you release the button, or until it reaches its lowest position. - Seite 50 Control panel (with memory function) Screw control panel from below to the desk top. To use the control panel (Fig. 1), which is screwed under the desk top, pull it out towards the user (Fig. 2). Fig.1 Fig.2 The arrows (a) indicate the direction – UP/DOWN. The desk top will move up or down until you release the button, or until it reaches its lowest position Memory function see page 59.
-
Seite 51: Fitting Printer Tray
Fitting printer tray (a) Fit the console to the retaining plate (SW 4) and attach the printer shelf to the console. (b) Insert the square shaft into the desk top frame. Screw the connecting clamp to the square shaft from underneath through the frame (SW 5). -
Seite 52: Fitting Cpu-Holder
Fitting CPU-holder (a) Attach the CPU-holder to the retaining plate (SW 3). (b) Insert the square shaft into the desk top frame. Screw the connecting clamp to the square shaft from underneath through the frame (SW 5). (c) Screw the retaining plate for the CPU-holder to the connecting clamp (SW 4). -
Seite 53: Fitting Modesty Panel
Fitting modesty panel (a) Remove the end caps from frame console. Place the threa- ded plate into the console. (b) Screw the modesty panel bracket to the plate from under- neath through the console (SW 5). Fit the modesty panel onto the modesty panel bracket (SW 4). Safety instructions: Ensure that the desk and its attachments have a minimum clearance of 25 mm to... -
Seite 54: Fitting Briefcase Extension
Fitting briefcase extension (a) Remove the end caps from the frame console. Slide the briefcase extension support into the frame console. (b) Screw them together from the side (SW 5). (c) Position top 1 to the consoles, fit them together from under- neath, tighten screws slightly (not illustrated). -
Seite 55: Fitting Fly-By Screen
Fitting fly-by screen (a) Remove end caps. (b) Insert the retaining plate for the fly-by screen into the frame console. (c) Screw in place from the side (SW 5). inside Safety instructions: Ensure that the desk and its attachments have a minimum clearance of 25 mm to other objects in all movable desk positions. -
Seite 56: Fitting Desk Screen (In 3Rd Level And Clamp Adapters)
Fitting desk screen (a) Remove cover and snap off the central part. (b) Attach cover and insert clamp adapter into desk adapter, tighten grub screw (SW 3). (c) Insert the screen and align it laterally. Tighten the screw on rear of adapter (SW 4). (d) Slide clamp adapter onto desk top and insert screen into adapter. -
Seite 57: Fitting Railing
Fitting railing (a) Remove cover. Mount profile on the adapter (SW 5). Note: pre-assembled adapter must be disassembled! (b) Remove end caps. Mount adapter on the bracket (SW 5). (c) Insert cable clip into profile groove. Safety instructions: Ensure that the desk and its attachments have a minimum clearance of 25 mm to other objects in all movable desk positions. -
Seite 58: Fitting Accessories (Tool-Free)
Fitting accessories (a) Accessories hook into the organiser groove. (b) 3rd-level accessories slot onto the desk screen from above. Please note maximum load specifications on page 57. (c) Note: if desk screens have an organiser groove on one or both sides, it is not possible to use 3rd-level accessories. -
Seite 59: Fitting Power Box
Fitting power box (a) Remove cover and snap off the central part. (b) Attach cover and insert power box into the desk adapter, tighten the grub screw (SW 3). (c) Slide power box clamp onto desk top. Tighten from beneath with grub screws (SW 4). -
Seite 60: Safety Information
Safety information Maximum load for accessories Filing tray one side Note: maximum load for organiser groove = 25 kg max. 10 kg Bracket with Binder shelf Filing tray filing tray max. 10 kg max. 5 kg max. 5 kg/filing tray Monitor arm max. -
Seite 61: Getting Started, Ergonomics
Getting started Make sure the desk has been set up correctly, that the plug to the control panel is inserted firmly and that the cables from your office equipment and the computer are in the appropriate trays. Connect the desk to the mains. Initialise (manual reset) the desk as described on page 59. -
Seite 62: Saved Position, Manual Reset
Saved position (Memory) Move the desk top to the required height, this position will be shown on the display. Press the S button. S will be shown on the display. Press the required memory button (e.g.. 2). S will be shown on the display. At this point the desk top position set will be saved under the selected memory button. -
Seite 63: Possible Faults And Remedies
Possible faults and remedies Drives not working Possible cause Remedy Power cord is not connected Plug the power cord into the control unit Drives are not connected Plug the motor cables into the control unit Poor plug contact Plug the motor cables, power cord and handswitch in properly Control unit is defective Contact customer service... - Seite 64 Error messages on the handswitch display The display reads HOT. Cause Remedy The control unit is fitted with over- Wait until the control unit has heating protection. Overheating has cooled down and HOT is no longer caused it to stop the control unit. displayed.
- Seite 65 Description Remedy Plug detection in Plug in the correct motor to the M1 motor socket motor socket that shows the error. Reset all motors. Plug detection in M2 motor socket Plug detection in M3 motor socket Actuator changed Synchronization lost Remove load from desktop.
- Seite 66 Click codes When the control unit is switched on its relays to inform the user acoustically about the system state and the reason why the control unit was switched off before. The table below shows which number of clicks corresponds to certain information. Number of clicks State information Key lock active:...
-
Seite 67: Declaration Of Eu Conformity
Declaration of EU conformity... -
Seite 68: Care And Cleaning Information
Care and cleaning information Plastic-coated and metal surfaces: Clean the surface with a duster. Use warm water and / or a mild cleaner to remove marks, then wipe dry. Caution: Do not use abrasive cleaners! This can cause permanent visible damage. Natural wood finishes: Wipe the surface with a duster. -
Seite 69: Appendix
Please notify K+N customer service! Maintenance The lift columns are maintenance free. Disposal The TALO.S desks with motorized height-adjustable must be disposed in accordance with the valid directives and regulations. Customer service: Telephone +49 (0)6039 483-0... - Seite 70 Deutschland König + Neurath AG Büromöbel-Systeme Industriestraße 1-3 61184 Karben Tel.: +49 (0)6039 483-0 Fax: +49 (0)6039 482-214 e-mail: info@koenig-neurath.de www.koenig-neurath.de Great Britain K + N International (Office Systems) Ltd 52 Britton Street London EC1M 5UQ Tel.: +44 (0)20 74909340 Fax: +44 (0)20 74909349 e-mail: info@koenig-neurath.co.uk www.koenig-neurath.co.uk...