Werbung
Quicklinks
Werbung

Verwandte Anleitungen für Custom KUBE-T


Inhaltszusammenfassung für Custom KUBE-T
- Seite 1 USER'S GUIDE GUIDA OPERATIVA GUIDE D'UTILISATION BEDIENUNGSANLEITUNG GUIA OPERATIVA...
- Seite 2 alcohol, solvent To clean the machine, use a pneumatics air or soft cloth, because it’s very easy to make a scratch on the touch panel’s surface. First remove the mains plug from the wall socket. Do not use alcohol, solvents, or hard brushes. Do not let water or other liquids get inside the machine.
- Seite 3 mark affixed to the product certify that the product satisfies the basic safety requirements. Il marchio applicato al prodotto certifica che il prodotto stesso soddisfa i requisiti base di sicurezza. Le label appliqué sur le produit certifie que le produit même satisfait les qualités requises de securité...
- Seite 4 Si richiama l'attenzione sulle seguenti azioni che possono compromettere la conformità sopra attestata, oltre, naturalmente, le caratteristiche del prodotto: Leggete e conservate le istruzioni seguenti; Seguite tutti gli avvisi e le istruzioni indicate sul touch screen; Per toccare il touch screen usate solo penne touch, matite oppure le dita; Evitate di mettere a contatto il touch screen con strumenti taglienti o appuntiti, come coltelli;...
- Seite 5 ® Table of contents Indice Table des matières Inhaltsverzeichnics Indice Appendix A: - A1 Tecnical specification - A2 Accessories - A3 Win98 installation (only for KUBE T HD)
- Seite 6 Blank Page...
- Seite 7 UNPACKING THE TOUCH SCREEN 1. Carton 2. Lower foam packing shell 3. Touch screen 4. Upper foam packing shell 5. Manual and CD-Rom 6. Instruction sheet 7. CD-Rom DISIMBALLO DEL TOUCH SCREEN 1. Scatola 2. Imballo sagomato di protezione inferiore 3.
- Seite 8 RS232 • Insert the power supply cable • Inserire il cavo di alimentazione • Inserer le câble de l'alimentateur adéquat • Das Kabel in das spezielle Speisegerät stecken • Insertar el cable del alimentador RS232 • Insert the external printer power supply cable •...
- Seite 9 COM4 COM3 COM2 • Insert serial interface connector • Inserire il connettore di interfaccia seriale • Inserer le connecteur d'interface en série • Den seriellen Schnittstellenverbinder einsetzen • Insertar el conector de interfaz serial COM4 COM3 COM2 • Insert USB connector (up or down) •...
- Seite 10 • Insert the mouse connector • Inserire il connettore del mouse • Inserer le connecteur du mouse • Stecken der steckverbinder die maus • Insertar el conector del mouse • Insert the ethernet connector • Inserire il connettore ethernet • Inserer le connecteur ethernet •...
- Seite 11 • Connector •Connettori • Connecteur • Schnittstellen • Conectador J27,J28 - Power Supply Connector (DC24V) Pin no. Signal Description Ground Signal +24 V Power Supply Ground Signal Ground Signal J21 - RS232 Serial Connector COM1 (DB9M) Pin no. Signal Description Data Carrier Detect.
- Seite 12 J20,J18,J19 - Serial Connector COM2, COM 3, COM4 (RJ45) Pin no. Signal Description Clear To Send. Ready to receive data Ready To Send N.C. Not Connected PIN 1 Ground Signal COM4 COM3 COM2 +24 VI Power Supply Data Trasmission Data Reception N.C.
- Seite 13 J3 - Ethernet Connector 10/100 Mbit/s (RJ45) Pin no. Signal Description ETX+ ETX- ERX+ N.C. Not Connected N.C. Not Connected ERX- PIN 1 N.C. Not Connected N.C. Not Connected J24 (MASTER) J24 - Compact Flash Card Connector Master J25 - Compact Flash Card Connector Slave J25 (SLAVE)
- Seite 14 • Switch touch screen ON/OFF •Accendere/Spegnere il touch screen • Brancher/Éteindre le touch screen • Den einwieden/ausschlaten • Encender/Apagar el touch screen • Switch printer On pressing key On/Off • Accendere la stampante premendo il tasto On/Off • Brancher l'imprimante en appuyant sur la touche On/Off •...
- Seite 15 Screen position regolation Regolazione posizione schermo Reglement position écran Arreglamiento posiciòn monitor Einstellung monitor For setting the four positions of the screen, there is a button under the display, user side, as shown in picture. DOWN Per regolare lo schermo, sollevarlo o abbassarlo nelle quattro posizioni possibili, premendo il pulsante sotto al display lato utente, come mostrato in...
- Seite 16 For setting the four positions of the screen, there is a button under the DOWN display, user side, as shown in picture. Per regolare lo schermo, sollevarlo o abbassarlo nelle quattro posizioni possibili, premendo il pulsante sotto al display lato utente, come mostrato in figura.
- Seite 17 1. Se il touch screen non si accende Problema Controlli SÌ/NO Rimedio Collegare correttamente il cavo di alimentazione Il cavo di alimentazione è collegato correttamente Collegare il cavo di alimentazione al SÌ Mancanza di giusto connettore alimentazione Il cavo dell’alimentatore è Collegare correttamente il cavo elettrica collegato alla rete 220/110V...
- Seite 18 1. If the touch screen don’t turn on: Problem Controls YES/NO Remedy Attach correctly the power supply The power supply cable is cable correctly connected Attach the power supply cable on right connector No power The power supply cable is supply Attach correctly the power supply connected on power line...
- Seite 19 En cas de mauvais fonctionnement contactez le Service Apr ès-Vente. Für eine schlecte arbeitweise einer machine, rufen sie bitte unser kundendienst an. En lo caso de mal funcionamiento llamar al servicio tecnico. HOT LINE +0039-0598869587 Monday-Friday at 9-12 and 14-17 e-mail: support@custom.it...
- Seite 20 Blank Page...
-
Seite 21: Technical Specifications
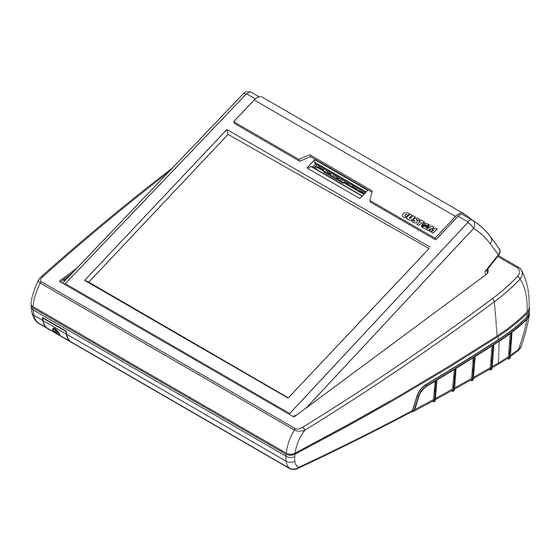
A1 TECNICAL SPECIFICATION A1 TECHNICAL SPECIFICATION TECHNICAL SPECIFICATIONS Processor MMX 300 MHz Chipset CS5530A Memory SDRAM 128 MB Compact Flash 128 MB (MASTER) LCD Touch Screen Display SVGA color TFT backlighted Resolution 800 x 600 Active Screen Size 10,4” (264,16 mm) diagonal Horizontal 211,2 mm Active Display Area... - Seite 22 Environmental Conditions 0°C ÷ 50 °C Operating Temperature 10% ÷ 80% w/o condensation Relative Humidity -20°C ÷ 70 °C / 10% ÷ 90% w/o condensation Storage temperature/humidity Operating 0÷10.000 feet (3048 m) Altitude Storage/shipment 0÷40.000 feet (12.192 m) Weight 2,5 kg DIMENSIONS This figure illustrates the overall dimensions for the touch screen.
-
Seite 23: Power Supply
A2 ACCESSORIES A.2.1 Power supply The following figure shows the power supply, that can be used to operate the printer. PPPW-060-24 Power Supply Input specifications Input voltage 90 Vac to 264 Vac Input frequency 47 Hz to 63 Hz Output specifications Output voltage 24 V Power specifications... - Seite 24 Blank Page...
- Seite 25 - Formattare le partizioni create con FORMAT. - Una volta riavviato KUBE-T copiare la cartella 'DRIVER' dallo Zip alla root di C: (“xcopy *.* /s” meaning copy subdirectories too). - Lanciare SETUP.EXE dalla cartella WIN98SE (si può scegliere se da A: o se da una copia in C:).
- Seite 26 (copy also the file driver21.cab from the folder of WIN98 or from Custom Eng. CD). - On Kube-T, plug a keyboard into the PS/2 port next to the USB sockets and a mouse into the PS/2 port next to the ethernet port, turn on the KUBE-T, enter BIOS setup mode with the key DELETE and change the 'Boot Sequence' setting to 'USB-ZIP,C'.
- Seite 28 P u b b l i c a t i o n i s s u e d b y : CUSTOM ENGINEERING SPA Via Berettine, 2 - 43010 Fontevivo, Parma ITALY Tel. +39 0521 680111 - Fax +39 0521 610701 All rights reserved Part Number : DOMM-KUBE-T Rev. 1.00 ®...