lidl 311499 Gebrauchsanweisung
Rc stunt drone
Vorschau ausblenden
Andere Handbücher für 311499:
- Gebrauchsanweisung (82 Seiten) ,
- Gebrauchsanweisung (82 Seiten)
Inhaltsverzeichnis
Werbung
Verfügbare Sprachen
Verfügbare Sprachen
DELTA-SPORT HANDELSKONTOR GMBH
Wragekamp 6 • DE-22397 Hamburg
GERMANY
02/2019
Delta-Sport-Nr.: QC-6223/QC-6224
IAN 311499
DRON RC STUNT
DRONE RC STUNT
DRON RC STUNT
DRONE RC STUNT
Instrucciones de uso
Istruzioni d'uso
DRONE STUNT RC
REMOTE-CONTROLLED STUNT DRONE
Manual de instruções
Instructions for use
RC STUNT DRONE
Gebrauchsanweisung
IAN 311499
Antes de leer, abra la página con las ilustraciones y familiarícese seguidamente con todas las funciones
del aparato.
Prima di leggere ribaltare la pagina con le immagini e familiarizzare poi con tutte le funzioni
dell´apparecchio.
Antes de ler, vire o lado com as imagens para fora e familiarize-se com todas as funções do aparelho.
Before reading, fold out the illustration page and get to know all of the functions of your unit.
Klappen Sie vor dem Lesen die Seite mit den Abbildungen aus und machen Sie sich anschließend mit
allen Funktionen des Artikels vertraut.
ES
Instrucciones de manejo y seguridad
IT/MT
Istruzioni d´uso e di sicurezza
PT
Manual de instruções e indicações de segurança
GB/MT
Instructions and Safety Notice
DE/AT/CH
Gebrauchs- und Sicherheitshinweise
Página
10
Pagina
23
Página
36
Page
49
Seite
61
Werbung
Inhaltsverzeichnis

Verwandte Anleitungen für lidl 311499


Inhaltszusammenfassung für lidl 311499
- Seite 1 Instructions and Safety Notice Page DELTA-SPORT HANDELSKONTOR GMBH DE/AT/CH Gebrauchs- und Sicherheitshinweise Seite DRONE STUNT RC REMOTE-CONTROLLED STUNT DRONE Wragekamp 6 • DE-22397 Hamburg GERMANY Manual de instruções Instructions for use 02/2019 RC STUNT DRONE Delta-Sport-Nr.: QC-6223/QC-6224 Gebrauchsanweisung IAN 311499 IAN 311499...
- Seite 2 40 - 70 min 2a 2c...
- Seite 3 SPEED4 SPEED3 SPEED2 SPEED1 3sec...
-
Seite 4: Inhaltsverzeichnis
Índice/Indice Alcance de suministro (Fig. A) ......10 Contenuto della fornitura (fig. A) ....23 Cuadricóptero (Fig. B) ......10 Quadricottero (fig. B) ......23 Control remoto (Fig. C/D) ...... 10 Radiocomando (fig. C/D) ....... 23 Datos técnicos ........... 10 Dati tecnici ............ - Seite 5 Índice/Contents Volume de fornecimento (Fig. A) ....36 Package contents (Fig. A) ........ 49 Quadricóptero (Fig. B) ......36 Quadrocopter (Fig. B) ......49 Telecomando (Fig. C/D) ......36 Remote control (Fig. C/D) ....... 49 Dados técnicos ..........36 Technical data ........... 49 Utilização prevista ..........
- Seite 6 Inhaltsverzeichnis Lieferumfang (Abb. A) ........61 Quadrocopter (Abb. B) ......61 Fernsteuerung (Abb. C/D) ...... 61 Technische Daten ..........61 Bestimmungsgemäße Verwendung ....62 Verwendete Symbole ........62 Sicherheitshinweise ........62 - 66 Warnhinweise Batterie/Akku! ..64 - 65 Vorhersehbarer Missbrauch ... 65 - 66 Batterien in die Fernsteuerung einsetzen (Abb.
-
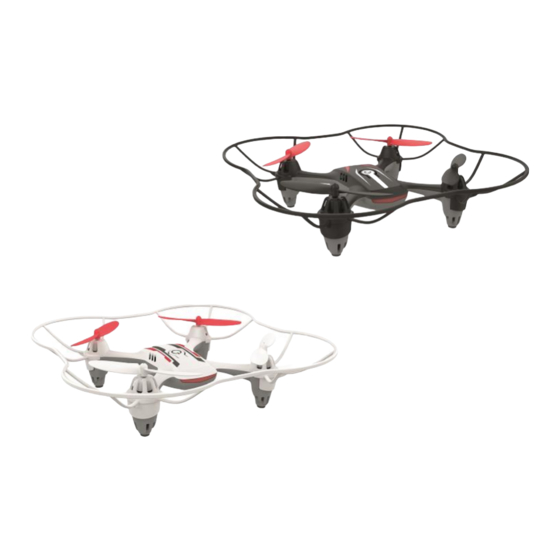
Seite 8: Alcance De Suministro (Fig. A)
¡Enhorabuena! Con su compra se ha decidido por • Palanca de control (hacia delante/detrás/ un artículo de gran calidad. Familiarícese con el izquierda lateralmente/derecha lateralmente) (2l) artículo antes de la primera puesta en marcha. • Dirección (ajuste de precisión hacia adelante/ Para ello, lea y siga detenidamente atrás/izquierda/derecha) (2m-2p) las siguientes instrucciones de uso. -
Seite 9: Uso Previsto
Uso previsto ADVERTENCIA: Peligro de lesiones en los ojos. No usar cerca de la cara para Este artículo es un juguete para personas a partir evitar lesiones en los ojos. de 8 años y solo es apto para su uso en el ámbito •... - Seite 10 • En interiores deben garantizarse unas Deberá comprobar las zonas de exclusión dimensiones de 6 x 4 m. Si el tamaño de aérea antes de cada vuelo. la estancia es menor, solo podrá utilizar el • El campo de aplicación del cuadricóptero cuadricóptero al aire libre.
-
Seite 11: Advertencias Sobre La Pila/Batería
• En caso de caída, se debe reducir la • Evite las influencias mecánicas externas (p. ej. aceleración de inmediato a cero. Los rotores golpes, objetos puntiagudos o aplastamientos). que giran pueden dañarse en caso de contacto ¡Existe peligro de explosión o de incendio! con obstáculos o impactos. -
Seite 12: Uso Indebido Previsible
• Como tanto el cable de carga USB como No deje la batería conectada a la electrónica la batería se calientan durante el proceso cuando no vaya a usarla (por ejemplo, al de carga, hay que asegurar una ventilación transportarla o guardarla). En caso contrario suficiente. -
Seite 13: Colocación De La Batería
Carga de la batería Colocación de las pilas 1. Con ayuda de un destornillador de estrella 1. Saque la batería (3) del compartimiento de la (6), afloje el tornillo (2q) de la tapa del batería (1f) del cuadricóptero (1) (Fig. E). compartimiento de las pilas en la parte ADVERTENCIA: No cargue nunca la posterior del control remoto (2) y retire la tapa... -
Seite 14: Preparación Del Vuelo
• Observar los posibles obstáculos antes PRECAUCIÓN: Imantenga siempre el del vuelo y, llegado el caso, despejarlos cuadricóptero dentro del alcance visual del trayecto y respetar una distancia durante el vuelo! correspondiente (>5 m). 4. No cuelgue cargas en el cuadricóptero (1). •... -
Seite 15: Control Del Cuadricóptero
Los indicadores luminosos (1g) del cuadricóptero Si el cuadricóptero (1) se mueve en sentido (1) se iluminan de forma continua. El horario, presione la tecla de compensación cuadricóptero (1) está listo para volar. de viro hacia la izquierda (2f), si se mueve NOTA: En la pantalla (2j) se le mostrará... -
Seite 16: Ajuste De La Velocidad (Fig. M)
1. Para activar el modo Headless, coloque el 3. Mueva la palanca de control (2l) en la cuadricóptero (1) y el control remoto (2) uno dirección en la que se deba hacer el volteo. detrás del otro y pulse la tecla (2c) en el control 4. -
Seite 17: Protección Del Rotor
Protección del rotor Ambos tipos cuentan con marcados en el lado inferior (A y B) que se deben tener en cuenta para La protección del rotor (1c) sirve para proporcionar el cambio y deben coincidir con los marcados seguridad ante lesiones (p. ej. cortes, lesiones en encima del cuadricóptero (1). -
Seite 18: Medidas Para La Eliminación De Las Pilas O La Batería
Los aparatos marcados con el símbolo IAN: 311499 adyacente no se pueden desechar con la Servicio España basura doméstica. Es obligatorio desechar Tel.: 902 59 99 22 dichos aparatos antiguos eléctricos y electrónicos (0,08 EUR/Min. por separado. Infórmese de las posibilidades de + 0,11 EUR/llamada eliminación regulada en su comunidad. -
Seite 19: Errores Posibles
Errores posibles A continuación se le muestran los posibles errores, sus causas y la solución. Errores Causas posibles Solución El control remoto El control remoto (2) Encienda el control remoto (2). (2) no reacciona. está apagado. Las pilas (5) están mal Coloque las pilas (5) correctamente. - Seite 20 Errores Causas posibles Solución La protección del Colisión, caída En el caso de que se suelte una protección del rotor rotor (1c) no se (1c), vuelva a introducirla fijamente y compruebe fija. que funciona y que está asentada de forma fija (1c).
-
Seite 21: Contenuto Della Fornitura (Fig. A)
Congratulazioni! Avete acquistato un articolo di • FLIP – rotazione a 360 gradi (2k) alta qualità. Consigliamo di familiarizzare con • Leva di comando (avanti/indietro/sinistra di l’articolo prima di cominciare ad utilizzarlo. lato/destra di lato) (2l) Leggere e seguire attentamente le •... -
Seite 22: Uso Conforme Alla Destinazione
Uso conforme alla AVVERTENZA: rischio di lesioni agli occhi. Non utilizzare vicino al volto in destinazione modo da evitare lesioni agli occhi. Questo è un articolo per il tempo libero per • Accertarsi che le condizioni meteo siano persone a partire da 8 anni di età ed è destinato adeguate. - Seite 23 Durante l’utilizzo all’aperto è consentito fare Gli utenti con handicap visivi e/o uditivi volare l’articolo solo a vista e ad un’altezza possono impiegare il quadricottero solo se massima di 100 m. Mantenete in questi casi accompagnati da persone di sorveglianza una distanza minima di 5 m.
-
Seite 24: Avvertenze Sulle Batterie/Batterie Ricaricabili
• Per evitare che il quadricottero subisca danni • Evitare l’esposizione ad azioni meccaniche dovuti ad una caduta causata da una tensione esterne (ad es. colpi, oggetti appuntiti o insufficiente oppure dalla batteria ricaricabile schiacciamenti). Pericolo di incendio o scarica, è assolutamente necessario osservare esplosione! le spie che segnalano un’eventuale tensione •... -
Seite 25: Uso Scorretto Prevedibile
Non caricare in nessun caso le batterie • Se la batteria ricaricabile ha subito un forte ricaricabili se l’isolamento esterno risulta urto, nei successivi 30 minuti riporla in un luogo danneggiato o se la batteria ricaricabile è estremamente sicuro (ad es. in una scatola deformata o gonfia. -
Seite 26: Inserire Le Batterie Nel Radiocomando (Fig. D)
Rimuovere la batteria • Non utilizzare l’articolo se alcune parti di esso dovessero essere staccate o danneggiate (ad ricaricabile (fig. E) es: a seguito di una collisione o di caduta). Aprire il coperchio (1h) del vano batterie (1f) e Inserire le batterie nel rimuovere la batteria (3). -
Seite 27: Preparazione Al Volo
• Controllare le previsioni meteo prima del volo e ATTENZIONE: durante il volo, tenere verificare i possibili mutamenti atmosferici. sempre il quadricottero a distanza tale da • Al momento del decollo, le persone devono poterlo vedere! mantenere una distanza di sicurezza di 5 m dal 4. -
Seite 28: Controllo Del Quadricottero
Le spie di controllo (1g) del quadricottero (1) Se il quadricottero (1) ruota in senso rimangono accese. Ora il quadricottero (1) è orario, premere il pulsante di calibratura pronto al decollo. dell’imbardata verso sinistra (2f), se ruota NOTA: sul display (2j) viene visualizzata la in senso antiorario premere il pulsante di velocità... -
Seite 29: Regolare La Velocità (Fig. M)
1. Per attivare la modalità headless, mettere Looping a 360° (fig. N) il quadricottero (1) e il radiocomando (2) 1. Portare il quadricottero (1) ad una quota di ca. uno dietro l’altro e premere il tasto (2c) sul 10 m. radiocomando (2). -
Seite 30: Protezione Dei Rotori
Protezione dei rotori Per maggiore chiarezza esse sono raffigurate nelle presenti istruzioni in colore grigio. La protezione dei rotori (1c) serve ad evitare Entrambi i tipi dispongono di contrassegni sul lesioni (ad es. ferite da taglio, alle pelle o agli lato superiore (A e B), attenersi ai contrassegni occhi) e per evitare le collisioni o evitare danni in per la sostituzione, devono corrispondere ai... -
Seite 31: Misure Per Lo Smaltimento Delle Batterie/Batterie Ricaricabili
Gli apparecchi contrassegnati con il simbolo IAN: 311499 riportato a fianco non devono essere smaltiti Assistenza Italia con i rifiuti domestici. Sussiste l’obbligo di Tel.: 02 36003201 smaltire separatamente i vecchi apparecchi E-Mail: deltasport@lidl.it elettrici ed elettronici di questo tipo. Informarsi Assistenza Malta presso il proprio comune circa le possibilità... -
Seite 32: Possibili Errori
Possibili errori Di seguito sono riportati i possibili errori, le loro cause e le indicazioni su come risolverli. Errore Possibile causa Soluzione Il radiocomando Il radiocomando (2) è Accendere il radiocomando (2). (2) non reagisce. spento. Le batterie (5) non sono Inserire le batterie (5) correttamente. - Seite 33 Errore Possibile causa Soluzione La protezione del Collisione, caduta Se una protezione del rotore (1c) dovesse stac- rotore (1c) non è carsi, agganciarla saldamente fino a sentire un fissata bene. clic e verificare la funzionalità e la stabilità delle protezioni dei rotori (1c). Le spie (1h) del Il quadricottero (1) Spostare la leva dell’acceleratore (2h) del radioco-...
-
Seite 34: Volume De Fornecimento (Fig. A)
Muitos parabéns! Com esta compra, optou por • Levantar voo/aterrar (2i) um artigo de alta qualidade. Antes de o utilizar • Indicações no visor (2j) pela primeira vez, familiarize-se com o artigo. • FLIP – rotação de 360 graus (2k) Leia com atenção e siga •... -
Seite 35: Utilização Prevista
• Verifique se o quadricóptero foi montado de Data de fabrico (mês/ano): 02/2019 acordo com o manual de instruções. Símbolo para corrente contínua ADVERTÊNCIA: risco de lesões oculares. Não utilizar perto do rosto, para evitar Utilização prevista lesões oculares. • Certifique-se de que as condições atmosféricas Este artigo é... - Seite 36 • Verifique se na área circundante estão diplomáticas e consulares, bem como presentes fontes de acidentes, tais como velas organizações internacionais que aí possuam ou vidros, e assegure-se de que não estão sede no âmbito do direito internacional e presentes crianças, animais de estimação sobre imóveis da polícia e de outras forças de ou animais de criação nas imediações do segurança.
-
Seite 37: Aviso Relativo Às Pilhas/Bateria
• Não exponha o quadricóptero ou o • As pilhas não devem ser engolidas! Se isso telecomando a luz solar direta ou calor acontecer, consulte um médico imediatamente! elevado por longos períodos. • Nunca coloque as pilhas ou a bateria no fogo •... -
Seite 38: Má Utilização Previsível
• Devido à ligação de encaixe especial da • Nunca transporte baterias em bolsos de calças bateria, não é possível carregar a bateria com ou sacos de mão. Tenha cuidado com objetos carregadores convencionais. afiados ou pontiagudos capazes de danificar a •... -
Seite 39: Inserir As Pilhas No Telecomando (Fig. D)
• A colocação de cargas e modificações de 3. Feche totalmente o compartimento da bateria qualquer tipo são proibidas. (1f). • Não utilize o artigo no caso de peças soltas NOTA: certifique-se de que a ligação de ou defeituosas do artigo (por exemplo, após encaixe está... -
Seite 40: Condições De Voo Adequadas
Condições de voo adequadas 2. Mova sempre as alavancas de velocidade (2h) e de comando (2l) lentamente e com muito Para um voo ideal, as condições em redor devem cuidado. respeitar os seguintes critérios: NOTA: depois do movimento, as alavancas •... -
Seite 41: Controlar O Quadricóptero
• Rotação (compensação de guinada) NOTA: é através deste processo que o (Fig. O) quadricóptero (1) e o telecomando (2) Se o quadricóptero (1) rodar sobre o próprio fazem o emparelhamento. eixo, sem que o utilizador mova a alavanca Se a alavanca de velocidade (2h) não for de comando (2l), poderá... -
Seite 42: Ajustar A Velocidade (Fig. M)
Velocidade 4 NOTA: ao ativar o modo de orientação (o bip soa quatro vezes) automática, o telecomando (2) e o Para pilotos muito experientes. quadricóptero (1) devem estar corretamente NOTA: ao desligar e voltar a ligar o emparelhados! telecomando, o quadricóptero (1) regressa Ative o modo de orientação automática apenas à... -
Seite 43: Terminar O Voo
Terminar o voo Substituir as pás do rotor (Fig. G) Substitua as pás do rotor (A), (B) assim que 1. Pressione o botão START/LAND (2i). O estiverem danificadas. quadricóptero desce lentamente e aterra. Para tal, utilize a ferramenta (7) para soltar as pás Depois de o quadricóptero (1) aterrar em do rotor (1a), (1b) do quadricóptero (1). -
Seite 44: Medidas De Eliminação De Pilhas/Da Bateria
– e um ções implicam o pagamento de custos. número que identifica o tipo de material. IAN: 311499 Os aparelhos identificados com o símbolo Assistência Portugal ao lado não podem ser eliminados com o Tel.:... -
Seite 45: Possíveis Falhas
Possíveis falhas Abaixo, encontram-se listadas possíveis falhas, as respetivas causas e medidas de resolução. Falhas Possíveis causas Resolução O telecomando (2) O telecomando (2) está Ligar o telecomando (2). não reage. desligado. Pilhas (5) inseridas Insira as pilhas (5) corretamente. incorretamente. - Seite 46 Falhas Possíveis causas Resolução A proteção Colisão, queda Se uma proteção do rotor (1c) se soltar, encaixe-a do rotor (1c) novamente e verifique se a proteção do rotor (1c) não assenta está a funcionar e instalada corretamente. firmemente. As luzes (1g) do O quadricóptero (1) não Empurre a alavanca de velocidade (2h) do teleco- quadricóptero...
-
Seite 47: Package Contents (Fig. A)
Congratulations! With this purchase, you have opt- • Control lever (forwards/backwards/sideways ed for a high-quality product. Familiarise yourself left/sideways right) (2l) with the item before using it for the first time. • Direction (fine-tuning forwards/backwards/left/ Please read and adhere to the right) (2m–2p) following instructions carefully. -
Seite 48: Intended Use
Intended use • Make sure weather conditions are suitable. The item must not get wet. This is a recreational item for children aged 8 • Check that the rotors are correctly and securely years and over and is intended for private, domes- fitted before each use. - Seite 49 • Do not fly the quadrocopter in areas where • Never fly the quadrocopter directly at other temperatures can change rapidly, e.g. over a people, animals or yourself. fire or over water surfaces. • The motor, electronics and rechargeable • Select a suitable location (open space) to oper- battery can heat up while the quadrocopter is ate the quadrocopter.
-
Seite 50: Battery Warning Notices
Battery warning notices • Pay attention to the correct polarity (+/-) when inserting the batteries. GENERAL WARNING NOTICES • Dispose of used batteries properly at municipal collection points or retail outlets. • Always keep batteries out of reach of children. ADDITIONAL WARNINGS FOR •... -
Seite 51: Foreseeable Misuse
• Never charge a battery that is punctured or • Do not operate the quadrocopter in too small damaged. Examine the battery very closely a space (under 6 x 4m), or if there are objects, for such damage if it has been dropped. If the people or animals within a radius of 5m. -
Seite 52: Inserting The Rechargeable Battery
Inserting the rechargeable 7. Insert the rechargeable battery (3) properly into the battery slot (1f) (see “Inserting the recharge- battery (Fig. E) able battery”). 1. Open the battery compartment lid (1h) of the Under-voltage warning rechargeable battery compartment (1f). 2. Connect the rechargeable battery (3) to the The lights (1g) start flashing fast when the re- battery connector (1f). -
Seite 53: Flight Preparation
Flight preparation 4. Press the on/off switch (1d). The control lights (1g) of the quadrocopter (1) flash alternately Pay attention to the following, before you start and a signal tone is emitted from the remote flying the quadrocopter (1): control (2). 1. -
Seite 54: Setting The Speed (Fig. M)
• Hover left/right (roll) (Fig. L) 1. To activate headless mode, put the quadrocop- If you want to perform a movement to the right ter (1) and the remote control (2) one behind the other and press the button (2c) on the or left without rotating the quadrocopter (1), i.e. -
Seite 55: Rollover (Fig. N)
360° rollover (Fig. N) 4. Remove the rechargeable battery (3) (see “Removing the rechargeable battery”). 1. Fly the quadrocopter (1) to a height of approx. 10m. Rotor protection 2. Keep it hovering and press the control lever (2k) once, which is located at the front of the remote The rotor guard (1c) acts as protection against in- control. -
Seite 56: Information On Disposal
Repairs after the warranty are in an environmentally-friendly manner. subject to a charge. The recycling code is used to identify IAN: 311499 various materials for recycling. The code Service Great Britain consists of the recycling symbol – which is meant Tel.:... -
Seite 57: Possible Defects
Possible defects Potential faults are listed below, along with their causes and how to rectify them. Defect Possible cause Remedy Remote control (2) Remote control (2) is Turn on remote control (2). does not respond. switched off. Batteries (5) incorrectly Insert the batteries (5) correctly. - Seite 58 Defect Possible cause Remedy The quadrocopter Contact has not been Slide the throttle (2h) on the remote control (2) all (1) lights (1g) blink established between the the way forward, and then all the way back. alternately. quadrocopter (1) and the This process establishes contact between the remote control (2) quadrocopter (1) and the remote control (2).
-
Seite 59: Lieferumfang (Abb. A)
Herzlichen Glückwunsch! Mit Ihrem Kauf haben • FLIP - 360 Grad-Drehung (2k) Sie sich für einen hochwertigen Artikel entschie- • Steuerhebel (vorwärts/rückwärts/links zur den. Machen Sie sich vor der ersten Inbetriebnah- Seite/rechts zur Seite) (2l) me mit dem Artikel vertraut. •... -
Seite 60: Bestimmungsgemäße Verwendung
Bestimmungsgemäße • Sollten Sie noch nicht über ausreichende Kennt- nisse über den Umgang mit ferngesteuerten Verwendung Quadrocoptern verfügen, so wenden Sie sich Dieser Artikel ist ein Spielzeug für Personen ab 8 bitte an einen erfahrenen Modellsportler oder Jahren und nur für die Verwendung im häuslichen, an einen Modellbau-Club. - Seite 61 • Überprüfen Sie, ob in der Umgebung Unfall- Es gilt ein Überflugsverbot und ein Mindestab- quellen wie z. B. Kerzen oder Gläser vorhan- stand von 1,5 km zu folgenden Arealen: den sind und stellen Sie sicher, dass sich keine Flughäfen, Kontrollzonen von Flugplätzen, Kinder und auch keine Haus- oder Nutztiere in Staats- oder Militärgebäuden.
-
Seite 62: Warnhinweise Batterie/Akku
• Bei einem schweren Absturz (zum Beispiel aus • Batterien dürfen nicht verschluckt werden! großer Höhe) kann die Kalibrierung beschädigt Sollte dies doch passieren, müssen Sie umge- bzw. verstimmt werden. hend einen Arzt aufsuchen! Vor einem erneuten Flug ist daher unbedingt die •... -
Seite 63: Vorhersehbarer Missbrauch
• Laden Sie den Akku niemals unmittelbar nach • Schließen Sie die Anschlussklemmen des Akkus dem Gebrauch. Lassen Sie den Akku immer erst niemals kurz. Es besteht Brand- oder Explosions- abkühlen (min. 5-10 Minuten). gefahr. • Aufgrund der besonderen Akku-Steckverbin- •... -
Seite 64: Batterien In Die Fernsteuerung Einsetzen (Abb. D)
Akku einsetzen (Abb. E) • Verletzen Sie nicht die Privatsphäre anderer Personen. 1. Öffnen Sie den Akkufachdeckel (1h) des Akku- • Geben Sie den Artikel nicht an Personen unter faches (1f). 8 Jahren ab. 2. Verbinden Sie den Akku (3) mit der Steckverbin- •... -
Seite 65: Unterspannungs-Warnung
Unterspannungs-Warnung 2. Bewegen Sie den Gas- (2h) und Steuerhebel (2l) immer langsam und vorsichtig mit Gefühl. Die Lichter (1g) fangen an schnell zu blinken, HINWEIS: Nach dem Bewegen springt der wenn der Akku (3) fast leer ist. Landen Sie den Gas- und Steuerhebel wieder in die Mitte Quadrocopter (1), sobald Sie dies feststellen. -
Seite 66: Quadrocopter Steuern
• Drehen (Gier-Trimmung) (Abb. O) HINWEIS: Durch diesen Vorgang wird Sollte sich der Quadrocopter (1) um die eigene zwischen dem Quadrocopter (1) und der Achse drehen, ohne dass Sie den Steuerhebel Fernsteuerung (2) ein Kontakt hergestellt. (2l) bewegen, können Sie dies mit der Gier- Wird der Gashebel (2h) nicht zuerst nach vorne Trimmung korrigieren. -
Seite 67: Geschwindigkeit Einstellen (Abb. M)
Aktivieren Sie den Headless Mode nur in der HINWEIS: Beim Aus- und Wiedereinschal- angegebenen Position, andernfalls kann es dazu ten der Fernsteuerung befindet sich der führen, dass Steuerbefehle nicht korrekt ausgeführt Quadrocopter (1) wieder bei Geschwindigkeit 2. werden. 360°-Überschlag (Abb. N) 1. -
Seite 68: Flug Beenden
Flug beenden Rotorblätter austauschen (Abb. G) Tauschen Sie die Rotorblätter (A), (B) aus, sobald 1. Drücken Sie die Taste START/LAND (2i). Der sie beschädigt sind. Quadrocopter fliegt langsam nach unten und Nutzen Sie dazu das Werkzeug (7), um die Rotor- landet. -
Seite 69: Entsorgungsmaßnahmen Batterien/Akku
Nach Ablauf der Garantie anfallende Repara- Recyclingsymbol – das den Verwertungskreislauf turen sind kostenpflichtig. widerspiegeln soll – und einer Nummer, die das Material kennzeichnet. IAN: 311499 Geräte, die mit dem nebenstehenden Service Deutschland Symbol gekennzeichnet sind, dürfen nicht Tel.: 0800-5435111 mit dem Hausmüll entsorgt werden. -
Seite 70: Mögliche Fehler
Mögliche Fehler Im Folgenden werden Ihnen mögliche Fehler, ihre Ursachen und die Behebung aufgezeigt. Fehler Mögliche Ursache Behebung Fernsteuerung (2) Fernsteuerung (2) ist Fernsteuerung (2) einschalten. reagiert nicht. ausgeschaltet. Batterien (5) falsch Batterien (5) richtig einlegen. eingelegt. Batterien (5) sind leer. Batterien (5) austauschen. - Seite 71 Fehler Mögliche Ursache Behebung Lichter (1g) vom Der Quadrocopter (1) Schieben Sie den Gashebel (2h) der Fernsteuerung Quadrocopter hat keinen Kontakt mit (2) ganz nach vorne und danach ganz nach hinten. (1) blinken der Fernbedienung (2). Durch diesen Vorgang wird zwischen dem Quadro- abwechselnd.