Inhaltsverzeichnis
Werbung
Verfügbare Sprachen
Verfügbare Sprachen
Quicklinks
NEDERLANDS
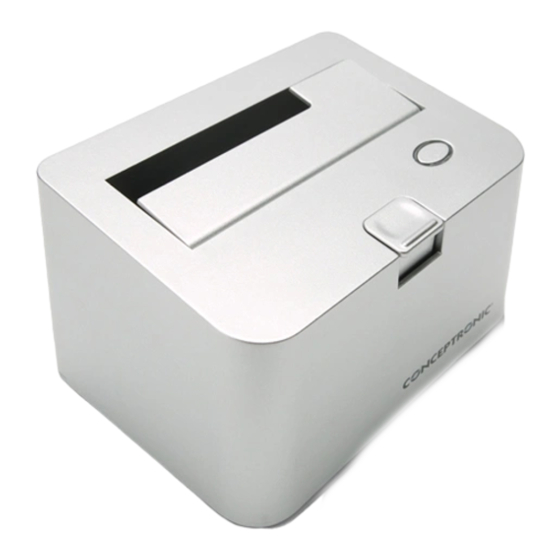
Conceptronic harddisk dockingstation met eSATA.
In deze gebruiksaanwijzing vindt u stap-voor-stap instructies voor de installatie van het Conceptronic
harddisk dockingstation met eSATA.
Bij problemen kunt u het beste naar onze support-site gaan (www.conceptronic.net - klik op 'Support').
Daar vindt u een database met veel gestelde vragen (FAQ).
Als u een vraag over dit product heeft die niet op onze website wordt beantwoord, kunt u ons gerust e-
mailen op support@conceptronic.net.
Ga voor meer informatie over Conceptronic producten naar de Conceptronic website:
www.conceptronic.net.
De hieronder beschreven software-installatie kan enigszins afwijken, afhankelijk van uw computer. Dit
hangt samen met de gebruikte versie van Windows.
U vindt de volgende items in de verpakking van de Conceptronic CHDDOCK23E:
•
Conceptronic CHDDOCK23E harddisk dockingstation met eSATA
•
Lichtnetadapter 12V gelijkstroom, 2A
•
USB-kabel
•
eSATA-kabel
•
Deze meertalige gebruiksaanwijzing
•
Garantiekaart
Conceptronic CHDDOCK23E
Gebruiksaanwijzing
Gefeliciteerd met uw nieuwe
1. Inhoud verpakking
1
Werbung
Inhaltsverzeichnis

Verwandte Anleitungen für Conceptronic CHDDOCK23E


Inhaltszusammenfassung für Conceptronic CHDDOCK23E
- Seite 1 In deze gebruiksaanwijzing vindt u stap-voor-stap instructies voor de installatie van het Conceptronic harddisk dockingstation met eSATA. Bij problemen kunt u het beste naar onze support-site gaan (www.conceptronic.net - klik op 'Support'). Daar vindt u een database met veel gestelde vragen (FAQ).
-
Seite 2: Plaats Van De Onderdelen
NEDERLANDS 2. Plaats van de onderdelen Bovenkant Betekenis van de nummers: 1. Interface SATA harddisk 3. Aan/uit/activiteitlampje 2. Uitwerpknop Achterkant Betekenis van de nummers: 1. DC gelijkstroomingang 3. USB-aansluiting 2. Aan/uitschakelaar 3. eSATA-aansluiting... - Seite 3 NEDERLANDS 3. Uw CHDDOCK23E aansluiten Voordat u uw harddisk dockingstation kunt gebruiken, moet u het op een stroombron en op uw computer aansluiten. U kunt het dockingstation aansluiten via USB of eSATA. Wanneer het dockingstation via eSATA is aangesloten, kunt u hogere gegevenssnelheden bereiken, maar niet iedere computer beschikt over eSATA.
- Seite 4 NEDERLANDS 4. Harddisk plaatsen U kunt een 2,5” of 3,5” SATA harddisk in het harddisk dockingstation doen. In de onderstaande afbeeldingen ziet u hoe u de harddisk in het dockingstation zet: 2,5” harddisk 3,5” harddisk Nadat de harddisk is geplaatst, kunt u het dockingstation aanzetten met de hoofdschakelaar aan de achterkant.
- Seite 5 Zet het dockingstation uit met de aan/uitschakelaar aan de achterkant. Druk op de uitwerpknop aan de bovenkant van het dockingstation. De harddisk komt nu naar buiten en kan uit het dockingstation worden verwijderd. Hardisk geplaatst Harddisk uitgeworpen Veel plezier met uw Conceptronic harddisk dockingstation met eSATA!
-
Seite 6: Package Contents
Congratulations on the purchase of your Conceptronic Harddisk Docking Station with eSATA. This User Manual gives you a step-by-step explanation of how to install the Conceptronic Harddisk Docking Station with eSATA. When problems occur, we advise you to go to our support-site (go to www.conceptronic.net and click ‘Support’. -
Seite 7: Product Overview
ENGLISH 2. Product Overview Top View Description of the numbers: 1. SATA harddisk inferface 3. Power & Activity LED 2. Eject button Back View Description of the numbers: 1. DC input connection 3. USB connection 2. Power switch 3. eSATA connection... - Seite 8 ENGLISH 3. Connecting your CHDDOCK23E Before you can use your harddisk docking station, you need to connect it to the power and your computer. You can connect the docking station by USB or by eSATA. Note: When the docking station is connected by eSATA, you can achieve higher transfer speeds, but eSATA is not available on every computer.
- Seite 9 ENGLISH 4. Inserting a harddisk You can insert a 2,5” or 3,5” SATA harddisk in the harddisk docking station. The pictures below show you how you can insert the harddisk in the docking station: 2,5” harddisk 3,5” harddisk After the harddisk is inserted, you can power the docking station with the power switch on the backside. Set the powerswitch on the backside to ‘I’...
- Seite 10 Press the Eject button on the top of the docking station. The harddisk will now popup and can be taken out of the docking station. Hardisk inserted Harddisk ejected Enjoy the use of your Conceptronic Harddisk Docking Station with eSATA!
-
Seite 11: Contenido Del Paquete
Conceptronic. Si se producen problemas, le aconsejamos que consulte a nuestro servicio técnico (en www.conceptronic.net y haga clic en “Support”. Aquí encontrará la base de datos de las preguntas más frecuentes o FAQ). Si tiene otras preguntas sobre su producto y no las encuentra en nuestro sitio web, póngase en contacto con nosotros por correo electrónico: apoyo@conceptronic.net. - Seite 12 ESPAÑOL 2. Resumen del producto Vista cenital Descripción de los números: 1. Interfaz del disco duro SATA 3. LED de encendido y actividad 2. Botón de expulsión Vista trasera Descripción de los números: 1. Conexión de entrada DC 3. Conexión USB 2.
- Seite 13 ESPAÑOL 3. Conectar el CHDDOCK23E Antes de utilizar la estación de acoplamiento de disco duro, deberá conectarla a una toma de corriente y a su ordenador. Para ello, puede utilizar los modos de conexión USB o eSATA. Nota: Si conecta la estación de acoplamiento mediante eSATA, obtendrá velocidades de transferencia más altas, pero no todos los ordenadores disponen de ese tipo de conexión.
- Seite 14 ESPAÑOL 4. Insertar un disco duro La estación de acoplamiento de disco duro acepta discos duros SATA de 2,5” o 3,5”. La ilustración siguiente le muestra cómo insertar un disco duro: Disco duro de 2,5” Disco duro de 3,5” Una vez insertado el disco duro, podrá encender la estación de acoplamiento con el interruptor de alimentación de la parte trasera.
- Seite 15 Pulse el Botón de expulsión, ubicado en la parte superior de la estación de acoplamiento. A continuación, la estación de acoplamiento expulsará el disco duro. Disco duro insertado Disco duro extraído ¡Disfrute de su Estación de acoplamiento de disco duro con eSATA de Conceptronic!
- Seite 16 Wir gratulieren Ihnen zum Kauf Ihrer Conceptronic Festplatten-Dockingstation mit eSATA. In diesem Benutzerhandbuch wird Ihnen Schritt für Schritt gezeigt, wie die Conceptronic Festplatten- Dockingstation mit eSATA installiert werden muss. Wenn Probleme auftreten sollten, besuchen Sie unsere Support-Seite (unter www.conceptronic.net) und klicken Sie auf ‚Support’.
- Seite 17 DEUTSCH 2. Gerätekomponenten Komponenten auf der Oberseite Legende: 1. SATA-Festplattenschnittstelle 3. Power- & Aktivitäts-LED 2. Auswurftaste Rückseite Legende: 1. Wechselstrom-Anschluss 3. USB-Anschluss 2. Powerschalter 3. eSATA-Anschluss...
- Seite 18 DEUTSCH 3. Anschluss der CHDDOCK23E Bevor Sie Ihre Festplatten-Dockingstation verwenden können, müssen Sie sie an die Stromversorgung und an Ihren Computer anschließen. Sie können die Dockingstation mit USB oder eSATA anschließen. Hinweis: Wenn die Dockingstation mit eSATA angeschlossen ist, können Sie höhere Übertragungsgeschwindigkeiten erreichen.
-
Seite 19: Einlegen Einer Festplatte
DEUTSCH 4. Einlegen einer Festplatte Sie können eine 2,5”- oder 3,5”-SATA-Festplatte in die Festplatten-Dockingstation einlegen. Nachfolgende Abbildungen zeigen Ihnen, wie die Festplatte in die Dockingstation eingelegt wird: 2,5“-Festplatte 3,5“-Festplatte Nachdem Sie die Festplatte eingelegt haben, können Sie die Dockingstation über den Powerschalter auf der Rückseite einschalten. -
Seite 20: Auswurf Einer Festplatte
Schalten Sie die Dockingstation über den Powerschalter auf der Rückseite aus. Drücken Sie die Auswurftaste auf der Oberseite der Dockingstation. Damit wird die Festplatte herausgeschoben und kann aus der Dockingstation entnommen werden. Festplatte eingeführt Festplatte ausgeworfen Viel Spaß mit Ihrer Conceptronic Festplatten-Dockingstation mit eSATA! -
Seite 21: Manuel D'utilisation
Conceptronic. En cas de problème, nous vous conseillons de consulter notre site web de support technique (en allant sur www.conceptronic.net et en cliquant sur « Support »). Vous y trouverez les réponses aux questions les plus fréquentes (FAQ). -
Seite 22: Présentation De La Station D'accueil
FRANÇAIS 2. Présentation de la station d’accueil Vue de haut Correspondance des numéros : 1. Interface pour disque dur SATA 3. Voyant d’alimentation et d’état 2. Touche d’éjection Vue de l’arrière Correspondance des numéros : 1. Alimentation électrique DC 3. Connecteur USB 2. - Seite 23 FRANÇAIS 3. Branchement de votre CHDDOCK23E Avant de pouvoir utiliser votre station d’accueil à disque dur, vous devez brancher cette dernière au courant électrique et à votre ordinateur. Cette dernière se connecte à votre ordinateur à l’aide d’un câble USB ou bien eSATA.
- Seite 24 FRANÇAIS 4. Insérer un disque dur Vous pouvez insérer un disque dur SATA de 2,5” ou 3,5” SATA dans la station d’accueil à disque dur. Le schéma ci-dessous montre comment insérer ce dernier : Disque du de 2,5” Disque dur de 3,5” Après avoir inséré...
- Seite 25 Le disque dur se déplacera vers le haut afin que vous puissiez le retirer de la station d’accueil. Disque dur inséré Disque dur retiré Découvrez toutes les possibilités de votre station d’accueil à disque dur avec eSATA de Conceptronic !
-
Seite 26: Contenuto Della Confezione
Conceptronic. In caso di problemi, si consiglia di consultare la pagina web di supporto (collegandovi con www.conceptronic.net e facendo clic su “Support”), dove troverete la banca dati con le domande e i quesiti più frequenti, accompagnati dalle relative risposte. - Seite 27 ITALIANO 2. Spiegazione del prodotto Vista superiore Descrizione dei numeri: 1. Interfaccia SATA per disco rigido 3. LED alimentazione e attività 2. Pulsante di espulsione Vista posteriore Descrizione dei numeri: 1. Connessione ingresso DC 3. Connessione USB 2. Interruttore di accensione 3.
- Seite 28 ITALIANO 3. Come collegare il CHDDOCK23E Prima di poter utilizzare la docking station per hard disk, sarà necessario accenderla e collegarla al computer. La docking station si può collegare via USB o eSATA. Nota: Nel caso in cui la docking station sia collegata via eSATA, è possibile ottenere velocità di trasferimento superiori, però...
- Seite 29 ITALIANO 4. Come inserire un hard disk È possibile inserire nella docking station un hard disk SATA da 2,5” o 3,5”. Le immagini qui di seguito mostrano come introdurre il disco rigido nella docking station: Hard disk da 2,5” Hard disk da 3,5” Dopo aver introdotto il disco rigido, si può...
- Seite 30 Premere il pulsante di espulsione posto sulla parte superiore della docking station. Il disco rigido uscirà fuori e lo si potrà estrarre dalla docking station. Hard disk inserito Hard disk estratto Divertitevi a usare la Docking Station per Hard disk con eSATA di Conceptronic!
-
Seite 31: Manual Do Utilizador
Conceptronic. Quando tiver algum problema, aconselhamo-lo a consultar a nossa página de suporte (vá a www.conceptronic.net) e clicar em ‘Support’ (Suporte). Aí vai encontrar a Base de Dados das Perguntas Mais Frequentes. Quando tiver outras questões sobre o seu produto e não encontrar resposta para elas na nossa página, então contacte-nos por e-mail: apoyo@conceptronic.net... - Seite 32 PORTUGUÊS 2. O produto Vista Superior Descrição dos números: 1. Interface de disco rígido SATA 2. Botão de ejecção actividade 3. LED indicador de estado e de Parte de trás Descrição dos números: 1. Ligação de entrada CC 3. Ligação USB 2.
- Seite 33 PORTUGUÊS 3. Ligar a sua CHDDOCK23E Antes de poder usar a sua estação de ancoragem, tem de a ligar à corrente e ao computador. Pode ligar a estação de ancoragem por USB ou por eSATA. Nota: Quando a estação de ancoragem está ligada por eSATA pode efectivamente atingir velocidades de transferência maiores mas a ligação eSATA não se encontra disponível em todos os computadores.
- Seite 34 PORTUGUÊS 4. Inserir um disco rígido Pode inserir um disco rígido SATA de 2,5 ou de 3,5 polegadas na estação de ancoragem. As imagens abaixo mostram-lhe como pode inserir o disco rígido na estação de ancoragem: Disco rígido de 2,5” Disco rígido de 3,5”...
- Seite 35 Carregue no botão de ejectar situado na parte de cima da estação de ancoragem. O disco rígido vai agora sair e pode ser retirado da estação de ancoragem. Inserir o disco rígido Ejectar o disco rígido Divirta-se com a sua estação de ancoragem para discos rígidos com eSATA da Conceptronic!
-
Seite 36: Használati Útmutató
Ha probléma jelentkezne, azt tanácsoljuk, hogy keresse fel terméktámogatást nyújtó webhelyünket (látogasson el a www.conceptronic.net honlapra, majd ott kattintson a „Support”-ra ). Ott található ugyanis a gyakran ismétlődő kérdések (GYIK) adatbázisa. Ha a termékkel kapcsolatban további kérdése volna, és arra választ webhelyünkön nem talál, e-mailben is fordulhat hozzánk: support@conceptronic.net... -
Seite 37: A Termék Áttekintése
MAGYAR 2. A termék áttekintése Felülnézet A számok feloldása: 1. SATA merevlemez-interfész 3. Áramellátás- és tevékenység- 2. Kiadó gomb jelző LED Hátulnézet A számok feloldása: 1. Egyenáramú bemenet csatlakoztatása 3. USB-csatlakozás 2. Teljesítménykapcsoló 4. eSATA-csatlakozás... - Seite 38 MAGYAR 3. A CHDDOCK23E csatlakoztatása Mielőtt a merevlemez-dokkoló egységet használná, csatlakoztatnia kell azt az áramellátást biztosító forráshoz, valamint számítógépéhez. A dokkolóegység USB, illetve eSATA segítségével csatlakoztatható. Megjegyzés: Ha a dokkolóegységet eSATA segítségével csatlakoztatja, nagyobb adatátviteli sebesség érhető el, viszont az eSATA nem minden számítógépen áll rendelkezésre.
- Seite 39 MAGYAR 4. Merevlemez behelyezése 2,5 colos vagy 3,5 colos SATA-merevlemez helyezhető be a merevlemez-dokkoló egységbe. Az alábbi képeken látható, miként lehet a merevlemezt a dokkolóegységbe behelyezni: 2.5 colos merevlemez 3,5 colos merevlemez A merevlemez behelyezése után a hátoldalon lévő teljesítménykapcsoló segítségével lehet a dokkolóegység áramellátását biztosítani.
- Seite 40 A dokkolóegységet a hátoldalon lévő teljesítménykapcsolóval kapcsolja ki. Nyomja meg az Eject gombot a dokkolóegység tetején. A merevlemez ezután megjelenik, majd ki is vehető a dokkolóegységből. Merevlemez behelyezve Merevlemez kiadva Kívánjuk, hogy örömmel használja a Conceptronic eSATÁ-val kiegészített merevlemez-dokkoló egységét!
-
Seite 41: Paket İçeriği
Ürününüzle ilgili başka sorularınız varsa ve bunların yanıtlarını web sitemizde bulamıyorsanız, bize e-posta ile ulaşın: support@conceptronic.net Conceptronic ürünleri ile ilgili daha fazla bilgi için, lütfen Conceptronic Web Sitesini ziyaret edin: www.conceptronic.net Aşağıda açıklanan yazılım yüklemesi bilgisayarınızdaki yüklemeden biraz daha farklı olabilir. Bu durum kullandığınız Windows sürümüne bağlıdır. - Seite 42 TÜRKÇE 2. Ürüne Genel Bakış Üst Görünüm Rakamların açıklaması: 1. SATA sabit disk arayüzü 3. Güç ve İşlem LED’i 2. Çıkartma düğmesi Arka Görünüm Rakamların açıklaması: 1. DC giriş bağlantısı 3. USB bağlantı 2. Güç anahtarı 4. eSATA bağlantısı...
- Seite 43 TÜRKÇE 3. CHDDOCK23E Bağlantısı Sabit disk kenetleme istasyonunuzu kullanmadan önce güç ve bilgisayar bağlantısını yapmanız gerekmektedir. Kenetleme istasyonunu USB ya da eSATA ile bağlayabilirsiniz. Not: Kenetleme istasyonu eSATA ile bağlandığında daha yüksek transfer hızlarına erişebilirsiniz fakat her bilgisayarda eSATA bulunmamaktadır.
- Seite 44 TÜRKÇE 4. Sabit Diskin Takılması Sabit disk kenetleme istasyonuna bir 2,5” ya da 3,5” SATA sabit disk takabilirsiniz. Aşağıdaki resimlerde sabit diskin kenetleme istasyonuna nasıl takılabileceği gösterilmiştir: 2,5” sabit disk 3,5” sabit disk Sabit diski taktıktan sonra, arka kısımda bulunan güç anahtarı ile kenetleme istasyonunun gücünü açabilirsiniz.
- Seite 45 Arka kısımda bulunan güç anahtarı ile kenetleme istasyonunu kapatın. Kenetleme istasyonunun üst kısmında bulunan Çıkarma (Eject) düğmesine basın. Sabit disk artık kenetleme istasyonundan çıkarılabilir. Sabit disk takılı Sabit disk çıkarılmış Conceptronic eSATA Sabit Disk Kenetleme İstasyonunu Kullanmanın Keyfini Çıkarın!