Christopeit Sport TM 5000S Montage- Und Bedienungsanleitung
Vorschau ausblenden
Andere Handbücher für TM 5000S:
- Montage- und bedienungsanleitung (53 Seiten) ,
- Montage- und bedienungsanleitung (45 Seiten)

Verwandte Anleitungen für Christopeit Sport TM 5000S


Inhaltszusammenfassung für Christopeit Sport TM 5000S
- Seite 1 Heimsport-Trainingsgerät Elektrisches Laufband 1840 Montage- und Bedienungsanleitung für Bestell-Nr. 1840 Assembly and exercise instructions for Order No.
-
Seite 2: Wichtige Empfehlungen Und Sicherheitshinweise
Inhaltsübersicht Contents Page 28 1. Wichtige Empfehlungen und Sicherheitshinweise Seite 2. Einzelteileübersicht Seite 3. Stückliste-Ersatzteilliste-Techn. Daten Seite 4 - 6 4. Montageanleitung mit Explosionsdarstellungen Seite 7 - 10 5. Reinigung, Wartung und Lagerung Seite 11 - 12 6. Computeranleitung, Störungsbeseitigung Seite 13 - 26 7. -
Seite 4: Stückliste - Ersatzteilliste
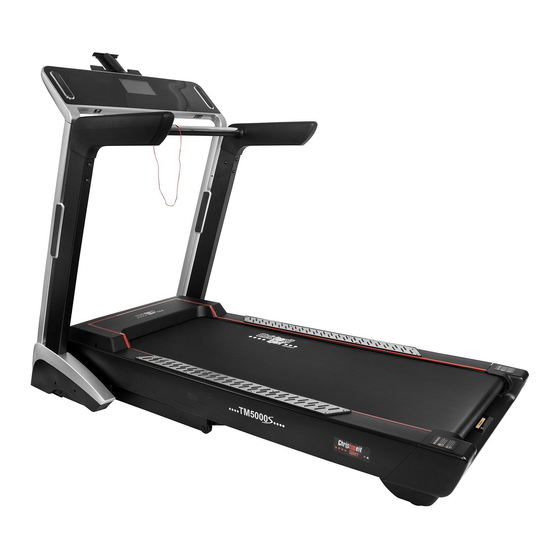
Stückliste - Ersatzteilliste • Ausklappautomatik Soft-Drop-System für ein leises und sicheres herablassen der Lauffläche TM 5000S Best.-Nr. 1840 • 4 Transportrollen für einen bequemen Standortwechsel • Geeignet bis zu einem Körpergewicht von max. 150 kg Technische Daten: Stand: 01. 05. 2017 • Abmessung der Lauffläche: ca. L 141 x B 51 cm • elektrische Daten: 220-240V/50Hz /1.700 Watt • Motor Dauerleistung 2,25 PS(1,7kw), maximale Motorleistung 4 PS(3kw) • Gerätegewicht: ca. 106 kg • Geschwindigkeit: 1 km/h bis 22 km/h (in 0,1 km/h Schritten einstellbar) • 20 individuelle Trainingsprogramme Stellmaße: ca. L 194 x B 88 x H 136 cm • 12 Wettkampfprogramme Stellmaße hochgeklappt: ca. L 125 x B 88 x H 154 cm • 17 Ausdauerprogramme • 1 Herzfrequenzprogramm mit Aufwärm- ,Lauf- und Auslaufphase • Überschreitung der Grenzwerte wird angezeigt... - Seite 5 Abbildungs- Bezeichnung Abmessung Menge Montiert an ET-Nummer Stück Lauffläche 13+14 36-1352-11-BT Motorabdeckung 36-1840-01-BT Seitenleiste links 36-1840-06-BT Seitenleiste rechts 36-1840-07-BT Rollenabdeckung links 36-1840-13-BT Rollenabdeckung rechts 36-1840-14-BT Endkappe 36-1840-02-BT Motorabdeckung links 36-1840-15-BT Motorabdeckung rechts 36-1840-16-BT Griffüberzug links 36-1840-17-BT Griffüberzug rechts 36-1840-18-BT Seitenverkleidung links 36-1840-04-BT Seitenverkleidung rechts 36-1840-05-BT...
- Seite 6 Abbildungs- Bezeichnung Abmessung Menge Montiert an ET-Nummer Stück Innensechskantschraube M6x10 39-9920 Senkkopfschraube M6x30 2+42 39-10306 Senkkopfschraube M6x25 2+42 39-9970-SW Kreuzschlitzschraube M5x16 2+27 39-10165 Kreuzschlitzschraube M5x8 2+24 39-9903-SW Kreuzschlitzschraube M4x8 95,108 39-10188 Kreuzschlitzschraube 4x16 22,26,28-35,40 39-10187 Kreuzschlitzschraube 109+113 39-10188 Kreuzschlitzschraube 4x12 25,36+95 39-10187 Zahnscheibe...
- Seite 7 Montageanleitung Legen Sie alles übersichtlich auf den Boden und kontrollieren Sie die Vollzähligkeit anhand der Montageschritte. Einig Schrau- ben befinden sich bereits an den Montagestellen auf zwecks einfacher Zuordnung. Die Montagezeit beträgt ca. 40min. Schritt 1: 1. Entnehmen Sie alle Kleinteile, sowie loses Verpackungsmaterial aus dem Karton und holen Sie dann mit Hilfe einer zweiten Per- sonden Grundrahmen (1) heraus.
- Seite 8 Schritt 4: 1. Führen Sie den Pulsgriff (6) mit Hilfe einer zweiten Person zu den Stützrohren links und rechts (3L+R) und verbinden Sie die Stecker der Pulskabel (97) mit den Pulsverbindungskabeln 1 (98). 2. Stecken Sie den Pulsgriff (6) vorsichtig in die Stützrohre (3L+R) ein, ohne dabei Kabel einzuquetschen, sodass die Befesti- gungsbohrungen übereinander stehen.
-
Seite 9: Anmerkung
Schritt 6: 1. Stecken Sie die Seitenverkleidungen links und rechts (30L+R) an die Stützrohre links und rechts (3L+R) und sichern Sie diese an den Halterungen links und rechts (12L+R) mittels den Schrauben 4x16 (75). 2. Stecken Sie dann die Innenabdeckungen links und rechts 31L+R) an die Halterungen (12L+R) und sichern Sie diese mit- tels der Schrauben (75). -
Seite 10: Ein- / Ausklappen Und Transportieren Des Laufbandes
Ein- / Ausklappen und transportieren 2. Platz sparend einklappen und Standortwechsel: Heben Sie den Laufrahmen an Position „A“ an und klappen des Laufbandes Sie das Laufband durch Anheben hochkant zusammen bis der Sicherungsknopf (15) einrastet. Durch vollständiges Einklappen 1. Zum Training ausklappen: werden automatisch die Transportrollen vorne in Funktion ge- Halten Sie das Laufband an Position „A“... -
Seite 11: Anmerkungen Zur Wartung Und Einstellung
Anmerkungen zur Wartung und Einstellung 1. Pflegen der Lauffläche: Damit das Laufband dauerhaft leicht und gut läuft, sollte immer nach 50 Betriebsstunden die Unterseite der Lauffläche, welche auf dem Gleitbrett liegt auf Ihre Gleitfähigkeit geprüft werden und ggf. mit Siliconspay (Kein Schmierstoff auf ÖL- oder Petroleum Basisverwenden) nachbehandelt werden. -
Seite 12: Ausklappen Der Halterung
Benutzung der Smartphone/Tablet-Halterung Ausklappen der Halterung: Bauteil Beschreibung Menge Halteklammer Auszug Ablage Smartphone/Tablet Schritt 1: Ziehen Sie hinter dem Computer an der Halterklammer (A) die Ablage (C) hoch, sodass sich diese mit dem Auszug (B) komplett herausschiebt. Schritt 2: Klappen Sie die Halteklammer (A) auf und schieben Sie diese et- was nach links um die aufgeklappte Position zu arretieren. -
Seite 13: Tastenfunktionen
Computeranleitung TM 5000S I- Computer 1. Anzeigen Nach Einschalten des Hauptschalters erscheint im Display für einige Sekunden das Christopeit Sport Logo. Ist das Laufband betriebsbereit wechselt das Display und zeigt das Hauptmenü an. Symbol für Steigungsstufe und Verbrauchsanzeige in Kcal Symbol Steigungsstufe leuchtet = Steigungsstufe wird im 5 Sek Wechsel angezeigt angezeigt;... -
Seite 14: Anzeigemöglichkeiten
2.3 TFT Bildschirm-Tasten: Start-Menü: Drücken dieser Taste ruft das Start-Menü auf. Vor: Im Start-Menü vorwärts den nächsten Menüpunkt anwählen. Zurück: Im Start-Menü rückwärts den vorherigen Menüpunkt anwählen; Eingabe: Bestätigt die ausgewählte Funktion Links: Bewegung nach links zur Auswahl Rechts: Bewegung nach rechts zur Auswahl Zurück: Zurück zur letzten angewählten Funktion 3. -
Seite 15: Schnellstart
Bildschirm-Informationen 2.1 Schnell-Start Drücken Sie die Start-Taste und der Bildschirm zeigt den Count Down von 3 Sekunden begleitet von Signaltönen an. Dieses Prozedere findet bei jedem Trainingsstart statt. Während des Trainings können die Geschwindigkeit und Steigung über die entspre- chenden Tasten beliebig verändert/angepasst werden. Drücken Sie die Stop-Taste und das Laufband verringert die Geschwindigkeit bis es stoppt. - Seite 16 Das ausgewählte Programm lässt sich zeitlich einstellen als auch in der Intensität in 3 Geschwindigkeits- und Steigungsstufen verändern. Verwenden Sie dazu die Auf-/Ab-Tasten und Rechts/Links-Tasten Bei den 17 Trainingsprogrammen sind die Geschwindigkeiten und Steigungen vom Programm vorgegeben. Man kann während des Programmablaufes manuell die Geschwindigkeit durch Drücken der +/- Tasten und Steigung durch Drücken der Auf-/Ab-Tasten beeinflussen.
- Seite 17 das Programm "PYRAMID CLIMB" aus. Geben Sie die Zeitvorgabe Wählen Sie durch Drücken der Eingabe -Taste ein und legen Sie die Intensitätsstufe für Geschwindigkeit und Steigung des Programmes fest. Drücken Sie die Start-Taste um dieses Programm zu trainieren. das Programm "PLATEAU CLIMB" aus. Geben Sie die Zeitvorgabe Wählen Sie durch Drücken der Eingabe -Taste ein und legen Sie die Intensitätsstufe für Geschwindigkeit und Steigung des Programmes fest.
- Seite 18 “ ” 400 Meter Standard Laufbahn; “ ” Ihr Trainingssymbol ist Blau “ ” Trainingssymbol vom Gegner ist rot Während des Wettkampfes wird Ihre Position und die des Gegners auf der 400m Laufbahn angezeigt. Wettkampf Programm: Während des Programmes können Sie die Zurück-Taste „ oder die Start-Menü...
- Seite 19 2.4 Benutzer-Programm Drücken Sie die Eingabe-Taste um das Untermenü der Benutzerprogramme (User Program) aufzurufen: Es sind 20 Benutzerprogramme einstellbar. Benutzen Sie die Auf-/Ab-Tasten um Programme auszuwählen und die Rechts-/Links -Tasten um die Trainingszeit einzustellen. Wählen Sie durch Drücken der Eingabe-Taste die Eingabemöglichkeiten aus und wählen Sie die Ge- schwindigkeit/Steigung (Incline/ Speed) an um die gewünschte Geschwindigkeit und Steigung für jede Unterteilung einzugeben.
-
Seite 20: Musik Abspielen
Aufwärmphase (3 Min) (WARM-UP STAGE) Trainingsphase Pulsgesteuerte Geschwindigkeit und Steigung (HEART RATE SPEED STAGE) Abkühlphase (1Min) (COOLING STAGE) Aufgrund fehlender Pulsdaten, keine Programmsteuerung möglich. (System didn’t detect your heart rate, HRC can’t run) 2.6 Musik Abspielen Drücken Sie die Eingabe-Taste um das Untermenü... -
Seite 21: Video Abspielen
2.7 Video abspielen Drücken Sie die Eingabe-Taste um das Untermenü Video (Movies) aufzurufen: Verwenden Sie die Auf-/Ab -Tasten um das gewünschte Video auszuwählen. Durch Drücken der Eingabe -Taste startet das Video. Verwenden Sie die Lautstärketasten und Pause/Vorspulen/Zurückspulen um die gewünschten Einstellungen vorzunehmen. Drücken Sie die Rechts-Taste um das Bild anzuwählen und durch Drücken der Eingabe –Taste können Sie das Vorschaubild auf den ganzen... -
Seite 22: Statusanzeige
um das Untermenü Hintergrundbeleuchtung (Switch) aufzurufen: Drücken Sie die Eingabe-Taste Einstellung von Sprache (Englisch / Chinesisch) und Maßeinheiten für Metrisch oder Imperial. Anwählen durch Auf-/Ab-Tasten und Rechts-/ Links -Tasten Speichern mittels der Eingabe-Taste auf der Funktion (Save). Metrisch: Geschwindigkeit in km/h | Distanz in km Imperial : Geschwindigkeit in mph | Distanz in Meilen 3. -
Seite 23: Error Code
5. Fit show Bluetooth App Dieser Computer beinhaltet die Verwendung der Fit Show App per Bluetooth Verbindung. Scannen Sie den QR Code um die Fit Show App aus Ihrem App Store herunter zu laden. 6. Error Code CODE Possible Reasons Solutions Check the Connector condition or Wire Joint connection ERR1... - Seite 24 Segments Incline INTERV Segments Speed Segments Incline LONG INTERV Segments Speed Segments Incline INTERV Segments AL-1 Speed Segments Incline INTERV Segments AL-2 Speed FARTLE Segments Incline Segments Speed Segments Incline UPHILL Segments CLIMB Speed Segments...
- Seite 25 Segments Incline PYRAMI D CLIMB Segments Speed Segments Incline PLATEA U CLIMB Segments Speed Segments Incline LADDE Segments Speed Segments Incline UPHILL INTERV Segments Speed Segments Incline STEADY PACE Segments Speed Segments Incline LONG SLOW Segments DIST-2 Speed Segments Incline...
- Seite 26 Speed Segments Incline CARDIO Segments Speed Segments Incline SHORT INTERV Segments AL-2 Speed Segments Incline UPHILL WALK Segments Speed III- REMARKS Program Parameter: Wettkampf-Programme: Challenge Program Parameter: Zeitunterteilung Time Section Programme Program Special forces-1 km/h Special forces-2 km/h Special forces-3 km/h Olympics game-1 km/h...
-
Seite 27: Trainingsanleitung
Trainingsanleitung Um spürbare körperliche und gesundheitliche Verbesserungen zu erreichen, Weitere Informationen zum Thema Aufwärmübungen, Dehnungsübungen müssen für die Bestimmung des erforderlichen Trainingsaufwandes die oder allgemeine Gymnastikübungen finden Sie in unserem Downloadbereich unter www.christopeit-sport.com folgenden Faktoren beachtet werden: 4. Motivation 1. Intensität: Der Schlüssel für ein erfolgreiches Programm ist ein regelmäßiges Training. - Seite 28 Contents 1. Summary of Parts Page 2. Important Recommendations and Safety Information Page 28 3. Parts List (List of spare parts) Page 29 - 31 4. Assembly Instructions With Exploded Diagrams,bv cn Page 32 - 37 6. Computer instructions Page 38 - 51 7.
- Seite 29 Parts List – Spare Parts List • Fold-out automatic (Soft-Drop-System) for a safety and easy let down of the tread • 4 transport rollers for an easy and comfortable move to location. TM 5000S Order No. 1840 • Load max. 150 kg (Body weight • Walking surface approx. L 141 x W 51 cm Technical data: Issue: 01. 11. 2014 • Electrical data: 220-240V/50-60Hz /1.700 Watt • Product weight: ca. 106 kg • 2,25 HP Motor continuous (1,7kw), maximum 4 HP Motor Peak (3kW) Space requirement approx: L 194 x B 88 x H 136 cm • Speed from 1 km/h - 22 km/h (adjustable in 0,1 km/h steps) Space requirement foldable approx: ca. L 125 x B 88 x H 154 cm • 20 individual programs • 12 competition programs • 17 endurance programs • 1 target HRC programs (pulse controlled) • 6 virtually programs • Quick speed buttons for 3 km/h, 6 km/h and 9km/h Please contact us if any components are defective or missing, or • Power Incline 0-15Level, electronically adjustable if you need any spare parts or replacements in future: • Quick incline buttons for 3, 6 and 9 incline level • Speed and incline adjustable at hand rail • Hand pulse measurement Internet service- and spare parts data base: • Vibration absorbing running surface (Cushion System)
- Seite 30 Illustration Designation Dimension Quantity Attached to ET-Number Illustration No. Edgings left 36-1840-06-BT Edgings right 36-1840-07-BT Wheel cover left 36-1840-13-BT Wheel cover right 36-1840-14-BT End cover 36-1840-02-BT Motor side cover left 36-1840-15-BT Motor side cover right 36-1840-16-BT Foam grip left 36-1840-17-BT Foam grip right 36-1840-18-BT Base cover 1 left...
- Seite 31 Illustration Designation Dimension Quantity Attached to ET-Number Illustration No. Phillips tapping screw 4x16 22,26,28-35,40 39-10187 Phillips tapping screw 109+113 39-10188 Phillips tapping screw 4x12 25,36+95 39-10187 Washer 10//20 55-58 39-9989-CR Washer 8//16 39-9962-CR Washer 6//12 67+68 39-10013-CR Washer 8//13 39-9962 Socket head cap bolt M8x15 39-10247...
-
Seite 32: Installation Instructions
Installation instructions Put everything clearly on the ground and control the comple- teness based on the assembly steps. Some screws are already at the mounting locations for an easy assignment. Assembly time is approximately 40 min. Step 1: 1. Remove all small parts, loose packing material out of the box and then take out with help of a second person the base frame (1) of packaging. - Seite 33 Step 4: 1. Place the pulse grip (6) with the help of a second person to the support tubes left and right (3L+R) and connect the plugs of pulse cable (97) with pulse connection cable 1 (98). 2. Insert the pulse grip (6) into the supports (3L+R) (without squee- zing a cable) so that the holes pattern and screw the connection tightly with screws M10x15 (58) and washers 10//20 (78).
- Seite 34 Step 6: 1. Put the base covers left and right (30L+R) in the correct position to the supports left and right (3L+R) and attach them by using screws 4x16 (75). 2. Put the bottom frame covers left and right (31L+R) in the correct position to the base metal plates (12L+R) and attach them by using screws 4x16 (75).
- Seite 35 Folding / unfolding and transport of the treadmill 2. Fold up for saving space and move: Raise the treadmill at position „A“ and push the treadmill into vertically position until the locking knob (15) locks up. 1. Fold down for exercising: By completely folding out, the front transport rollers automati- Put your hands at the treadmills position „A“...
-
Seite 36: Maintenance And Adjusting
Maintenance and adjusting 1. Lubrication for the running belt: In order to keep the machine in the best condition, please add some Silicone oil between the running belt and the running board after 50 hours or 1 to 2 month of use. But the running belt may slip, if you lubricate too much. - Seite 37 The method of using the Shelf: Part. No Description Board Extended frame Supported frame PAD/Phone Step one: Hold the boss of the board A, pull the extended frame B and sup- ported frame C out from the computer. (the position of the boss is showed as picture 4). Step two: Rotate the board A as the direction of the arrow in the picture 2, then push it to the left.
-
Seite 38: Button Functions
I- COMPUTER 1. Window Display After switch on the main switch, the display shows the Christopeit Sport logo for some seconds. If the treadmill is ready for data input the display changes to Start menu. Window: Show current Incline Level or Calorie value indicator on, window shows the current Incline Level;... -
Seite 39: Main Interface
2.3 TFT Function Buttons: HOME: Back to Main Interface; UP: Move Up to Select; DOWN: Move Down to Select; ENTER: Confirm the Selected Function; LEFT: Move Left to Select; RIGHT: Move Right to Select; RETURN: Return to the Previous Interface. 3. -
Seite 40: Quick Start
Main Interface Specifications 2.1 Quick Start Press START Key, Main Screen show up „3 – 2 – 1 - GO“, and then the Treadmill will Startup („3 – 2 – 1 - GO“ Countdown Process will along with every Startups): During exercise, you can control the Speed and Incline by pressing correspon- ding Buttons on the Panel. - Seite 41 After Setting, press START on Panel to Start the Treadmill and Run current Program: 17 Preset Profiles have marked Speed and Incline in waveform, allowing users to visually understand the Program‘s Exercise Strength and Trends. Motion Profiles: Select a desired Profiles, and set the running Time, then Start. Build-in Profiles divided in 20-Time Sections, Each Section Time = Set Time/20.
- Seite 42 Select “UPHILL INTERVAL” Profile, go through the Incline/ Speed values per section, set desired Time, then press START to enter the “UPHILL INTERVAL“ interface. Select “STEADY PACE” Profile, go through the Incline/ Speed values per section, set desired Time, then press START to enter the “STEADY PACE“...
- Seite 43 Select „Confirm“ and press to STOP the current Exercise, Treadmill will stop, then can enter the other Exercise Function; Select „Cancel“ and press to continue to run the current Exercise. 12 Challenge Profiles Select “Special forces-1” Profile, go through the Speed values per section, set desired Time, then press START to enter the "Special forces-1"...
-
Seite 44: User Program
2.4 User Program Select and press to enter the „User Program“ submenu: Built-in 20 User Programs: Use Key to switch & Select, Key to Set Time. Select and press to enter the „Setting“ Interface, choose Incline/ Speed menu to set the value for each section, press to save and set next cyclically. - Seite 45 WARM-UP STAGE ( 3Min.) HEART RATE CONTROL SPEED STAGE COOLING STAGE (1 Min.) System NOT Detect Heart Rate Signal, HRC CAN’T RUN:...
-
Seite 46: Music Play
2.6 Music Play Select and press to enter the „Music“ submenu: UP | DOWN Key to select music, press to Play; using & Keys on the panel to do relevant operations; support Background Play. 2.7 Movies Play Select and press to enter the „Movies“... -
Seite 47: Status Bar
Select and press to enter the „Switch“ Setting Interface: Setting Language: English / Chinese; Setting Work Unit: Metric Units or Imperial Units. Move selection to “Save”, press to save the Setting: Metric Units: Speed (km/h) | Distance (km) Imperial Units: Speed (mph) | Distance (mile) 3. -
Seite 48: Over-Current Protection
Instantaneous ERR5 2. Large Resistance over Running Deck, need Lubrication; Over-current Protection 3. Re-write the Controller Current Parameter; 6. Error Code Controller not matching the outer Electric, to change a CODE Possible Reasons Solutions ERR6 Over-current Protection compatible Controller. ERR1 Communication Fails Check the Connector condition or Wire Joint connection between the Console and Control Board, Replace the Connector or Re-Plug Wire Joints will be helped if so. - Seite 49 Segments Incline INTERV Segments AL-1 Speed Segments Incline INTERV Segments AL-2 Speed Segments FARTLE Incline Segments Speed Segments Incline UPHILL Segments CLIMB Speed Segments Incline PYRAMI D CLIMB Segments Speed Segments Incline PLATEA U CLIMB Segments Speed Segments...
- Seite 50 Segments Incline LADDE Segments Speed Segments Incline UPHILL INTERV Segments Speed Segments Incline STEADY PACE Segments Speed Segments Incline LONG SLOW Segments DIST-2 Speed Segments Incline CARDIO Segments Speed Segments Incline SHORT INTERV Segments AL-2 Speed Segments Incline...
- Seite 51 Segments Incline UPHILL WALK Segments Speed III- REMARKS Program Parameter: Program Parameter: Time Section Challenge Program Parameter: Program Special forces-1 SPEED Time Section Special forces-2 SPEED Program Special forces-3 SPEED Olympics game-1 SPEED Olympics game-2 SPEED Olympics game-3 SPEED Professional SPEED game-1 Professional...
-
Seite 52: Training Instructions
Training instructions You must consider the following factors in determining the amount of training 4. Motivation effort required in order to attain tangible physical and health benefits: The key to a successful program is regular training. You should set a fixed time and place for each day of training and prepare yourself mentally for the 1.