Inhaltsverzeichnis
Werbung
Verfügbare Sprachen
Verfügbare Sprachen
Quicklinks
Werbung
Inhaltsverzeichnis

Verwandte Anleitungen für Bimar VP42T


Inhaltszusammenfassung für Bimar VP42T
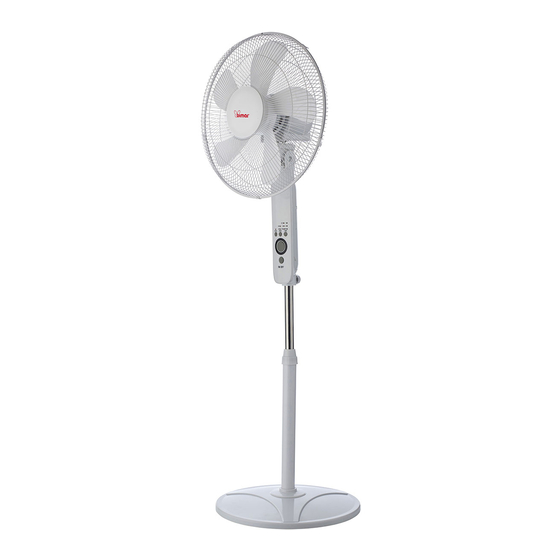
- Seite 1 LIBRETTO ISTRUZIONI INSTRUCTION BOOKLET BEDIENUNGSANLEITUNG NOTICE D'INSTRUCTIONS FOLLETO DE INSTRUCCIONES VENTILATORE A PIANTANA STAND FAN STANDVENTILATOR VENTILATEUR À PIED VENTILADOR DE PIE type VP42T (mod. B008.G16DY3F)
-
Seite 2: Avvertenze Generali
Questo simbolo vi invita a leggere attentamente queste istruzioni prima dell’uso dell’apparecchio, ed eventualmente informare terzi, necessario. Conservare libretto ulteriori consultazioni e per l’intera durata di vita dell’apparecchio. Se nella lettura di queste istruzioni d’uso alcune parti risultassero difficili nella comprensione o se sorgessero dubbi, prima di utilizzare il prodotto contattare l’azienda all’indirizzo scritto in ultima pagina. - Seite 3 • L’apparecchio può essere utilizzato da bambini di età non inferiore a 8 anni e da persone con ridotte capacità fisiche, sensoriali o mentali, o prive di esperienza o della necessaria conoscenza, purché sotto sorveglianza oppure dopo che le stesse abbiano ricevuto istruzioni relative all’uso sicuro dell’apparecchio e alla comprensione dei pericoli ad esso inerenti.
- Seite 4 • Assicurarsi che il ventilatore funzioni correttamente: nel caso contrario spegnere l’apparecchio e farlo controllare da personale professionalmente qualificato. • Non spostare l’apparecchio durante il funzionamento. • Se l’apparecchio non è in funzione togliere la spina dalla presa di corrente. •...
-
Seite 5: Installazione
riparazioni effettuate da personale non qualificato possono essere pericolose e fanno decadere la garanzia. • Assicurarsi che il ventilatore sia scollegato dalla rete di alimentazione prima di togliere lo schermo di protezione . INSTALLAZIONE • Dopo aver tolto l’imballaggio, assicurarsi dell’integrità dell’apparecchio; in caso di dubbio non utilizzarlo e rivolgersi a personale professionalmente qualificato. - Seite 6 Procedere come descritto e utilizzare le figure per riferimento. A. Svitare e sfilare la ghiera (6) dalla colonna ed inserire l’anello (3), e riavvitare la ghiera. B. Innestare la colonna (14) nella relativa sede della base, bloccarla mediante la vite a “L” con rondella (1) impegnando anche il contrappeso Assicurarsi che colonna e base e contrappeso siano saldamente accoppiati.
- Seite 7 Pannello comandi Telecomando Attenzione: il ventilatore può essere utilizzato solo se correttamente assemblato in buono stato. Le funzioni del ventilatore si azionano sia con la tastiera del pannello comandi, e con il telecomando che deve essere puntato frontalmente (distanza max di circa 4m) verso il pannello comandi, e prima ancora bisogna inserirvi le batterie (aprire lo sportello posteriore e inserire due batterie tipo “AAA”...
-
Seite 8: Pulizia E Manutenzione
Velocità massima selezionata Velocità media selezionata Velocità minima selezionata Timer: imposta il tempo di funzionamento, al termine del quale l’apparecchio si arresta. Premere ripetutamente il tasto “TIMER”: ad ogni pressione varia il tempo (da ½ h sino a 7’h30’ con settaggi di ½ h), e sul pannello comandi si illumina il tempo selezionato. - Seite 9 • E’ indispensabile mantenere i fori di aerazione del motore liberi da polvere e lanugine: verificare periodicamente e pulire con un panno. • Per periodi lunghi di inutilizzo, è consigliabile riporre il ventilatore al riparo da polvere e umidità. • Se si decide di non utilizzare più l’apparecchio, si raccomanda di renderlo inoperante tagliando il cavo di alimentazione (prima assicurarsi d’aver tolto la spina dalla presa di corrente), e di rendere innocue quelle parti che sono pericolose qualora utilizzate per gioco dai bambini (ad esempio l’elica).
-
Seite 10: General Notices
Please read these instructions carefully before using the appliance, and instruct other persons using it, too, if necessary. Keep the manual handy for future use. If when reading these instructions manual certain parts should be difficult to understand, or if there is any confusion, contact the company indicated on the last page before using the product. - Seite 11 or lack of experience and knowledge if they are supervised or if they have been given instructions concerning the use of the appliance in a safe way and if they understand the hazards involved. Children must not play with the appliance. Cleaning and user maintenance must not be performed by children without supervision.
-
Seite 12: Installation
• Do not pull on the cord to move the appliance. • Do not pull on the cord or the appliance itself to disconnect the plug from the plug point. • If the power cord is damaged, it must be replaced by the manufacturer, its service agent or similarly qualified persons in order to avoid risks. - Seite 13 • The power socket must be easy to reach so the plug can be removed quickly in case of emergency. • To not place the appliance near sinks or other container of liquids (minimum distance of 2 meters) to avoid the risk of it falling in. •...
- Seite 14 "L" screw Base with counterweight Ring Fan fixing ring nut Drive shaft Rod fixing ring nut Adjustable hose Floor fixing screw Control panel 10) Plastic ring screw 11) Front grill / protective screen 12) Rear grill 13) Propeller 14) Column 15) Rear grill fixing ring nut Control panel Remote controller...
- Seite 15 Warning: The fan can only be used if properly assembled in good condition. The fan functions are operated with both the keypad of the control panel and the remote control which must be pointed at the front (maximum distance of about 4m) towards the control panel;...
-
Seite 16: Cleaning And Maintenance
Height adjustment: unscrew the ring nut (6); raise or lower the main unit to the desired height and then lock the ring nut. To operate the fan, plug it into a socket: indicating the standby status; press the “ " button to activate the fan and select the desired functions. To deactivate the unit, press the "... -
Seite 17: Allgemeine Hinweise
Dieses Symbol fordert Sie auf, diese Anleitung vor dem Gebrauch des Geräts zu lesen und bei Bedarf auch andere Personen darüber zu informieren. Bewahren Sie diese Anleitung zum späteren Nachschlagen und während der gesamten Lebensdauer des Geräts auf. Sollten Teile dieser Anleitung schwer verständlich sein oder wenn Sie Zweifel haben, kontaktieren Sie bitte das Unternehmen unter der auf der letzten Seite genannten Adresse, bevor Sie das Produkt benutzen. - Seite 18 notwendige Aufsicht oder Anweisungen in Hinblick auf den sicheren Umgang mit dem Gerät erhalten, und wenn sie sich der möglichen Gefahren bewusst sind. Kinder sollten nicht mit dem Gerät spielen. Die vom Benutzer durchzuführende Säuberung und Wartung darf nicht von Kindern ohne Aufsicht vorgenommen werden. •...
- Seite 19 • Ziehen Sie den Stecker nicht am Kabel oder mit dem Gerät selber aus der Steckdose. • Wenn das Stromkabel beschädigt ist, muss es vom Hersteller, seinem technischen Kundendienst oder einer Person, die in ähnlicher Weise qualifiziert ist, ersetzt werden, um etwaige Gefahren zu vermeiden. •...
- Seite 20 ist, so müssen diese den geltenden Sicherheitsvorschriften entsprechen und ihre Stromstärke (Ampere) darf nicht niedriger sein, als die maximale Stromstärke des Gerätes. • Prüfen Sie vor jeder Verwendung, dass sich das Gerät in einem guten Zustand befindet und dass das Stromkabel nicht beschädigt ist: Wenden Sie sich im Zweifelsfall an entsprechend qualifiziertes Personal.
- Seite 21 Befestigungsschraube sollte sich im unteren Teil befinden) und mit der entsprechenden Schraube (10) festschrauben. H. Nach Abschluss dieser Arbeitsschritte überprüfen, dass die Schutzgitter fest miteinander und mit dem Motor verbunden sind. L-Schraube Sockel mit Gegengewicht Ring Nutmutter für Lüfterradbefestigung Motorwelle Nutmutter für Stangenbefestigung...
- Seite 22 Bedienungstafel Fernbedienung BENUTZUNG Achtung: Der Ventilator darf dann eingesetzt werden, wenn ordnungsgemäß zusammengebaut und in einwandfreiem Zustand ist. Die Ventilatorfunktionen lassen sich sowohl über die Tastatur der Bedienungstafel als auch über die Fernbedienung ansprechen; letztere muss dazu direkt in Richtung Bedienungstafel ausgerichtet werden (max. Abstand ca. 4 m).
- Seite 23 3. Natural: Wechselnde Ventilation (Symbol „ “) gemäß nachfolgend dargestellter Pläne. Maximalgeschwindigkeit Mittlere Geschwindigkeit ausgewählt ausgewählt Minimalgeschwindigkeit ausgewählt Timer: Er stellt die Betriebsdauer ein; nach deren Ablauf das Gerät anhält. Wiederholtes Betätigen der Taste „TIMER“: Bei jedem Tastendruck ändert sich die Zeitdauer (von ½...
-
Seite 24: Reinigung Und Pflege
REINIGUNG UND PFLEGE Achtung: ziehen Sie den Netzstecker aus der Netzsteckdose, bevor Sie das Gerät reinigen. • Verwenden Sie zum Reinigen ein weiches, leicht feuchtes Tuch. Verwenden Sie keine scheuernden oder aggressiven Reinigungsmittel. • Kein Teil des Ventilators darf in Wasser oder andere Flüssigkeiten eingetaucht werden: Sollte dies geschehen, keinesfalls die Hand in die Flüssigkeit tauchen, sondern als Erstes den Netzstecker aus der Netzsteckdose ziehen. -
Seite 25: Avertissements Généraux
Nous vous prions de lire attentivement ces instructions avant d’utiliser l'appareil et de les divulguer à toutes les personnes qui pourraient en avoir besoin. Gardez-lez a portée de main. Si à la lecture de ce manuel d'instruction certaines parties étaient difficiles à... - Seite 26 liquide oxydant. Accrochez le diffuseur d’arômes à la grille frontale ou à l’arrière (toujours à l’extérieur) au moyen des crochets fixés derrière. • N’introduisez aucun outil ni vos doigts entre les mailles de la grille de protection de l’hélice. • N’utilisez pas l’appareil à une température ambiante supérieure à 40°C. •...
- Seite 27 • Retirez toujours la fiche de la prise de courant lorsque l’appareil ne fonctionne pas. • Débranchez toujours l’appareil de la prise de courant avant d’assembler, de démonter ou de nettoyer l’appareil. • N’exposez pas l’appareil aux agents atmosphériques (soleil, pluie. etc.). •...
- Seite 28 - sources de chaleur (par ex. flammes libres, gazinières, etc.) - conteneurs de liquides (par ex. éviers, etc.) pour éviter les éclaboussures d'eau et qu’il ne tombe à l’intérieur (distance de 2 mètres minimum) - tissus (rideaux, etc.) ou des matières volatiles susceptibles d’obstruer la grille d’aspiration ;...
- Seite 29 1) Vis en forme de “L” Base avec contre poids Anneau Capsule fixation ventilateur L’arbre moteur Capsule fixation tige Tuyau réglable Vis fixation Panneau de commandes 10) Vis anneau en plastique 11) Grille antérieure/écran de protection 12) Grille postérieure 13) Hélice 14) Colonne 15) Capsule fixation...
- Seite 30 UTILISATION Attention : le ventilateur ne peut être utilisé que s’il est bien assemblé et en bon état. Les fonctions du ventilateur se mettent en route soit à l’aide des touches du panneau de commandes et avec la télécommande qui doit être dirigée vers l’avant (distance maximale d’environ 4m) vers le panneau de commandes.
-
Seite 31: Nettoyage Et Entretien
panneau de commande le temps sélectionné s’affiche. Pour désactiver la minuterie, appuyer sur la touche jusqu’à ce que toutes les durées s’éteignent. Oscillation (droite-gauche): appuyer sur la touche “SWING”, l’activer ou la désactiver. Inclinaison verticale (haut-bas): elle se sélectionne en mettant le corps du moteur dans la direction souhaitée (haut-horizontal-bas). - Seite 32 AVERTISSEMENTS POUR L'ÉLIMINATION CORRECTE DU PRODUIT AUX TERMES DE LA DIRECTIVE EUROPÉENNE 2011/65/UE. Au terme de son utilisation, le produit ne doit pas être éliminé avec les déchets urbains. Le produit doit être remis à l'un des centres de collecte sélective prévus par l'administration communale ou auprès des revendeurs assurant ce service.
-
Seite 33: Advertencias Generales
Este símbolo le invita a leer atentamente las instrucciones antes de utilizar el aparato y a comunicarlas a terceros si es necesario. Guarde este folleto para referencias futuras y durante toda la vida del aparato. Si cualquier parte de estas instrucciones de uso es difícil de comprender o si tiene dudas, contacte con la empresa a la dirección que aparece en la última página antes de utilizar el producto. - Seite 34 • este aparato puede ser utilizado por niños de edad no inferior a 8 años y por personas con capacidades mentales, sensoriales y físicas reducidas o sin experiencia o conocimientos, si reciben la supervisión o las instrucciones necesarias acerca del uso seguro del aparato y si están conscientes de los peligros potenciales.
-
Seite 35: Instalación
• Desconecte siempre el aparato de la toma de corriente antes de armar, desarmar o limpiar el aparato. • No deje el aparato expuesto a los agentes atmosféricos (sol, lluvia, etc.). • No toque el aparato con las manos o los pies mojados. •... -
Seite 36: Montaje
calificado, que comprobará la sección de los cables del enchufe está adaptado a la potencia absorbida por el aparato. En general está desaconsejado el uso de adaptadores o de alargadores; si fuera indispensable, tienen que ser conformes a las normas vigentes de seguridad y su capacidad de amperaje no tiene que ser inferior a la máxima del aparato. - Seite 37 la trasera (12) bloquéelas con el anillo de plástico (el tornillo de fijación debe quedar en la parte inferior) y asegure la fijación enroscando el tornillo (10). H. Al terminar las operaciones, verifique que las rejillas de protección estén bien acopladas y conectadas rígidamente con el motor.
- Seite 38 Panel de mandos Mando a distancia Alerta: el ventilador se puede utilizar sólo si está ensamblado de manera correcta y está en buenas condiciones. Las funciones del ventilador se accionan tanto con el teclado del panel de mandos como con el mando a distancia que se debe apuntar en la parte delantera (distancia máx.
-
Seite 39: Limpieza Y Mantenimiento
6. Natural: ventilación intermitente (símbolo “ ”), es decir según los esquemas indicados aquí. Velocidad máxima seleccionada Velocidad media seleccionada Velocidad mínima seleccionada Temporizador: configura el tiempo de funcionamiento, al final del cual el aparato se detiene. Pulse varias veces la tecla “TIMER”: cada vez que se pulsa varía el tiempo (de ½... - Seite 40 eléctricas se encuentren secas: en caso de dudas póngase en contacto con personal técnico capacitado. • Es indispensable mantener los orificios de aireación del motor libres de polvos y pelusas. • Para períodos largos de inutilizo, es necesario conservar el ventilador lejos del polvo y la humedad;...
- Seite 41 Prescrizioni relative alle informazioni/Information requirements/ Informations/Informationsanforderungen/ Disposiciones relativas a las informaciones Descrizione/Description/ Description/ Simbolo/S Valore/Value/ Unità/Unit/ Beschreibung/ Descripción ymbol/ Valeur/ Unité/ Einheit/ Wert/Valor Símbolo Portata massima d’aria/Maximum fan flow rate/ 48.9 m³/min Puissance de ventilation maximale/ Maximaler Luftdurchsatz des Lüfters/ Capacidad máxima de aire Potenza assorbita del ventilatore/Fan power input/ 43.1...
- Seite 42 Dati tecnici/Technical data Données techniques/ Technische Daten/Datos técnicos 220-240V~50Hz 50W...
- Seite 44 Via G.Amendola, 16/18 25019 Sirmione (BS) – ITALY www.bimar-spa.it Servizio clienti: servizioclienti@bimar-spa.it 8955895542 VP42T_I.B._17...