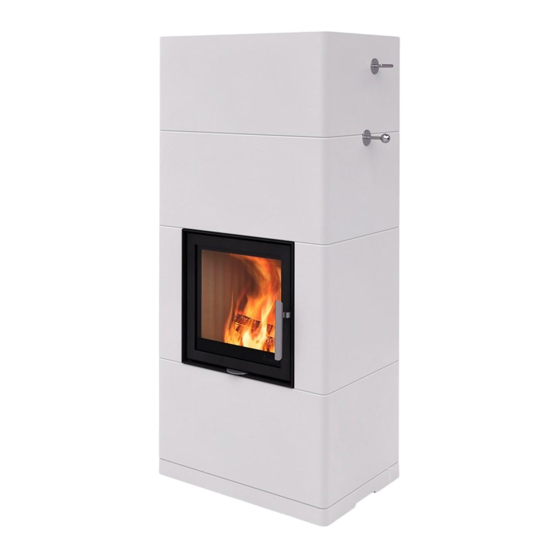
Inhaltszusammenfassung für Nordpeis Salzburg
- Seite 1 Montageanleitung Installation manual Salzburg Art.no: PN-SAL00-000/ PN-SAL00-001 Last updated: 05.10.2011 RRF - 50 11 2758/ 50 11 2822...
-
Seite 2: Allgemeine Information Zu Wärmespeichernden Feuerstellen
Höchstgewicht eines Schornsteins aus Stahlelementen und ein ruhigeres Flammenbild, kann man die bei Anschluß „oben“: 300 kg Luftzufuhr mit dem Lüftungsventil drosseln. Das Modell Salzburg hat eine Nachbrenntechnologie die man nur Dieses Gerät kann nicht an einen Schornstein aus Be-... - Seite 3 Wenn Ihnen eine traditionell verputzte Oberfläche muß den landesgemäßen Vorschriften und Regeln besser gefällt, befeuchten Sie die Verkleidung und entsprechen. Nordpeis haftet nicht für unsachgemäße decken Sie sie ganz mit Fliesenleim und einem Montage oder Installation. Glasfibernetz, bevor Sie Mörtel -oder Mineralverputz auftragen.
- Seite 4 90-130 sich der Anstrich verfärben. Cesius Länge der Holzscheite 300 mm Bei Modell Salzburg empfehlen wir pro Produktgewicht 610kg (717 kg hoch) Befeuerungszyklus ein Nachlegen von 3 Mal. Das Nachlegen besteht aus ca. 2 kg trockener Holzscheite Empfohlene Holzmenge beim...
- Seite 5 Es muß ein Abstand von 6-10 mm Luft Sie diese Figuren. zwischen dem inneren Kern und der montierten Bei Modell Salzburg Version „high“ werden die in FIG Verkleidung bestehen. 22 + 48 gezeigten Thermotteteile mit längeren Teilen ausgetauscht, die dieser Version beiliegen.
- Seite 6 Verkleidung 10mm nach unten. Dies gilt für beide Beenden Sie die Montage wie in FIG 41-52 gezeigt. Hebel. FIG 41-52 Montage der Brennkammer Merke: Kleben Sie die Dekorhülsen erst an die Die richtige Montage der Thermotteplatten und der Klappenhebel nach dem Anstrich der Verkleidung hinteren Platte aus Gußeisen wie in FIG 44 gezeigt, ist und nach erfolgter Erstbefeuerung.
-
Seite 7: General Information About Heat Accumulating Fireplaces
Soot isolate the ducts and thus lower the efficiency. One can also notice that the The heat accumulating fireplaces from Nordpeis have draught is reduced and that the flames are difficult a long duct system where the heat developed in the to control with the air vent function. - Seite 8 Nordpeis AS is included, or a light and appropriate filling material. Any not responsible for wrongly assembled fireplaces.
- Seite 9 Place the first PowerStone bottomplate (2) in the centre of the base plate before the PowerStone element 3 is For Salzburg M, we recommend a firing cycle with three placed on top. Glue in place the transit element (5) for...
- Seite 10 48, must be exchanged for longer versions when are to be glued with the acrylic that is included. If acrylic assembling Salzburg M – High. seeps out between the joints on the outside, remove it before it dries with a wet sponge / finger.
- Seite 11 Top Connection illustrations. FIG. 28-34: FIG 52-53 Installation of the Door Follow the steps for the top connection. The hole for To meet government requirements in certain European the flue damper arm must be marked when the damper countries, all doors are self-closing. If this is not a is placed as shown in FIG 31.
- Seite 12 Fig 1 Salzburg high/ hoch...
- Seite 13 Salzburg Air/ Zuluft...
- Seite 14 FIG 2...
- Seite 15 FIG 3 FIG 4 CO-SAL00-001 PN-SAL00-P01 FIG 5 FIG 6 PN-SAL00-P04 PN-SAL00-P02 PN-SAL00-P03...
- Seite 16 FIG 7 FIG 8 PN-SAL00-P04 PN-SAL00-P03 PN-SAL00-P05 FIG 9 FIG 10 CO-SAL00-002 PN-SAL00-P06...
- Seite 17 FIG 11 FIG 12 04-26413-000 PN-SAL00-P06 FIG 13...
- Seite 18 FIG 14 22-SAL00-060 IP-SAL00-030 22-SAL00-220 FIG 14b...
- Seite 19 FIG 15 FIG 16 PN-SAL00-P07 04-26420-010 FIG 17 CO-SAL00-003 CO-SAL00-004...
- Seite 20 FIG 18 FIG 19 FIG 20 PN-SAL00-P07 (EXT 1-3) CO-SAL00-005 (EXT 4)
- Seite 21 FIG 21 FIG 22 CO-SAL00-P08 LA-SAL00-007 FIG 23 FIG 24 PN-SAL00-P09 LA-SAL00-008...
- Seite 22 FIG 25 CO-SAL00-005 FIG 26 22-SAL00-130 22-SAL00-130 22-SAL00-200 22-SAL00-200 22-SAL00-210 22-SAL00-210 22-SAL00-190 (l/pit=459mm) 22-SAL00-180 (l/pit=338mm)
- Seite 23 FIG 27 4 pcs no. 2.5 FIG 28 FIG 29 PN-SAL00-P10 PN-SAL00-P11...
- Seite 24 FIG 30 FIG 31 PN-SAL00-P10 CO-SAL00-006 FIG 32 no. 2.5 22-SAL00-230 22-SAL00-210...
- Seite 25 FIG 33 FIG 34 PN-SAL00-P13 CO-SAL00-007...
- Seite 26 FIG 35 PN-SAL00-P10 PN-SAL00-P15(a/b) FIG 36 FIG 37...
- Seite 27 FIG 38 FIG 39 PN-SAL00-011(a) PN-SAL00-P13(a) PN-SAL00-012(b) PN-SAL00-P14(b) FIG 40 CO-SAL00-007(a) CO-SAL00-008(b)
- Seite 28 FIG 41 FIG 42 04-26408-000 04-26408-000 LA-SAL00-001 FIG 43 FIG 44 LA-SAL00-002 IA-SAL00-020...
- Seite 29 FIG 45 FIG 46 LA-SAL00-003 LA-SAL00-004 FIG 47 FIG 48 LA-SAL00-006 LA-SAL00-005 LA-SAL00-009 (only for Extension part)
- Seite 30 FIG 49 FIG 50 20-01201-019 22-SAL00-150 22-SAL00-160 FIG 51 FIG 52 22-SAL00-270...
- Seite 31 FIG 53 FIG Z...
- Seite 32 FIG 54 FIG 55 IP-SAL00-040 IP-SAL00-040 IP-SAL00-040 IP-SAL00-040 FIG 56 IP-SAL00-010 IP-SAL00-010...
- Seite 33 FIG 57 FIG 58 FIG 59 FIG 60 22-SAL00-230 22-SAL00-230...
- Seite 34 Nordpeis AS, Gjellebekkstubben 9-11, N-3420 LIERSKOGEN, Norway www.nordpeis.no...


