Inhaltsverzeichnis
Werbung
Verfügbare Sprachen
Verfügbare Sprachen
Werbung
Inhaltsverzeichnis
Fehlerbehebung

Verwandte Anleitungen für Levoit LV550HH


Inhaltszusammenfassung für Levoit LV550HH
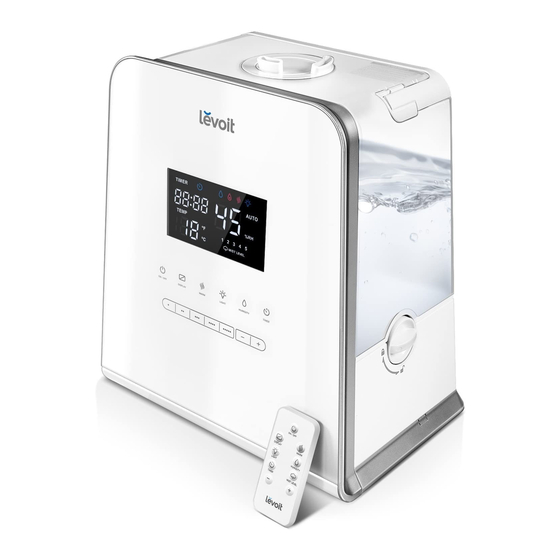
- Seite 1 Model No.: LV550HH Hybrid Ultrasonic Humidifier ENGLISH • DEUTSCH Questions or Concerns? Questions or Concerns? support.eu@levoit.com Please contact us Mon-Fri 9:00AM-5:00PM PST at (888) 726-8520 or email support@levoit.com...
-
Seite 2: Inhaltsverzeichnis
English Deutsch TABLE OF CONTENTS INHALTSVERZEICHNIS Package Contents Packungsinhalt Specifications Spezifikationen Safety Information Sicherungshinweis Getting to Know Your Humidifier Lernen Sie Ihren Befeuchter Kennen · LED Display · LED-Anzeige · Control Panel · Schalttafel Getting Started Anfangen Operation Betrieb · General Operation ·... -
Seite 3: Package Contents
English Ultrasonic Cool Mist Humidifier Model No.: LV550HH PACKAGE CONTENTS SPECIFICATIONS 1 x LV550HH Hybrid Ultrasonic Humidifier Power Supply 220-240V 50/60Hz 1 x Cleaning Brush 3 x Aroma Pads (1 Pre-installed) Rated Power 110W 1 x Remote Water Tank 5.5 L (1.4 gallons) -
Seite 4: Safety Information
S A F E T Y I N F O R M AT I O N IMPORTANT: Please read, understand, and comply with all of the instructions provided in this manual before using the device. Failure to comply with the instructions given in this manual and/or using the device in ways other than the ones mentioned in this manual may result in serious injury and/or damage to the product. - Seite 5 • DO NOT fill the water tank through the nozzle or • DO NOT clean the unit while it is connected mist tube. Doing so may damage the humidifier. to a power source or while it is on. • DO NOT add essential oils or medicated •...
-
Seite 6: Getting To Know Your Humidifier
G E T T I N G T O K N O W Y O U R H U M I D I F I E R Handle 2. Nozzle 3. Water Tank 4. LED Display 5. Control Panel 6. Safety Lock Base 8. - Seite 7 12. Water Tank Cap 13. Mist Tube 14. Water Level Sensor 15. Heating Element 16. Inner Chamber 17. Cleaning Brush 18. Night Light 19. Cleaning Brush Storage 20. Air Vent 21. Transducer 22. Power Cord...
-
Seite 8: Led Display
LED Display Timer 2. Mist Icon 3. No Water Indicator 4. Warm Mist Icon 5. Night Light Icon 6. Auto Mode Indicator Relative Humidity Level (RH) 8. Mist Level Indicator 9. Temperature Unit 10. Ambient Temperature Control Panel Power Button 2. -
Seite 9: Getting Started
G E T T I N G S TA R T E D 3. Lift up the handle, then pull up on the Turn the safety lock to the position. handle to remove the water tank from [Figure 1.1] the base. [Figure 1.3] Figure 1.1 Figure 1.3 2. - Seite 10 G E T T I N G S TA R T E D ( c o n t . ) 5. Fill the tank with cold or room 6. Replace the cap once you have filled temperature water. Use distilled water the tank to your desired level.
- Seite 11 Carefully place the water tank back on 8. Turn the safety lock to the position. the base, making sure to align the water [Figure 1.10] tank cap with its respective opening. 9. Replace the nozzle. [Figure 1.11] [Figure 1.9] Figure 1.10 Figure 1.11 Figure 1.9 NOTE: Wipe off any excess water on the top and bottom of the base before replacing the water tank.
-
Seite 12: Operation
O P E R AT I O N General Operation Place the humidifier on a flat, elevated 4. Press once to turn on the humidifier. surface. [Figure 2.1] The humidifier will start producing mist. 2. Properly fill the water tank as mentioned [Figure 2.2] in the Getting Started section (page 9). -
Seite 13: Button Controls
Button Controls NOTE: • For added convenience, the same button controls can be found on the included remote control. • The LED display will automatically dim after 10 seconds of inactivity while the humidifier is operating. Power Button Press once to turn on or turn off the humidifier. Display Button Press once to turn on or turn off the display on the humidifier. - Seite 14 Button Controls (cont.) Humidity Button The humidity button has 3 functions for this humidifier: i. Auto Mode: Press once to activate the automatic (Auto) mode for the humidifier. The Auto Mode will produce mist as needed to maintain the relative humidity (RH) at a comfortable level based on the ambient temperature [Chart A].
- Seite 15 ii. Customizable Humidity Hold for two seconds to access the humidity level selection. You will see “Mist Level” at the bottom right corner of the display along with a flashing number above it, indicating that you can now select a humidity level. [Figure 3.1] 2.
- Seite 16 Button Controls (cont.) Timer Button The humidifier is equipped with a built-in 12-hour timer. The humidifier will automatically turn off when the programmed timer finishes counting down. Press to activate the function. 2. Use the + or - buttons to select a time anywhere from 1–12 hours. [Figure 4.1] 3.
-
Seite 17: Humidity Sensor
Mist Level Controls Press the mist level controls at the bottom of the control panel to select a mist level for the humidifier. There are 5 mist levels to choose from. Each level has its own button. You can also use the + or - buttons to select a mist level. Humidity Sensor The humidity sensor on the power cord is a vital component to this appliance. -
Seite 18: Automatic Shut Off
Automatic Shut Off The humidifier will automatically turn off when all of the water in the tank has been diffused, or when a programmed timer has finished counting down. When the water level is low the display will continue showing “ ”... -
Seite 19: Using The Aroma Box
U S I N G T H E A R O M A B O X Your new humidifier can also be used as an aroma diffuser to provide added comfort in your home. Turn off and unplug the humidifier from 3. - Seite 20 U S I N G T H E A R O M A B O X ( c o n t . ) 4. Add 2-3 drops of essential oil on the 5. Carefully replace the aroma box. Fill the aroma pad.
-
Seite 21: Preventing Water Leaks
P R E V E N T I N G W AT E R L E A K S When not sealed properly, the water tank on your new humidifier may leak. The following tips will ensure that your humidifier will operate smoothly. Make sure the silicone ring around the 3. - Seite 22 P R E V E N T I N G W AT E R L E A K S ( c o n t . ) NOTE: DO NOT move the entire humidifier using the handle on the water tank. [Figure 8.5] (To properly remove the water tank, see the Getting Started section on page 9.) Figure 8.5...
- Seite 23 4. It is recommended to empty the inner chamber before replacing the water tank back onto the base. If there is too much water in the inner chamber, water may leak from the seam between the base and the water tank. [Figures 8.6 & 8.7] Figure 8.6 Figure 8.7 5.
- Seite 24 P R E V E N T I N G W AT E R L E A K S ( c o n t . ) 6. Make sure the safety lock is turned to the position when the water tank is on the base. [Figure 8.10] Figure 8.10 DO NOT shake the humidifier or place it on an inclined surface.
-
Seite 25: Keeping Things Clean
K E E P I N G T H I N G S C L E A N General Cleaning CAUTION: Make sure the humidifier is disconnected from any power source before cleaning. It is recommended to clean the humidifier on a weekly basis if used continuously, or at least once a month. - Seite 26 General Cleaning (cont.) 4. Pour 3 cups of distilled white vinegar 8. Pour out the excess vinegar and rinse along with 3 cups of water into the water the inner chamber thoroughly with warm tank. Replace the cap and gently shake water.
-
Seite 27: Cleaning The Aroma Pad
6 months. water tank and base and rinse both • You can purchase new aroma pads by parts thoroughly under clean, running searching for “Levoit LV550HH Replacement water. Aroma Pads” on Amazon. 6. Allow the water tank and base to completely air dry before reassembling the humidifier. -
Seite 28: Replacing The Remote Control Battery
Replacing the Remote Control Battery Press the locking tab toward the pulling slot to remove the battery compartment. [Figure 10.1] 2. Properly dispose of the old battery. 3. Place a new 3V CR2025 battery into the battery compartment with the positive side facing up. -
Seite 29: Troubleshooting
T R O U B L E S H O O T I N G Problem Cause Solution No mist is coming out Unit is not plugged in. Plug the humidifier into a powered of the nozzle. electrical outlet. Unit is not turned on. Tap the power button to turn on the unit. - Seite 30 T R O U B L E S H O O T I N G ( c o n t . ) Problem Cause Solution White dust appears Water being used has a high mineral Use distilled water with the humidifier. around the humidifier content.
- Seite 31 Problem Cause Solution The mist being The humidifier is heating up to Please wait for 15 minutes. Use caution produced is not produce warm mist. It will take about when using the warm mist function. The warm after pressing 15 minutes after pressing for the mist being produced is 40°C (104°F).
- Seite 32 T R O U B L E S H O O T I N G ( c o n t . ) Problem Cause Solution Remote control does Remote control is out of range from Use the remote control within 16 feet not work.
-
Seite 33: Warranty Information
W A R R A N T Y I N F O R M AT I O N TERMS & POLICY Levoit warrants all products to be of the highest quality in material, craftsmanship and service for a minimum of 2 years, effective from the date of purchase. -
Seite 34: Packungsinhalt
Deutsch Hybrid Ultraschall Luftbefeuchter Modell Nr.: LV550HH LIEFERUMFANG SPEZIFIKATIONEN 1 x LV550HH Hybrid Ultraschall Stromspannung AC 220–240V, Luftbefeuchter 50 / 60Hz 1 x Reinigungsbürste Nennleistung 110 W 3 x Aroma Pads (1 Vorinstalliert) 1 x Fernbedienung Kapazität des 5,5 L (1,4 Gallonen) -
Seite 35: Sicherheitshinweis
S I C H E R H E I T S H I N W E I S WICHTIG: Bitte lesen Sie alle Anweisungen und Sicherheitshinweise dieses Handbuches, bevor Sie das Gerät verwenden. Das Missachten der Anweisungen und Sicherheitshinweise, die hier enthalten sind, oder die Verwendung in einer Art und Weise oder für einen anderen Zweck als hier nicht beschrieben, kann zu ernsthaften Verletzungen und/oder zu Beschädigungen des Gerätes führen. - Seite 36 S I C H E R H E I T S H I N W E I S ( f o r t s . ) B. Herdplatten, Öfen, Heizkörpern oder ein Abstand von mindestens 254mm zu den Computern. Wänden besteht. •...
- Seite 37 Reinigung und Desinfektion (Seite 57). • Die Basis NICHT zerlegen, um den Befeuchter in irgendeiner Weise zu reparieren.· Dies könnte das Gerät beschädigen und die Garantie ungültig machen. • Verwenden Sie den Befeuchter NICHT, wenn er beschädigt ist oder aufgrund von Herstellungsfehlern nicht einwandfrei funktioniert.
-
Seite 38: Lernen Sie Ihren Befeuchter Kennen
L E R N E N S I E I H R E N B E F E U C H T E R K E N N E N Griff 2. Düse 3. Wassertank 4. LED Bildschirm 5. Bedienfeld 6. - Seite 39 12. Wasser Tankdeckel 13. Mist Tube 14. Waterstandsensor 15. Heizelement 16. Innere Kammer 17. Reinigungsbürster 18. Nachtlicht 19. Reinigung Pinsel Lagerung 20. Luftentlüftung 21. Wandler 22. Netzkabel...
-
Seite 40: Led-Anzeige
LED Anzeige Timer Nebel-Symbol Kein Wasser Indikator Warme Nebel-Symbol Nachtlicht-Symbol Auto-Modus-Anzeige Relative Luftfreuchtigkeit (RH) Nebelstandanzeige Termperatureinheit 10. Umgebungstemperatur Schalttafel Ein- / Ausschalter Anzeige-Taste Warmer Nebel-Taste Nachtlicht-Taste ON/OFF DISPLAY WARM LIGHT HUMIDITY TIMER Luftfeuchtigkeit-Taste Timer-Taste Mist Level Kontrollen Minus-Taste Plus-Taste... -
Seite 41: Anfangen
A N F A N G E N 3. Heben Sie den Griff an und ziehen Sie Drehen Sie die Sicherheitsverriegelung ihn nach oben, um den Wassertank vom in die Position . [Abbildung 1.1] Boden zu entfernen. [Abbildung 1.3] Abbildung 1.1 Abbildung 1.3 2. - Seite 42 A N F A N G E N ( f o r t s . ) 5. Füllen Sie den Wassertank mit kaltem 6. Nachdem Sie den Tank auf das oder Raumtemperatur-Wasser; es wird gewünschte Niveau gefüllt haben, empfohlen, destilliertes Wasser zu setzen Sie den Deckel wieder auf und verwenden, um beste Ergebnisse zu drehen ihn im Uhrzeigersinn, um ihn...
- Seite 43 Setzen Sie den Wassertank vorsichtig 8. Drehen Sie die Sicherheitsverriegelung wieder auf die Basis und achten Sie in die Position . [Abbildung 1.10] darauf, den Wassertankdeckel mit der 9. Tauschen Sie die Düse aus. entsprechenden Öffnung auszurichten. [Abbildung 1.11] [Abbildung 1.9] Abbildung 1.10 Abbildung 1.9 Abbildung 1.11...
-
Seite 44: Betrieb
B E T R I E B Allgemeiner Betrieb Stellen Sie den Luftbefeuchter auf eine 4. Drücken einmal, um den Befeuchter flache, erhöhte Oberfläche. einzuschalten. Der Befeuchter beginnt, [Abbildung 2.1] Nebel zu produzieren. [Abbildung 2.2] 2. Füllen Sie den Wassertank 5. -
Seite 45: Tastensteuerung
Tastensteuerung HINWEIS: • Für zusätzlichen Komfort finden Sie die gleichen Bedienelemente auf der mitgelieferten Fernbedienung. • Die LED-Anzeige dimmt automatisch nach 10 Sekunden Inaktivität, während der Befeuchter in Betrieb ist. Power-Taste Einmal drücken, um den Befeuchter ein- oder auszuschalten. Anzeige-Taste Einmal drücken, um das Display des Befeuchters ein- oder auszuschalten. -
Seite 46: Relative Luftfeuchtigkeit (%Rh)
Tastensteuerung (forts.) Feuchtigkeitstaste Die Feuchtigkeitstaste hat 3 Funktionen für diesen Befeuchter: i. Auto-Modus: Drücken Sie einmal auf , um den automatischen (Auto)- Modus für den Befeuchter zu aktivieren. Der Auto-Modus erzeugt bei Bedarf Nebel, um die relative Luftfeuchtigkeit (RH) auf einem angenehmen Niveau zu halten, basierend auf der Umgebungstemperatur [Tabelle A]. -
Seite 47: Anpassbare Luftfeuchtigkeit
ii. Anpassbare Luftfeuchtigkeit Halten Sie Zwei Sekunden lang gedrückt, um auf die Auswahl der Feuchtigkeitsstufe zuzugreifen. In der unteren rechten Ecke des Displays erscheint “Mist Level” zusammen mit einer blinkenden Zahl darüber, die anzeigt, dass Sie nun einen Feuchtewert auswählen können. [Abbildung 3.1] 2. - Seite 48 Tastensteuerung (forts.) iii. Nebelfunktionen abbrechen: Um eine Nebelfunktion während des Betriebs des Befeuchters abzubrechen, drücken Sie einfach Timer-Taste Der Befeuchter ist mit einem eingebauten 12-Stunden-Timer ausgestattet. Der Befeuchter schaltet sich automatisch aus, wenn der programmierte Timer abgelaufen ist. Drücken Sie die Taste , um die Funktion zu aktivieren.
-
Seite 49: Feuchtesensor
Nebel-Stufe-Kontrollen Drücken Sie die Nebelpegelregler am unteren Rand des Bedienfeldes, um einen Nebelpegel für den Befeuchter auszuwählen. Es stehen 5 Nebelstufen zur Auswahl. Jede Ebene hat ihre eigene Taste. Sie können auch die Tasten + oder - verwenden, um einen Nebelpegel auszuwählen. Feuchtesensor Der Feuchtesensor am Netzkabel ist ein wichtiger Bestandteil dieses Gerätes. -
Seite 50: Automatische
Automatische Abschaltung Der Befeuchter schaltet sich automatisch aus, wenn das gesamte Wasser im Tank diffundiert ist oder wenn ein programmierter Timer abgelaufen ist. Wenn der Wasserstand niedrig ist, zeigt das Display weiterhin an, bis mehr Wasser in den Wassertank eingefüllt wird. [Abbildung 6.1] ON / OFF DISP LAYW ARML... -
Seite 51: Verwendung Des Aroma-Boxes
V E R W E N D U N G D E S A R O M A - B O X E S Ihr neuer Luftbefeuchter kann auch als Aromadiffusor verwendet werden, um zusätzlichen Komfort in Ihrem Zuhause zu bieten. Schalten Sie den Befeuchter aus und 3. - Seite 52 V E R W E N D U N G D E S A R O M A - B O X E S ( F O R T S . ) 4. Geben Sie 2-3 Tropfen ätherisches Öl 5. Füllen Sie den Wassertank mit Wasser auf das Aroma-pad.
-
Seite 53: Verwendung Von Wasserlecks
V E R M E I D U N G V O N W A S S E R L E C K A G E N Wenn der Wassertank Ihres neuen Luftbefeuchters nicht richtig abgedichtet ist, kann er undicht werden. - Seite 54 V E R M E I D U N G VO N WA S S E R L E C K S ( f o r t s . ) HINWEIS: Bewegen Sie NICHT den gesamten Befeuchter mit dem Griff am Wassertank.
- Seite 55 4. Es wird empfohlen, die Innenkammer zu entleeren, bevor der Wassertank wieder auf den Boden gestellt wird. Wenn sich zu viel Wasser in der Innenkammer befindet, kann Wasser aus der Naht zwischen dem Boden und dem Wassertank austreten. [Abbildung 8.6 & 8.7] Abbildung 8.6 Abbildung 8.7 5.
- Seite 56 V E R M E I D U N G VO N WA S S E R L E C K S ( f o r t s . ) 6. Vergewissern Sie sich, dass die Sicherheitsverriegelung in die Position gedreht ist, wenn sich der Wassertank auf dem Boden befindet.
-
Seite 57: Sauberhaltung
S A U B E R H A LT U N G Allgemeine Reinigung ACHTUNG: Stellen Sie sicher, dass der Befeuchter vor der Reinigung von jeder Stromquelle getrennt ist. Es wird empfohlen, den Luftbefeuchter wöchentlich zu reinigen, wenn er kontinuierlich oder mindestens einmal im Monat verwendet wird. - Seite 58 Allgemeine Reinigung (forts.) 4. Geben Sie 3 Tassen destillierten weißen 8. Gießen Sie den überschüssigen Essig Essig zusammen mit 3 Tassen Wasser aus und spülen Sie den Innenraum in den Wassertank. Setzen Sie die gründlich mit warmem Wasser ab. Kappe wieder auf und schütteln Sie Trocknen Sie die Kammer mit einem den Wassertank vorsichtig, um alle weichen, sauberen Tuch.
-
Seite 59: Reinigung Der Aroma-Pad
Sie den Monate zu wechseln. Luftbefeuchter wieder zusammenbauen. • Sie können die Artikel über die Suche nach “Levoit Aroma Pads für LV550HH” bei Amazon erwerben. HINWEIS: • Tragen Sie immer Handschuhe, um Ihre Hände zu Desinfektion des Luftbefeuchters schützen, während Sie Bleichmittel verwenden. -
Seite 60: Ersetzung Der Batterien Der Fernbedienung
Ersetzung der Batterien der Fernbedienung Drücken Sie die Verriegelungslasche in Richtung des Ziehschlitzes, um das Batteriefach zu entfernen. [Abbildung 10.1] 2. Entsorgen Sie die alte Batterie ordnungsgemäß. 3. Legen Sie eine neue 3V CR2025 Batterie mit der positiven Seite nach oben in das Batteriefach ein. -
Seite 61: F H E L E R B E H E B U N G
F H E L E R B E H E B U N G Problem Ursache Lösung Es kommt kein Nebel Das Gerät ist nicht angeschlossen. Schließen Sie den Befeuchter an eine aus der Düse. Steckdose an. Das Gerät ist nicht eingeschaltet. Tippen Sie auf die Netztaste, um das Gerät einzuschalten. - Seite 62 F H E L E R B E H E B U N G ( f o r t s . ) Problem Ursache Lösung Befeuchter macht Gerät funktioniert nicht richtig. Schalten Sie das Gerät aus und ziehen ein lautes oder Sie den Netzstecker.
- Seite 63 Problem Ursache Lösung Unterhalb der Basis Der Wassertank ist nicht richtig Schalten Sie das Gerät aus und ziehen positioniert. Sie den Netzstecker, dann richten Sie den bildet sich eine Wassertankdeckel auf die entsprechende Wasserlache. (forts.) Öffnung im Innenraum aus. Drehen Sie die Sicherheitsverriegelung in die Position Überschüssiges Wasser, das beim...
- Seite 64 F H E L E R B E H E B U N G ( f o r t s . ) Problem Ursache Lösung Falsche Die relative Luftfeuchtigkeit im Raum Wenn die relative Luftfeuchtigkeit im Raum über 68% RH liegt, wird Luftfeuchtigkeit wird ist zu hoch.
-
Seite 65: Garantie
G A R A N T I E BEDIENUNG & POLITIK Levoit garantiert bei allen Produkten, dass wir die höchsten Standards bei den Materialien, der Verarbeitung und beim Service anlegen. Diese Garantie ist gültig für zwei Jahre ab Kaufdatum. Garantiezeiten können zwischen den Produktkategorien variieren. - Seite 66 Levoit.com AL0418BFV1.1EU(EN,DE)