AIPTEK MONET Bedienungsanleitung
Vorschau ausblenden
Andere Handbücher für MONET:
- Kurzanleitung (65 Seiten) ,
- Startanleitung (198 Seiten)
Inhaltsverzeichnis
Werbung
Verfügbare Sprachen
Verfügbare Sprachen
Quicklinks
Welcome:
Dear user, thanks for purchasing this product.
Much investment in time and effort has gone into its development, and it is our hope
that it will give you many years of trouble-free service.
Safety Notice:
1. Place the digital photo frame on a flat surface. Any collision or falling to the ground is likely
to damage the product.
2. This product should be protected against damp, and it will be damaged when damp or
liquid gets inside.
3. The screen (LCD panel) of this product is made of glass, which can easily be damaged by
abnormal external force or sharp object.
4. Never press the LCD, lest it may be damaged. If liquid crystal leaks, you need to clean it
immediately with soap and water.
5. This product supports hot plugging of memory cards. However, it is suggested to power off
this product before plugging/unplugging your memory card to protect the memory card or
other devices.
6. To ensure safety and the display effect, always use the power adapter supplied by the
manufacturer.
7. To clean the screen, cut off the power supply first and use lightly wet soft cloth to wipe it.
Never apply alcohol, gasoline or other chemical agents.
8. To ensure normal operations of this product and avoid any accident, do not use or store
this product under the following conditions: environment with too low/high temperature;
places with heavy dampness or long-term direct sunshine; bad conditions such as
strong shock.
9. During the operation, this product may heat lightly, which is normal.
10. According to the manufacturer, for the colored LCD, 0.01% of pixel-sum flaw rate is
allowable. Your understanding is appreciated.
11. Both product and user's manual are subject to further improvement or supplement without
further notice.
FCC Compliance Statement:
This device complies with Part 15 of the FCC Rules. Operation is subjected to the
following two conditions: (1) this device may not cause harmful interference, and (2) this
device must accept any interference received, including interference that may cause
undesired operation.
This equipment has been tested and found to comply with limits for a Class B digital
device, pursuant to Part 15 of the FCC rules. These limits are designed to provide
reasonable protection against harmful interference in residential installations. This
equipment generates, uses, and can radiate radio frequency energy, and if not installed and used in accordance
with the instructions, may cause harmful interference to radio communications.
However, there is no guarantee that interference will not occur in a particular installation. If this equipment does
cause interference to radio or television equipment reception, which can be determined by turning the equipment
off and on, the user is encouraged to try to correct the interference by one or more of the following measures:
-Reorient or relocate the receiving antenna.
-Move the equipment away from the receiver.
-Plug the equipment into an outlet on a circuit different from that to which the receiver is
connected.
-Consult the dealer or an experienced radio/television technician for additional suggestions.
You are cautioned that any change or modifications to the equipment not expressly approved by the party
responsible for compliance could void Your authority to operate such equipment.
If the time arises to throw away your
product, please recycle all the components
possible. Batteries and rechargeable
batteries are not to be disposed
in your domestic waste! Please recycle
them at your local recycling point.
Together we can help to protect the
environment.
Werbung
Inhaltsverzeichnis
Fehlerbehebung

Verwandte Anleitungen für AIPTEK MONET


Inhaltszusammenfassung für AIPTEK MONET
- Seite 1 Welcome: Dear user, thanks for purchasing this product. Much investment in time and effort has gone into its development, and it is our hope that it will give you many years of trouble-free service. Safety Notice: 1. Place the digital photo frame on a flat surface. Any collision or falling to the ground is likely to damage the product.
-
Seite 2: Getting Started
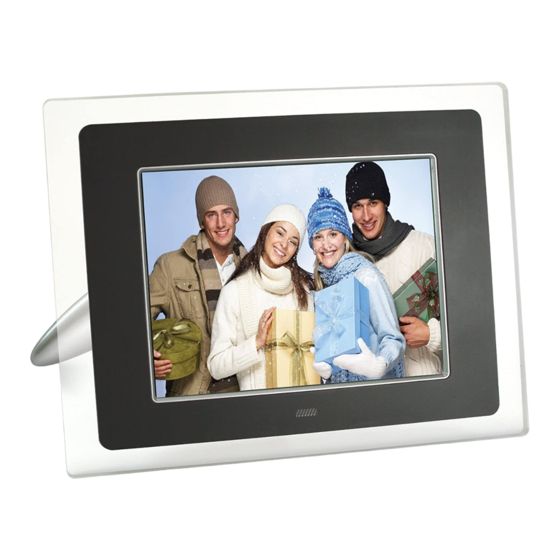
Getting Started Photo frame parts LCD Panel Decoration board Front frame Remote sensor Front view Front frame latch ESC button Enter button 4-Way button Power indicator Power switch ( LED switch Stand Rear view SD/MMC/MS Pro USB port card slot DC power jack CF card slot Up button... -
Seite 3: Product Introduction
Product introduction The digital photo frame comes with the following features: • Automatically starts picture/calendar display • Automatically displays/repeats picture slideshow with various transition effects • Supports JPEG-format pictures (up to 16 mega pixels) • Supports various slideshow speed settings •... - Seite 4 Connecting to AC power Connect one end of the accessory power cable to the photo frame, and then connect the power adapter to a power socket. Powering on/off the photo frame Turn the power switch to the ON position to power on the photo frame.
-
Seite 5: Functions And Operations
Functions and Operations Start-up When the photo frame boots up, it will enter one of the three modes according to your system setup: Mode Description Calendar Displays calendar and clock. Card Select Displays a list of storage devices for you to select. Automatically starts playing photo slideshow. - Seite 6 Card Select / Function Select Button tip <4-Way> left/right : Select item <Enter> : Confirm <ESC> : Function Select Card Select Calendar When the photo frame is set to boot up with Card Select option and powered on, the photo frame will enter Card Select interface. In other modes you can press the ESC button repeatedly to switch to the Card Select interface.
- Seite 7 Single picture / Slideshow Button tip <4-Way> : Select photo. Single picture & Slideshow: Up to bring up brightness menu; left/right to adjust <Enter> : Confirm; Single picture Slideshow <ESC> : Single picture/Slideshow Index view Function Select When the photo frame is set to boot up with slideshow and powered on, the photo frame will enter Slideshow mode.
- Seite 8 Copy / Delete photos Button tip <4-Way> up/down : Select item <4-Way> right : Mark/Unmark item; confirm menu action <4-Way> left : Cancel menu action <Enter> : Confirm; bring up menu <ESC> : Copy/Delete Function Select; cancel menu action When you select the icon in the Function Select interface, the photo frame will enter file manager mode.
-
Seite 9: System Settings
System settings Button tip <4-Way> up/down : Select item <4-Way> right : Confirm menu action <4-Way> left : Cancel menu action <Enter> : Confirm menu action <ESC> : System setup Function Select; cancel menu action When you select the icon in the Function Select interface, the photo frame will enter system setup interface. -
Seite 10: Remote Control
Appendix Remote control Button Description Before using the remote control, be ESC button sure to remove the battery insulator. Rotate picture counter- clockwise Directional buttons Rotate picture clockwise Enter button Show file information in single picture mode Zoom in Mode switch Note: Remote distance ≤5m;... -
Seite 11: Troubleshooting
Appendix Troubleshooting Problem Cause Solution Check whether the AC adapter is Power is off or power Power indicator is not lit. well connected and power supply is indicator is broken. normal. AC adapter is not well Check whether the AC adapter is well No start-up interface. -
Seite 12: Specifications
Appendix Specifications Item Specification Panel Size 8-inch TFT LCD Panel Resolution 800x600 pixels RGB (Active Area: 162x121.5 mm) Aspect Ratio (panel) Photo Format JPEG Max Resolution 16 mega-pixel Auto Slide Show Photo Effect Yes (Various settings) Slideshow Speed Yes (Various settings) External Memory Card USB flash, SD, MMC, MS Pro, CF (up to 2GB) USB Flash Drive... - Seite 13 Willkommen! Lieber Kunde - vielen Dank für den Kauf unseres Produktes. In die Entwicklung des Gerätes wurde viel Zeit und Mühe investiert; wir hoffen, dass es Ihnen viele Jahre störungsfreien Betrieb und Freude bescheren wird. Sicherheitshinweise: 1. Stellen Sie den digitalen Bilderrahmen auf einem e�enen Untergrund auf. Das Gerät kann Stellen Sie den digitalen Bilderrahmen auf einem e�enen Untergrund auf.
-
Seite 14: Erste Schritte
Erste Schritte Bilderrahmen - Komponenten LCD-Bildschirm Dekoboard Frontrahmen Fernbedienungssensor Vorderansicht Frontrahmenriegel Esc-Taste Eingabetaste 4-Wege-Taste Betriebsanzeige LED-/Ein-/ Ausschalter ( Aufsteller Rückansicht SD/MMC/MS Pro- USB-Port Kartensteckplatz Netzteilanschluss CF-Kartensteckplatz Aufwärtstaste Rechtstaste* Linkstaste* Die Hinweise beziehen sich auf die Ansicht von vorne. Abwärtstaste... -
Seite 15: Das Produkt
Das Produkt Ihr digitaler Bilderrahmen �ietet die folgenden Merkmale: • Automatische Bild�/Kalenderanzeige • Automatische �Endlos���Diaschau mit verschiedenen ��er�lendungseffekten • Unterstützung von Bildern im JPEG��ormat ��is 16 Megapixel�� • Verschiedene Diaschaugeschwindigkeiten • Kalender� und Uhrzeitanzeige • Betrie� mit SD/MM��, MS Pro�, ���Speicherkarten ��is 2 GB�� •... -
Seite 16: Speicherkarten/Usb-Flash-Laufwerke Verwenden
Stromanschluss Ver�inden Sie den kleinen Stecker des Netzteils mit dem Bilderrahmen, ver�inden Sie das Netzteil anschließend mit einer Steckdose. Bilderrahmen ein- und ausschalten Zum Einschalten �ringen Sie den Ein� /Ausschalter in die EIN �Position. Die Betrie�sanzeige leuchtet auf, so�ald das Gerät eingeschaltet ist. -
Seite 17: Funktionen Und Bedienung
Funktionen und Bedienung Starten Nach dem Einschalten wechselt der Bilderrahmen je nach Systemeinstellungen in einen von drei Modi: Modus Beschreibung Zeigt Kalender und Uhrzeit an. Kalender Zeigt eine �iste von Speichergeräten zur Auswahl an. Kartenauswahl Beginnt automatisch mit der Wiederga�e einer Diaschau. Der Bilderrahmens sucht in folgender Reihenfolge nach Bilddateien: SD/MM�/MS Pro ��... - Seite 18 Kartenauswahl / Funktionsauswahl Tastenfunktionen <4-Wege-Taste> Links-/Rechtstasten : Element auswählen <Eingabetaste> : Bestätigen <ESC> : Funktionsauswahl Kartenauswahl Kalender Wenn der Bilderrahmen zur Auswahl einer Speicherkarte nach dem Einschalten eingestellt ist, wechselt der Bilderrahmen zur Kartenauswahl. In anderen Modi können Sie durch wiederholtes Drücken der ES���aste zur Kartenauswahl wechseln.
-
Seite 19: Fotos Durchsuchen / Diaschau
Fotos durchsuchen / Diaschau Tastenfunktionen <4-Wege> : Foto auswählen. Einzelbild und Diaschau: Aufwärts: Helligkeit-Menü einblenden. Links- /Rechtstasten: Einstellen. <Eingabetaste> : Bestätigen. Einzelbild Diaschau <ESC> : Einzelbild/Diaschau Indexansicht Funktionsauswahl Wenn der Bilderrahmen zum Anzeigen einer Diaschau nach dem Einschalten eingestellt ist, wechselt der Bilderrahmen in den Diaschaumodus. Wenn Sie �ei der �unktionsauswahl das Sym�ol wählen, zeigt der Bilderrahmen die verfüg�aren �otos in einer ��ersicht �Indexansicht��... - Seite 20 Fotos kopieren / löschen Tastenfunktionen <4-Wege-Taste> Aufwärts-/Abwärtstasten : Element auswählen <4-Wege> Rechtstaste : Element markieren/Markierung aufheben; Menüfunktion bestätigen <4-Wege> Linkstaste : Menüfunktion abbrechen <Eingabetaste> : Bestätigen; Menü einblenden <ESC> : Kopieren/Löschen Funktionsauswahl; Menüfunktion abbrechen Wenn Sie �ei der �unktionsauswahl das Sym�ol wählen, wechselt der Bilderrahmen in den Dateimanager�Modus.
-
Seite 21: Systemeinstellungen
Systemeinstellungen Tastenfunktionen <4-Wege-Taste> Aufwärts-/Abwärtstasten : Element auswählen <4-Wege> Rechtstaste : Menüfunktion bestätigen <4-Wege> Linkstaste : Menüfunktion abbrechen <Eingabetaste> : Menüfunktion bestätigen <ESC> : Systemeinstellungen Funktionsauswahl; Menüfunktion abbrechen Wenn Sie �ei der �unktionsauswahl das Sym�ol wählen, wechselt der Bilderrahmen zu den Systemeinstellungen. So ändern Sie Systemeinstellungen: 1��... - Seite 22 Anhang Fernbedienung Taste Funktion Ziehen Sie den Isolierstreifen heraus, bevor Sie Esc��aste die Fernbedienung benutzen. Dreht ein Bild gegen den Uhrzeigersinn. 4�Wege��asten �Hoch, Rechts, Unten, �inks�� Dreht ein Bild im Uhrzeigersinn. Einga�etaste Zeigt �eim Durchsuchen von �otos Informationen zur Datei. Vergrößern Modus umschalten Hinweis: Die Reichweite der Fernbedienung...
-
Seite 23: Problemlösung
Anhang Problemlösung Problem Ursache Lösung Das Gerät wird nicht mit ��erzeugen Sie sich davon, dass das Die Betrie�sanzeige Strom versorgt oder die Netzteil richtig eingesteckt ist und die leuchtet nicht. Betrie�sanzeige ist defekt. Steckdose Strom führt. Das Netzteil ist nicht richtig Sorgen Sie dafür, dass das Netzteil eingesteckt oder das richtig eingesteckt ist und der... - Seite 24 Anhang Technische Daten Element Technische Angaben Anzeigegröße 8 Zoll�������D Anzeigeauflösung 800 x 600 Pixels RGB �Aktive �läche: 162 x 121,5 mm�� Bildformat �Anzeige�� �otoformat JPEG Max. Auflösung 16 Megapixel Auto�Diaschau �otoeffekte Ja �Verschiedene Einstellungen�� Diaschaugeschwindigkeit Ja �verschiedene Einstellungen�� Externe Speicherkarten USB��lash, SD, MM�, MS Pro, ��...
- Seite 25 Bienvenue: Cher utilisateur, nous vous remercions pour l'achat de ce produit. Beaucoup d'investissements en temps et en efforts ont été réalisés pour son développement, et nous espérons qu'il vous procurera des années de bons et loyaux services. Instructions de sécurité: 1.
-
Seite 26: Mise En Route
Mise en route Les parties du cadre photo Panneau LCD Planche de décoration Cadre avant Capteur de télécommande Vue de face Loquet du Bouton ESC cadre avant Bouton Entrer Bouton à 4 directions Témoin d'alimentation Interrupteur d'alimentation ( Socle Vue de dos Fente pour carte Port USB SD/MMC/MS Pro... -
Seite 27: Présentation Du Produit
Présentation du produit Le cadre photo numéri�ue est livré avec les �onctionnalités suivantes : • Démarrage automatique de l�affic�age des images/calendrier • Affic�age/répétition automatique du diaporama d�images avec différents effets de transition • �rise en charge des images au �ormat J�EG �jus�u'à 16 méga pixels�� •... - Seite 28 Brancher l'alimentation AC Branchez une extrémité du câble d'alimentation accessoire sur le cadre photo, puis connectez l'adaptateur d'alimentation à la prise secteur. Mettre marche/arrêt tension le cadre photo �oussez le bouton d'alimentation sur la position Marche pour allumer le cadre photo. Lors�u'il est allumé, le témoin d'alimentation s'allume.
- Seite 29 Fonctions et opérations Mise en marche Lors�ue le cadre photo s'allume, il utilisera un des trois modes suivants en �onction de ce �ue vous avez réglé dans les réglages du système : Mode Description Affic�e le calendrier et l��orloge. �alendrier Affic�e une liste de tous les supports de stockage pour �électionner la carte vous permettre d'en sélectionner un.
- Seite 30 Sélectionner la carte / Fonction sélectionner Astuce bouton <4-directions> gauche/droite : Sélectionner un élément <Entrer> : Confirmer <ESC> : Fonction sélectionner Sélectionner la carte Calendrier Lors�ue le cadre photo a été réglé pour s'allumer dans le mode �électionner la carte et �ue vous l'allumez, le cadre photo utilisera alors l'inter�ace �électionner la carte.
- Seite 31 Naviguer les photos / Diaporama Astuce bouton <4-directions> : Sélectionner une photo. Naviguer les photos & Diaporama: Haut pour afficher le menu Luminosité ; gauche/droite pour changer le réglage <Entrer> : Confirmer ; Naviguer les photos Diaporama <ESC> : Naviguer les photos/Diaporama Vue Index Fonction sélectionner Lors�ue le cadre photo a été...
- Seite 32 Copier / supprimer les photos Astuce bouton <4-directions> haut/bas : Sélectionner un élément <4-directions> droite : Marquer/Enlever la marque ; confirmer l’action du menu <4-directions> gauche : Annuler l’action du menu <Entrer> : Confirmer ; ouvrir le menu <ESC> : Copier/Supprimer Fonction sélectionner ;...
-
Seite 33: Réglages Du Système
Réglages du système Astuce bouton <4-directions> haut/bas : Sélectionner un élément <4-directions> droite : Confirmer l’action du menu <4-directions> gauche : Annuler l’action du menu <Entrer> : Confirmer l’action du menu <ESC> : Réglage du système Fonction sélectionner; annuler l’action du menu Lors�ue vous sélectionnez l'icône dans l'inter�ace Fonction sélectionner, le cadre photo utilisera alors l'inter�ace de réglage du système. - Seite 34 Appendice Télécommande Bouton Description Avant d'utiliser la Avant d'utiliser la télécommande, assurez-vous Bouton E�H d'enlever l'isolant de la batterie. �our tourner l'image vers la gauche Haut/�roit/Bas/Gauche �our tourner l'image vers la droite Bouton Entrer �our affic�er les informations du fic�ier dans le mode de navigation des photos Zoom avant �électeur de mode...
-
Seite 35: Guide De Dépannage
Appendice Guide de dépannage Problème Cause Solution L'alimentation est coupée Vérifie�� que l�adaptateur AC est Le témoin d'alimentation ou le témoin d'alimentation bien branché et �ue l'alimentation ne s'allume pas. est cassé. électri�ue est normale. L'adaptateur A� n'est pas Vérifie�� que l�adaptateur AC est bien �as d'inter�ace de branché... - Seite 36 Appendice Caractéristiques techniques Elément Caractéristiques techniques �aille de l’écran L�� �F� 8 pouces Résolution de l’écran 800x600 pixels RVB �zone active : 162x121,5 mm�� �roportions �panneau�� Format de photo J�EG Résolution max. 16 mégapixels �iaporama auto E��et photo Oui �Réglagas divers�� Vitesse diapo.
- Seite 37 Benvenuto: Vi ringraziano per avere acquistato questo prodotto. Abbiamo investito molto tempo ed energie in questo progetto e speriamo che vi procuri molti anni di servizio senza problemi. Avviso per la sicurezza: 1. �ollo�are la �orni�e di�itale su una su�erfi�ie �iatta. �utti i ti�i di �ollisione o �aduta a terra �ollo�are la �orni�e di�itale su una su�erfi�ie �iatta.
- Seite 38 Preparazione Parti della cornice Pannello LCD Cornice decorativa Cornice frontale Sensore telecomando Veduta frontale Chiusura cornice Tasto ESC frontale Tasto Invio Tasto di navigazione a 4 vie Indicatore d’alimentazione Interruttore d’alimentazione ( Base Veduta posteriore Alloggio scheda Porta USB SD/MMC/MS Pro Connettore Alloggio scheda CF d’alimentazione CC...
- Seite 39 Introduzione al prodotto La �ornice digitale �a le seguenti �unzioni: • Avvio automatico della visualizzazione delle immagini/calendario • Visualizzazione/ripetizione automatica di presentazioni di immagini con vari e��etti di transizione • Su��orto imma�ini di formato JPEG (fino a 16 me�a�ixel) • �upporto di varie impostazioni di velocit�...
- Seite 40 Collegamento all’alimentazione CA �ollegare un estremit� del cavo d'alimentazione �ornito in dotazione alla �ornice digitale e poi collegare l'altra estremit� ad una presa di corrente. Accensione / spegnimento della Cornice digitale Impostare l'interruttore d'alimentazione sulla posizione ON per accendere la �ornice digitale.
- Seite 41 Funzione ed Operazioni Avvio �uando la �ornice digitale si avvia, accede ad una delle tre modalit�, in base alla Impostazione del sistema: Modalità Descrizione Visualizza il calendario e l’orologio �alendario Visualizza un elenco di dispositivi d’arc�iviazione tra cui �elezionare sc�eda selezionare Avvia automaticamente l’esecuzione della presentazione foto.
- Seite 42 Selezionare scheda / Sel. funzione Suggerimenti sui tasti <Tasto di navigazione> Sinistra/Destra : Selezione voce <Invio> : Conferma <ESC> : Sel. funzione Selezionare scheda Calendario �uando la �ornice digitale �� impostata per avviarsi con l’opzione �elezionare sc�eda ed �� accesa, acceder� all’inter�accia �elezionare sc�eda. In altre modalit�, premere ripetutamente il tasto E��...
- Seite 43 Navigazione foto/Presentazione Suggerimenti sui tasti <Tasto di navigazione> : Selezione foto. Navigazione foto e Presentazione: Su per visualizzare il menu Luminosità; Sinistra/destra per eseguire la regolazione <Invio> : Conferma; Navigazione foto Presentazione <ESC> : Navigazione foto/Presentazione Visualizzazione indice Sel. funzione �uando la �ornice digitale ��...
- Seite 44 Copiare ed Eliminare le foto Suggerimenti sui tasti <Tasto di navigazione> Su/Giù : Selezione voce <Tasto di navigazione> Destra : Selezione/deselezione voce; conferma azione del menu <Tasto di navigazione> Sinistra : Annulla l’azione del menu <Invio> : Conferma; fa apparire il menu <ESC>...
-
Seite 45: Impostazioni Del Sistema
Impostazioni del sistema Suggerimenti sui tasti <Tasto di navigazione> Su/Giù : Selezione voce <Tasto di navigazione> Destra : Conferma l’azione del menu <Tasto di navigazione> Sinistra : Annulla l’azione del menu <Invio> : Conferma l’azione del menu <ESC> : Configurazione del sistema Sel. - Seite 46 Appendice Telecomando Tasto Descrizione Prima di usare il telecomando, assicurarsi �asto ES� di rimuovere l’isolamento della Ruota l’immagine in senso batteria. antiorario �asti direzionali Ruota l'immagine in senso orario �asto Invio Mostra le in�ormazioni in modalit� di navigazione �oto Ingrandimento Interruttore modalit�...
-
Seite 47: Risoluzione Dei Problemi
Appendice Risoluzione dei problemi Problema Causa Soluzione L'indicatore �ontrollare se l'adattatore �A �� La cornice �� spenta d'alimentazione non �� collegato in modo appropriato e se oppure l’indicatore �� rotto. acceso. l'erogazione di corrente �� normale. L’adattatore �A �� collegato �ontrollare se l'adattatore �A ��... - Seite 48 Appendice Specifiche Voce Specifiche �imensioni del pannello L�D �F� 8 �olli�i Risoluzione del pannello 800 x 600 �ixel RGB (area attiva: 162 x 121��5 mm) Rapporto proporzioni �pannello�� Formato �oto JPEG Risoluzione massima 16 Megapi�el Presentazione automatica �ì Effetti foto�rafi�i �ì...
- Seite 49 Bienvenido: Querido usuario, gracias por adquirir este producto. Se ha invertido una gran cantidad de tiempo y mucho esfuerzo en desarrollar este producto, por lo que esperamos que lo pueda disfrutar durante muchos años. Aviso de seguridad: 1. � �������� ��� ����� ������� ���� ������������ ������� ��� ������������� �����. �� ����� ���� ��� �...
- Seite 50 Introducción Partes del marco para fotografías Panel LCD Placa decorativa Marco frontal Sensor remoto Vista frontal Cierre del marco Botón ESC frontal Botón Aceptar Botón de 4 direcciones Indicador de encendido Conmutador de alimentación( Base /LED Vista posterior Ranura para tarjetas Puerto USB SD, MMC y MS Pro Ranura para tarjetas...
-
Seite 51: Presentación Del Producto
Presentación del producto �l marco digital para �otogra�ías cuenta con las siguientes características: • Inicia automáticamente la visualización de imágenes y del calendario • Muestra y repite la presentación de diapositivas automáticamente con varios e�ectos de transición • Admite �otogra�ías con �ormato J��G �hasta 16 megapíxeles�� •... - Seite 52 Conectar la alimentación de CA Conecte un extremo del cable de alimentación en el marco para fotografías y, a continuación, conecte el adaptador de alimentación a una toma de corriente eléctrica. Encender y apagar el marco para fotografías Poner el conmutador de alimentación en la posición de ANCENDIDO (ON) para proporcionar energía al marco para fotografías.
- Seite 53 Funciones y funcionamiento Inicio �uando el marco para �otogra�ías se inicia, entrará en uno de los tres modos �������������� ���� ������ó� ���� ��� ������������ó� ����� �����������: Modo Descripción Muestra el calendario y el reloj. �alendario Muestra una lista de dispositivos de almacenamiento Selección de tarjeta que puede seleccionar. Inicia automáticamente la reproducción de la presentación de diapositivas de �otogra�ías.
- Seite 54 Seleccionar tarjeta / Seleccionar función Indicador de botón <4 direcciones> Izquierda/Derecha : Seleccionar elemento <Entrar> : Confirmar <ESC> : Seleccionar función Seleccionar tarjeta Calendario �uando el marco para �otogra�ías se establece para que se inicie con la opción Sel. tarjeta y se enciende, el marco entrará en la inter�az Sel. tarjeta. �n otros modos puede presionar el botón �S�...
- Seite 55 Búsqueda de fotografías / Presentación de diapositivas Indicador de botón <4 direcciones> : Seleccionar fotografía. Búsqueda de fotografías y presentación de diapositivas: Arriba para abrir el menú Brillo; Izquierda/Derecha para ajustar <Entrar> : Confirmar; Búsqueda de fotografías Presentación de diapositivas <ESC>...
- Seite 56 Copiar o eliminar fotografías Indicador de botón <4 direcciones> Arriba/Abajo : Seleccionar elemento <4 direcciones> Derecha : Marcar o anular la marca de un elemento; confirmar la acción de menú <4 direcciones> Izquierda : Cancelar la acción de menú <Entrar> : Confirmar; abrir el menú <ESC>...
-
Seite 57: Configuración Del Sistema
Configuración del sistema Indicador de botón <4 direcciones> Arriba/Abajo : Seleccionar elemento <4 direcciones> Derecha : Confirmar la acción de menú <4 direcciones> Izquierda : Cancelar la acción de menú <Entrar> : Confirmar la acción de menú <ESC> : Configuración del sistema Seleccionar función;... -
Seite 58: Mando A Distancia
Apéndice Mando a distancia Botón Descripción Antes de usar el mando a distancia, asegúrese de Botón �S� extraer el aislante de las pilas. Girar la imagen en sentido contrario a las agujas del reloj Botones de dirección Girar la imagen en el senti- do de las agujas del reloj Botón Aceptar Mostrar la in�ormación... -
Seite 59: Resolución De Problemas
Apéndice Resolución de problemas Problema Causa Solución La alimentación está �l indicador de �ompruebe si el adaptador de �A apagada o el indicador alimentación no está está bien conectado y la �uente de de alimentación está iluminado. alimentación �unciona correctamente. averiado. -
Seite 60: Especificaciones
Apéndice Especificaciones Elemento Especificaciones �amaño del panel L�� �F� de 8 pulgadas Resolución del panel RGB de 800x600 píxeles �área activa: 162x121,5 mm�� Relación de aspecto �panel�� Formatos de �otogra�ía J��G Resolución máxima 16 megapíxeles �resentación de diapositivas Sí automática E������ �������á����... - Seite 61 Welkom: Beste gebruiker, bedankt voor de aankoop van dit product. We hebben heel wat tijd en moeite gestopt in de ontwikkeling ervan en we hopen dat u jarenlang zorgeloos zult kunnen genieten van uw nieuwe aankoop. Veiligheidsrichtlijnen: 1. �laats de digitale fotolijst op een plat oppervlak. �anneer de lijst ergens tegenaan stoot of �laats de digitale fotolijst op een plat oppervlak.
-
Seite 62: Aan De Slag
Aan de slag Onderdelen fotolijst LCD-scherm Decoratieve Lijst Voorkant lijst Sensor afstandbediening Vooraanzicht Grendel voorkant lijst ESC-knop Knop Enter 4-richtingsknop Voedingsindicator Voeding/LED- schakelaar ( Voet Achteraanzicht SD/MMC/MS Pro USB-poort kaartsleuf Stekker CF kaartsleuf gelijkstroomvoeding Knop Omhoog Knop Rechts* Knop Links* De richtingen zijn van toepassing bij vooraanzicht. -
Seite 63: Technische Specificaties
Kennismaken met het product �e digitale fotolijst wordt geleverd met de volgende eigenschappen: • Automatisch starten van de foto/kalenderweergave • Automatisch weergeven/herhalen van de diavoorstelling met verschillende overgangseffecten. • �ndersteuning voor foto's in J�E��indeling �tot 16 megapixels�� • �ndersteunt verschillende snelheden voor diavoorstelling •... - Seite 64 Aansluiten op de wisselstroom Sluit het ene uiteinde van de bijgeleverde voedingskabel aan op de fotolijst en sluit vervolgens de voedingsadapter aan op een stopcontact. De fotolijst in/uitschakelen �uw de voedingsschakelaar naar de positie ON om de fotolijst in te schakelen. �anneer de voeding is ingeschakeld, licht de voedingsindicator op.
- Seite 65 Functies en bewerkingen Starten Als de fotolijst start, komt deze in een van drie modi terecht afhankelijk van de systeeminstellingen: Modus Beschrijving �oont kalender en klok. Kalender �oont een lijst met opslagapparaten waaruit u kunt Kaart selecteren kiezen. Begint automatisch met het weergeven van foto's. �e fotolijst zoekt in deze volgorde naar fotobestanden: Autospeel S�/MM�/MS �ro...
- Seite 66 Kaarten/Functies Knoptips <4-wegs> links/rechts : Item selecteren <Enter> : Bevestigen <ESC> : Functies Kaarten Kalender Als de fotolijst is ingesteld op starten met Kaarten, toont de lijst na het inschakelen het venster Kaarten. In andere modi kunt u herhaaldelijk op de knop ES� drukken om naar het venster Kaarten te gaan.
- Seite 67 Door foto's bladeren en Autospeel Knoptips <4-wegs> : Selecteer foto. Door foto’s bladeren en Autospeel: Omhoog om het menu helderheid te openen; links/rechts om aan te passen <Enter> : Bevestigen; Single Foto Autospeel <ESC> : Foto bladeren/Autospeel Inhoudweergave Functies Als de fotolijst is ingesteld op starten met Autospeel, start de lijst na het inschakelen met het automatisch weergeven van foto's.
- Seite 68 Foto's kopiëren/wissen Knoptips <4-wegs> omhoog/omlaag : Item selecteren <4-wegs> rechts : Selecteren/Selectie opheffen; menu-optie bevestigen <4-wegs> links : handeling annuleren <Enter> : Bevestigen; menu openen <ESC> : Kopiëren/wissen Functies; handeling annuleren Als u op het pictogram klikt in het venster Functies, verschijnt de modus bestandsbeheer.
-
Seite 69: Systeeminstellingen
Systeeminstellingen Knoptips <4-wegs> omhoog/omlaag : Item selecteren <4-wegs> rechts : handeling bevestigen <4-wegs> links : handeling annuleren <Enter> : handeling bevestigen <ESC> : Systeem instellen Functies; handeling annuleren Als u op het pictogram klikt in het venster Functies, verschijnt het venster systeeminstellingen. - Seite 70 Bijlage Afstandsbediening Knop Beschrijving Zorg dat u de isolatie verwijdert voordat u de ES��knop afstandsbediening gebruikt. �e foto tegen de klok in draaien �mhoog/Rechts/�mlaag/ Links �e foto met de klok mee draaien Enter�knop Bestandsinformatie tonen in de bladermodus Inzoomen Schakelen tussen modi Opmerking: Afstand voor afstandsbediening ≤5m;...
-
Seite 71: Probleemoplossing
Bijlage Probleemoplossing Probleem Oorzaak Oplossing �e voeding is �ontroleer of de wisselstroomadapter �e voedingsindicator is uitgeschakeld of de goed is aangesloten en of de voeding niet opgelicht. voedingsindicator is normaal werkt. defect. �e wisselstroomadapter �ontroleer of de wisselstroomadapter is niet goed aangesloten �een opstartinterface. - Seite 72 Bijlage Specificaties Item Specificaties Beeldschermgrootte 8" �F� L�� Beeldschermresolutie 800x600 pixels R�B �actief gebied: 162 x 121,5 mm�� Beeldverhouding �beeldscherm�� Fotoformaat J�E� Max. resolutie 16 megapixels Automatische diavoorstelling Foto�effect Ja �verschilende instellingen�� Snelheid diavoorstelling Ja �verschillende instellingen�� Externe geheugenkaart USB flash, SD, MMC, MS Pro, CF (tot 2GB) USB-flashstation USB�poort Ja �voor USB Flash�station en pc�aansluiting��...
- Seite 73 Bem-vindo: Caro utilizador, obrigado por ter comprado este produto. Investimos muito tempo e esforço no seu desenvolvimento e esperamos que o mesmo o sirva durante muitos anos sem problemas. Normas de Segurança: 1. �olo�ue a moldura digital numa superfície lisa. Qual�uer cho�ue ou �ueda ao solo poderá �olo�ue a moldura digital numa superfície lisa.
- Seite 74 Introdução Componentes da moldura digital Ecrã LCD Moldura decorativa Moldura frontal Sensor de controlo remoto Vista frontal Trinco da moldura Botão ESC frontal Botão Enter Botão de 4 direcções Indicador de energia Botão de energia )/Botão de LED Apoio Vista traseira Pro ranhura para Porta USB cartão de SD/MMC/...
-
Seite 75: Especificações Técnicas
Introdução do Produto A �o�dura di�ita� t��� a� ����uint��� �unciona�idad���: • Inicia auto�atica���nt�� a ��xibi��o d�� i�a���n�/ca���nd��rio • �xib��/r��p��t�� a� auto�atica���nt�� a� r��produ����� d�� i�a���n� co� ���rio� �����ito� d�� tran�i��o • �uporta i�a���n� no �or�ato J��G �at�� 16 ����ap�x��i��� • �uporta ���ria�... - Seite 76 Ligar à energia AC �igue uma extremidade do cabo d�� a�i���nta��o à �o�dura �� d��poi� �i�u�� o tran��or�ador à tomada. Ligar/desligar a moldura �o�o�u�� o bot�o d�� ��n��r�ia na po�i��o Ligado para ligar a moldura. Quando a moldura for ligada, o indicador de energia irá acender-se. Indicador de Para desligar a moldura, colo�ue o botão de energia...
- Seite 77 Funções e Operações Modo de Iniciar Quando a moldura arrancar, entrará num dos três modos de acordo com a confi�ura��o do �i�t���a: Modo Descrição �alendário �xib�� o ca���nd��rio �� r�����io. Exibe uma lista onde pode escolher os dispositivos Escolher �artão de armazenamento.
- Seite 78 Escolher funções / Escolher cartão Sugestão de botão <4 direcções> esquerda/direita : Seleccionar o item <Enter> : Confirmar <ESC> : Escolher funções Escolher Cartão Calendário Quando a �o�dura �or �i�ada �� ���ti���r d��finida para arrancar co� ��co����r �art�o�� a moldura entrará na interface Escolher �artão. Noutros modos pode premir o botão ���...
- Seite 79 Foto fixa/Reprodução de imagens Sugestão de botão <4 direcções> : Seleccionar foto. Foto fixa e Reprodução de imagens: Cima para aceder ao menu de brilho; esquerda/direita para ajustar <Enter> : Confirmar; Foto fixa Reprodução de imagens <ESC> : Foto fixa/Reprodução de imagens Vista de índice Escolher funções Quando a �o�dura �or �i�ada ��...
- Seite 80 Copiar/Apagar fotos Sugestão de botão <4 direcções> cima/baixo : Seleccionar o item <4 direcções> direita : Marcar/Desmarcar o item; confirmar a acção do menu <4 direcções> esquerda : Cancelar a acção do menu <Enter> : Confirmar; aceder ao menu <ESC> : Copiar/Apagar Escolher funções;...
-
Seite 81: Definições Do Sistema
Definições do sistema Sugestão de botão <4 direcções> cima/baixo : Seleccionar o item <4 direcções> direita : Confirmar a acção do menu <4 direcções> esquerda : Cancelar a acção do menu <Enter> : Confirmar a acção do menu <ESC> : Configuração do sistema Escolher funções;... -
Seite 82: Controlo Remoto
Apêndice Controlo remoto Botão Descrição Antes de utilizar o Antes de utilizar o controlo remoto, não se esqueça de Bot�o ��� remover o plástico que isola a pilha. Rodar a foto no sentido inverso ao dos ponteiros do r�����io Bot���� d�� dir��c��o Rodar a foto no sentido do�... -
Seite 83: Resolução De Problemas
Apêndice Resolução de problemas Problema Causa Solução A moldura está desligada V��rifi�u�� ��� o tran��or�ador A� ���t�� O indicador de energia ou o indicador de energia bem ligado e se o fornecimento de não está aceso. ���t�� danificado. energia é normal. O transformador A�... - Seite 84 Apêndice Especificações Item Especificações Tamanho do ecrã ��� TFT d�� 8 po����ada� R���o�u��o do ��cr� 800x600 p�x��i� RGB �Ár��a acti�a: 162x121��5 ���� �ropor��o ���cr��� For�ato d�� �oto J��G R���o�u��o ���xi�a 16 megapíxeis Rep. da Imagem �i� Efeitos de fotos �i� �V��ria� d��fini������� V���ocidad��...
- Seite 85 Witamy: Szanowny użytkowniku, dziękujemy za zakupienie tego produktu. Poświęciliśmy wiele czasu i wysiłków na rozwój tego produktu i mamy nadzieję, że będzie on służył bezawaryjnie przez wiele lat. Uwaga dotycząca bezpieczeństwa: 1. �staw cy�rową ramkę do zd�ęć na p�askie� powierzchni. �akiekolwiek koliz�e lub upadek �staw cy�rową...
- Seite 86 Wprowadzenie Elementy ramki do zdjęć Panel LCD Dekoracyjna płyta Ramka przednia Sensor pilota Widok z przodu Zatrzask ramki Przycisk Esc przedniej Przycisk Enter 4-kierunkowy przycisk Wskaźnik zasilania Włącznik zasilania )/Przełącznik Podstawa Widok z tyłu SD/MMC/MS Pro Port USB gniazdo karty Gniazdo zasilania gniazdo karty CF prądu stałego...
-
Seite 87: Specyfikacje Techniczne
Wprowadzenie do produktu �y�rowa ramka do zd�ęć �est dostarczana z następu�ącymi �unkc�ami: • Automatyczne uruchamianie wyświetlania obrazów/kalendarza • Automatyczne wyświetlanie/powtarzanie pokazu sla�dów obrazów z różnymi e�ektami prze�ścia • Obs�uga obrazów w �ormacie ���G �do 16 megapikseli�� • Obs�uga różnych szybkości pokazu sla�dów •... - Seite 88 Podłączanie do adaptera prądu zmiennego �od�ącz �eden koniec kabla zasila�ącego z akcesoriów do ramki zd�ęć�� a następnie pod�ącz adapter zasila�ący do gniazda zasilania. Włączanie/wyłączanie ramki do zdjęć �rze�ącz w�ącznik zasilania do pozyc�i Włączenie w celu w�ączenia zasilania ramki do zd�ęć. �o w�ączeniu zasilania�� zaświeci się wskaźnik zasilania.
- Seite 89 Funkcje i operacje Uruchomienie Podczas uruchamiania ramki do zdjęć, przechodzi ona do jednego z trzech trybów, według ustawień systemu: Tryb Opis Kalendarz Wyświetlanie kalendarza i zegara. Wyświetla do wyboru listę urządzeń pamięci Wybierz kartę masowej. Automatyczne rozpoczęcie odtwarzania pokazu slajdów. Ramka do zdjęć wyszukuje pliki z obrazami w tej kolejności: SD/MMC/MS Pro Pokaz slajdów zdjęć...
- Seite 90 Wybierz kartę / Wybór funkcji Wskazówka dla przycisku <4-kierunkowy> w lewo/w prawo: Wybór elementu <Enter>: Potwierdzenie <ESC>: Wybór funkcji Wybierz kartę Kalendarz �o ustawieniu ramki do zd�ęć na uruchomienie z opc�ą �ybierz kartę i w�ączenie zasilania�� ramka do zd�ęć prze�dzie do inter�e�su �ybierz kartę. � innych trybach można nacisnąć...
- Seite 91 Pojedyncze zdjęcie/Pokaz slajdów Wskazówka dla przycisku <4-kierunkowy>: Wybór zdjęcia. Pojedyncze zdjęcie i pokaz slajdów: W górę wyświetlenie menu zwiększania jasności; w lewo/w prawo regulacja <Enter>: Potwierdzenie; Pojedyncze zdjęcie Slideshow <ESC>: Pojedyncze zdjęcie/Pokaz slajdów Index view Wybierz funkcję �o ustawieniu ramki do zd�ęć na uruchomianie w trybie pokazu sla�dów i w�ączenie zasilania��...
- Seite 92 Kopiuj/Usuń zdjęcia Wskazówka dla przycisku <4-kierunkowy> w górę/w dół: Wybór elementu <4-kierunkowy> w prawo: Zaznaczenie/usunięcie zaznaczenia elementu; potwierdzenie akcji menu <4-kierunkowy> w lewo: Anulowanie akcji menu <Enter>: Potwierdzenie; wyświetlenie menu <ESC>: Kopiuj/Usuń Wybór funkcji; anulowanie akcji menu �o wybraniu ikony w inter�e�sie �ybór �unkc�i��...
-
Seite 93: Ustawienia Systemu
Ustawienia systemu Wskazówka dla przycisku <4-kierunkowy> w górę/w dół: Wybór elementu <4-kierunkowy> w prawo: Potwierdzenie akcji menu <4-kierunkowy> w lewo: Anulowanie akcji menu <Enter>: Potwierdzenie akcji menu <ESC>:Ustawienia systemu Wybór funkcji; anulowanie akcji menu �o wybraniu ikony w inter�e�sie �ybór �unkc�i�� ramka do zd�ęć prze�dzie do inter�e�su ustawień... -
Seite 94: Pilot Zdalnego Sterowania
Dodatek Pilot zdalnego sterowania Przycisk Opis Przed użyciem pilota zdalnego sterowania należy �rzycisk �sc usunąć isolator baterii. Obracanie obrazu przeciwnie do wskazówek zegara �rzyciski kierunkowe Obracanie obrazu zgodnie ze wskazówkami zegara �rzycisk �nter �okazywanie in�ormac�i o pliku w trybie po�edynczego zd�ęcia �owiększenie �rze�ączanie trybu Uwaga: Odległość... -
Seite 95: Rozwiązywanie Problemów
Dodatek Rozwiązywanie problemów Problem Przyczyna Rozwiązanie �y�ączone zasilanie lub Sprawdź�� czy �est dobrze pod�ączony Nie świeci się wskaźnik uszkodzony wskaźnik adapter prądu zmiennego i czy zasilania. zasilania. zasilanie �est normalne. Nieprawid�owo Sprawdź�� czy adapter prądu pod�ączony adapter Brak inter�e�su zmiennego �est dobrze pod�ączony i prądu zmiennego startowego. - Seite 96 Dodatek Specyfikacje Element Specyfikacje Rozmiar panelu 8-calowy ekran ��� TFT Rozdzielczość panela 800x600 pikseli RGB �Aktywny obszar: 162x121��5 mm�� �spó�czynnik kszta�tu �panel�� Format zd�ęcia ���G Maksymalna rozdzielczość 16 mega-pikseli Automatyczny pokaz sla�dów ��ekt zd�ęcia Tak �Różne ustawienia�� Szybkość pokazu sla�dów Tak �Różne ustawienia��...