DoorBird D10x Series Installationsanleitung
Vorschau ausblenden
Andere Handbücher für D10x Series:
- Installationsanleitung (45 Seiten) ,
- Installationsanleitung (24 Seiten)

Verwandte Anleitungen für DoorBird D10x Series


Inhaltszusammenfassung für DoorBird D10x Series
- Seite 1 Video Door Station D10x Series Video Türstation D10x Serie Installation manual Pages 1-8 Installationsanleitung Seiten 10-18 Version 1.9, Min. HW 1.01...
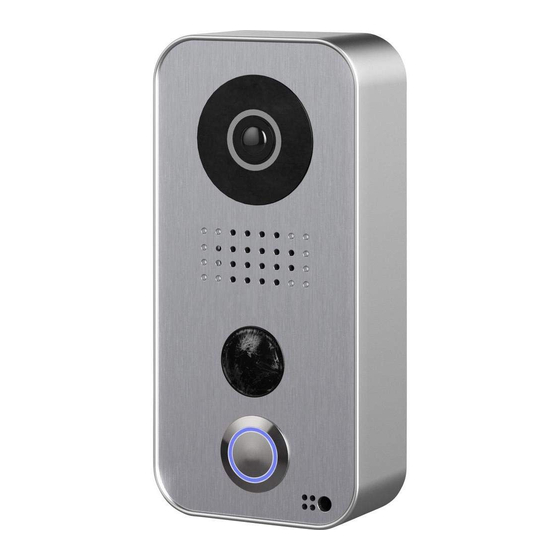
- Seite 2 Components Contents 1x DoorBird Vdeo Door Station 1x Power supply unit (mains adaptor) with four country-specific adaptors 1x Cable with plug for the power supply (black, red) 1x Cable with plug and RJ45 jack for the network cable (white-orange, orange, white-green,...
- Seite 3 For the power supply, door chime, etc. 3) Screw opening For the safety screw Videos Need help with the installation? Be sure to watch our installation videos which can be found on http://www.doorbird.com/support Each individual step of the installation is clearly documented in the videos.
-
Seite 4: Installation
Please ensure that the upload speed of your Internet connection is at least 0.5 Mbps. You can also carry out a speed test at any time via the DoorBird app. The user experience is only as good as your network speed, network stability and quality of your network components, such as your Internet router and WiFi access points or WiFi repeaters. - Seite 5 a wall socket inside your house, usually where the two wires from your previous doorbell come out of the wall in the interior of the house. Do not plug the power supply unit into the wall socket yet. Connect the power supply unit inside the house with the crimp connector provided and the two wires that you would like to use to power the device.
- Seite 6 Should you have any questions, please contact the manufacturer of your door chime. You can find compatible door chimes and a sample wiring diagram at www.doorbird.com/support Conventional door opener button If an electric door opener is connected to the video door station, the Two insulated wires.
- Seite 7 supplied cables with your wires. The accompanying crimp connectors are weatherproof and are equipped with heat-shrink tubing which can be sealed after assembly by, for example, carefully using a heat gun. Please remove any cables on the connection terminal that you do not need. Connector Description Wire...
-
Seite 8: Diagnostic-Led
If you have problems adding the video door station to the App please check if the video door station is online ( www.doorbird.com/checkonline ). If the video door station is not online, please check the WiFi or network cable connection again. -
Seite 9: Legal Notes
Legal notes General remarks Data privacy and data security 1. DoorBird is a registered trademark of Bird Home 1. For maximum security, the device uses the same Automation GmbH. encryption technologies as are used in online banking. For your security, no port forwarding or DynDNS is usedeither. - Seite 10 Video Door Station D10x Series Video Türstation D10x Serie Installation manual Pages 1-8 Installationsanleitung Seiten 10-18 Version 1.9, Min. HW 1.01...
- Seite 11 Installationsanleitung Die stets aktuelle Version der Installationsanleitung finden Sie unter www.doorbird.com/de/support Komponenten Inhalt 1x DoorBird Video Türstation 1x Steckernetzteil mit vier Landesadaptern 1x Kabel mit Stecker für die Stromversorgung (schwarz, rot) 1x Kabel mit Stecker und RJ45 Buchse für das Netzwerkkabel (weiß-orange, orange, weiß- grün, grün)
- Seite 12 1) Einrastpunkte Für die Montageplatte 2) Anschlussterminal Für die Stromversorgung, Türgong etc. 3) Schrauböffnung Für die Sicherheitsschraube Videos Sie können die Installation durch unsere Installationsvideos auf www.doorbird.com/de/support begleiten lassen. In den Videos wird jeder Installationsschritt einzeln und gut dokumentiert dargestellt.
- Seite 13 Netzwerkgeschwindigkeit und Netzwerkkomponenten Stellen Sie sicher, dass Ihre Internetverbindung über mindestens 0,5 Mbit/s Uploadgeschwindigkeit verfügt. Sie können über die DoorBird App jederzeit auch einen Geschwindigkeitstest durchführen. Das Nutzererlebnis ist nur so gut wie Ihre Netzwerkgeschwindigkeit, Netzwerkstabilität und Qualität Ihrer Netzwerkkomponenten, wie z.B. Ihr Internetrouter und W-LAN Access Points oder W-LAN Repeater.
- Seite 14 Zur Stromversorgung der Video Türstation per Steckernetzteil werden zwei isolierte Drähte benötigt. Diese Drähte sind im Normalfall bereits vorhanden und frei, wenn Sie die bestehende Türklingel abmontiert haben. Verwenden Sie ausschließlich das mitgelieferte Steckernetzteil oder bei uns separat erhältliche Hutschienennetzteil, da diese speziell stabilisiert und mit einer integrierten Audio Störungsunterdrückung ausgestattet sind.
- Seite 15 Daten Ihres Türöffners entnehmen. Bei Fragen hierzu kontaktieren Sie bitte den Hersteller Ihres Türöffners. Beispiele für kompatible elektrische Türöffner und einen beispielhaften Anschlussplan finden Sie unter www.doorbird.com/de/support Herkömmlicher elektrischer Türgong Wenn jemand bei Ihnen an der Video Türstation klingelt, erhalten Sie Zwei isolierte Drähte.
- Seite 16 Schritt 7: Montageplatte anschrauben Führen Sie die Drähte, die Sie an die Video Türstation anschließen möchten, durch die dafür vorgesehene Öffnung in der Montageplatte. Drücken Sie die Montageplatte gegen die Hauswand und drehen Sie die mitgelieferten Schrauben in die Dübel bzw. in die Hauswand. Die Video Türstation bzw.
- Seite 17 Schritt 9: Drähte anschließen Die Video Türstation verfügt auf der Rückseite für ein komfortables und sicheres Anschließen der Drähte über ein Anschlussterminal mit Buchsen. Die einzelnen Kontakte am Anschlussterminal sind auf der Rückseite des Gehäuses beschriftet. Einige Anschlüsse am Anschlussterminal können bereits durch uns mit Kabeln für Sie vorbelegt sein.
-
Seite 18: Diagnose-Led
Türstation angeschlossen haben. Schritt 12: Download und Installation der App Laden Sie sich die App "DoorBird" von Bird Home Automation aus dem Apple App Store bzw. Google Play Store auf Ihr mobiles Endgerät. Die stets aktuelle Version der App Bedienungsanleitung finden Sie unter www.doorbird.com/de/support... -
Seite 19: Rechtliche Hinweise
Rechtliche Hinweise Allgemeines Datenschutz und Datensicherheit 1. DoorBird ist ein registriertes Warenzeichen der Bird 1. Für maximale Sicherheit verwendet das Gerät dieselben Home Automation GmbH. Verschlüsselungstechnologien wie beim Onlinebanking. Zu Ihrer Sicherheit sind auch keine Portweiterleitungen oder 2. Apple, das Apple Logo, Mac, Mac OS, Macintosh, iPad, DynDNS im Einsatz.