Inhaltsverzeichnis
Werbung
Verfügbare Sprachen
Verfügbare Sprachen
Quicklinks
Werbung
Inhaltsverzeichnis

Verwandte Anleitungen für DoorBird D1102KV


Inhaltszusammenfassung für DoorBird D1102KV
- Seite 1 Page 2-19 Installation Manual IP Video Door Station D11x Series Seite 20-37 Installationsanleitung IP Video Türstation D11x Serie Page 38-54 Manuel d‘installation Interphone vidéo IP Série D11x Páginas 55-71 Manual de instalación Videoportero IP Serie D11x D11x VERSION 2.3, MIN. HW 2.0...
-
Seite 2: Hazard Information
You can always find the most up-to-date version of the shocks. installation manual on www.doorbird.com/support To make things easier we use the term “device” for • Devices with 110-240 V connection: The device the product “IP Video Door Station D11x series”... - Seite 3 as inside a refrigerated area or in front of an air conditioner. WARNING ̵ Places subject to steam or smoke (e.g. near • Before turning on power, make sure wires are heating or cooking surfaces). not crossed or shorted. If not, fire or eletric ̵...
-
Seite 4: Warranty Information
For information about the device warranty, see devices; failures due to Internet providers www.doorbird.com/warranty and cellular network providers; failures such as disconnected lines and other losses in communication, which makes it impossible to... - Seite 5 COMPONENTS* 1x Main Electrical Unit 1x Back-housing with 1x Installation manual 1x Quickstart guide with call button(s) wall-mounting bracket with Digital Passport and front panel 1x Drilling template 1x Waterproof A4 laser 1x Power supply unit (mains adapter) printer paper for labelling with up to four country-specific adapters name plates 1x RJ45 Adapter...
- Seite 6 DEVICE WITH 2 CALL BUTTONS Front Inside WIFI 1) Front panel 11) Diagnostic-LED 2) HDTV Video Lights up a few seconds after 3) Security screws connecting the device to power 4) Light Sensor 12) Main Electrical Unit For night-vision mode 13) Screw connection terminal 5) Bluetooth transceiver 14) Gasket...
- Seite 7 The flush-mounted model may differ optically. VIDEOS Need help with the installation? Be sure to watch our installation videos which can be found on http://www.doorbird.com/support Each individual step of the installation is clearly documented in the videos. INSTALLATION All the steps below should be carried out carefully by a competent adult, taking into consideration any applicable safety regulations.
- Seite 8 DISMANTLING THE EXISTING SWITCHING OFF POWER DOORBELL Switch off the power to all wires leading to Should there already be a doorbell or door station on the assembly location, i.e. the door chime, the exterior wall of the house, please remove it. electric door opener, power supply unit for the video door station etc.
- Seite 9 Important note for cavity mounting (e.g. in pedestals and mailboxes): To protect the electronic units, please ensure that the technical components are protected against dripping and running water caused by condensate or entering the mounting space through openings. To protect the electronic units, ensure that the mounting space inside is not accumulating water. Sufficient air circulation must be ensured, as well as unobstructed drainage of water at the base of the installation.
- Seite 10 D1101V D1102V D1101KH Pull the front panel with attached Main Electrical Pull the front panel with attached Main Electrical Pull down the front Unit out of the mounting Unit out of the mounting housing (backbox). panel. housing (backbox). 4.2 MOUNTING Lead all cables and wires you want to connect to the device through the mounting housing.
- Seite 11 Install a network cable (which is plugged into a network switch / router “DoorBird 2-Wire Ethernet PoE Converter with Internet access) from the inside of your building to the assembly A1071”, sold separately. It allows you to location.
-
Seite 12: Connecting The Device
To power the device via a PoE-Switch (e.g. D-Link DGS-1008P) or PoE- with one power supply , we recommend Injector (e.g. DoorBird Gigabit PoE Injector A1091), use a CAT.5 cable or to use a PoE-Switch with PoE Standard IEEE 802.3af Mode A or an appropriate higher in accordance with the PoE standard IEEE 802.3af Mode A. - Seite 13 COM 1 CB 2 Max 24V Max 0V 15VDC 0 A (NO) LAN/POE CB 1 R1 R1 E1 E1 V- V+ Port Description LAN/POE The device does not have an integrated standarized RJ45 socket to ensure ... • that the device rests as flat as possible on the wall. •...
- Seite 14 You can configure the default state of the relay (open/close) via the DoorBird App. These ports can be used to connect e.g. an electric door opener. The device does not supply power to the connected device.
- Seite 15 ASSEMBLE THE DEVICE TO THE MOUNTNG HOUSING (BACKBOX) Assemble the front panel with the attached Main Eletrical Unit carefully using the orange (Torx+Pin) screw driver provided. D1101V D1102V D1101KH Turn the safety screws clockwise until they are firmly tightened. Tighten the safety screws by hand only (less than 5 newton meter [Nm]), otherwise the Main Eletrical NOT IC E Unit housing may be damaged.
-
Seite 16: Diagnostic-Led
If you use WiFi for connecting the device to your The device features a well documented API for Internet Router, first go to the DoorBird App > ”WiFi third-party integration. For information, terms and Setup“ and follow the instructions. - Seite 17 Stainless Steel Only high-quality stainless steel is used for all available DoorBird door stations. However, high-quality stainless steel can also rust, as approx. 70 % of stainless steel is made of iron. Rust resistance is only achieved by a protective layer (also called passive layer), which covers the iron like a skin.
- Seite 18 (loose contact). If the problem still exists, please check if your PoE-Switch / PoE Injector supports the PoE Standard IEEE 802.3af Mode A, see also www.doorbird.com/poe If the device is to be supplied with power by a DIN-rail power supply, switch on the DIN-rail...
-
Seite 19: Legal Notes
General remarks updates cannot be undone. Since the products and software of Bird Home Automation GmbH are not explicitly customer-specific 1. DoorBird is a registered trademark of Bird Home Automation products, a customer cannot deny an automatic update if the GmbH. - Seite 20 Bedienungsanleitung. hin, die die optimale Verwendung des Geräts unterstützen. Die stets aktuelle Version der Installationsanleitung finden Sie unter www.doorbird.com/de/support Zur Vereinfachung der Begriffe verwenden wir „Gerät“ Gefahrenhinweise für das Produkt „IP Video Türstation D11x“ sowie „mobiles Endgerät“ für ein Smartphone/Tablet.
- Seite 21 • Gerätemontage an Wand oder Decke: Vermeiden Sie Installationsorte, an denen das WARNUNG Gerät Erschütterungen oder Stößen ausgesetzt Styroporteile etc. sind kein Spielzeug und ist. können gefährlich für Kinder sein. Entsorgen • Bei Geräten mit Erdungsklemmen muss eine Sie das Verpackungsmaterial sofort nach der Erdung angeschlossen werden.
- Seite 22 Nichtbeachten der Gefahrenhinweise fallen gelassen wird. Mit Vorsicht behandeln. verursacht werden, übernehmen wir keine • Das Gerät wird während eines Stromausfalls Haftung. In solchen Fällen erlischt jeder außer Betrieb gesetzt. Gewährleistungsanspruch! Für Folgeschäden • Bei Geräten mit Gegensprechfunktion oder übernehmen wir keine Haftung. eingebautem Lautsprecher oder eingebautem Mikrofon kann das Gerät in Bereichen, in denen Antennen von Mobilfunksendern, Radio- oder...
- Seite 23 Originalverpackung oder einer entsprechenden Verpackung, so dass Schäden vermieden werden. Gewährleistung Informationen zur Gewährleistung des Geräts finden 1x Elektrische 1x Gehäuse mit Sie unter www.doorbird.com/de/warranty Haupteinheit mit Wandmontagehalterung Ruftaste(n) und Frontblende Informationen zur Entsorgung elektrischer und elektronischer Geräte (für...
-
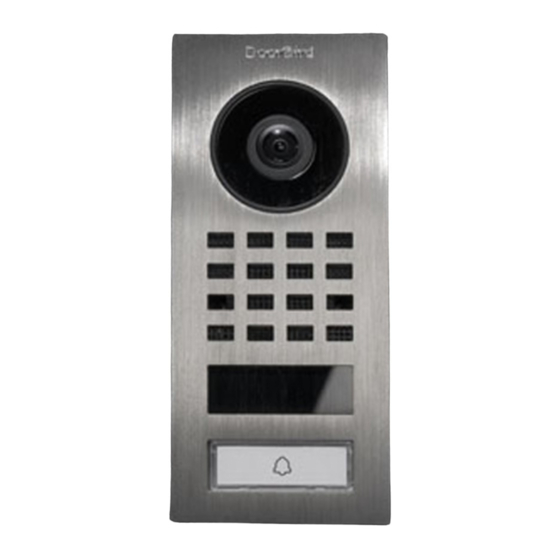
Seite 24: Gerät Mit Einer Ruftaste
GERÄT MIT EINER RUFTASTE Vorderseite Innenseite WIFI 1) Frontblende 10) Diagnose LED 2) HDTV Video Leuchtet nach ein paar Sekunden auf nachdem 3) Sicherheitsschrauben das Gerät mit dem Strom verbunden wurde 4) Lichtsensor 11) Elektrische Haupteinheit Für den Nachtsichtmodus 12) Schraubklemmenblock 5) Bluetooth-Transceiver 13) Dichtung 6) Lautsprecher... -
Seite 25: Gerät Mit Fingerabdrucklesermodul
WIFI 1) Frontblende 11) Elektrische Haupteinheit 2) HDTV Video 12) Diagnose LED 3) Lautsprecher Leuchtet nach ein paar Sekunden auf nachdem 4) Sicherheitsschrauben das Gerät mit dem Strom verbunden wurde 5) Lichtsensor 13) Dichtung Für den Nachtsichtmodus 14) Schraubklemmenblock 6) Mikrofon 15) Halterung für 2-Draht Ethernet PoE Konverter 7) Bluetooth-Transceiver A1071 (optional) -
Seite 26: Demontage Der Bestehenden Türklingel
Abstand der Person von 50 cm (19.68 in) zum Gerät mindestens 0,5 Mbit/s Uploadgeschwindigkeit verfügt. eine geringe Montagehöhe ausreicht. Daher ist das Sie können über die DoorBird App jederzeit auch einen Objektiv auch mechanisch nicht verstellbar. Geschwindigkeitstest durchführen. Das Nutzererleb- Die Kameralinse sollte sich auf einer Höhe von... -
Seite 27: Montage Des Rückgehäuses
Nur bei D1101V und D1102V! Weiter ist berücksichtigen, dass es zum Alternativ sind Wandmontage-Kits mit einem Eck- Schutz der elektronischen Einheiten Keil- (7.5° vertikal nach oben oder unten) und einem innerhalb des Montageraums nicht zu Eck-Winkel-Wandmontageadapter (45° horizontal, einer Staunässe kommen darf. links oder rechts montierbar) für D1101V und D1102V separat erhältlich. -
Seite 28: Entfernen Der Frontblende
4.1 ENTFERNEN DER FRONTBLENDE Entfernen Sie die Frontblende mit der Haupteinheit vorsichtig mit dem mitgelieferten orangenen (Torx+Pin) Schraubendreher vom Gehäuse. Die Frontplatte und die Sicherheitsschrauben sind so konstruiert, dass sie nicht aus der Frontplatte herausgeschraubt werden können. Dadurch fallen sie bei der Montage nicht heraus/kommen abhanden. D1101V D1102V D1101KH... -
Seite 29: Optionen Zur Netzwerkverbindung
Wenn Sie nur zwei Drähte am Montage- Installieren Sie ein Netzwerkkabel (das an einen Netzwerk-Switch/Router ort zur Verfügung haben, können Sie den „DoorBird 2-Draht Ethernet PoE mit Internetzugang angeschlossen ist) von der Innenseite Ihres Gebäudes Konverter A1071“ verwenden, der separat zum Montageort. -
Seite 30: Stromversorgung Vorbereiten
Zur Stromversorgung des Geräts per PoE-Switch (z.B. D-Link DGS-1008P) einzigen Netzteil versorgen müssen, empfehlen wir Ihnen, einen PoE-Switch oder PoE-Injektor (z.B. DoorBird Gigabit PoE Injektor A1091) verwenden mit PoE-Standard IEEE 802.3af Mode A Sie ein Cat.5 Netzwerkkabel oder besser gemäß PoE Standard IEEE oder ein entsprechendes Hutschienen- 802.3af Mode A. -
Seite 31: Gerät Anschliessen
OPTION 3 Stromversorgung per Hutschienennetzteil Alternativ zum Steckernetzteil bieten wir in unserem Shop Hutschienen- Wenn Sie mehr als ein Gerät mit einem netzteile an, welche durch eine Fachkraft installiert werden können. Die einzigen Netzteil versorgen müssen, Netzwerkanbindung erfolgt per Netzwerkkabel oder WLAN. empfehlen wir Ihnen, einen PoE-Switch mit PoE-Standard IEEE 802.3af Mode A oder ein entsprechendes Hutschienen-... - Seite 32 Verdrahtung eines elektrischen Türöffners generell den Einsatz eines abgesetzten Sicherheitsrelais, das im Hausinneren montiert wird (z.B. DoorBird E/A Tür Controller A1081). E1, E1 Digitaler Eingang (0 V, 0 A (NO)), für Türöffnertaster, max. 0 V DC/AC, 0 A.
-
Seite 33: Anschlüsse Der Ruftaste
15 VDC - Eingang 15 V DC Spannungsversorgung, Minuspol (-). Bitte verbinden Sie den schwarzen Draht des mitgelieferten Netzteils (Netzadapter) mit diesem Anschluss, wenn Sie das Gerät nicht mit PoE versorgen. Kombinieren Sie die Stromversorgung per Steckernetzteil nicht mit NOTICE der Stromversorgung per PoE. -
Seite 34: Diagnose-Led
Die Genauigkeit der Entfernung des Bewegungssensor DER APP kann je nach Umgebungssituation variieren. Laden Sie sich die App “DoorBird“ von Bird Home BLUETOOTH TRANSCEIVER Automation aus dem Apple App Store bzw. Google Play Store auf Ihr mobiles Endgerät. Die stets aktuelle Das Gerät verfügt über einen integrierten Bluetooth... -
Seite 35: Beschriftung Eines Namensschilds Wechseln
WARTUNG DER FRONTBLENDE • Silberputzmittel Pflege und Reinigung Nach jeder Reinigung mit klarem Wasser nebelfeucht Alle DoorBird Frontblenden werden aus hochwertigen nachwischen und trockenreiben, um die Bildung Materialien gefertigt und sind für eine lange von Kalkspuren zu verhindern. Durch Nutzung von Lebensdauer ausgelegt. - Seite 36 Wenn das Problem weiterhin besteht, Sie www.doorbird.com/downloads/ports.pdf überprüfen Sie bitte, ob Ihr PoE-Switch / PoE- Injektor den PoE-Standard IEEE 802.3af Mode A unterstützt, siehe auch www.doorbird.com/ de/poe Wenn das Gerät über ein Hutschinennetzteil versorgt werden soll, schalten Sie die das Hutschinennetzteil jetzt ein.
-
Seite 37: Rechtliche Hinweise
Datenschutz-, Datensicherheits- oder Stabilitätsgründen oder um sie Allgemeines auf dem Stand der Technik zu halten). Wenn ein Firmware-Update 1. DoorBird ist ein registriertes Warenzeichen der Bird Home verfügbar ist, verteilen es die Server der Bird Home Automation Automation GmbH. GmbH im Normalfall automatisch an alle kompatiblen Produkte, 2. - Seite 38 • L’installation, le montage et les travaux Vous trouverez la toute dernière version du manuel d’entretien des appareils électriques doivent d’installation à l’adresse www.doorbird.com/support. être exclusivement réalisés par un spécialiste Pour simplifier les termes, nous utiliserons le mot agréé. En ne respectant pas cette consigne, «...
- Seite 39 et de dysfonctionnement de l’appareil. WARNING • Pour les appareils contenant du plastique ou du verre véritable, n’exercez pas de forte personnes et les animaux domestiques. pression sur le verre. La rupture de celui-ci peut • Il y a de la tension sur certaines pièces de occasionner des blessures.
- Seite 40 des instructions de sécurité. Dans ce type haut-parleur ou d‘un microphone intégré, le de cas, il n’existe aucun recours en garantie ! fonctionnement de l’appareil peut être entravé Nous déclinons toute responsabilité en cas de dans les endroits se trouvant à proximité dommages indirects.
- Seite 41 Vous trouverez les informations relatives à la garantie Afin de trouver le point de collecte le plus proche, en consultant la page www.doorbird.com/warranty veuillez contacter les autorités locales. Des sanctions peuvent être appliquées en cas d‘élimination incorrecte de ces déchets, conformément à...
- Seite 42 APPAREIL AVEC 1 BOUTON D’APPEL Avant Intérieur WIFI 1) Face avant 10) LED de diagnostic 2) Vidéo HDTV S‘allume quelques secondes 3) Vis de sécurité après avoir branché l‘appareil 4) Capteur de luminosité 11) Unité électrique principale Pour le mode vision nocturne 12) Borne de raccordement à...
- Seite 43 WIFI 1) Face avant 11) Unité électrique principale 2) Vidéo HDTV 12) LED de diagnostic 3) Haut-parleur S‘allume quelques secondes 4) Vis de sécurité après avoir branché l‘appareil 5) Capteur de luminosité 13) Joint d‘étanchéité Pour le mode vision nocturne 14) Borne de raccordement à...
- Seite 44 COUPER LE COURANT Avez-vous besoin d‘aide pour l‘installation ? Regardez nos vidéos d‘installation qui se trouvent sur la page https://www.doorbird.com/support Coupez l‘alimentation de tous les fils menant au site de montage, càd le carillon de porte, Chaque étape de l‘installation y est clairement l‘ouvre-porte électrique, le bloc d‘alimentation...
- Seite 45 Pour les D1101V et D1102V uniquement Nous proposons des kits de montage mural pour les Un capteur d‘images ne doit pas être exposé N OT ICE modèles D1101V et D1102V avec montage en saillie : à la lumière directe du soleil pendant une un adaptateur mural d‘angle vertical (7,5°...
- Seite 46 4.1 ASSEMBLAGE DE LA FACE AVANT Retirez avec précaution le panneau avant et l’unité principale électrique hors du boîtier, à l’aide du tournevis orange fourni (torx-pin). Nous avons conçu la face avant et les vis de sécurité de manière à ce qu‘elles ne puissent pas être vissés à...
- Seite 47 „Convertisseur 2 fils PoE Ether- Faites passer un câble réseau (relié à un commutateur/routeur réseau net DoorBird A1071“, vendu séparément. Il vous permet de transférer des données avec accès internet) de l’intérieur du bâtiment jusqu’à l’emplacement réseau (Ethernet) et de l‘alimentation...
- Seite 48 DGS-1008P) ou un injecteur PoE (p. ex. l‘injecteur PoE Gigabit DoorBird de l‘alimentation électrique ; celle-ci A1091), utilisez un câble CAT.5 ou supérieur conforme à la norme PoE doit être mesurée et vérifiée sur place...
-
Seite 49: Connexion De L'appareil
CONNEXION DE L‘APPAREIL Pour faciliter l‘installation, nous vous recommandons vivement de retirer la Il est possible de raccorder les câbles et les fils à l‘appareil de manière fiche de la borne de raccordement à simple et sûre grâce à la borne de raccordement à vis étiquetée. Vous vis lorsque vous connectez les câbles et pouvez maintenant raccorder tous les câbles et fils nécessaires à... - Seite 50 Relais de verrouilage bistable n° 1, max. 24 V DC/AC, 1 A. Dispositif de sécurité : Le relais conserve son état même en cas de perte de puissance. Vous pouvez configurer l‘état par défaut du relais (ouvert/fermé) via la APP DoorBird. Ces ports peuvent être utilisés pour connecter, p. ex., un ouvre-porte électrique. L‘appareil ne fournit pas de courant à...
-
Seite 51: Allumer L'appareil
à votre routeur Internet l‘alimentation électrique. au moyen d‘un câble réseau, allez dans l‘application DoorBird > „Ajouter un appareil“ et cliquez sur l‘icône Si la LED de diagnostic ne s‘allume pas, veuillez vérifier du code QR dans le champ „Nom d‘utilisateur“. - Seite 52 Veuillez consulter notre blog ou la dernière version nécessaire avec un peu de détergent, un chiffon doux de ce manuel sur la page www.doorbird.com/support ou une brosse. Les pièces en plastique (caméra ou pour connaître les dernières mises à jour.
- Seite 53 Pour les surfaces très brillantes, utilisez PoE supporte la norme PoE IEEE 802.3af Mode un chiffon sans rayures (par exemple, un chiffon de A, voir aussi www.doorbird.com/poe nettoyage pour les verres, un chiffon de polissage pour les meubles, etc.).
-
Seite 54: Mentions Légales
Généralités sûre et efficace. Grâce aux améliorations continues, des fonctions 1. DoorBird est une marque déposée de Bird Home Automation peuvent être ajoutées, étendues ou légèrement modifiées au fil du GmbH. - Seite 55 El incumplimiento de esta puede suponer un riesgo de daños graves para la En www.doorbird.com/es/support encontrará la salud o de lesiones mortales debido a de versión actual del manual de instalación. Para descarga eléctrica.
- Seite 56 líquido del interior, podría ocasionar lesiones. En caso de accidente haga gárgaras, enjuaguese ADVERTENCIA la boca, ojos o piel con abundante agua durante o conexión, ya que podría resultar en una al menos 15 minutos y consulte a su médico. descarga eléctrica.
- Seite 57 • En los aparatos con intercomunicador, Para obtener información sobre la garantía del altavoz incorporado o micrófono incorporado aparato, consulte www.doorbird.com/warranty o funciones de transmisión de señales, mantenga los cables a más de 30 cm (12‘‘) alejados del cableado de AC 100-240 V, podría producirse ruido inducido por la AC y/o mal Informaciones sobre la eliminación de...
- Seite 58 COMPONENTES* 1 Unidad principal 1 Carcasa trasera de 1 Manual de instalación 1 Manual de inicio rápido eléctrica con botones de montaje con soporte con Digital Passport llamada y panel frontal para montaje mural 1 Plantilla de taladrado 1 Papel A4 resistente al agua 1 Fuente de alimentación (110-240 V CA a para impresora láser para 15 V CC) con hasta cuatro adaptadores para...
- Seite 59 APARATO CON DOS BOTONES DE LLAMADA Parte delantera Parte interior WIFI 1) Panel frontal 11) Led de diagnóstico 2) Vídeo HDTV Se ilumina unos segundos después de 3) Tornillos de seguridad conectar el aparato a la corriente. 4) Sensor de luz 12) Unidad principal eléctrica para modo de visión nocturna 13) Bloque de bornes de tornillo...
- Seite 60 Eche un vistazo a nuestros vídeos de instalación en carga de 0,5 Mbits/s como mínimo. La aplicación de www.doorbird.com/es/support para guiarse. En los ví- DoorBird ofrece la posibilidad de hacer una prueba de deos se representa cada paso de instalación de forma velocidad en cualquier momento. La experiencia del individual y bien documentada.
-
Seite 61: Elección Del Lugar De Montaje
DESMONTAJE DEL DESCONEXIÓN DE LA CORRIENTE TIMBRE EXISTENTE Desconecte de la corriente todos los cables Si hay un timbre o un videoportero instalados en la que se tiendan hasta el lugar de montaje, pared de casa, desmóntelos. p. ej., del videoportero, del timbre, del portero automático eléctrico, del switch/inyector PoE, etc. -
Seite 62: Extracción Del Panel Frontal
Nota importante para el montaje en cavidades (por ejemplo, en pedestales y buzones): Para proteger las unidades electrónicas, Debe garantizarse una circulación de aire asegúrese de que los componentes técnicos suficiente, así como un drenaje sin obstáculos estén protegidos contra el goteo y el agua del agua en la base de la instalación. - Seite 63 D1101KH D1101V D1102V Extraiga la placa frontal con la unidad principal Tire del panel frontal Tire del panel frontal eléctrica de la carcasa trasera de montaje. hacia abajo. hacia sí. 4.2 MONTAJE Pase todos los cables y conductores que quiera conectar por la carcasa de montaje. Atornille el soporte para montaje mural de la carcasa a la pared.
-
Seite 64: Preparación De La Alimentación
Cable de red (recomendado, no requiere mantenimiento) de montaje, puede utilizar el convertidor Ethernet PoE DoorBird A1071 de 2 ca- IInstale un cable de red (que esté conectado a un switch de red o rúter bles, que se vende por separado. Este... -
Seite 65: Conexión Del Aparato
DIN (véase la opción 3). Para suministrar corriente al aparato mediante switch PoE (p. ej., D-Link DGS-1008P) o inyector PoE (p. ej., el inyector DoorBird Gigabit PoE A1091), utilice un cable de red cat. 5 o superior conforme a la norma PoE IEEE 802.3af modo A. - Seite 66 COM 1 CB 2 Max 24V Max 0V 15VDC 0 A (NO) LAN/POE CB 1 R1 R1 E1 E1 V- V+ CONEXIONES DESCRIPCIÓN LAN/POE El aparato no dispone de conector hembra RJ45 normalizado integrado para garantizar que: • el aparato quede lo más plano posible en la pared, •...
- Seite 67 Por eso, recomendamos usar un relé de seguridad remoto para el cableado de un portero automático eléctrico, que se monta en el interior de la casa (p. ej., controlador de puerta E/S A1081 DoorBird). E1, E1 Entrada digital (0 V, 0 A [NA]) para pulsador de portero automático, máx. 0 V CC/CA, 0 A.
-
Seite 68: Puesta En Marcha
Si va a conectar el aparato a través de la red WLAN alimentación para raíl DIN. con su rúter, primero vaya a la aplicación DoorBird > «Ajustes WiFi» y siga las instrucciones. Puede ver si el aparato está recibiendo corriente con el led de diagnóstico. - Seite 69 Más información en www.doorbird.com/es/api Acero inoxidable Para los videoporteros DoorBird solo se utilizan aceros DOORBIRD CONNECT inoxidables de excelente calidad. No obstante, incluso el acero inoxidable se puede oxidar, ya que está...
-
Seite 70: Resolución De Problemas
PoE es compatible con el estándar desmineralizada previene la formación de residuos PoE IEEE 802.3af modo A; véase también www. de cal. doorbird.com/es/poe. Acero inoxidable con recubrimiento de PVD Si desea alimentar el aparato con una fuente Para las superficies con recubrimiento de PVD, de alimentación para raíl DIN, encienda ahora... - Seite 71 Automation GmbH normalmente lo distribuyen automáticamente Observaciones generales a todos los productos compatibles conectados a Internet o a los 1. DoorBird es una marca registrada de Bird Home Automation servidores de Bird Home Automation GmbH. Este proceso es gradual GmbH.
- Seite 72 Space for notes / Platz für Notizen...
- Seite 74 Space for notes / Platz für Notizen...
- Seite 76 Part of ASSA ABLOY www.doorbird.com...