Werbung
Verfügbare Sprachen
Verfügbare Sprachen
Quicklinks
S
BATTERY - to - BATTERY CHARGER
Specification:
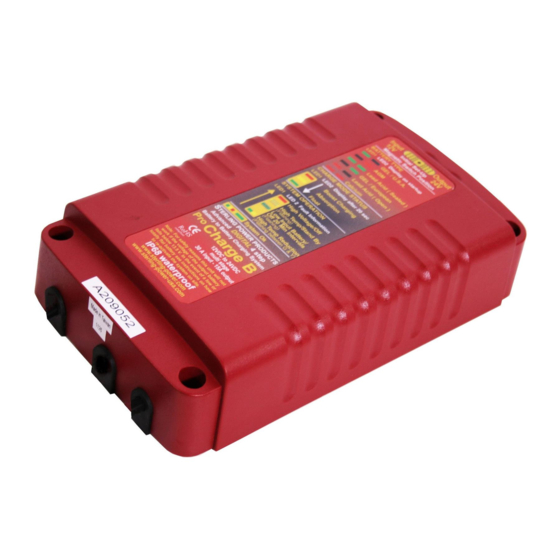
Size: 230mm x 130mm x 50mm
(LxWxD)
Weight: 2.5Kg (5.5 lbs)
system activated at > 13.3V
system sleep at < 13.0V after 20 mins
current pass shut down at 13.2V
sleep current draw < 1mA
over voltage trip ( output )
over voltage trip ( input )
low voltage warning ( output )
low voltage warning ( input )
(for 24V x voltages by 2)
www.busse-yachtshop.de | info@busse-yachtshop.de
TERLING POWER PRODUCTS
Waterproof
12V-12V / 12-24V / 12-36V
Advanced Charging Technology
Installations Instructions & Manual
Installations- und Bedienungsanleitung
WATERPROOF
a n d
SALTWATER
T E S T E D
IP68
This appliance is not intended for use
by persons (including children) with
reduced physical, sensory or mental
capabilities, or lack of experience and
knowledge, unless they have been
given supervision of instruction
concerning use of the appliance by a
person responsible for their safety.
Please ensure children do not tamper
with this device.
4
technology
ProDigital
RoHS
compliant
Werbung

Verwandte Anleitungen für Sterling Power Products 12-36V


Inhaltszusammenfassung für Sterling Power Products 12-36V
- Seite 1 TERLING POWER PRODUCTS BATTERY - to - BATTERY CHARGER Waterproof 12V-12V / 12-24V / 12-36V Advanced Charging Technology Installations Instructions & Manual Installations- und Bedienungsanleitung technology ProDigital RoHS WATERPROOF a n d SALTWATER compliant T E S T E D...
- Seite 2 optional remote on/off Ignition Do not connect cable 1 & 2 if auto activation required Important the engine battery neg and the aux battery neg will become common when the 2 outputs are connected, i.e. the neg will make the batteries negative common within our unit.
- Seite 3 ATTERY ATTERY HARGER NSTRUCTIONS Thank you for purchasing the Sterling Battery-to-Battery Charger, a sophisticated product which will help you to fast and effectively charge a second battery on board of your boat or vehicle. Before starting to install the unit, please read and understand these instructions completely, in order to avoid any possible safety risks and to avoid any danger of damaging the unit or your boat / vehicle.
-
Seite 4: Installation
The Sterling Battery-to-Battery Charger will charge your extra battery bank about 5 times faster and will put about 50% extra power into them compared to conventional charging technology. It will also increase the life of your batteries by de-sulphating them. The charger can be programmed for all major types of batteries. I.e. open or sealed lead-acid batteries, gel and AGM batteries, all of which will be charged with their recommended charge characteristics. - Seite 5 following instructions. Battery Type Setting. (See page 2 for all the battery type information) Selecting your battery type: Unfortunately, with modern batteries this may not be as simple as it first appears. Please read the Disclaimer in red print on page 2 about battery type selection. If you are not sure which setting to use, then always err on the side of caution.
- Seite 6 This product has 2 tri coloured LEDs located at the side of the product labelled LED1 and LED2. Each LED has the ability to emit 3 colours and also flash denotes the LED colour which flashes). Red, Orange and Green, by using the 2 LEDs and the 3 colours we can mix them to give various amounts of information to the user.
- Seite 7 Battery Type Setup Procedure: Start unit 1. Wire the unit according to the instructions with the input and output cables connected. 2. In order to activate the unit you must increase the input voltage over 13.3V by starting the engine or switching on a battery charger. Please use a voltmeter to check the input voltage if in doubt.
- Seite 8 TERLING POWER PRODUCTS BATTERY - - BATTERY L ADER sserdicht 12-24V / 12-24V / 12-36V Advanced Charging Technology Installations Instructions & Manual Installations- und Bedienungsanleitung technology ProDigital RoHS WATERPROOF compliant a n d SALTWATER T E S T E D...
- Seite 9 optionale Fernbe- dienung an/aus Zünd- schlüssel Kabel 1 & 2 nicht verbinden wenn auto- matische Aktivierung benötigt Wichtig Motorbatterie neg und Hilfsbatterie neg werden vereint wenn die 2 Ausgänge verbunden sind, neg macht die Batterien zum gemeinsamen Negativ innerhalb unseres Gerätes Motor Dieses produkt wird die Hilfs/Batteriebank...
- Seite 10 ATTERIE ATTERIE LADER ANLEITUNG Vielen Dank für den Kauf Ihres Sterling Batterie-zu-Batterie Lader, ein hochentwickeltes Produkt welches Ihnen hilft eine zweite Batterie an Ihrem Boot oder Fahrzeug rasch und effektiv zu laden. Bevor Sie das Gerät installieren, lesen Sie diese Anleitung genau und stellen sicher dass Sie sie verstehen, um jedwede Sicherheitsrisiken oder Sachschaden zu vermeiden.
- Seite 11 Das Sterling B2b Ladegerät lädt Ihre Batteriebank bis zu 5mal schneller und gibt ihr bis zu 50% mehr Leistung als konventionelle Ladetechnologie. Es verlängert ausserdem das Leben Ihrer Batterie da es sie desulfiert. Sie können es für alle Haupttypen von Batterien programmieren, zB offene oder geschlossene Blei-Säure Batterie, Gel- und AGM Batterie, diese werden laut deren empfohlenen Ladecharakteristiken geladen.
- Seite 12 Terminologie: Das Wort Boost, auch Absorption oder Ausgleichsladung, beschreibt die erste Etappe des Ladezyklus. Das bedeutet das Gerät bietet den Batterien die Boost - Spannung (und diese absorbieren den gesamten Strom bis zum max Strom für das Ladegerät) für so lange als möglich an. Dann lösst der Strom langsam nach.
- Seite 13 Systeminformation / Alarme BATTER IESPANNUNG / OFF (RECHTES L.E.D. AUF ROT ) Dies ist Warnung das Gerät abzustellen. Dieser Alarm bedeutet die Spannung am Eingang zum Batterie-Batterie Lader ist mehr als 15,5V ü (f r 12 V Gerät , dies bedeutet für gewöhnlich dass die Ladequelle der Motorbatterie überlädt, dies kann die LiMa, Solarzelle,Batterieladegerät,Windgenerator etc.
- Seite 14 Batterietypauswahl Vorgang: Start Gerät 1. Verkabeln Sie das Gerät laut Anleitung mit Ein- und Ausgang verbunden. 2. Um Gerät zu aktivieren muss Spannung über 13,3V steigen, entweder durch Start des Motors oder eines Batterieladers. Bitte checken Sie mit einem Voltmeter falls Sie unsicher sind. Falls Sie Led1 Led2 Batterietyp auswählen möchten, aktivieren Sie das Gerät noch nicht.
- Seite 15 TERLING POWER PRODUCTS Chargeur batterie à batterie étanche 12V vers 12V / 12V vers 24V / 12V vers 36V mode d ’emploi et manuel d ’utilisation technology ProDigital WATERPROOF RoHS a n d SALTWATER T E S T E D compliant IP68 specification:...
- Seite 16 controle (optionelle) on / off Ignition Allumage ou interrupteur positive Important Les bornes négatives de la batterie moteur et de la batterie auxiliaire seront communes une fois les batteries connectées. L ’appareil connecte Batterie automatiquement Parc batterie auxiliaire les bornes négatives. démarrage Le parc choisi pour illustrer le schéma est de 36 volts, pour une installation en 24 Volts il y aurait 2 batteries.
- Seite 17 ’ ANUEL D UTILISATION DU CHARGEUR BATTERIES À BATTERIES Merci d ’avoir choisi le chargeur batterie à batterie Sterling, un appareil élaboré qui vous aidera à charger de façon rapide et efficace un parc de batteries secondaire à bord de votre bateau ou de votre véhicule.
- Seite 18 Le chargeur batterie à batterie Sterling chargera votre parc de batteries auxiliaire environ 5 fois plus rapidement, et augmente la charge des batteries d ’environ 50 %. Il augmentera la durée de vie de vos batteries en les désulfatant. Le chargeur peut être programmé pour tous les types de batteries, scellées ou ouvertes, acide-plomb, gel, AGM;...
- Seite 19 Réglages suivant les types de batteries: consulter la page 2 pour trouver les informations. Sélection du type de batteries: Avec les batteries modernes ce choix peut être plus compliqué qu ’il y parait au premier abord, bien lire les limites de garanties en rouge concernant le choix des batteries.
- Seite 20 BOOST / Courant constant la led 1 est rouge Cette led est allumée au démarrage, elle doit rester allumer jusqu ’à la période d ’absorption, la led jaune s ’allume alors, ce qui prouve que la tension de charge est atteinte. ABSORPTION, LED1 = jaune Cette situation dure pendant toute la période où...
- Seite 21 Installation de la procédure sélection des batteries: Démarrage. 1. Raccorder l ’appareil en respectant les instructions , les entrées et les sorties doivent être connectées. 2. Pour que l ’appareil soit activé vous devez atteindre une tension d ’entrée de 13,3 volts, soit en démarrant le moteur ou en branchant un chargeur de batteries.