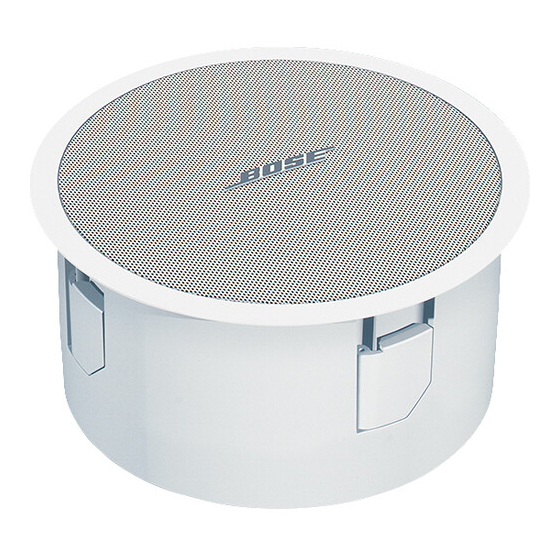
Bose FreeSpace 3 Installationsanleitung
Series ii
Vorschau ausblenden
Andere Handbücher für FreeSpace 3:
- Installationshandbuch (12 Seiten) ,
- Installationsanleitung (112 Seiten) ,
- Installationshandbuch (13 Seiten)
Werbung
Quicklinks
®
®
Bose
FreeSpace
AM263579_00 _V.pdf • December 5, 2002
3 Series II Loudspeaker
Installation Guide*
Installationsvejledning*
Installationsanleitung*
Guía de instalación*
Guide d'installation*
Guida all'installazione*
Installatiehandleiding*
Installationsanvisning*
*For use by trained installers only
*Kun til brug for erfarne installatører
*Montage ausschließlich durch
ausgebildetes Installationspersonal
*Para uso exclusivo de instaladores capacitados
*Réservé aux installateurs ayant suivi une formation
*Solo per l'uso da parte di installatori professionisti
*Uitsluitend voor gebruik door ervaren installateurs
*Ska endast användas av utbildade installatörer
1
Werbung

Verwandte Anleitungen für Bose FreeSpace 3


Inhaltszusammenfassung für Bose FreeSpace 3
- Seite 1 ® ® Bose FreeSpace 3 Series II Loudspeaker Installation Guide* Installationsvejledning* Installationsanleitung* Guía de instalación* Guide d’installation* Guida all’installazione* Installatiehandleiding* Installationsanvisning* *For use by trained installers only *Kun til brug for erfarne installatører *Montage ausschließlich durch ausgebildetes Installationspersonal *Para uso exclusivo de instaladores capacitados *Réservé...
-
Seite 2: Declaration Of Conformity
General Purpose Loudspeakers, in accordance with UL1480. The Bose Freespace 3 Series II Acoustimass Module and Flush-Mount Satellite also comply with the requirements of NFPA 70, National Electric Code 2002, Article 300-22(c) and UL2043 for use in air handling spaces, and NFPA 90A-1996 Installation of Air Conditioning and Ventilation Systems, Section 2-3.10.1(a), exception 3 when used with the PC-FreeSpace 3B and PC-FreeSpace 3F Plenum Cover... - Seite 3 Installation/Instalación/Installazione/Installatie Package contents Kassen indeholder Packungsinhalt El paquete contiene Contenu de l’emballage eller Contenuto oder della confezione eller Inhoud van de verpakking Paketets innehåll Dimensions Choices/Valgmuligheder/ Mål Optionen/Opciones/Au choix/ Abmessungen Opzioni/Keuzes/Alternativ Dimensiones Dimensions Dimensioni Afmetingen Dimensioner Front AM263579_00 _V.pdf • December 5, 2002...
- Seite 4 Installation/Instalación/Installazione/Installatie Dimensions Mål Abmessungen Dimensiones Dimensions Dimensioni Afmetingen Dimensioner Rear Side AM263579_00 _V.pdf • December 5, 2002...
- Seite 5 Installation/Instalación/Installazione/Installatie Dimensions Mål Abmessungen Dimensiones Dimensions Dimensioni Afmetingen Dimensioner Front Side Rear Side AM263579_00 _V.pdf • December 5, 2002...
- Seite 6 Choices Valgmuligheder Optionen Opciones Au choix Opzioni Keuzes Alternativ ® ® Bose FreeSpace 3F Cosmetic Cover Bose FreeSpace 3F Rough-in ® Bose FreeSpace 3F Tile Bridge Bose 8/32 Junction Box PC-FreeSpace 3F Plenum Cover AM263579_00 _V.pdf • December 5, 2002...
- Seite 7 Mount Kit Mount Kit Required Nécessite Påkræves È necessario Erforderlich Verplicht Se requiere Krävs Bose FreeSpace 3B Rough-in Pan Bose FreeSpace 3B Tile Bridge eller oder eller PC-FreeSpace 3B Plenum Cover Bose 8/32 Junction Box AM263579_00 _V.pdf • December 5, 2002...
- Seite 8 Installation/Instalación/Installazione/Installatie Raccordement aux Amplifier output sorties de connection l’amplificateur Tilslutning til Connessione di forstærkerudgang uscita Anschluss des dell’amplificatore Verstärker- Uitgangsverbinding ausgangs van de versterker Conexión de Anslutning salida del från amplificador 100V förstärkare STEREO STEREO CH 1 CH 2 (MONO, USE JUMPERS) 70V/100V DIRECT...
- Seite 9 Installation/Instalación/Installazione/Installatie • Lower Wattage: The transformer tap is set at the factory for 200W use. To set it for lower wattage, Transformer tap remove the end of the + jumper wire that is connected to 200W and reattach it to the appropriate tap setting (100W, 50W, or 25W).
- Seite 10 Installation/Instalación/Installazione/Installatie Direct • Mono Direct: To bypass the transformer and prepare the loudspeaker for 4Ω use and mono sound input, remove the two jumpers from the transformer settings on the front of the loudspeakers. Leave the (transformer CH1 and CH2 input jumpers on the back of the loudspeaker as they are. bypass) use •...
- Seite 11 Installation/Instalación/Installazione/Installatie • Stereo Direct: To bypass the transformer and prepare the loudspeaker for 6Ω use and stereo sound input, remove all jumper wires. • Stereo direkte: Fjern alle koblingskabler ved benyttelse af lavohm på transformeren og forberedelse af højttaleren til anvendelse med 6 Ω og stereo lydindgang. •...
- Seite 12 Installation/Instalación/Installazione/Installatie Satellite speaker connection Tilslutning af Satellithøjttaler Channel 2 in Stereo Anschluss des Satelliten- Lautsprechers Conexión del Channel 1 in Stereo altavoz satélite Raccordement 2 speaker des cubes Collegamento dei diffusori a cubetto Verbinding van de satelliet- luidsprekers Channel 2 in Stereo Anslutning av satellithögtalare...
- Seite 13 Precaución: No conecte directamente al módulo ningún altavoz que no sea altavoz satélite compatibles FreeSpace 3. • Il est possible de raccorder d’autres enceintes Bose sur le module Acoustimass, FreeSpace 3 série II, Impiego di altri notamment les FreeSpace Model 16, Model 32, Model 32SE, Panaray 302 ou FreeSpace 6. S’assurer diffusori uniquement de raccorder directement les enceintes et le module sur des canaux séparés de...
- Seite 14 Installation/Instalación/Installazione/Installatie Mounting the module Montering til modulet Aufbau des Moduls Montaje del módulo Fixation du module Installazione Monteren van de module Montering för modulen • Choose a mounting position, method, and hardware consistent with local building codes and regula- tions. •...
- Seite 15 Installation/Instalación/Installazione/Installatie AM263579_00 _V.pdf • December 5, 2002...
- Seite 16 Installation/Instalación/Installazione/Installatie AM263579_00 _V.pdf • December 5, 2002...
- Seite 17 Installation/Instalación/Installazione/Installatie Mounting and wiring satellite speakers Montering og lednings- fremføring til satellithøjttalere Aufbau und Verdrahtung • Choose a position and mounting method consistent with local building codes and regulations. von Satelliten- • Vælg monteringsted, -metode der er i overensstemmelse med lokale byggevedtægter. Lautsprechern •...
- Seite 18 Installation/Instalación/Installazione/Installatie FM c. FM d. FM e. FM f. FM g. FM h. AM263579_00 _V.pdf • December 5, 2002...
- Seite 19 Installation/Instalación/Installazione/Installatie SM e. • Use four screws per bracket. • Brug fire skruer per beslag. • Benutzen Sie vier Schrauben pro Halter. • Utilice cuatro tornillos por abrazadera. • Chaque support doit être fixé SM f. par 4 vis. • Usare quattro viti per ogni staffa.
- Seite 20 ©2002 Bose Corporation, The Mountain Framingham, MA 01701-9168 USA 263579 AM Rev.01 JN30604 AM263579_00 _V.pdf • December 5, 2002...