Werbung
Verfügbare Sprachen
Verfügbare Sprachen
Quicklinks
CLIMATIZADOR PORTÁTIL / CLIMATIZZATORE
PORTATILE 7000 BTU
CLIMATIZADOR PORTÁTIL
Instrucciones de utilización y de seguridad
PORTABLE AIR CONDITIONER
Operation and safety notes
IAN 393749_2107
CLIMATIZZATORE PORTATILE
Indicazioni per l'uso e per la sicurezza
MOBILES KLIMAGERÄT
Bedienungs- und Sicherheitshinweise
Werbung

Verwandte Anleitungen für Silvercrest PD-8871


Inhaltszusammenfassung für Silvercrest PD-8871
- Seite 1 CLIMATIZADOR PORTÁTIL / CLIMATIZZATORE PORTATILE 7000 BTU CLIMATIZADOR PORTÁTIL CLIMATIZZATORE PORTATILE Instrucciones de utilización y de seguridad Indicazioni per l’uso e per la sicurezza PORTABLE AIR CONDITIONER MOBILES KLIMAGERÄT Operation and safety notes Bedienungs- und Sicherheitshinweise IAN 393749_2107...
- Seite 2 Antes de empezar a leer abra las dos páginas que contienen las imágenes y, en seguida, familiarícese con todas las funciones del dispositivo. Prima di leggere aprire le due pagine con le immagini e prendere confidenza con le diverse funzioni dell’apparecchio.
- Seite 3 HIGH TIMER COOL DEHUM POWER TEMP TEMP MODE SPEED TIMER 22 26 23...
- Seite 5 Leyenda de pictogramas utilizados ....... Página Introducción ................... Página Especificaciones de uso ................Página Descripción de los componentes ..............Página Características técnicas ................. Página Volumen de suministro ................... Página 10 Indicaciones de seguridad ............Página 11 Indicaciones de seguridad sobre l as pilas / baterías ................
- Seite 6 Leyenda de pictogramas utilizados Función de ¡Lea las temporizador instrucciones! Temporizador de 24 horas 24 horas Timer da 24 ore Voltio (corriente Apto para espacios 60 m³ alterna) de hasta 60 m³ Potencia de 7.000 BTU Hercio (frecuencia) refrigeración: (2 kW) 7000 BTU (2 kW) ¡Tenga en cuenta las advertencias e...
- Seite 7 Leyenda de pictogramas utilizados ATENCIÓN, PELIGRO DE INCENDIOS: El aparato cuenta con 2 niveles de gas propano R290. ventilación 2 niveles de ventilación 2 livelli di ventilazione Para cualquier tarea de reparación, siga únicamente las indica- ciones del fabricante. Temperatura Clase de protección ajustable de 16 a 16–31 °C...
- Seite 8 Especificaciones Tejido para ventana con de uso cremallera Cinta adhesiva Este producto es un sistema de Manguera de salida de aire climatización portátil que se utiliza caliente exclusivamente para regular la tem- Conexión de manguera peratura, circulación y deshumidifi- (ventana) cación del aire en espacios interiores Conexión de manguera secos.
- Seite 9 Características Pila (mando a técnicas distancia): 2 x AAA 1,5 V (LR03) Modelo: PD-8871 Peso: 21,2 kg Tensión de Tipo de protección: IP20 (uso en alimentación: 220–240 V∼, espacios inte- 50 Hz riores) Potencia absorbida: 785 W Clases de Presión de funcionamiento protección:...
- Seite 10 Volumen de 1 conexión de manguera (sistema suministro de climatización) 2 tapones de fijación 1 sistema de refrigeración portátil 2 pilas 1,5 V (tipo LR03 (AAA)) 1 mando a distancia 1 sellado de ventanas 2 cables pasaventanas 1 manual de instrucciones e 1 manguera de salida de aire indicaciones de seguridad caliente...
- Seite 11 Nombre Símbolo Valor Unidad Consumo energético de siste- Flujo doble: Flujo do- Flujo doble: mas de climatización de flujo ble: N/A kWh / a único/flujo doble (información Flujo único: Flujo único: Flujo único: separada para el modo de 0,769 kWh / h refrigeración y el modo de calefacción) Nivel de potencia acústica...
- Seite 12 propia, conexiones defectuosas ¡PELIGRO o un manejo inadecuado. DE DESCARGA ELÉCTRICA! Para las reparaciones solo se Una instalación eléctrica mal podrán utilizar piezas que coin- realizada o una tensión de red cidan con los datos originales demasiado alta pueden provo- del aparato.
- Seite 13 No tuerza el cable de alimenta- ción ni lo coloque sobre ¡RIESGO DE INCENDIO! bordes afilados. Algunas partes del producto se Utilice el producto únicamente calientan durante su funciona- en espacios interiores. Nunca lo miento y pueden provocar utilice en habitaciones húmedas incendios si se manipulan o bajo la lluvia.
- Seite 14 mente a los niños sobre este el medio ambiente si se mani- peligro. pula incorrectamente. Transporte y almacene siempre Tenga en cuenta que los refrige- el producto en vertical, nunca rantes pueden ser inodoros. inclinado. Evite el contacto con el refrige- Apague el producto y desco- rante y no dañe el circuito de necte el cable de alimentación...
- Seite 15 El refrigerante solo puede ser No coloque el producto direc- llenado o drenado por profesio- tamente junto a una pared o nales certificados. debajo de muebles colgados o Los trabajos de mantenimiento similares para evitar la acumu- y reparación solo deben ser lación de calor.
- Seite 16 por todos lados respecto a las Indicaciones de seguridad sobre paredes, cortinas, muebles y otros obstáculos. las pilas/baterías Utilice el producto en espacios ¡PELIGRO DE MUERTE! con un volumen máximo de Mantenga las pilas/baterías 60 m³. fuera del alcance de los niños. No utilice ningún objeto para ¡En caso de ingestión, acuda acelerar el proceso de descon-...
- Seite 17 ¡Si las pilas/baterías se sulfatan, en las pilas/baterías como en evite el contacto de la piel, los el producto. ojos y las mucosas con los pro- ¡Limpie los contactos de la pila/ ductos químicos! ¡En caso de batería y en el compartimento entrar en contacto con el ácido, de las pilas antes de la inserción lave inmediatamente la zona...
- Seite 18 En caso contrario, no utilice el climatización) cada una a producto. Póngase en contacto un extremo de la manguera de con el fabricante utilizando la salida de aire caliente (ver dirección de atención al cliente fig. D). Para ello, separe los ex- proporcionada en el apartado tremos de la manguera de sa- «Dirección de atención al...
- Seite 19 Retire las pilas gastadas del Nota: Para colocar el tejido compartimento de las pilas. de ventana puede resultar Coloque 2 pilas tipo AAA útil abrir la ventana. Asegúrese (LR03) en el compartimento de de dejar suficiente espacio en las pilas. Preste atención a la las esquinas para que el sellado polaridad correcta (+ o -) que de las ventanas no quede atas-...
- Seite 20 No utilice alargadores ni enchu- Pulse el botón de velocidad SPEED fes múltiples. para ajustar la Apunte el mando a distancia velocidad del ventilador. El indi- en dirección al receptor de cador de velocidad del ventila- señal y asegúrese de que muestra la velocidad no haya obstáculos entre los ajustada (HIGH o LOW).
- Seite 21 temperatura ambiental detec- este modo la temperatura no se tada en ese momento y se mos- puede ajustar manualmente. trará en la pantalla Pulse el botón de velocidad En este modo la temperatura no SPEED para ajustar la se puede ajustar manualmente. velocidad del ventilador.
- Seite 22 Para cancelar la función del de modo (COOL, DEHUM temporizador, pulse una vez el o FAN). El temporizador comen- botón de temporizador TIMER zará a contar el tiempo restante y el producto se encenderá au- tomáticamente cuando se Ajustar flujo de aire acabe el tiempo.
- Seite 23 Utilizar el drenaje «E2» en la pantalla . El pro- de agua constante ducto deja de funcionar. Si el producto se utiliza principal- Para vaciar el depósito mente en modo de deshumidifica- agua, proceda del siguiente ción, existe la opción de permitir modo: que el agua drene de forma cons- Apague el producto y saque el...
- Seite 24 Localización de caso de que el problema no se errores solucionara, póngase en contacto con nuestro servicio de atención al cliente. Nunca repare el producto Algunos errores surgen debido a usted mismo. alteraciones leves que incluso pue- den ser solventadas en casa. En Problema Posible causa Solución...
- Seite 25 Problema Posible causa Solución Código de El sensor de temperatura Póngase en contacto con error E0 ambiente está defectuoso. el servicio de atención al cliente. Código de El depósito de agua está Vacíe el depósito de agua. error E2 lleno. Limpieza y cuidado No utilice productos de limpieza agresivos, cepillos con cerdas...
- Seite 26 Límpielo con agua tibia (máx. Tenga en cuenta el distin- 40 °C) y un poco de deter- tivo del embalaje para la gente neutro y déjelo secar separación de residuos. completamente al aire (sin luz Está compuesto por abre- solar directa). viaturas (a) y números (b) Vuelva a colocar el filtro de que significan lo siguiente:...
- Seite 27 Las pilas/baterías defectuosas o Garantía y servicio técnico usadas deben ser recicladas según lo indicado en la directiva 2006/66/CE y en sus modifica- Garantía ciones. Recicle las pilas/baterías El producto ha sido fabricado cui- y/o el producto en los puntos de dadosamente siguiendo exigentes recogida adecuados.
- Seite 28 La garantía cubre defectos de materiales o de fabricación. Esta garantía no cubre aquellos compo- nentes del producto sometidos a un desgaste normal y que, por ello, puedan considerarse piezas de desgaste (por ej. las pilas). Tam- poco cubre daños de componentes frágiles como, por ejemplo, los in- terruptores, baterías y piezas de cristal.
- Seite 29 Legenda dei pittogrammi utilizzati ......... Pagina 30 Introduzione ..................Pagina 31 Utilizzo conforme alla destinazione d’uso ........... Pagina 32 Descrizione dei componenti ................Pagina 32 Specifiche tecniche ..................Pagina 32 Contenuto della confezione ................Pagina 34 Indicazioni di sicurezza ............... Pagina 35 Avvertenze di sicurezza per batterie / accumulatori ........
- Seite 30 Legenda dei pittogrammi utilizzati Leggere le istruzioni! Timer da 24 ore Temporizador de 24 horas Timer da 24 ore Volt Adatto a locali fino 60 m³ (tensione alternata) a 60 m³ Raffreddamento: 7.000 BTU Hertz (frequenza) (2 kW) 7000 BTU (2 kW) Rispettare le avver- Potenza nominale: 785 W...
- Seite 31 Legenda dei pittogrammi utilizzati ATTENZIONE, PERICOLO D'INCENDIO: Questo apparecchio 2 gradi di contiene gas propano ventilazione 2 niveles de ventilación 2 livelli di ventilazione R290. Per lavori di riparazione, seguire esclusivamente le indi- cazioni del produttore. Temperatura regola- Classe di isolamento bile da 16 fino a 16–31 °C 31 °C...
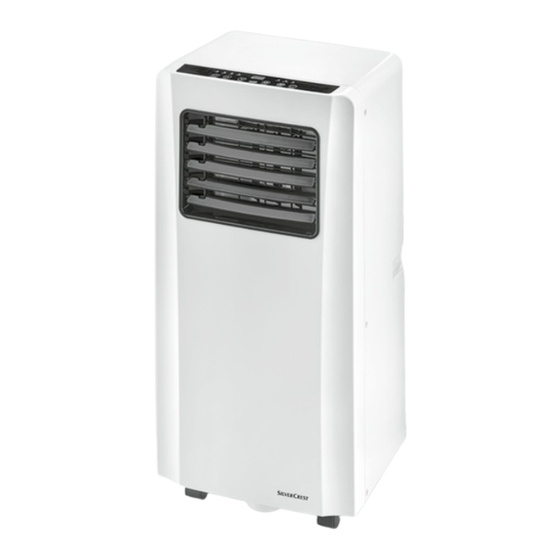
- Seite 32 Tasto on / off POWER (HIGH / LOW) 2 batterie Rotelle Coperchio del vano batterie Entrata laterale per l‘aria Specifiche tecniche Filtro dell‘aria Uscita posteriore per l‘aria Modello: PD-8871 Tappo dello scarico Tensione di Entrata posteriore per l‘aria 32 IT/MT...
- Seite 33 alimentazione: 220–240 V∼, Grado di 50 Hz protezione: IP20 (utilizzo Potenza di in ambienti assorbimento: 785 W chiusi) Classe di Sovrapressione isolamento: I (condiziona- d‘esercizio tore) consentita III / (teleco- mando) Scarica: 2,6 MPa Classe di efficienza Aspirazione: 1,0 MPa energetica: Pressione Prestazione di...
- Seite 34 Contenuto della 1 attacco per tubo flessibile confezione (condizionatore) 2 tappi di fissaggio 1 condizionatore mobile 2 batterie da 1,5 V (tipo LR03 1 telecomando (AAA)) 2 passanti per finestra 1 guarnizione per finestra 1 tubo di scarico dell‘aria calda 1 manuale di istruzioni per l‘uso 1 attacco per tubo flessibile (finestra) e la sicurezza...
- Seite 35 Denominazione Simbolo Valore Unità Potenza assorbita in standby Consumo di corrente dei condizio- Bicanale: Bicanale: Bicanale: natori monocanali o bicanali (dati kWh / a separati per raffreddamento e Monoca- Monoca- Monoca- riscaldamento) nale: nale: nale: 0,769 kWh / h Livello di intensità sonora dB(A) Potenziale di riscaldamento globale kg C0₂...
- Seite 36 qualsiasi diritto di garanzia e di responsabilità civile. RISCHIO DI FOLGORAZIONE! In caso di riparazioni è consen- Una scorretta installazione tito utilizzare soltanto componenti elettrica o una tensione di rete che corrispondono alle caratte- eccessiva possono condurre a ristiche originali dell‘apparecchio. folgorazione elettrica.
- Seite 37 Utilizzare il prodotto esclusiva- mente in ambienti interni. Non PERICOLO DI INCENDIO! utilizzarlo mai in ambienti umidi Durante il funzionamento, alcune o sotto la pioggia. parti del prodotto diventano molto Non utilizzare mai il prodotto calde e, in caso di maneggio in prossimità...
- Seite 38 Trasportare e riporre il prodotto Si noti che gli agenti frigorigeni sempre in posizione verticale, mai possono essere inodori. in posizione inclinata. Evitare il contatto con l‘agente Spegnere il prodotto e staccare frigorigeno ed evitare di danneg- la spina dalla presa di corrente giare il circuito frigorifero.
- Seite 39 eseguiti solamente secondo le a una parete, sotto un mobile modalità suggerite dal produttore. pensile o simili. È necessario attenersi ai regola- Non collocare mai il prodotto menti sui gas vigenti nel luogo sopra o vicino a superfici calde di utilizzo. (ad es.
- Seite 40 Utilizzare il prodotto in locali che Avvertenze di sicurezza per presentano un volume massimo di 60 m³. batterie / Non utilizzare alcun oggetto, accumulatori eccetto quelli consentiti dal pro- PERICOLO LETALE! Tenere le duttore, per l‘accelerazione del batterie / gli accumulatori fuori processo di sbrinamento.
- Seite 41 quali ad esempio la vicinanza Rischio di danneggiamento a termosifoni o l‘irraggiamento del prodotto solare diretto. Utilizzare esclusivamente il tipo di Evitare il contatto delle sostanze batterie / di accumulatori indicato! chimiche con la pelle, gli occhi Inserire le batterie / gli accumu- e le mucose in caso di fuoriuscita latori secondo il contrassegno del liquido dalle batterie / dagli...
- Seite 42 Procedere con cautela durante Assicurarsi che le entrate per l‘apertura. l‘aria e le uscite per l‘a- Estrarre il prodotto dalla siano sempre libere. confezione. Osservare una distanza minima Verificare la completezza della di 30 cm tra il prodotto e gli fornitura (vedi fig.
- Seite 43 Nota: non incollare la fascetta Nota: Svuotare la vaschetta a strappo sul vetro (vedi dell‘acqua come descritto nel Fig. G). capitolo „Svuotare la vaschetta Fissare il materiale per finestra dell‘acqua“. alla fascetta a strappo Inserire / sostituire le Iniziare con la parte sottile e la- batterie del telecomando vorare procedendo dal centro verso il resto della fascetta a...
- Seite 44 Collocare il prodotto come de- impostata lampeggia sul display scritto nel capitolo „Collocazione e si salva dopo ca. 5 secondi. del prodotto“. Premere il tasto velocità SPEED Infilare la spina in una presa , per impostare la velocità con contatto di terra installata del ventilatore.
- Seite 45 misurata e verrà mostrata sul di- la temperatura non può essere splay impostata manualmente. In questa modalità, la tempera- Premere il tasto velocità SPEED tura non può essere impostata , per impostare la velocità manualmente. del ventilatore. L‘indicatore di La velocità del ventilatore viene velocità...
- Seite 46 rimasto e il prodotto si accenderà sull‘uscita anteriore per l‘aria da solo, non appena il tempo verso l‘alto o verso il basso. sarà finito. Svuotare la vaschetta Per interrompere la funzione dell‘acqua timer, premere una volta il tasto timer TIMER La vaschetta dell‘acqua inte- grata si riempie con acqua Spegnimento automatico...
- Seite 47 dall‘apertura e far uscire l‘ac- scarico dell‘aria calda qua (vedi fig. J). prodotto. Collegare un tubo di scarico Per svuotare il serbatoio dell‘ac- adatto (non incluso nella confe- qua utilizzare uno straccio per zione) all‘apertura. pavimenti o una ciotola a fondo Posizionare l‘estremità...
- Seite 48 Problema Possibile causa Soluzione Il prodotto non La vaschetta dell'acqua è Svuotare la vaschetta parte. piena. dell'acqua. La temperatura ambiente è Adattare la regolazione più bassa di quella impostata della temperatura. (modalità raffreddamento). Il prodotto non Le porte e le finestre non Chiudere porte e finestre.
- Seite 49 Svuotare completamente la va- ATTENZIONE! PERICOLO schetta dell‘acqua (vedi capitolo DI CORTOCIRCUITO! Un‘e- „Svuotare la vaschetta dell‘acqua“). ventuale penetrazione di acqua Pulire il prodotto con un panno o altri liquidi nell‘alloggiamento leggermente umido. Quindi far può provocare un cortocircuito. asciugare completamente tutti i Non immergere mai il prodotto componenti.
- Seite 50 Smaltimento Per questioni di tutela ambien- tale non gettare il prodotto usato tra i rifiuti domestici, L’imballaggio è composto ma provvedere invece al suo da materiali ecologici che corretto smaltimento. Presso possono essere smaltiti l’amministrazione competente presso i siti di raccolta locali è...
- Seite 51 Questo apparecchio contiene un La prestazione di garanzia vale sia agente frigorigeno. L‘agente frigori- per difetti di materiale che per difetti geno deve essere smaltito in modo di fabbricazione. La presente garan- conforme quale sostanza proble- zia non si estende a parti del prodotto matica presso un punto di raccolta soggette a normale usura e che pos- autorizzato.
- Seite 53 List of pictograms used ..............Page 54 Introduction ....................Page 55 Intended use .......................Page 55 Parts description ....................Page 56 Technical data ....................Page 56 Scope of delivery ....................Page 57 Safety notes ....................Page 59 Safety instructions for batteries / rechargeable batteries ........Page 63 Before first use ..................Page 64 Checking the product and delivery contents ............Page 64 Setting up the product ..................Page 64...
- Seite 54 List of pictograms used Read the instructions! 24 hour timer function Temporizador de 24 horas Timer da 24 ore Volts Suitable for rooms 60 m³ (alternating voltage) up to 60 m³ Cooling capacity: 7.000 BTU Hertz (frequency) (2 kW) 7000 BTU (2 kW) Observe the warnings 785 W Power rating: 785 W...
- Seite 55 List of pictograms used ATTENTION, FIRE HAZARD: The device is filled with R290 propane 2 fan speeds gas. For repair work, 2 niveles de ventilación 2 livelli di ventilazione always follow the man- ufacturer's instructions exclusively. Temperature adjustable Protection class III from 16 to 31 °C 16–31 °C Dispose of the pack-...
- Seite 56 2 batteries cial use. Battery compartment cover Parts description Technical data Control panel Model: PD-8871 Ventilation slots Supply voltage: Front air outlet (HIGH / LOW) 220–240 V∼, Castors 50 Hz Side air inlet Power consumption: 785 W...
- Seite 57 30° C / Water tank 80 % rH) capacity: approx. 0.5 L Noise level: 65 dB Dimensions Battery (remote (L x W x H): approx. 33 x control): 28 x 69 cm 2 x AAA 1.5 V Window sealing (LR03) Weight: 21.2 kg Circumference:...
- Seite 58 Designation Symbol Value Unit Nominal power in heating mode rated heating mode 0.769 Nominal power consumption in cooling mode Nominal power consumption in heating mode 2.60 Nominal energy efficiency EERd ratio in cooling mode Nominal coefficient of COPd – performance in heating mode Power consumption in operating state “temperature controller off”...
- Seite 59 Only connect the product if the Safety notes mains voltage of the socket cor- responds with the specifications on the rating plate. DANGER TO LIFE Only connect the product to an AND RISK OF ACCIDENTS easily accessible socket, so that FOR INFANTS AND CHIL- the product can quickly be dis- DREN! This product may be...
- Seite 60 Do not use the product with an water. In this event, immediately external timer switch or a sepa- unplug the mains plug from rate remote control system. the power socket. Never immerse the product, the Ensure that children do not insert mains cable or the mains plug objects into the product.
- Seite 61 operation. Also instruct other users of the hazards! DANGER DUE TO Please note that some of the REFRIGERANT! product‘s parts may still be hot The product contains 140 g of even after it has been switched off. refrigerant gas R290, which is Do not insert hands, fingers or highly flammable and can cause objects into the air inlets...
- Seite 62 The refrigerant may only be Never place the lamp on or near charged or drained by certified hot surfaces (hobs, etc.). personnel. Do not allow the mains cable Maintenance work and repairs to come into contact with hot parts. may only be carried out in accord- Never expose the product to high ance with the manufacturer‘s temperatures (radiators, etc.) or...
- Seite 63 demonstrates their competence Never throw batteries / recharge- in the safe handling of refriger- able batteries into fire or water. ants using a method known to Do not exert mechanical loads on the industry. batteries / rechargeable batteries. Service work should only be Risk of battery / rechargeable carried out in accordance with battery leakage...
- Seite 64 Remove the batteries / recharge- Be very careful when opening able batteries if the product will the packaging. not be used for an extended Remove the product from the period. packaging. Check that the delivery contents Risk of product damage are complete (see fig.
- Seite 65 Screw the hose connection (win- Tip: It may be helpful to open dow) and the hose connection the window in order to attach (air conditioner) each to one the window fabric . Be sure end of the hot air outlet hose to leave enough space in the (see fig.
- Seite 66 (+ or -) is correct as indicated in Using cooling mode the battery compartment. Press the POWER button Reattach the battery compart- to switch on the product. The ment cover to the battery product switches on and the compartment. display shows the pre-set / last set temperature.
- Seite 67 tank“ or “Using continuous water is now in fan mode. The temper- drainage“. ature is automatically set to 25 °C Press the POWER button and shown on the display . The to switch on the product. temperature cannot be set manu- Press the MODE button ally in this mode.
- Seite 68 on automatically when the time Draining the water tank is up. The integrated water tank To cancel the timer function, press fills with water in the follow- the TIMER button once. ing situations: – At low room temperature and high Automatic switch-off humidity, the product may not be (sleep timer)
- Seite 69 Connect a suitable drainage hose Pull the drain plug (as well (not included) to the opening. as the inner plug beneath it) out Place the open end of the drain of the opening and allow the hose in a suitable collecting vessel water to drain (see fig.
- Seite 70 Problem Possible cause Solution The product Doors and windows are Close doors and windows. is not cooling not closed properly. sufficiently. There are heat sources in Remove all heat sources the room. if possible. Connect the hot air outlet The hot air outlet hose hose or clean it.
- Seite 71 Clean the housing and the remote Drain the water tank as described control with a soft, dry cloth. in the chapter “Draining the water tank“. Cleaning the air filter Disposal Clean the air filter every 2 weeks or when it is visibly dirty. Unplug the mains plug before The packaging is made en-...
- Seite 72 To help protect the environ- The device contains refrigerant. ment, please dispose of the Refrigerant must be professionally product properly when it has disposed of as hazardous waste reached the end of its useful at an approved collection point. life and not in the household Warranty and service waste.
- Seite 73 The warranty applies to defects in material or manufacture. This war- ranty does not cover product parts subject to normal wear, thus possibly considered consumables (e.g. batter- ies) or for damage to fragile parts, e.g. switches, rechargeable batteries or glass parts. Service address Teknihall Elektronik GmbH Assar-Gabrielsson-Str.
- Seite 75 Legende der verwendeten Piktogramme .....Seite 76 Einleitung ......................Seite 77 Bestimmungsgemäße Verwendung ..............Seite 78 Teilebeschreibung ....................Seite 78 Technische Daten ....................Seite 78 Lieferumfang .......................Seite 79 Sicherheitshinweise ................Seite 81 Sicherheitshinweise für Batterien / Akkus ............Seite 85 Vor der ersten Inbetriebnahme ..........Seite 87 Produkt und Lieferumfang prüfen ..............Seite 87 Produkt aufstellen ....................Seite 87 Fensterabdichtung anbringen ................Seite 88 Produkt abbauen ....................Seite 88...
- Seite 76 Legende der verwendeten Piktogramme 24 Stunden Anweisungen lesen! Timer-Funktion 24 hour timer Volt Für Räume bis zu 60m³ (Wechselspannung) 60 m³ geeignet Kühlleistung: Hertz (Frequenz) 7000 BTU (2 kW) Warn- und Sicherheits- 785W Nennleistung: 785 W hinweise beachten! Lebens- und Unfall- 65db (A) Geräuschpegel: gefahr für Kleinkinder...
- Seite 77 Legende der verwendeten Piktogramme ACHTUNG, BRANDGEFAHR: Gerät ist mit Propangas R290 gefüllt. Befolgen 2 Ventilationsstufen Sie für Instandsetzungs- 2 fan speeds arbeiten grundsätzlich, ausschließlich die Anweisungen des Herstellers. Einstellbare Temperatur von Schutzklasse III 16–31°C 16 bis 31 °C Entsorgen Sie Ver- Garantie: 3 Jahre packung und Gerät umweltgerecht!
- Seite 78 TEMP+ -Taste Einsatz bestimmt. Ein- / Aus-Taste POWER 2 Batterien Teilebeschreibung Batteriefachdeckel Bedienfeld Technische Daten Lüftungsschlitze Vorderer Luftauslass Modell: PD-8871 (HIGH / LOW) Versorgungs - Rollen spannung: 220–240 V∼, Seitlicher Lufteinlass 50 Hz Luftfilter Aufnahmeleistung: 785 W Hinterer Luftauslass Schutzklassen: I (Klimagerät)
- Seite 79 Menge an Länge des Kältemittel: 140 g Netzkabels: ca. 1,8 m Mindestraumgröße Länge des (Grundfläche): 4 m² Heißluft-Ablass- Maximales schlauchs: ca. 1,5 m Raumvolumen: 60 m³ Kapazität des Entfeuchtungs- Wassertanks: ca. 0,5 l Funktion: bis zu 50 ml / Abmessungen Stunde (Raum (L x B x H): ca.
- Seite 80 Informationen zur Angabe des Modells / der Modelle, auf das / die sich die Informationen beziehen: Bezeichnung Symbol Wert Einheit Nenn-Leistung im Kühlbetrieb rated Kühlbetrieb Nenn-Leistung im Heizbetrieb rated Heizbetrieb Nenn-Leistungsaufnahme 0,769 im Kühlbetrieb Nenn-Leistungsaufnahme im Heizbetrieb Nenn-Leistungszahl im EERd 2,60 Kühlbetrieb Nenn-Leistungszahl im...
- Seite 81 Sicherheitshinweise STROMSCHLAGGEFAHR! Fehlerhafte Elektroinstallation oder LEBENS- UND UN- zu hohe Netzspannung können FALLGEFAHR FÜR KLEIN- zu elektrischem Stromschlag führen. KINDER UND KINDER! Die- Schließen Sie das Produkt nur an, ses Produkt kann von Kindern ab wenn die Netzspannung der 8 Jahren und darüber sowie von Steckdose mit der Angabe auf Personen mit verringerten physi- dem Typenschild übereinstimmt.
- Seite 82 sind Haftungs- und Garantie- Knicken Sie das Netzkabel ansprüche ausgeschlossen. nicht und legen Sie es nicht über Bei Reparaturen dürfen nur scharfe Kanten. Teile verwendet werden, die Verwenden Sie das Produkt nur in den ursprünglichen Gerätedaten Innenräumen. Betreiben Sie es nie entsprechen.
- Seite 83 . Weisen Sie insbesondere BRANDGEFAHR! Kinder auf diese Gefahr hin. Teile des Produkts werden Transportieren und lagern Sie das während des Betriebs heiß und Produkt stets aufrecht, niemals in können bei unsachgemäßem Schräglage. Umgang Brände auslösen. Schalten Sie das Produkt aus und Decken Sie das Produkt niemals ziehen Sie den Netzstecker ab.
- Seite 84 brennbar ist und bei unsachge- Wartungsarbeiten und Repara- mäßem Umgang Gesundheits- turen dürfen nur entsprechend und Umweltschäden verursachen der Empfehlung des Herstellers kann. durchgeführt werden. Beachten Sie, dass Kältemittel Die örtlich geltenden Gasverord- geruchlos sein können. nungen sind einzuhalten. Vermeiden Sie Kontakt mit dem Lüftungsöffnungen müssen stets Kältemittel und beschädigen Sie frei durchlässig sein und dürfen...
- Seite 85 an eine Wand oder unter Hän- Betreiben Sie das Produkt in geschränke o. Ä. stellen. Räumen mit einem Volumen von Stellen Sie das Produkt nie auf maximal 60 m³. oder in der Nähe von heißen Keine Gegenstände, außer den Oberflächen ab (Herdplatten etc.). vom Hersteller erlaubten, zur Bringen Sie das Netzkabel Beschleunigung des Abtaupro-...
- Seite 86 SCHUTZHAND- Verschlucken kann zu Verbrennun- SCHUHE TRAGEN! gen, Perforation von Weichge- webe und Tod führen. Schwere Ausgelaufene oder beschädigte Verbrennungen können innerhalb Batterien / Akkus können bei von 2 Stunden nach dem Ver- Berührung mit der Haut Verät- schlucken auftreten. zungen verursachen.
- Seite 87 Produkt aufstellen trockenen, fusselfreien Tuch oder Wattestäbchen! Stellen Sie das Produkt auf einer Entfernen Sie erschöpfte Batterien / gut zugänglichen, ebenen, trocke- Akkus umgehend aus dem Produkt. nen, hitzebeständigen und stabi- Die Anschlussklemmen dürfen len Fläche auf, um Vibrationen nicht kurzgeschlossen werden. und Lärm möglichst gering zu halten.
- Seite 88 hinteren Luftauslass (siehe Öffnen Sie den Zippverschluss Abb. E). des Fensterstoffs um ca. 50 cm. Fensterabdichtung Stecken Sie den Heißluft-Auslass- anbringen schlauch des Klimageräts in Reinigen Sie Fenster und Fenster- die Öffnung. Schließen Sie den rahmen mit Seife oder einem Zippverschluss dann wieder, so Reinigungsmittel und achten Sie dass der den Heißluft-Auslass-...
- Seite 89 Setzen Sie den Batteriefach- können Sie die Richtung des deckel wieder ein. Luftstroms steuern. Inbetriebnahme Kühlmodus verwenden Drücken Sie die Ein- / Aus-Taste Hinweis: Das Produkt verfügt über POWER , um das Produkt 3 Betriebsmodi: Kühlmodus, Entfeuch- einzuschalten. Das Produkt schal- tungsmodus und Lüftungsmodus.
- Seite 90 Entfeuchtungsmodus kann in diesem Modus nicht verwenden manuell eingestellt werden. Hinweis: Bei Betrieb im Entfeuch- Um das Produkt auszuschalten tungsmodus können Sie den Heiß- drücken Sie die Ein- / Aus-Taste luft-Auslassschlauch vom Produkt POWER entfernen. Lüftungsmodus verwenden Für Anweisungen zum Entleeren Hinweis: Bei Betrieb im Lüftungs- des integrierten Wassertanks sehen Sie das Kapitel „Wasser-...
- Seite 91 Timerfunktion Abschaltautomatik verwenden (Sleep-Timer) Einschaltautomatik Drücken Sie die Timer-Taste Drücken Sie die Timer-Taste TIMER , wenn das Produkt TIMER , wenn das Produkt eingeschaltet ist. ausgeschaltet ist. Das Display Stellen Sie über die TEMP– - blinkt und die Timer-Anzeige Taste / TEMP+ -Taste leuchtet auf.
- Seite 92 Wassertank entleeren Ziehen Sie den Entleerungsstopfen Der integrierte Wassertank (sowie den darunter liegenden füllt sich in den folgenden inneren Stopfen) aus der Öffnung Situationen mit Wasser: heraus und lassen Sie das Wasser – Bei niedriger Raumtemperatur und abfließen (siehe Abb. J). hoher Luftfeuchtigkeit kann das Stecken Sie beide Entleerungs- Produkt die Feuchtigkeit womöglich...
- Seite 93 Fehlersuche Legen Sie das offene Ende des Ablaufschlauches in ein geeignetes Auffanggefäß oder einen Abfluss. Manche Fehler entstehen aufgrund Achten Sie darauf, dass der Ab- geringfügiger Störungen und können laufschlauch möglichst direkt und zum Teil selbst behoben werden. ohne Knicke oder Knoten zum Sollte eine Behebung dennoch nicht Abfluss führt.
- Seite 94 Problem Mögliche Ursache Lösung Fehlercode E0 Raumtemperatursensor Wenden Sie sich an den ist defekt. Kundendienst. Fehlercode E2 Wassertank ist voll. Leeren Sie den Wassertank. Reinigung und Pflege kann zu Beschädigungen des Produkts führen. Verwenden Sie keine aggressiven STROMSCHLAGGEFAHR! Reinigungsmittel, Bürsten mit Unsachgemäßer Umgang mit Metall- oder Nylonborsten sowie dem Produkt kann zu elektrischem...
- Seite 95 Ziehen Sie den Luftfilter Beachten Sie die Kennzeich- dem Gehäuse heraus (siehe nung der Verpackungsmate- Abb. K). rialien bei der Abfalltrennung, Reinigen Sie ihn mit lauwarmem diese sind gekennzeichnet mit Wasser (max. 40 °C) und etwas Abkürzungen (a) und Num- neutralem Reiniger und lassen mern (b) mit folgender Be- Sie ihn an der Luft vollständig...
- Seite 96 Defekte oder verbrauchte Batterien / produziert und vor Anlieferung ge- Akkus müssen gemäß Richtlinie wissenhaft geprüft. Im Falle von 2006/66/EG und deren Änderun- Mängeln dieses Produkts stehen Ih- gen recycelt werden. Geben Sie nen gegen den Verkäufer des Pro- Batterien / Akkus und / oder das dukts gesetzliche Rechte zu.
- Seite 97 an zerbrechlichen Teilen, z. B. Schalter, Akkus oder die aus Glas gefertigt sind. Serviceadresse Teknihall Elektronik GmbH Assar-Gabrielsson-Str. 11–13 63128 Dietzenbach DEUTSCHLAND 00800 333 00 888* smartwares-service-de@teknihall.com smartwares-service-ch@teknihall.com smartwares-service-at@teknihall.com * Kostenfreie Nummer IAN 393749_2107 Bitte halten Sie für alle Anfragen den Kassenbon und die Artikelnummer (IAN 393749_2107) als Nachweis für den Kauf bereit.
- Seite 98 Tristar Europe B.V. Jules Verneweg 87 5015 BH Tilburg THE NETHERLANDS Estado de las informaciones · Versione delle informazioni · Last Information Update Stand der Informationen: 11 / 2021 Ident.-No.: PD-8871112021-ES / IT IAN 393749_2107...