Werbung
Werbung
Inhaltsverzeichnis

Verwandte Anleitungen für ESX VNC711 FI-DUCATO


Inhaltszusammenfassung für ESX VNC711 FI-DUCATO
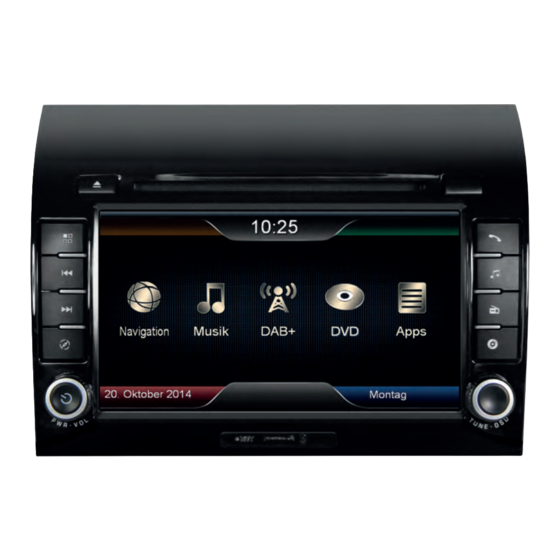
- Seite 1 VNC711 FI-DUCATO VNC711 FI-DUCATO-DAB...
- Seite 2 SCOPE OF DELIVERY / Lieferumfang ITEM FIGURE SLOT QUANTITY Artikel Abbildung Steckplatz Anzahl MAIN DEVICE – Hauptgerät MOUNTING FRAME INCL. SCREWS – Einbaurahmen inkl. Schrauben STYLUS – Markierstift MICRO SD CARD 8GB INKL: NAVIGATION SOFTWARE – MicroSD Speicherkarte 8GB Navigationssoftware REMOTE CONTROL –...
- Seite 3 SCOPE OF DELIVERY / Lieferumfang ITEM FIGURE SLOT QUANTITY Artikel Abbildung Steckplatz Anzahl AUDIO OUT (DUAL ZONE) Audio-Ausgang (Dual Zone) AUDIO OUT (SUBWOOFER/CENTER) Audio-Ausgang (Subwoofer/Center) AUDIO OUT (2 X FRONT / 2 X REAR) Audio-Ausgang (2 x Front / 2 x Rear) USB CABLE SET WITH 2 CONNECTORS USB Kabelsatz mit 2 Anschlüssen BT-MICROPHONE...
- Seite 4 CONNECTION DIAGRAM / Anschlussdiagramm ANTENNA ADAPTER Antennen-Adapter FRONT CAM INPUT Frontkamera-Eingang BT-MICROPHONE BT-Mikrofon AUDIO OUT (2X FRONT / 2 X REAR) Audio-Ausgang (2 x Front / 2 x Rear) AUDIO OUT (SUBWOOFER/CENTER) Audio-Ausgang (Subwoofer/Center) VIDEO INPUT CABLE SET Video-Eingang Kabelsatz WITHOUT FUNCTION Ohne Funktion VN711 FI-DUCATO-DAB...
-
Seite 5: Wichtige Hinweise
INSTALLATION NOTES / Installationshinweise Important Notes prior to installation: This guide is an installation aid for a proper installation of the device. Please read the following instructions prior installation: 1.) Please treat all parts of the sound system and the components of your vehicle with caution. 2.) Follow under all circumstance the regulations of the vehicle manufacturer and do not make any modifications on the vehicle, which could interfere the driving safety. -
Seite 6: Stromversorgung
34 (BATT) of the ISO power connector of the vehicle, the steady plus (+ 12V) is applied. See figure on the left and on the top panel of the device. To turn on the ESX device normally, on pin 32 the ACC/ignition (+12V) must be applied. - Seite 7 Vermeiden Sie das Verlegen des Kabels über die Lenksäule. In der Regel sollte das Kabel lang genug sein, um die A-Säule (Fahrerseite) über die Beifahrerseite zu erreichen. Ein evtl. werksseitig vorhandenes Mik- rofon ist nicht kompatibel mit dem ESX-Gerät. Bitte verwenden Sie das mit- gelieferte Mikrofon.
-
Seite 8: Installation Example / Einbaubeispiel
Fiat Ducato platform, some of the descriptions and instructions in this installation guide may not be applicable. Das folgende Einbaubeispiel zeigt die Installation eines ESX Naviceivers in ein Fiat Ducato III Modell von Dethleffs. Aufgrund der vielen verschiedenen Ausstattungs- varianten der Fiat Ducato-Plattform, könnten einige Beschreibungen und Installa- tionshinweise in dieser Einbauanleitung nicht zutreffend sein. - Seite 9 INSTALLATION EXAMPLE / Einbaubeispiel FIAT DUCATO III DETHLEFFS (Type 250, 2006 ->) Remove the ridges inside the radio bay on both sides. Entfernen Sie die Stege im Innern des Radioschachts auf beiden Seiten. The upper storage compartment above the radio bay is perfect for the GPS an- tenna (14) installation.
- Seite 10 Handschuhfachs. Verwenden Sie dafür einen geeig- neten Kunststoffbohrer. Install now the supplied ESX device holder into the radio bay. For this, use the included screws. Now lay the cable of the new ESX device (see page 2-3) inside the vehicle from the bay to the desired installation location.
- Seite 11 Slide the ESX device carefully into the radio bay. Before you complete the installa- tion of the new ESX device, check its function. Please note that it may take up to 15 minutes, until a GPS signal can be received (in the open).
- Seite 12 ESX Car Media Systems · Audio Design GmbH Am Breilingsweg 3 · D-76709 Kronau/Germany Tel. +49 7253 - 9465-0 · Fax +49 7253 - 946510 www.esxnavi.de - www.audiodesign.de ©2017 All Rights Reserved...