
Verwandte Anleitungen für Klarstein ICE GALET


Inhaltszusammenfassung für Klarstein ICE GALET
- Seite 1 ICE GALET Eiswürfelmaschine Ice Cube Maker Máquina de hielo Machine à glaçons Macchina per cubetti di ghiaccio 10045476 10045477 www.klarstein.com...
- Seite 3 Sehr geehrter Kunde, wir gratulieren Ihnen zum Erwerb Ihres Gerätes. Lesen Sie die folgenden Hinweise sorgfältig durch und befolgen Sie diese, um möglichen Schäden vorzubeugen. Für Schäden, die durch Missachtung der Hinweise und unsachgemäßen Gebrauch entstehen, übernehmen wir keine Haftung. Scannen Sie den folgenden QR-Code, um Zugriff auf die aktuellste Bedienungsanleitung und weitere Informationen rund um das Produkt zu erhalten.
- Seite 4 SICHERHEITSHINWEISE • Stellen Sie das Gerät auf einen ebenen Untergrund. • Benutzen Sie das Gerät nur in Innenräumen. • Ziehen Sie den Stecker aus der Steckdose, wenn Sie das Gerät nicht benutzen. • Tauchen Sie das Netzkabel und den Stecker niemals in Wasser oder andere Flüssigkeiten.
- Seite 5 WARNUNG Brandgefahr durch unsachgemäße Entsorgung! Bitte beachten Sie die örtlichen Vorschriften zur Entsorgung von Geräten, die brennbare Kältemitteln und Gase enthalten. • Halten Sie Lüftungsöffnungen im Gerätegehäuse frei von Hindernissen. • Beschädigen Sie nicht den Kältemittelkreislauf. • Verwenden Sie keine mechanischen Vorrichtungen oder anderen Mittel, um den Auftauprozess oder den Eisgewinnungsprozess zu beschleunigen.
- Seite 6 HINWEISE ZUM KÄLTEMITTEL R290 Warnhinweise • Die Klimaanlage muss aufrecht aufbewahrt und transportiert werden. Andernfalls können irreparable Kompressorschäden entstehen. Lassen Sie das Gerät im mindestens 24 Stunden stehen, bevor Sie es in Betrieb nehmen. • Schalten Sie den das Gerät vor der Reinigung aus und trennen Sie es von der Stromversorgung.
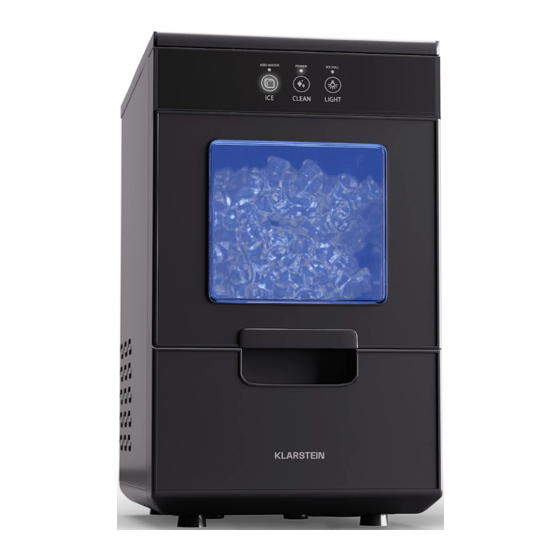
- Seite 7 GERÄTEÜBERSICHT Wasserablasskappe: Nach der Bedienfeld Reinigung die Ablasskappe auf der Rückseite des Geräts 3 Anzeigen: ADD WATER abnehmen, den Stopfen (Wasser nachfüllen), POWER, aus dem Abflussrohr ziehen ICE FULL (Eis voll) und den Behälter unter der Schublade entleeren. Dann den 3 Tasten: ICE (Eis), CLEAN Stöpsel wieder einsetzen und (Reinigen), LIGHT (Licht)
- Seite 8 VOR DEM ERSTEN BETRIEB • Entfernen Sie die äußere und innere Verpackung und überprüfen Sie dann, ob alle Zubehörteile enthalten sind. Sollten Teile fehlen, wenden Sie sich bitte an unseren Kundendienst. • Entfernen Sie alle Klebestreifen am Gerät. Nehmen Sie die Zubehörteile im Inneren heraus.
- Seite 9 INBETRIEBNAHME Nehmen Sie die Schublade heraus. Füllen Sie Trinkwasser ein, wobei die maximale Skala nicht überschritten werden darf. Setzen Sie die Schublade und die Abtropfschale wieder ein.
- Seite 10 BEDIENFELD UND BEDIENUNG Stecken Sie das Netzkabel ein, die Anzeige POWER leuchtet. Sie können das Gerät durch Berühren der Tasten auf dem Bedienfeld bedienen, wie unten gezeigt. Die Hauptfunktionen sind: ICE (Eis), CLEAN (Reinigung) und LIGHT (Licht). Taste CLEAN Wenn Sie das Gerät zum ersten Mal benutzen oder es lange Zeit nicht benutzt haben, sollten Sie zuerst eine Reinigung durchführen.
- Seite 11 • Nach dem Reinigungsvorgang stellen Sie das Gerät an den Rand der Arbeitsfläche. Achten Sie darauf, dass das Gerät stabil steht, stellen Sie einen Auffanggefäß (Schüssel) unter das Gerät, entfernen Sie die Wasserablasskappe an der Rückseite und ziehen Sie den Stopfen aus dem Abflussrohr.
- Seite 12 Halten Sie dafür den Schubladengriff leicht fest und ziehen Sie ihn in horizontaler Richtung heraus, bis die Rückseite der Schublade die Frontblende berührt, und setzen Sie sie dann vorsichtig ab. Die Schublade hängt dann in einem bestimmten Winkel in der Frontblende. Wenn Sie die Schublade schließen wollen, halten Sie stattdessen den Schubladengriff fest und legen Sie die Schublade waagerecht, dann schieben Sie sie vorsichtig bis zum vollständigen Schließen.
- Seite 13 FEHLERBEHEBUNG Problem Mögliche Ursache Lösungsansatz Anzeige ADD Mangel an Wasser. Stoppen Sie den Eisbereiter, füllen Sie WATER leuchtet. Wasser ein und drücken Sie erneut die Taste "ICE"/"CLEAN", um das Gerät neu zu starten. Anzeige ICE FULL Es ist zu viel Eis Entnehmen Sie die Eiswürfel.
- Seite 14 SPEZIELLE ENTSORGUNGSHINWEISE FÜR VERBRAUCHER IN DEUTSCHLAND Entsorgen Sie Ihre Altgeräte fachgerecht. Dadurch wird gewährleistet, dass die Altgeräte umweltgerecht verwertet und negative Auswirkungen auf die Umwelt und menschliche Gesundheit vermieden werden. Bei der Entsorgung sind folgende Regeln zu beachten: • Jeder Verbraucher ist gesetzlich verpflichtet, Elektro- und Elek- tronikaltgeräte (Altgeräte) sowie Batterien und Akkus getrennt vom Hausmüll zu entsorgen.
- Seite 15 • Bei einem Vertrieb unter Verwendung von Fernkommunikationsmitteln ist die unentgeltliche Abholung am Ort der Abgabe auf Elektro- und Elektronikgeräte der Kategorien 1, 2 und 4 gemäß § 2 Abs. 1 ElektroG, nämlich „Wärmeüberträger“, „Bildschirmgeräte“ (Oberfläche von mehr als 100 cm²) oder „Großgeräte“...
- Seite 16 HINWEISE ZUR ENTSORGUNG Wenn es in Ihrem Land eine gesetzliche Regelung zur Entsorgung von elektrischen und elektronischen Geräten gibt, weist dieses Symbol auf dem Produkt oder auf der Verpackung darauf hin, dass dieses Produkt nicht im Hausmüll entsorgt werden darf. Stattdessen muss es zu einer Sammelstelle für das Recycling von elektrischen und elektronischen Geräten gebracht werden.
- Seite 17 Dear customer, Congratulations on your purchase. Please read the following instructions carefully and follow them to prevent potential damage. We accept no liability for damage caused by disregarding the instructions and improper use. Please scan the QR code to access the latest operating instructions and further information about the product.
- Seite 18 SAFETY INSTRUCTIONS • Place the device on a level surface. • Only use the unit indoors. • Unplug the device when not in use. • Never immerse the power cord or the plug in water or other liquids. • Only use equipment that is expressly recommended for this device by the manufacturer.
- Seite 19 WARNING Fire hazard from improper disposal! Please observe the local regulations for the disposal of appliances containing flammable refrigerants and gases. • Keep ventilation openings in the unit housing free of obstructions. • Do not damage the refrigerant circuit. • Do not use mechanical devices or other means to speed up the defrosting process or the ice-making process.
- Seite 20 NOTES ON REFRIGERANT R290 Warnings • The air conditioning system must be kept and transported upright. Otherwise, irreparable compressor damage may occur. Leave the unit for at least 24 hours before putting it into operation. • Switch off the device and disconnect it from the power supply before cleaning. •...
- Seite 21 DEVICE OVERVIEW Water drain cap: After cleaning, Control panel remove the drain cap on the back of the unit, pull the plug 3 displays: ADD WATER, POWER, out of the drain pipe, and ICE FULL empty the container under the drawer.
- Seite 22 BEFORE FIRST USE • Remove the outer and inner packaging, then check that all accessories are included. If parts are missing, please contact our customer service. • Remove all adhesive strips from the device. Remove the accessories inside. • Clean the interior with lukewarm water and a soft cloth. •...
- Seite 23 GETTING STARTED Remove the drawer. Fill with drinking water, not exceeding the maximum scale. Reinstall the drawer and drip tray.
- Seite 24 CONTROL PANEL AND OPERATION Plug in the power cord; the POWER indicator will light up. You can operate the machine by touching the buttons on the control panel as shown below. The main functions are: ICE, CLEAN and LIGHT. CLEAN button If you are using the device for the first time or have not used it for a long time, you should clean it first.
- Seite 25 • After the cleaning process, place the device on the edge of the work surface. Make sure the unit is stable, place a receptacle (bowl) under the unit, remove the water drain cap at the back, and pull the plug from the drain pipe. The water in the tank under the drawer and the evaporator will now run into the water tank.
- Seite 26 To do this, lightly hold the drawer handle and pull it out in a horizontal direction until the back of the drawer touches the front panel, and then gently set it down. The drawer then hangs at a certain angle in the front panel. When you want to close the drawer, hold the drawer handle instead and lay the drawer horizontally, then gently push it until it closes completely.
- Seite 27 TROUBLESHOOTING Problem Potential cause Possible solution The ADD WATER Lack of water. Stop the ice maker, add water then indicator lights press the "ICE"/"CLEAN" button again to restart the machine. The ICE FULL There is too much ice. Remove the ice cubes. indicator lights up No ice cubes inside.
- Seite 28 DISPOSAL CONSIDERATIONS If there is a legal regulation in your country regarding the disposal of electrical and electronic equipment, this symbol on the product or on the packaging indicates that this product must not be disposed of with household waste. Instead, it must be taken to a collection point for the recycling of electrical and electronic equipment.
- Seite 29 Estimado cliente: Le felicitamos por la adquisición de este producto. Lea atentamente el siguiente manual y siga cuidadosamente las instrucciones de uso con el fin de evitar posibles daños. La empresa no se responsabiliza de los daños ocasionados por un uso indebido del producto o por haber desatendido las indicaciones de seguridad.
- Seite 30 INDICACIONES DE SEGURIDAD • Coloque el aparato en una superficie plana. • Utilice el aparato solo en habitaciones interiores. • Desenchufe el aparato de la toma de corriente cuando ya no lo utilice. • No sumerja el aparato, el cable de alimentación ni el enchufe en agua ni en ningún otro líquido.
- Seite 31 ADVERTENCIA Peligro de incendio por eliminación inadecuada! Tenga en cuenta la normativa local para la eliminación de aparatos que contengan refrigerantes y gases inflamables. • Mantenga las aberturas de ventilación de la carcasa del aparato libres de obstrucciones. • No dañe el circuito de refrigerante. •...
- Seite 32 INDICACIONES SOBRE EL REFRIGERANTE R290 Advertencias • Transporte y guarde el aparato en posición vertical. De lo contrario, podría dañar de forma irreparable el compresor. Deje el aparato en posición vertical durante al menos 24 horas antes de ponerlo en marcha. •...
- Seite 33 DESCRIPCIÓN DEL APARATO Tapa de vaciado de agua: Panel de control después de la limpieza, retire la tapa de vaciado situado en 3 indicadores: ADD WATER la parte posterior del aparato, (añadir agua), POWER, ICE FULL saque el tapón del tubo de (hielo lleno) vaciado y vacíe el recipiente situado debajo del cajón.
- Seite 34 ANTES DEL PRIMER USO • Retire el embalaje exterior e interior y compruebe que se incluyen todos los accesorios. Si falta alguna pieza, póngase en contacto con el servicio técnico. • Retire todas las tiras adhesivas del aparato. Retire los accesorios del interior. •...
- Seite 35 PUESTA EN MARCHA Saque el cajón. Llene el cajón con agua potable, sin superar la escala máxima. Vuelva a colocar el cajón y la bandeja de goteo.
- Seite 36 PANEL DE CONTROL Y FUNCIONAMIENTO Enchufe el cable de alimentación, el indicador POWER se ilumina. Puede hacer funcionar el aparato pulsando los botones del panel de control como se muestra a continuación. Las funciones principales son: ICE (hielo), CLEAN (limpieza) y LIGHT (luz).
- Seite 37 • Tras la limpieza, coloque el aparato en el borde de la encimera. Asegúrese de que el aparato está estable, coloque una bandeja de goteo (cuenco) debajo del aparato, retire la tapa de vaciado del agua de la parte trasera y saque el tapón del tubo de desagüe.
- Seite 38 Para ello, sujete ligeramente el tirador del cajón y extráigalo horizontalmente hasta que la parte posterior del cajón toque el panel frontal, y después quítelo con cuidado. El cajón cuelga entonces en un ángulo determinado en el panel frontal. Si desea cerrar el cajón, sujete el tirador en su lugar y coloque el cajón en posición horizontal, después empújelo suavemente hasta que se cierre por completo.
- Seite 39 REPARACIÓN DE ANOMALÍAS Problema Posible causa Posible solución Se ilumina el Falta agua. Detenga la máquina de hielo, llénela de indicador ADD agua y pulse de nuevo el botón ICE/CLEAN WATER. para volver a poner el aparato en marcha. El indicador ICE Hay demasiado hielo.
- Seite 40 INDICACIONES SOBRE LA RETIRADA DEL APARATO Si en su país existe una disposición legal relativa a la eliminación de aparatos eléctricos y electrónicos, este símbolo estampado en el producto o en el embalaje advierte de que no debe eliminarse como residuo doméstico.
- Seite 41 Cher client, chère cliente, Toutes nos félicitations pour l’acquisition de ce nouvel appareil. Lisez attentivement les consignes suivantes et suivez-les pour éviter d'éventuels dommages. Nous ne saurions être tenus pour responsables des dommages dus au non-respect des consignes et à la mauvaise utilisation de l’appareil.
- Seite 42 CONSIGNES DE SÉCURITÉ • Installez l'appareil sur une surface plane. • Utilisez l'appareil à l'intérieur uniquement. • Débranchez la fiche de l'appareil lorsque vous ne l'utilisez pas. • Ne plongez pas le cordon d'alimentation ou la fiche dans l'eau ou dans d'autres liquides.
- Seite 43 MISE EN GARDE Risque d'incendie en cas d'élimination incorrecte ! Veuillez respecter les réglementations locales en matière d'élimination des appareils contenant des réfrigérants et des gaz inflammables. • Maintenez les ouvertures d'aération du boîtier de l'appareil libres de tout obstacle. •...
- Seite 44 REMARQUES CONCERNANT LE RÉFRIGÉRANT R290 Mises en garde • Le climatiseur doit être entreposé et transporté à la verticale. Faute de quoi, le compresseur pourrait être endommagé de façon irréparable. En cas de doute, laissez l‘appareil reposer pendant au moins 24 heures avant de le mettre en service.
- Seite 45 APERÇU DE L'APPAREIL Panneau de commande Bouchon de vidange d'eau : Après le nettoyage, retirez le 3 voyants : ADD WATER bouchon de vidange à l'arrière (rajoutez de l'eau), POWER, ICE de l'appareil, retirez le bouchon FULL (bac à glace plein) du tuyau de vidange et videz le récipient sous le tiroir.
- Seite 46 AVANT LA PREMIÈRE UTILISATION • Retirez l'emballage extérieur et intérieur, puis vérifiez que tous les accessoires sont présents. S'il manque des pièces, contactez notre service client. • Retirez toutes les bandes adhésives de l'appareil. Sortez les accessoires à l'intérieur. • Nettoyez les surfaces intérieures à...
- Seite 47 MISE EN MARCHE Retirez le tiroir. Remplissez-le d'eau potable, sans dépasser le niveau d'échelle maximal. Réinstallez le tiroir et le bac d'égouttement.
- Seite 48 PANNEAU DE COMMANDE ET UTILISATION Branchez le cordon d'alimentation, le voyant POWER s'allume. Vous pouvez faire fonctionner la machine en touchant les boutons du panneau de commande comme indiqué ci-dessous. Les fonctions principales sont : ICE (glace), CLEAN (nettoyage) et LIGHT (éclairage) Touche CLEAN Si vous utilisez l'appareil pour la première fois ou si vous ne l'avez pas utilisé...
- Seite 49 • Après le nettoyage, placez l'appareil sur le bord du plan de travail. Assurez- vous que l'appareil est stable, placez un récipient (bol) sous l'appareil, retirez le bouchon de vidange d'eau à l'arrière et retirez le bouchon du tuyau de vidange.
- Seite 50 Pour ce faire, tenez légèrement la poignée du tiroir et tirez-la dans le sens horizontal jusqu'à ce que l'arrière du tiroir touche le panneau avant, puis posez-la doucement. Le tiroir est alors suspendu à un certain angle dans le panneau avant. Lorsque vous souhaitez fermer le tiroir, tenez plutôt la poignée du tiroir et posez le tiroir horizontalement, puis poussez-le doucement jusqu'à...
- Seite 51 RÉSOLUTION DES PROBLÈMES Problème Cause possible Solution Voyant ADD Manque d'eau Arrêtez la machine à glaçons, ajoutez de l'eau WATER allumé. et appuyez à nouveau sur la touche ICE/ CLEAN pour redémarrer la machine. Le voyant ICE Il y a trop de glace Retirez les glaçons.
- Seite 52 INFORMATIONS SUR LE RECYCLAGE Si l'élimination des appareils électriques et électroniques est réglementée dans votre pays, ce symbole sur le produit ou sur l'emballage PIÈCEique qu'il ne doit pas être mis au rebut avec les ordures ménagères. Vous devez l'acheminer vers un point de collecte pour le recyclage des appareils électriques et électroniques.
- Seite 53 Gentile cliente, La ringraziamo per l'acquisto del dispositivo. La preghiamo di leggere attentamente le seguenti indicazioni e di seguirle per evitare eventuali danni. Non ci assumiamo alcuna responsabilità per danni scaturiti da una mancata osservanza delle avvertenze di sicurezza e da un uso improprio del dispositivo.
- Seite 54 AVVERTENZE DI SICUREZZA • Posizionare il dispositivo su una superficie piana. • Usare il dispositivo solo in locali interni. • Quando non viene utilizzato il dispositivo, staccare la spina dalla presa. • Non immergere il cavo di alimentazione e la spina in acqua o altri liquidi. •...
- Seite 55 ATTENZIONE Pericolo di incendio a causa di uno smaltimento improprio! Si prega di osservare le norme locali per lo smaltimento di dispositivi contenenti refrigeranti e gas infiammabili. • Mantenere le aperture di ventilazione nell'alloggiamento del dispositivo libere da ostruzioni. • Non danneggiare il circuito del refrigerante.
- Seite 56 AVVERTENZE SUL REFRIGERANTE R290 Avvertenze • Il climatizzatore deve essere conservato e trasportato in verticale, altrimenti possono risultare danni irreparabili al compressore. Lasciare il dispositivo in posizione verticale per almeno 24 ore prima di metterlo in funzione. • Spegnere il dispositivo e staccare la spina prima di pulirlo. •...
- Seite 57 DESCRIZIONE DEL DISPOSITIVO Pannello di controllo Tappo di scarico dell'acqua: 3 indicazioni: ADD WATER dopo la pulizia, rimuovere i (aggiungere acqua), POWER, tappi di scarico sul retro del ICE FULL (vano del ghiaccio dispositivo e sul tubo di scarico pieno) e svuotare il contenitore sotto il cassetto.
- Seite 58 OPERAZIONI PRELIMINARI • Rimuovere l'imballaggio all'interno e all'esterno e assicurarsi che siano presenti tutti gli accessori. Se mancano dei componenti, rivolgersi al nostro servizio di assistenza ai clienti. • Rimuovere tutte le strisce adesive presenti sul dispositivo. Togliere gli accessori interni. •...
- Seite 59 MESSA IN FUNZIONE Togliere il cassetto. Aggiungere acqua potabile senza superare l'indicazione di riempimento massimo. Riposizionare il cassetto e la vaschetta di gocciolamento.
- Seite 60 PANNELLO DI CONTROLLO E UTILIZZO Inserire il cavo e l'indicazione POWER si illumina. Il dispositivo può essere gestito utilizzando i tasti sul pannello di controllo, come mostrato di seguito. Le funzioni principali sono: ICE (ghiaccio), CLEAN (pulizia) e LIGHT (luce). Tasto CLEAN Se si utilizza il dispositivo per la prima volta o non è...
- Seite 61 • Dopo la pulizia, posizionare il dispositivo sul bordo della superficie di appoggio. Assicurarsi che il dispositivo sia in una posizione stabile, mettere un contenitore di raccolta (ciotola) sotto il dispositivo, rimuovere i tappi di scarico dal retro e dal tubo di scarico. L'acqua nel serbatoio sotto il cassetto e il vaporizzatore defluisce nel contenitore di raccolta.
- Seite 62 Tenere l'impugnatura del cassetto e tirare in orizzontale, fino a quando la parete posteriore del cassetto tocca il pannello frontale e poggiarlo con cura alla superficie. Il cassetto resta agganciato al pannello frontale a una certa inclinazione. Per chiudere il cassetto, tenere saldamente l'impugnatura e metterlo in posizione orizzontale prima di spingerlo completamente nel dispositivo.
- Seite 63 RISOLUZIONE DEI PROBLEMI Problema Possibile causa Soluzioni L'indicazione ADD Acqua insufficiente. Interrompere il funzionamento della WATER si accende. macchina del ghiaccio, aggiungere acqua e premere di nuovo "ICE"/"CLEAN" per riavviare il dispositivo. L'indicazione ICE C'è troppo ghiaccio nel Rimuovere i cubetti di ghiaccio. FULL si illumina o vano di raccolta.
- Seite 64 AVVISO DI SMALTIMENTO Se nel vostro Paese sono vigenti regolamenti legislativi relativi allo smaltimento di dispositivi elettrici ed elettronici, questo simbolo sul prodotto o sull'imballaggio indica che non è consentito smaltire questo prodotto insieme ai rifiuti domestici. Il dispositivo deve invece essere portato in un centro di raccolta per il riciclaggio di dispositivi elettrici ed elettronici.