Anmelden
Hochladen
Anleitungen
Marken
SOMFY Anleitungen
Telefone
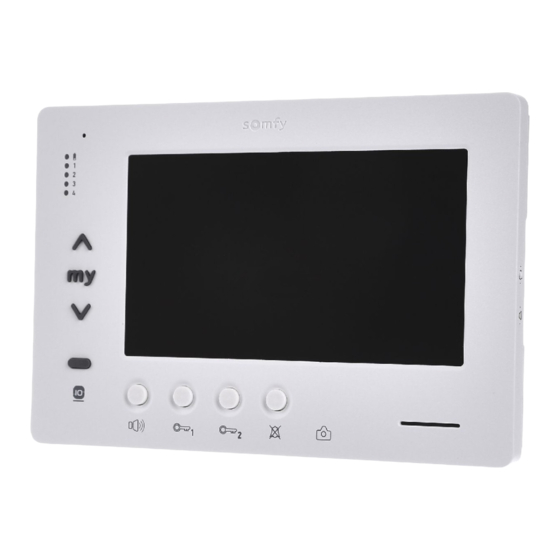
Vsystempro Premium IO
SOMFY Vsystempro Premium IO Handbücher
Anleitungen und Benutzerhandbücher für SOMFY Vsystempro Premium IO. Wir haben
1
SOMFY Vsystempro Premium IO Anleitung zum kostenlosen PDF-Download zur Verfügung: Installationsanleitung
SOMFY Vsystempro Premium IO Installationsanleitung (128 Seiten)
Marke:
SOMFY
| Kategorie:
Telefone
| Dateigröße: 38.94 MB
Inhaltsverzeichnis
Français
3
Inhaltsverzeichnis
3
1 Informations Importantes Sécurité
4
Généralités
4
Consignes Générales de Sécurité
4
Conditions D'utilisation
4
Recyclage
4
2 Présentation du Produit
5
Description Générale
5
Présentation du Moniteur
5
Dimensions du Moniteur
5
Installation Type
6
3 Fixation du Moniteur
7
4 Installation Électrique
7
Câblage du Moniteur
7
Sonnerie Locale
8
Modules Complémentaires
8
5 Paramétrage du Moniteur
9
Légendes Utilisées pour les Illustrations des Chapitres Suivants
9
Sélecteur N
9
Commutateur N° 9 (C9)
9
Commutateur N° 10 (C10)
10
6 Programmation de la Télécommande Io
12
Généralités
12
Enregistrement de la Commande du Moniteur en tant que Première Télécommande
12
Ajout ou Suppression de la Commande Io-Homecontrol® du Moniteur à Partir D'une Télécommande Io-Homecontrol® Existante
12
7 Schémas Électriques
13
Installation Avec un Module Extérieur «1 Bouton» et un Moniteur
13
Installation Avec un Module Extérieur «1 Bouton» et Deux Moniteurs
13
Installation Avec un Module Extérieur «2 Boutons» et Deux Moniteurs
13
Bouton Poussoir D'une Sonnerie Déportée
13
8 Réglages
14
9 Mise en Place de la Carte Mémoire
14
10 Utilisation des DIfférents Boutons
14
11 Caractéristiques Techniques
14
Deutsch
15
1 Wichtige Hinweise Sicherheit
16
Allgemeines
16
Allgemeine Sicherheitshinweise
16
Spezifische Sicherheitshinweise
16
Recycling
16
2 Produktbeschreibung
17
Allgemeine Beschreibung
17
Beschreibung der Innenstation
17
Maße der Innenstation
17
Typische Installation
18
3 Befestigung der Innenstation
19
4 Elektrischer Anschluss
19
Verdrahtung der Innenstation
19
Lokale Klingel
20
Zusatzmodule
20
5 Parametrierung der Innenstation
21
Legende der Abbildungen in den Folgenden Abschnitten
21
Wahlschalter Nr
21
Verteiler Nr. 9 (C9)
21
Verteiler Nr. 10 (C10)
22
6 Programmierung des Io-Funksenders
24
Allgemeines
24
Speichern des Funksenders der Innenstation als Primärer Funksender
24
Hinzufügen oder Löschen eines Io-Homecontrol®-Funksenders Mithilfe eines Bestehenden Io-Homecontrol®-Funksenders
24
7 Schaltpläne
25
Anlage mit einem Außenmodul mit einer Taste und einer Innenstation
25
Anlage mit einem Außenmodul mit einer Taste und Zwei Innenstationen
25
Anlage mit einem Außenmodul mit Zwei Tasten und Zwei Innenstationen
25
Klingeltaste einer Externen Klingel
25
Regler der Innenstation
26
9 Einsetzen der Speicherkarte
26
10 Verwendung der Verschiedenen Tasten
26
11 Technische Daten
26
Italiano
27
1 Informazioni Importanti Sicurezza
28
Informazioni Generiche
28
Istruzioni Generali DI Sicurezza
28
Condizioni DI Utilizzo
28
Riciclaggio
28
2 Descrizione del Prodotto
29
Descrizione Generale
29
Descrizione del Monitor
29
Dimensioni del Monitor
29
Installazione Tipica
30
3 Fissaggio del Monitor
31
4 Impianto Elettrico
31
Cablaggio del Monitor
31
Suoneria Locale
32
Moduli Complementari
32
5 Configurazione del Monitor
33
Legende Utilizzate Per le Illustrazioni Dei Capitoli Seguenti
33
Selettore N
33
Commutatore N° 9 (C9)
33
Commutatore N° 10 (C10)
34
6 Programmazione del Trasmettitore Io
36
Informazioni Generiche
36
Programmazione del Comando del Monitor Come Primo Telecomando
36
Aggiungere O Rimuovere Il Comando Io-Homecontrol® del Monitor da un Telecomando Io-Homecontrol® Esistente
36
7 Schemi Elettrici
37
Installazione con un Modulo Esterno «1 Pulsante» E un Monitor
37
Installazione con un Modulo Esterno «1 Pulsante» E Due Monitor
37
Installazione con un Modulo Esterno «2 Pulsanti» E Due Monitor
37
Pulsante DI una Suoneria Remota
37
8 Impostazioni
38
9 Inserimento Della Scheda DI Memoria
38
10 Utilizzo Dei Diversi Pulsanti
38
11 Caratteristiche Tecniche
38
Español
39
1 Información Importante: Seguridad
40
Aspectos Generales
40
Instrucciones Generales de Seguridad
40
Condiciones de Uso
40
Reciclaje
40
2 Presentación del Producto
41
Descripción General
41
Presentación del Monitor
41
Dimensiones del Monitor
41
Tipo de Instalación
42
3 Fijación del Monitor
43
4 Instalación Eléctrica
43
Cableado del Monitor
43
Timbre Local
44
Módulos Complementarios
44
5 Configuración del Monitor
45
Leyendas Utilizadas para las Ilustraciones de Los Capítulos Siguientes
45
Selector N
45
Conmutador N.° 9 (C9)
45
6 Programación del Mando a Distancia Io
48
Memorización del Mando del Monitor como Primer Mando a Distancia
48
Adición O Eliminación del Mando Io-Homecontrol® del Monitor desde un Mando a Distancia Io-Homecontrol® Existente
48
7 Esquemas Eléctricos
49
Instalación con un Módulo Exterior con «1 Botón» y un Monitor
49
Instalación con un Módulo Exterior con «1 Botón» y 2 Monitores
49
Instalación con un Módulo Exterior con «2 Botones» y 2 Monitores
49
Botón Pulsador con Timbre Externo
49
8 Ajustes
50
9 Inserción de la Tarjeta de Memoria
50
10 Uso de Los Distintos Botones
50
11 Características Técnicas
50
Português
51
1 Informações Importantes Segurança
52
Generalidades
52
Instruções Gerais de Segurança
52
Condições de Utilização
52
Reciclagem
52
Descrição Geral
53
Descrição Do Monitor
53
Dimensões Do Monitor
53
Instalação Tipo
54
3 Fixação Do Monitor
55
4 Instalação Eléctrica
55
Cablagem Do Monitor
55
Campainha Local
56
Módulos Complementares
56
5 Parametrização Do Monitor
57
Legendas Utilizadas Nas Ilustrações Dos Capítulos Seguintes
57
Selector N.º
57
6 Programação Do Comando à Distância Io
60
Generalidades
60
Memorização Do Comando Do Monitor como Comando à Distância Principal
60
Adição ou Eliminação Do Comando Io-Homecontrol® Do Monitor a Partir de um Comando à Distância Io-Homecontrol® Existente
60
7 Esquemas Eléctricos
61
Instalação Com um Módulo Exterior de "1 Botão" E um Monitor
61
Instalação Com um Módulo Exterior de "1 Botão" E Dois Monitores
61
Instalação Com um Módulo Exterior de "2 Botões" E Dois Monitores
61
Botão de Pressão de Uma Campainha Deslocada
61
9 Colocação Do Cartão de Memória
62
10 Utilização Dos Diferentes Botões
62
11 Características Técnicas
62
English
63
Important Information Safety
64
General Information
64
General Safety Instructions
64
Conditions of Use
64
Recycling
64
Product Presentation
65
General Description
65
Presentation of the Monitor
65
Dimensions of the Monitor
65
Electrical Installation
67
Monitor Wiring
67
Local Buzzer
68
Additional Modules
68
Assembling the Monitor
67
Configuring the Monitor
69
Keys Used for the Illustrations in the Following Chapters
69
Selector no
69
Switch No. 9 (C9)
69
Switch No. 10 (C10)
70
Programming the Io Remote Control
72
General Information
72
Registering the Monitor Control as the First Remote Control
72
Adding or Removing the Io-Homecontrol® Monitor Control Using an Existing Io-Homecontrol® Remote Control
72
Electrical Diagrams
73
Installation with an External "1-Button" Module and a Monitor
73
Installation with an External "1-Button" Module and Two Monitors
73
Installation with an External "2-Button" Module and Two Monitors
73
Push Button for a Remote Buzzer
73
Technical Data
74
Using the DIfferent Buttons
74
Installing the Memory Card
74
Settings
74
Polski
75
1 Ważne Informacje Bezpieczeństwo
76
Informacje Ogólne
76
Ogólne Zalecenia Dotyczące Bezpieczeństwa
76
Warunki Użytkowania
76
Recykling
76
2 Prezentacja Produktu
77
Opis Ogólny
77
Prezentacja Monitora
77
Wymiary Monitora
77
Instalacja Standardowa
78
3 Mocowanie Monitora
79
4 Instalacja Elektryczna
79
Okablowanie Monitora
79
Dodatkowe Moduły
80
5 Ustawianie Parametrów Monitora
81
Objaśnienia Symboli Używanych Na Ilustracjach Następujących Rozdziałów
81
Przycisk Wyboru Nr
81
Przełącznik Nr 9 (C9)
81
Przełącznik Nr 10 (C10)
82
6 Programowanie Nadajnika Zdalnego Sterowania Io
84
Informacje Ogólne
84
Io-Homecontrol
84
7 Schematy Elektryczne
85
Instalacja Z Modułem Zewnętrznym "1-Przyciskowym" I Z Jednym Monitorem
85
Instalacja Z Modułem Zewnętrznym "1-Przyciskowym" I Dwoma Monitorami
85
Instalacja Z Modułem Zewnętrznym "2-Przyciskowym" I Dwoma Monitorami
85
Przycisk Zdalnego Dzwonka
85
Ustawienia Monitora
86
9 Wkładanie Karty PamięCI
86
10 Sposób Użycia Różnych Przycisków
86
11 Dane Techniczne
86
Čeština
87
Důležité Informace Bezpečnost
88
Obecné Zásady
88
Všeobecné Bezpečnostní Pokyny
88
Podmínky Použití
88
Recyklace
88
2 Představení Výrobku
89
Všeobecný Popis
89
Prezentace Monitoru
89
Rozměry Monitoru
89
Typová Montáž
90
3 Připevnění Monitoru
91
4 Elektrická Instalace
91
Kabeláž Monitoru
91
Místní Zvonění
92
Doplňkové Moduly
92
5 Nastavení Monitoru
93
Legendy Používané Pro Ilustrace V NásledujíCích Kapitolách
93
Přepínač Č
93
Přepínač Č. 9 (C9)
93
Přepínač Č. 10 (C10)
94
6 Programování Dálkového OvláDání Io
96
Obecné Zásady
96
Uložení OvláDání K Monitoru Jako Prvního Dálkového OvláDání
96
7 Schémata Zapojení
97
Tlačítko Externího Zvonění
97
9 Instalace Paměťové Karty
98
10 Použití Různých Tlačítek
98
Technické Údaje
98
Ελληνικά
99
1 Σημαντικές Πληροφορίες - Ασφάλεια
100
Γενικές Πληροφορίες
100
Γενικές Οδηγίες Ασφαλείας
100
Συνθήκες Χρήσης
100
Ανακύκλωση
100
2 Παρουσίαση Του Προϊόντος
101
Γενική Περιγραφή
101
Παρουσίαση Της Οθόνης
101
Διαστάσεις Της Οθόνης
101
Τυπική Εγκατάσταση
102
3 Στερέωση Της Οθόνης
103
4 Ηλεκτρική Εγκατάσταση
103
Σύνδεση Της Οθόνης
103
Τοπικό Κουδούνι
104
Συμπληρωματικές Μονάδες
104
5 Ρύθμιση Παραμέτρων Της Οθόνης
105
Σύμβολα Που Χρησιμοποιούνται Για Τις Εικόνες Των Κεφαλαίων Που Ακολουθούν
105
Επιλογέας N
105
Μεταγωγέας N° 9 (C9)
105
6 Προγραμματισμός Του Τηλεχειριστηρίου Io
108
Γενικές Πληροφορίες
108
Καταχώριση Του Χειριστηρίου Της Οθόνης Ως Πρώτου Τηλεχειριστηρίου
108
Προσθήκη Ή Κατάργηση Του Χειριστηρίου Io-Homecontrol® Της Οθόνης Από Ένα Τηλεχειριστήριο Io-Homecontrol® Που Ήδη Υπάρχει
108
7 Ηλεκτρικά Σχεδιαγράμματα
109
Εγκατάσταση Με Μία Εξωτερική Μονάδα «1 Κουμπιού» Και Μία Οθόνη
109
Εγκατάσταση Με Μία Εξωτερική Μονάδα «1 Κουμπιού» Και Δύο Οθόνες
109
Εγκατάσταση Με Μία Εξωτερική Μονάδα «2 Κουμπιών» Και Δύο Οθόνες
109
Ανεξάρτητο Μπουτόν Κουδουνιού
109
9 Τοποθέτηση Της Κάρτας Μνήμης
110
10 Χρήση Των Διαφόρων Κουμπιών
110
11 Τεχνικά Χαρακτηριστικά
110
Werbung
Werbung
Verwandte Produkte
SOMFY VSYSTEM PRO Origin RTS
SOMFY VSystemPRO
SOMFY VSYSTEMPO
SOMFY VSYSTEMPRO VSP-M0701
SOMFY VSYSTEMPRO VSP-M0702
SOMFY VSYSTEMPRO VSP-CS04
SOMFY VSYSTEMPRO VSP-EM02
SOMFY VSYSTEMPRO VSP-EM04
SOMFY VSYSTEMPRO VSP-PS02
SOMFY VSYSTEMPRO VSP-AD04
SOMFY Kategorien
Torantriebe
Motoren
Steuergeräte
Rollladen
Antriebssysteme
Weitere SOMFY Anleitungen
Anmelden
Anmelden
ODER
Mit Facebook anmelden
Mit Google anmelden
Anleitung hochladen
Von PC hochladen
Von URL hochladen