Anmelden
Hochladen
Anleitungen
Marken
Ingeteam Anleitungen
Wechselrichter
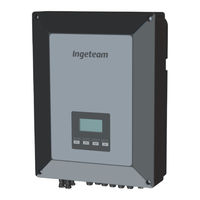
INGECON SUN 1Play 4.6TL M
Ingeteam INGECON SUN 1Play 4.6TL M Handbücher
Anleitungen und Benutzerhandbücher für Ingeteam INGECON SUN 1Play 4.6TL M. Wir haben
1
Ingeteam INGECON SUN 1Play 4.6TL M Anleitung zum kostenlosen PDF-Download zur Verfügung: Handbuch Für Montage Und Betrieb
Ingeteam INGECON SUN 1Play 4.6TL M Handbuch Für Montage Und Betrieb (312 Seiten)
Marke:
Ingeteam
| Kategorie:
Wechselrichter
| Dateigröße: 13.21 MB
Inhaltsverzeichnis
Deutsch
8
Wichtige Sicherheitsbedingungen
5
Sicherheitsbedingungen
5
Mögliche Personengefährdungen
6
Mögliche Gerätegefährdungen
6
Persönliche Schutzausrüstung (PSA)
7
Inhaltsverzeichnis
8
1 Informationen zu dieser Betriebsanleitung
10
Anwendungsbereich und Nomenklatur
10
Adressaten
10
Symbole
10
2 Beschreibung des Geräts
11
Übersicht
11
Optionales Zubehör
11
Elektrische Sicherheit
11
Überspannungskategorie (OVC)
11
Verschmutzungsgrad
11
Lärmverschmutzung
12
Anlagenschaltplan
12
Netzwerkkonfigurationen
12
Merkmalstabellen
14
Allgemeine Daten
14
Differenzialschutz
16
Beschreibung der Kabelzugänge
16
Isolationswiderstand der Photovoltaik-Anlage
16
3 Entgegennahme und Lagerung des Geräts
17
Entgegennahme
17
Geräteidentifikation
17
Transportschäden
17
Energiespeicherung
17
Konservierung
17
4 Gerätetransport
18
Transport
18
Auspacken
18
5 Vorbereitung der Geräteinstallation
19
Umgebung
19
Umgebungsbedingungen
20
Auflagefläche und Verankerung
20
Schutz des Anschlusses an das Stromnetz
20
Länge der Verkabelung
21
PV-Solarpaneele
21
6 Geräteinstallation
22
Allgemeine Installationsanforderungen
22
Befestigung des Geräts an der Wand
22
Öffnen und Schließen des Gehäuses
24
7 Anschluss des Zubehörs
26
Sicherheitshinweise für den Anschluss des Zubehörs
26
Verbindung über INGECON Comm
27
Kommunikation über RS-485
27
Kommunikation über Ethernet TCP
28
Kommunikation über WLAN TCP
29
Verbindung über INGECON Connect
30
Kommunikation für den Bausatz Eigenverbrauch
30
Anschluss des Hilfsrelais mit Potenzialfreiem Kontakt
31
Anschluss des Digitaleingangs
32
8 AC-Anschluss
33
Sicherheitshinweise für den AC-Anschluss
33
Anforderungen an die Verkabelung für den AC-Anschluss
33
Ablauf zum AC-Anschluss
34
9 DC-Anschluss
35
Sicherheitshinweise für den DC-Anschluss
35
Anforderungen an die Verkabelung für den DC-Anschluss
35
Ablauf zum DC-Anschluss
35
10 Bedienung des Displays
37
Tastatur und LED
37
Display
38
Menüeinteilung
39
Grafische Darstellung der Täglichen Leistung
40
Grafische Darstellung der Energie der Letzten 24 Tage
40
Hauptmenü
40
Erste Konfiguration des Geräts Durchführen
41
Leistungsbegrenzung Konfigurieren
41
Land / Norm Konfigurieren
41
Modbus-Nr. Konfigurieren
41
Hilfsrelais Konfigurieren
41
Cos Phi Konfigurieren
41
Den Wechselrichter für den Eigenverbrauchsmodus Konfigurieren
42
Den Wechselrichter in Betriebszustand Schalten
42
Den Wechselrichter in Stillstand Schalten
42
Grafik der Täglichen Leistung Abfragen
42
Die Grafik der Energie der Letzten 24 Tage Abfragen
43
Variablen des Wechselrichters Überwachen
43
Alarme, Meldungen und Stillstandsursachen Anzeigen
44
17:04 11-17 Geringe PV-Leistung
44
Wechselrichterdaten Abfragen
44
Reset auf Auslieferungszustand Durchführen
44
Test der Belüftung Durchführen
45
Autotest Durchführen
45
Displaysprache Ändern
45
Datum und Uhrzeit Ändern
45
Kumulierte Daten Teilweise Löschen
46
Bildschirm des Wechselrichters Blockieren
46
11 Erster Netzanschluss
47
Prüfung des Geräts
47
Inspektion
47
Hermetischer Geräteverschluss
47
Ablauf für den Ersten Netzanschluss
47
Please, Select an Option
48
12 Aktualisierung der Firmware
49
13 Kommunikation über USB
50
Vorgehensweise zur Herstellung des Anschlusses
50
14 Abschalten des Geräts
52
Ablauf zum Abschalten des Geräts
52
15 Vorbeugende Wartung
53
Sicherheitsbedingungen
53
Zustand des Gehäuses
53
Zustand der Kabel und Anschlüsse
53
Kühlsystem
53
Umgebung
53
16 Behebung von Problemen
54
Alarme Anzeigen der Leds
54
Beseitigung
54
17 Abfallbehandlung
57
English
61
Important Safety Instructions
59
Safety Conditions
59
Personal Protective Equipment (PPE)
60
Contents
61
1 About this Manual
63
Scope and Nomenclature
63
Recipients
63
Symbols
63
2 Unit Description
64
Overview
64
Optional Accessories
64
Electrical Safety
64
Overvoltage Category (OVC)
64
Contamination Class
64
Acoustic Contamination
64
Electrical Diagram of the System
65
Grid Configurations
65
Specifications Tables
67
General Data
68
Residual Current Device
69
Description of Wiring Inlets
69
Insulation Resistance of the PV Array
69
3 Receipt of the Unit and Storage
70
Reception
70
Equipment Identification
70
Transport Damage
70
Storage
70
Conservation
70
4 Transporting the Equipment
71
Transport
71
Unpacking
71
5 Preparation for Installing the Unit
72
Environment
72
Environmental Conditions
73
Supporting Surface and Fastening
73
Protection of the Connection to the Electricity Grid
73
Wiring Length
74
Photovoltaic Panels
74
6 Installing the Unit
75
General Requirements for Installation
75
Attaching the Unit to the Wall
75
Opening and Closing the Housing
77
7 Connection of Accessories
79
Safety Instructions for Connecting Accessories
79
Connection Via INGECON Comm
80
RS-485 Communication
80
Ethernet TCP Communication
81
Wi-Fi TCP Communication
82
Connection Via INGECON Connect
83
Communication for the Direct Self Consumption Kit
83
Connecting the Potential-Free Auxiliary Relay
84
Connecting the Digital Input
85
8 AC Connection
86
Safety Instructions for the AC Connection
86
Wiring Requirements for the AC Connection
86
AC Connection Process
87
600 DC Connection
88
Safety Instructions for the DC Connection
88
Wiring Requirements for the DC Connection
88
DC Connection Process
88
10 Display Control
90
Keypad and Leds
90
Display
91
Menu Structure
92
Daily Power Graph
93
Energy Graph for the Last 24 Days
93
Main Menu
93
Configuring the Unit for the First Time
94
Configuring the Power Limit
94
Configuring the Country / Regulation
94
Configuring the Modbus ID
94
Configuring the Auxiliary Relay
94
Configuring the Cosine of Phi
94
Configure the Inverter to Work in Self Consumption Mode
95
Place the Inverter in Operating Mode
95
Place the Inverter in Stop Mode
95
See the Daily Power Graph
95
See the Energy Graph for the Last 24 Days
95
Monitor the Inverter's Variables
96
List of Alarms, Warnings and Reasons for Shutdown
96
See Inverter Data
97
Reset to Default Settings
97
Perform a Ventilation Test
97
Performing an Autotest
97
Change Display Language
98
Change Date and Time
98
Perform a Partial Delete of Accumulated Data
98
Block Inverter Screen
98
11 First Connection to the Grid
99
Unit Inspection
99
Inspection
99
Hermetic Sealing of the Unit
99
Process for the First Connection to the Grid
99
Please, Select an Option
100
12 Firmware Update
101
13 Communication Via USB
102
Wiring Process
102
14 Shutting down the Unit
103
Process of Shutting down the Unit
103
15 Preventive Maintenance
104
Safety Conditions
104
Condition of the Housing
104
Condition of Cables and Terminals
104
Cooling System
104
Environment
104
16 Troubleshooting
105
Alarms. LED Messages
105
17 Waste Handling
107
Español
111
Condiciones Importantes de Seguridad
109
Condiciones de Seguridad
109
Equipo de Protección Individual (EPI)
110
Contenidos
111
1 Información sobre Este Manual
113
Campo de Aplicación y Nomenclatura
113
Destinatarios
113
Simbología
113
2 Descripción del Equipo
114
Visión General
114
Accesorios Opcionales
114
Seguridad Eléctrica
114
Categoría de Sobretensión (OVC)
114
Grado de Contaminación
114
Contaminación Acústica
115
Esquema Eléctrico del Sistema
115
Configuraciones de Red
115
Tablas de Características
117
Datos Generales
118
Protección Diferencial
119
Descripción de Accesos de Cableado
119
Resistencia de Aislamiento del Campo Fotovoltaico
119
3 Recepción del Equipo y Almacenamiento
120
Recepción
120
Identificación del Equipo
120
Daños en el Transporte
120
Almacenamiento
120
Conservación
120
4 Transporte del Equipo
121
Transporte
121
Desembalaje
121
5 Preparación para la Instalación del Equipo
122
Entorno
122
Condiciones Medioambientales
123
Superficie de Apoyo y Anclaje
123
Protección de la Conexión a la Red Eléctrica
123
Longitud del Cableado
124
Paneles Fotovoltaicos
124
6 Instalación del Equipo
125
Requerimientos Generales de Instalación
125
Fijación del Equipo en Pared
125
Apertura y Cierre de la Envolvente
127
7 Conexión de Accesorios
129
Indicaciones de Seguridad para la Conexión de Accesorios
129
Conexión Mediante INGECON Comm
130
Comunicación Vía RS-485
130
Comunicación Vía Ethernet TCP
131
Comunicación Vía Wi-Fi TCP
132
Conexión Mediante INGECON Connect
133
Comunicación para el Kit de Autoconsumo Directo
133
Conexión del Relé Auxiliar Libre de Potencial
134
Conexión de la Entrada Digital
135
8 Conexión de AC
136
Indicaciones de Seguridad para la Conexión de AC
136
Requisitos del Cableado para la Conexión de AC
136
Proceso de Conexión de AC
137
9 Conexión de DC
138
Indicaciones de Seguridad para la Conexión de DC
138
Requisitos del Cableado para la Conexión de DC
138
Proceso de Conexión de DC
138
10 Manejo del Display
140
Teclado y LED
140
Display
141
Organización de Menús
142
Gráfica Potencia Diaria
143
Gráfica Energías Últimos 24 Días
143
Menú Principal
143
Realizar la Primera Configuración del Equipo
144
Configurar la Limitación de Potencia
144
Configurar el Páis / Normativa
144
Configurar el Número de Modbus
144
Configurar el Relé Auxiliar
144
Configurar el Coseno de Phi
144
Configurar el Inversor para Trabajar en Modo Autoconsumo
145
Poner el Inversor en Estado de Funcionamiento
145
Poner el Inversor en Estado de Paro
145
Consultar la Gráfica de Potencia Diaria
145
Consultar la Gráfica de Energías de Los Últimos 24 Días
145
Monitorizar las Variables del Inversor
146
Visualizar Alarmas, Avisos y Motivos de Paro
146
Consultar Datos del Inversor
147
Realizar un Reset a Estado de Fábrica
147
Realizar un Test de Ventilación
147
Realizar el Autotest
148
Cambiar el Idioma del Display
148
Cambiar la Fecha y Hora
148
Realizar un Borrado Parcial de Datos Acumulados
148
Bloquear la Pantalla del Inversor
148
11 Primera Conexión a Red
149
Revisión del Equipo
149
Inspección
149
Cierre Hermético del Equipo
149
Proceso para la Primera Conexión a Red
149
Please, Select an Option
150
12 Actualización de Firmware
151
13 Comunicación Vía USB
152
Proceso de Conexión
152
14 Desconexión del Equipo
154
Proceso de Desconexión del Equipo
154
15 Mantenimiento Preventivo
155
Condiciones de Seguridad
155
Estado de la Envolvente
155
Estado de Los Cables y Terminales
155
Sistema de Refrigeración
155
Entorno
155
16 Solución de Problemas
156
Alarmas. Indicaciones de Los LED
156
17 Tratamiento de Residuos
158
Français
161
Conditions Importantes de Sécurité
159
Conditions de Sécurité
159
Équipements de Protection Individuelle (EPI)
160
Table des Matières
161
1 Information Concernant Ce Manuel
163
Champ D'application et Nomenclature
163
Destinataires
163
Symbolique
163
2 Description de L'appareil
164
Description Générale
164
Accessoires en Option
164
Sécurité Électrique
164
Catégorie de Surtension (OVC)
164
Degré de Pollution
164
Pollution Sonore
165
Schéma Électrique du Système
165
Configurations Réseau
165
Tableaux de Caractéristiques
167
Données Générales
168
Protection Différentielle
169
Description des Accès de Câbles
169
Résistance D'isolement du Champ Photovoltaïque
169
3 Réception et Stockage de L'appareil
170
Réception
170
Identification de L'appareil
170
Dommages Lors du Transport
170
Stockage
170
Conservation
170
4 Transport de L'appareil
171
Transport
171
Déballage
171
5 Préparation pour L'installation de L'appareil
172
Environnement
172
Conditions Environnementales
173
Surface D'appui et de Fixation
173
Protection de la Connexion au Réseau Électrique
173
Longueur du Câblage
174
Panneaux Photovoltaïques
174
6 Installation de L'appareil
175
Exigences Générales D'installation
175
Fixation de L'appareil au Mur
175
Ouverture et Fermeture de L'enveloppe
177
7 Connexion des Accessoires
179
Consignes de Sécurité pour la Connexion D'accessoires
179
Connexion Via INGECON Comm
180
Communication Via RS-485
180
Communication Via Ethernet TCP
181
Communication Via Wi-Fi TCP
182
Connexion Via INGECON Connect
183
Communication pour le Kit de Consom. Auto. Directe
183
Connexion du Relais Auxiliaire Sans Potentiel
184
Connexion de L'entrée Numérique
185
8 Connexion AC
186
Consignes de Sécurité pour la Connexion de Câbles AC
186
Spécifications des Câbles pour la Connexion AC
186
Processus de Connexion de Câble AC
187
9 Connexion DC
188
Consignes de Sécurité pour la Connexion de Câbles DC
188
Spécifications des Câbles pour la Connexion DC
188
Processus de Connexion de Câbles DC
188
10 Maniement de L'écran
190
Clavier et LED
190
Écran
191
Organisation des Menus
192
Graphique de Puissance Quotidienne
193
Graphique D'énergie des Derniers 24 Jours
193
Menu Principal
193
Réaliser la Première Configuration de L'appareil
194
Configurer la Limite de Puissance
194
Configurer le Pays / Réglementation
194
Configurer le Numéro Modbus
194
Configurer le Relais Auxiliaire
194
Configurer le Cosinus de Phi
194
Configurer L'onduleur pour Travailler en Mode Consom. Auto
195
Mettre L'onduleur en Service
195
Mettre L'onduleur en Arrêt
195
Consulter le Graphique de Puissance Quotidienne
195
Consulter le Graphique D'énergies des 24 Derniers Jours
195
Monitorer les Variables de L'onduleur
196
Afficher les Alarmes, Avertissements et Causes D'arrêt
196
Consulter les Données de L'onduleur
197
Effectuer une Réinitialisation D'usine
197
Réaliser un Test de Ventilation
197
Réaliser L'autotest
198
Modifier la Langue de L'écran D'affichage
198
Modifier la Date et L'heure
198
Réaliser une Suppression Partielle des Données Accumulées
198
Verrouiller L'écran de L'onduleur
198
11 Première Connexion au Réseau
199
Révision de L'appareil
199
Inspection
199
Fermeture Hermétique de L'appareil
199
Processus pour la Première Connexion au Réseau
199
Please, Select an Option
200
12 Mise à Jour du Firmware
201
13 Communication Via USB
202
Processus de Connexion
202
14 Déconnexion de L'appareil
204
Processus de Déconnexion de L'appareil
204
15 Maintenance Préventive
205
Conditions de Sécurité
205
État de L'enveloppe
205
État des Câbles et des Cosses
205
Système de Refroidissement
205
Environnement
205
16 Dépannage
206
Alarmes. Indications des LED
206
17 Traitement des Déchets
208
Italiano
211
Importanti Condizioni DI Sicurezza
209
Condizioni DI Sicurezza
209
Dispositivo DI Protezione Individuale (DPI)
210
Contenuti
211
1 Informazioni Su Questo Manuale
213
Campo DI Applicazione E Nomenclatura
213
Destinatari
213
Simbologia
213
2 Descrizione del Dispositivo
214
Visione Generale
214
Accessori Opzionali
214
Sicurezza Elettrica
214
Categoria DI Sovratensione (OVC)
214
Grado DI Inquinamento
214
Inquinamento Acustico
215
Schema Elettrico del Sistema
215
Configurazioni DI Rete
215
Tabella Delle Caratteristiche
217
Dati Generali
218
Protezione Differenziale
219
Descrizione Degli Accessi Dei Cavi
219
Resistenza DI Isolamento del Campo Fotovoltaico
219
3 Ricevimento del Dispositivo E Stoccaggio
220
Ricevimento
220
Identificazione del Dispositivo
220
Danni Durante Il Trasporto
220
Stoccaggio
220
Conservazione
220
4 Movimentazione del Dispositivo
221
Trasporto
221
Disimballo
221
5 Preparazione Per L'installazione del Dispositivo
222
Ambiente
222
Condizioni Ambientali
223
Superficie DI Appoggio E Fissaggio
223
Protezione del Collegamento Alla Rete Elettrica
223
Lunghezza del Cablaggio
224
Pannelli Fotovoltaici
224
6 Installazione del Dispositivo
225
Requisiti Generali DI Installazione
225
Fissaggio del Dispositivo a Parete
225
Apertura E Chiusura Dell'involucro
227
7 Collegamento Degli Accessori
229
Indicazioni DI Sicurezza Per Il Collegamento Degli Accessori
229
Collegamento Tramite INGECON Comm
230
Comunicazione Via RS-485
230
Comunicazione Via Ethernet TCP
231
Comunicazione Via Wi-Fi TCP
232
Collegamento Tramite INGECON Connect
233
Comunicazione Per Il Kit DI Autoconsumo Diretto
233
Collegamento del Relè Ausiliare DI Potenziale Zero
234
Connessione Dell'ingresso Digitale
235
8 Collegamento AC
236
Indicazioni DI Sicurezza Per Il Collegamento Dei Cavi AC
236
Requisiti del Cablaggio Per Il Collegamento Dei Cavi AC
236
Procedura DI Collegamento AC
237
9 Collegamento DC
238
Indicazioni DI Sicurezza Per Il Collegamento Dei Cavi DC
238
Requisiti del Cablaggio Per Il Collegamento Dei Cavi DC
238
Procedura DI Collegamento DC
238
10 Uso del Display
240
Tastiera E Led
240
Display
241
Organizzazione Dei Menu
242
Grafica Potenza Giornaliera
243
Grafica Energie Ultimi 24 Giorni
243
Menu Principale
243
Prima Configurazione del Dispositivo
244
Impostazioni Limite DI Potenza
244
Impostazioni Paese / Normativa
244
Impostazioni Numero Modbus
244
Impostazioni Relè Ausiliario
244
Impostazione Coseno DI Phi
244
Come Impostare L'inverter Per Lavorare in Modalità Autoconsumo
245
Messa in Funzione Dell'inverter
245
Spegnimento Dell'inverter
245
Grafico Della Potenza Giornaliera
245
Grafico Dell'energia Degli Ultimi 24 Giorni
245
Monitoraggio Delle Variabili Dell'inverter
246
Visualizzazione Allarmi, Avvisi E Motivi DI Arresto
246
Dati Dell'inverter
247
Ripristino Impostazioni DI Fabbrica
247
Test Ventilatore
247
Autotest
248
Lingua del Display
248
Data E Ora
248
Eliminazione Parziale Dei Dati Accumulati
248
Blocco Schermo Dell'inverter
248
11 Primo Collegamento Alla Rete
249
Revisione del Dispositivo
249
Ispezione
249
Chiusura Ermetica del Dispositivo
249
Procedura Per Il Primo Collegamento Alla Rete
249
Please, Select an Option
250
12 Aggiornamento del Firmware
251
13 Comunicazione Via USB
252
Procedura DI Collegamento
252
14 Scollegamento del Dispositivo
254
Processo DI Scollegamento del Dispositivo
254
15 Manutenzione Preventiva
255
Condizioni DI Sicurezza
255
Stato Dell'involucro
255
Stato Dei Cavi E Dei Terminali
255
Sistema DI Raffreddamento
255
Ambiente
255
16 Risoluzione Dei Problemi
256
Allarmi. Indicazioni Dei LED
256
17 Smaltimento Dei Rifiuti
258
Português
261
Condições de Segurança Importantes
259
Condições de Segurança
259
Equipamento de Proteção Individual (EPI)
260
Índice
261
1 Informações sobre Este Manual
263
Campo de Aplicação E Nomenclatura
263
Destinatários
263
Símbolos
263
2 Descrição Do Equipamento
264
Visão Geral
264
Acessórios Opcionais
264
Segurança Elétrica
264
Categoria de Sobretensão (OVC)
264
Grau de Contaminação
264
Contaminação Acústica
265
Esquema Elétrico Do Sistema
265
Configurações de Rede
265
Tabelas de Características
267
Dados Gerais
268
Proteção Diferencial
269
Descrição Dos Acessos de Fiação
269
Resistência de Isolamento Do Campo Fotovoltaico
269
3 Recepção Do Equipamento E Armazenamento
270
Recepção
270
Identificação Do Equipamento
270
Danos no Transporte
270
Armazenamento
270
Conservação
270
4 Transporte Do Equipamento
271
Transporte
271
Embalagem
271
5 Preparação para a Instalação Do Equipamento
272
Ambiente
272
Condições Ambientais
273
Superfície de Apoio E Encaixe
273
Proteção da Conexão Com a Rede Elétrica
273
Comprimento da Fiação
274
Painéis Fotovoltaicos
274
6 Instalação Do Equipamento
275
Requisitos Gerais de Instalação
275
Fixação Do Equipamento Na Parede
275
Abertura E Fechamento Do Invólucro
277
7 Conexão de Acessórios
279
Indicações de Segurança para a Conexão de Acessórios
279
Conexão Através de INGECON Comm
280
Comunicação por RS-485
280
Comunicação Via Ethernet TCP
281
Comunicação por Wi-Fi TCP
282
Conexão Através de INGECON Connect
283
Comunicação para O Kit de Autoconsumo Direto
283
Conexão Do Relé Auxiliar de Potencial Livre
284
Conexão da Entrada Digital
285
8 Conexão de AC
286
Indicações de Segurança para a Conexão de AC
286
Requisitos da Fiação para a Conexão de AC
286
Processo de Conexão de AC
287
9 Conexão de DC
288
Indicações de Segurança para a Conexão de DC
288
Requisitos da Fiação para a Conexão de DC
288
Processo de Conexão de DC
288
10 Utilização Do Visor
290
Teclado E LED
290
Visor
291
Organização de Menus
292
Gráfico Potência DIária
293
Gráfico Energias Últimos 24 Dias
293
Menu Principal
293
Realizar a Primeira Configuração Do Equipamento
294
Configurar a Limitação de Potência
294
Configurar O País/Regulamentação
294
Configurar O Número de Modbus
294
Configurar O Relé Auxiliar
294
Configurar O Cosseno Fi
294
Configurar O Inversor para Trabalhar no Modo Autoconsumo
295
Colocar O Inversor Em Estado de Funcionamento
295
Colocar O Inversor Em Estado de Parada
295
Consultar O Gráfico de Potência DIária
295
Consultar O Gráfico de Energia Dos Últimos 24 Dias
295
Monitorar as Variáveis Do Inversor
296
Visualizar Alarmes, Avisos E Motivos de Parada
296
Consultar os Dados Do Inversor
297
Realizar um Reset para O Estado de Fábrica
297
Realizar um Teste de Ventilação
297
Realizar O Autotest
298
Alterar O Idioma Do Visor
298
Alterar a Data E Hora
298
Realizar Uma Eliminação Parcial Dos Dados Acumulados
298
Bloquear a Tela Do Inversor
298
11 Primeira Conexão Com a Rede
299
Revisão Do Equipamento
299
Inspeção
299
Fechamento Hermético Do Equipamento
299
Processo para a Primeira Conexão Com a Rede
299
12 Atualização de Firmware
301
13 Comunicação por USB
302
Processo de Conexão
302
14 Desligamento Do Equipamento
304
Processo de Desconexão Do Equipamento
304
15 Manutenção Preventiva
305
Condições de Segurança
305
Estado Do Invólucro
305
Estado Dos Cabos E Dos Terminais
305
Sistema de Refrigeração
305
Ambiente
305
16 Resolução de Problemas
306
Alarmes. Indicações Dos LED
306
17 Tratamento de Resíduos
308
Werbung
Werbung
Verwandte Produkte
Ingeteam INGECON SUN 1Play 4.6HF
Ingeteam INGECON SUN 1Play 2.5HF
Ingeteam INGECON SUN 1Play 3HF
Ingeteam INGECON SUN 1Play 3.68HF
Ingeteam INGECON SUN 1Play 5HF
Ingeteam INGECON SUN 1Play 6HF
Ingeteam INGECON SUN 1Play HF series
Ingeteam INGECON SUN 1Play 2.5TL M
Ingeteam INGECON SUN 1Play 2.7TL M
Ingeteam INGECON SUN 1Play 5TL M
Ingeteam Kategorien
Wechselrichter
Medienkonverter
Ladegeräte für Autobatterien
Schalttafel
Solaranlage
Weitere Ingeteam Anleitungen
Anmelden
Anmelden
ODER
Mit Facebook anmelden
Mit Google anmelden
Anleitung hochladen
Von PC hochladen
Von URL hochladen