Inhaltsverzeichnis
Werbung
Verfügbare Sprachen
Verfügbare Sprachen
Quicklinks
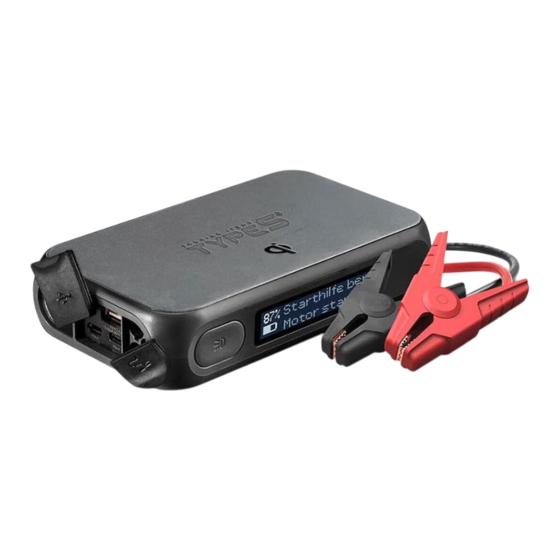
Wir gratulieren Dir zu Deinem StartYa 8Qi Gen2
Der StartYa 8Qi der 2. Generation mit seinen diversen Funktionen und Möglichkeiten
wird Dein idealer Begleiter auf all Deinen Touren mit viel Power für Dein Handy, Tablet,
Laptop und natürlich Auto.
Seit über 20 Jahren arbeiten wir bei TYPE S daran, Dir mit unseren Innovationen in
Deinem automobilen Alltag und in Deiner Freizeit mehr Sicherheit und Komfort zu
geben.
Diese kleine Anleitung wird Dir dabei helfen, Deinen StartYa 8Qi Gen2 optimal zu
nutzen.
Bei Fragen wende Dich jederzeit gerne an uns unter www.typeSauto.de
Wir laden Dich auch ein, uns auf Facebook, Instagram und Youtube zu besuchen:
TYPE S Deutschland
Vielen Dank, dass Du uns Dein Vertrauen schenkst.
Powerbank mit
kabelloser Lade-
funktion
1
Aufbewahrungstasche
USB Kabel mit
Starthilfekabel
Micro USB
DE
Anleitung
Startya 8Qi
Startya 8Qi
Schnellstart Anleitung
Quick Start Manual
Schnellstart Anleitung
Quick Start Manual
Werbung
Inhaltsverzeichnis

Verwandte Anleitungen für TypeS StartYa 8Qi Gen2


Inhaltszusammenfassung für TypeS StartYa 8Qi Gen2
- Seite 1 Seit über 20 Jahren arbeiten wir bei TYPE S daran, Dir mit unseren Innovationen in Deinem automobilen Alltag und in Deiner Freizeit mehr Sicherheit und Komfort zu geben. Diese kleine Anleitung wird Dir dabei helfen, Deinen StartYa 8Qi Gen2 optimal zu nutzen. Bei Fragen wende Dich jederzeit gerne an uns unter www.typeSauto.de...
- Seite 2 Technische Spezi kationen Produktabmessungen 151 × 84 × 32 mm (5.94 × 3.3 × 1.26 in) Produktgewicht 434g (0.96 lbs) Akku Lithium-Ion Kapazität Bis zu 8000mAh (3.7V) Wattstunden 29.6 Wh Eingang (Micro USB / USB-C) 5V 2A USB-A Ausgang 5V 2.4A USB-C Ausgang 9V 2A / 5V 2.6A Qi induktive Ladeleistung...
-
Seite 3: Funktionen Im Überblick
Funktionen im Überblick 1.USB-A Ausgang 2. LED Licht: Taschenlampe, Stroboskop und SOS Blinken 3. Micro-USB Eingang 4. USB-C Ausgang & Eingang 5. Starthilfekabel Eingang 6. Verpolungsschutz 7. Modustaste für das Einschalten, LED Licht & Sprachauswahl 8. LCD Anzeige 9. Batteriestand in % 10. -
Seite 4: Überprüfung Ladestatus
Lieferumfang StartYa 8Qi Gen2 Powerbank mit USB Kabel mit Anleitung Aufbewahrungstasche Starthilfekabel kabelloser Lade- Micro USB funktion Startya 8Qi Startya 8Qi Schnellstart Anleitung Quick Start Manual Schnellstart Anleitung Quick Start Manual Überprüfung Ladestatus Drücke die Modustaste, um den Ladestand Deines StartYa zu überprüfen. - Seite 5 Au aden StartYa 1. Schließe das mitgelieferte Micro-USB-Ladekabel an einen USB-A-Anschluss eines Computers oder ein 2A-USB-Netzteil (nicht im Lieferumfang enthalten). 2. Schließe das Micro-USB-Ladekabel an den Micro-USB-Ladeeingang vom StartYa an. 3. Trenne das Ladekabel vom StartYa, wenn er vollständig geladen ist. Bewahre den StartYa an einem sicheren Ort wie der Aufbewahrungstasche auf, wenn er nicht verwendet wird.
- Seite 6 Au aden mit dem StartYa Wir empfehlen die Verwendung des original Ladekabels, das mit Deinem Mobilgerät geliefert wurde, oder eines vom Hersteller zerti zierten Kabels. Du kannst mit dem USB-A- und USB-C-Ausgang gleichzeitig zwei Mobilgeräte au aden. Um den Ladevorgang zu starten, drücke einmal die Modustaste.
-
Seite 7: Starthilfe Geben
Starthilfe geben WICHTIGE HINWEISE VORAB Schalthebel im Leerlauf (Handschalter) / Neutral, alternativ Park (Automatik). Parkbremse anziehen. Innenraumbeleuchtung, Scheinwerfer, Lüftung etc. ausschalten Die Klemmen sind farbcodiert: ROT für POSITIV (+) und SCHWARZ für NEGATIV (-). Niemals die rote (+) und schwarze (-) Klemme miteinander verbinden. Nicht über die Autobatterie beugen beim Verbinden der Klemmen mit den Polen. - Seite 8 SCHWARZ Drücke die Modustaste zum Einschalten des StartYa; stelle sicher, dass der Ladestand über 50% liegt. Stecke das GRAUE Ende des Steckers vom Starthilfekabel in den StartYa Eingang. Das LCD Display zeigt Dir nun den nächsten Schritt: das Anklemmen an die Pole. ROTE Schließe erst die Klemme an den POSITIVEN (+) Pol an.
- Seite 9 Überprüfe den LED-Status am Stecker des Starthilfekabels. Fahre mit dem nächsten Schritt fort, außer die LED blinkt und aus dem Stecker piept es. In diesem Fall sieh in der Tabelle weiter hinten nach, was das bedeutet. Wenn die Klemmen ordnungsgemäß an den Polen angeschlossen sind, zeigt das LCD-Display dies an.
- Seite 10 Es hat nicht geklappt? Hier stellen wir Dir häu ge Probleme und mögliche Lösungen vor. • Ladestand vom StartYa unter 50%? Bitte lade ihn auf. • Dein Motor bewegt sich beim Starthilfeversuch etwas, startet jedoch nicht: Positioniere die Klemmen des Starthilfekabels anders an den Polen. Warte 60 Sekunden vorm nächsten Startversuch.
- Seite 11 Bedeutung: Rotes Grünes Licht Licht Bereit zur Starthilfe StartYa au aden Spannung der Autobatterie höher als vom StartYa. Trotzdem bereit zur Starthilfe. Piepen Starthilfekabel von den Polen und vom StartYa trennen. Zuviel Zeit ohne Startversuch vergangen: Bitte trenne das Starthilfekabel von den Kein Polen und vom StartYa.
-
Seite 12: Sprachauswahl
Sprachauswahl Funktion Aktion Schalte die Drücke die Modustaste Starthilfe an Halte die Modustaste 5 Sekunden lang gedrückt bis das Wort "Englisch" auf dem LCD-Bildschirm angezeigt wird. Dann drücke die Taste so oft, bis Sprache wechseln Deine bevorzugte Sprache erscheint. 10 Sekunden warten, dann ist der Sprachwechsel abgeschlossen LED Licht Taschenlampe... - Seite 13 Hinweise & Warnungen Wir gehen davon aus, dass Du Deinen StartYa mit Sorgfalt und Vorsicht behandelst, um Dich und Deine Umwelt nicht in Gefahr zu bringen: Trage zum Schutz Deiner Augen immer eine Schutzbrille und zum Schutz Deiner Hände Handschuhe, wenn Du Starthilfe gibst.
- Seite 14 Im Extremfall können Lithium Zellen undicht werden und Flüssigkeit austreten. Diese Flüssigkeit kann Sach- und Personenschäden verursachen, daher bitte vorsichtig mit einem Tuch abwischen und das Gerät danach vorschriftsmäßig entsorgen. Unbedingt Haut- und Augenkontakt vermeiden. Sollte es dennoch zu Haut- oder Augenkontakt kommen, die Flüssigkeit sofort mit viel Wasser abspülen. Danach nimm bitte jedenfalls unverzüglich ärztliche Betreuung in Anspruch Der StartYa ist nur für die Starthilfe von 12V Bordnetz Autos, Lastwagen, Boote oder Motorräder mit Verbrennungsmotor und einem Säure-Batteriesystem geeignet.
- Seite 15 Congratulations on your StartYa 8Qi Gen2 The StartYa 8Qi of the 2nd Generation with its many helpful functions is designed to become your daily companion, providing energy for your mobile phone, tablet, laptop and of course vehicle. For more than 20 years our innovative solutions have aimed to increase your safety, comfort, and peace of mind during your daily life as well as recreation time spent in your ride.
-
Seite 16: Technical Speci Cations
Technical speci cations Product Dimensions: 5.94 × 3.3 × 1.26 in (151 × 84 × 32 mm) Product Weight: 0.96 lbs (434g) Internal Battery: Lithium-Ion Capacity: Up to 8000mAh (3.7V) Watt Hours: 29.6 Wh Input (Micro USB / USB-C): 5V 2A USB-A Output: 5V 2.4A USB-C Output:... -
Seite 17: Feature Overview
Feature overview 1.USB-A Output 2.LED Flashlight, Strobe & Hazard Modes 3.Micro USB Charge Input 4.USB-C Output / Input 5.Jumper Cables Port 6.Safe & Smart Polarity & Overcharge Protection 7.Mode Button: Power, LED & Language Selection 8.LCD Display 9.Battery Level 10.Wireless Charging Pad 11.Jumper Cables 12.Negative Clamp (Black) 13.Positive Clamp (Red) -
Seite 18: Package Contents
Package contents Jump Starter Storage Case Safe & Smart USB Cable with User Manual Power Bank Jumper Cables Micro USB Startya 8Qi Startya 8Qi Schnellstart Anleitung Quick Start Manual Schnellstart Anleitung Quick Start Manual Checking the power level Press the Mode Button to check the capacity of the Jump Starter. When charging, the battery indicator will glow. - Seite 19 Charging the Jump Starter At home: 1. Plug included Micro USB Charging Cable into a USB-A port on 2A USB wall adapter (not included). 2. Connect the Micro USB Charging Cable into the Micro USB Charge Input Port on the Jump Starter. 3.
- Seite 20 Charging your mobile devices We recommend using the original charging cable that came with your mobile device, or an approved cable certi ed by the mobile device manufacturer. Two mobile devices can be charged at the same time by utilizing both the USB-A and USB-C Output ports. To begin charging, press the Mode Button once.
-
Seite 21: Jump Starting
Jump starting BEFORE YOU JUMP START! Before you attempt to jump start your vehicle, ensure your vehicle is in Park. Ensure manual transmission vehicles are in Neutral with the Emergency Brake engaged. The Cable Clamps are color-coded, RED for POSITIVE (+) and BLACK for NEGATIVE (-). - Seite 22 Jump starting Black Press the Mode Button to power on the Jump Starter; ensure the power level is 50% or higher. GRAY Insert the end of the Jumper Cables into the Jumper Cables Port. The LCD Display will read: Clamp cables to battery.
- Seite 23 Check the LED status on the Polarity Circuit Protection Box. Proceed to the next step unless the LED is ashing and BEEPING. Reference Polarity Protection Circuit Status chart in the next section. Once the clamps are properly connected to the vehicle battery, the LCD Display will read: Ready, Start vehicle ignition.
- Seite 24 Disconnect the cables from your vehicle within 30 seconds. First remove the BLACK/NEGATIVE (-) clamp and then the RED/POSITIVE (+) clamp. Do not allow the metal ends of the jumper cable clamps to touch each other, or the clamp to GRAY touch anything metal on the car.
- Seite 25 Polarity Protection Circuit Status Status Meaning Red Light Green Light Sound None The car battery is ready for jump start. None The Jump Starter needs to be charged. None The car battery is ready for jump start. If the indicator doesn’t turn solid Green, the car battery voltage is higher than the jump starter.
-
Seite 26: Language Selection
Language Selection Function Action Remarks Turn on the jump Press the Mode Button starter Switch language to Press and hold the Mode LED light remains on from 3s till 5s, English Button for 5 seconds until the light turned off when the word “English” word “English”... - Seite 27 Warning We trust you will treat your StartYa with care and caution to prevent harm to you and your environment: • Use only according to instructions in this manual to avoid injuries or material damage. • Do not disassemble or try to repair the device and its accessories. •...
- Seite 28 • Under abusive conditions, Lithium-Ion cells may leak and liquid could be ejected from the battery. This liquid could cause personal injury or material damage. Please wipe carefully with a cloth avoiding skin contact and then dispose of the device. If skin or eye contact occurs, immediately ush with water and seek medical help.
- Seite 29 Do not use this device to jump start batteries outside of these four types of vehicles; doing so may cause a re or other serious injuries. Refer to the user manual for additional safety information.