Inhaltsverzeichnis
Werbung
Verfügbare Sprachen
Verfügbare Sprachen
Quicklinks
Werbung
Inhaltsverzeichnis
Fehlerbehebung

Verwandte Anleitungen für Gelhard GTV2224


Inhaltszusammenfassung für Gelhard GTV2224
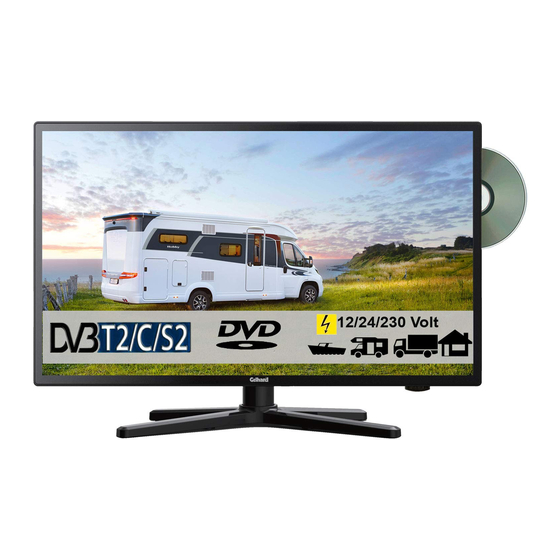
- Seite 1 22“ (55cm) TFT-LED-Fernseher mit DVB-T/T2HD, DVB-S/S2, DVB-C & CI+ SLOT Model Nr.: GTV2224 Lesen Sie sich die gesamte Anleitung des Fernsehers sorgfältig durch, bevor Sie das Gerät benutzen. Bewahren Sie die Anleitung für den weiteren Gebrauch gut auf.
-
Seite 2: Inhaltsverzeichnis
USB MEDIENWIEDERGABE ..............23 HOTEL MODUS ................... 24 TECHNISCHE DATEN USB ANSCHLUSS ..........26 EINFACHE PROBLEMBEHEBUNG ............27 DATENBLATT GTV2224 ................28 INFORMATIONEN ZUR LAGERUNG UND BETRIEB ......... 29 VEREINFACHTE EU- KONFORMITÄTSERKLÄRUNG ....... 29 GEWÄHRLEISTUNG ................... 30 ENTSORGUNGSHINWEISE ................ 31... -
Seite 3: Sicherheitsinformationen
SICHERHEITSINFORMATIONEN WICHTIGE SICHERHEITSHINWEISE – BITTE VOR DER BENUTZUNG SORGFÄLTIG LESEN. Beachten Sie die Sicherheitshinweise auf der Rückseite des Fernsehers. Warnung zur Vorbeugung vor Elektrischem Schock. Entfernen Sie keine Der Abdeckungen. Keine durch den Benutzer wartbaren Teile im Gerät. Lassen Sie das Gerät durch Qualifiziertes Fachpersonal warten. - Seite 4 Das Gerät darf nur an eine Stromversorgung angeschlossen werden, die der Stromversorgung entspricht, die auf dem Typenschild, das sich auf der Rückseite des Gerätes befindet, angegeben ist. Verbinden Sie das Gerät niemals mit irgendeiner anderen Art der Stromversorgung. Die Netzsteckdose sollte sich in der Nähe des Gerätes befinden und muss einfach zu erreichen sein.
- Seite 5 Säubern Sie das Gerät mit einem, weichen Tuch. Benutzen Sie niemals Lösungsmittel oder Flüssigkeiten auf Öl Basic. Für hartnäckige Flecken können Sie einen feuchten Lappen mit verdünntem Reinigungsmittel verwenden. Für das laden der gezeigten Internet Inhalte ist die Firma TV Grawe Service GmbH nicht verantwortlich.
-
Seite 6: Anschlüsse
ANSCHLÜSSE Geräte- Rückseite Anschlüsse Rückseite: Eingang für die 12V / 24VSpannungsversorgung. COAX: Digitaler Audio Ausgang. Video Ausgang (Cinch / nur in Kombination mit Audio Ausgang). L / R: Audio Ausgang (Cinch / nur in Kombination mit Video Ausgang). Earphone: Kopfhörer Ausgang (3,5mm). TV1 (T2HD /C): Terrestrischer- / Kabel Eingang. - Seite 7 Fernbedienungsempfänger (Bitte freihalten) Bedienfeld (Rückseite): VOL +: Lauter (Menü: Recht). VOL -: Leiser (Menü: Links). CH +: Nächstes Programm (Menü: Hoch). CH -: Vorheriges Programm (Menü: Runter). INPUT: Öffnet Eingangsquellen. (Menü: OK). MENÜ: OSD Menü Öffnen / Schließen. POWER: Gerät An / Aus (Standby)
-
Seite 8: Fernbedienung
FERNBEDIENUNG Die Fernbedienung benutzt Infrarotwellen (IR). Halten Sie die Fernbedienung in die Richtung der Vorderseite des LED- Fernsehers. Befindet sich die Fernbedienung außerhalb der Reichweite bzw. des Winkels, kann es vorkommen, dass die Fernbedienung nicht ordnungsgemäß arbeitet. Power: Ein / Aus (Standby)- Schalten. ... -
Seite 9: Navigationstasten
FERNBEDIENUNG DISP: Zeigt Sendungsinformationen an. INPUT: Eingangsquellen anzeigen. NAVIGATIONSTASTEN: ▲ HOCH ▼ RUNTER ◄ LINKS ► RECHTS OK: Menüpunkt bestätigen / Senderliste öffnen MENÜ: Menü Einstellungen öffnen. EXIT: Menü Einstellungen schließen VOL (+ / -): Lauter / Leiser ... -
Seite 10: Common Interface / Ci - Steckplatz
COMMON INTERFACE / CI - STECKPLATZ Dieser Fernseher ist mit einem CI+ Steckplatz ausgestattet und unterstützt folgende digitale Standards: DVB-T/T2HD, DVB-S/S2 und DVB-C Common Interface / Steckplatz Der CI-Steckplatz (CI+) wurde entworfen, um Conditional-Access-Module (CAM) und Smart Cards anzunehmen und damit auf den Pay- TV und andere Dienste zugreifen zu können. Kontaktieren Sie Ihren Pay- TV Dienstleister, um mehr Informationen über Module und Abonnements zu erhalten. -
Seite 11: Tv Einschalten / Ausschalten
TV EINSCHALTEN / AUSSCHALTEN Vergewissern Sie sich das das Netzkabel gesteckt ist und der Kippschalter betätigt ist. Schalten Sie das Gerät über die [POWER] Taste am Gerät oder der Fernbedienung ein. Hinweis: Das Gerät besitzt einen Kippschalter mit dem das Gerät stromlos geschaltet werden kann. ALLGEMEINE BEDIENUNG 1. -
Seite 12: Land Oder Region
Land oder Region Wählen Sie das gewünschte Land aus. 1. Mit den Tasten [▲▼] navigieren Sie in dem Menü und wählen die gewünschte Zeitzone aus. 2. Mit der Taste [►] gelangen Sie zum nächsten Menüpunkt „Zeitzone“. 3. Mit der Taste [◄] gelangen Sie zum vorherigen Menüpunkt „Sprache“. Zeitzone Wählen die Zeitzone aus. -
Seite 13: Eingangsquelle Wählen
Herzlich willkommen Wählen Sie aus ob Sie als nächstes in die Smart TV Oberfläche oder den TV Bereich wechseln wollen. 1. Drücken Sie die Tasten [▲▼◄►] um in dem Menü zu navigieren. 2. Mit der Taste [OK] wählen Sie die gewünschten Menüpunkt aus. 3. -
Seite 14: Automatischer Sendersuchlauf
Automatischer Sendersuchlauf: 1. Wählen Sie einen Satelliten (z.B. Astra 19.2E) aus. Drücken Sie die Taste [OK], um den Satelliten zu markieren. 2. Drücken Sie die Taste [MENU] und wählen Sie „Scan“ aus. 3. Wählen Sie nun den „Suchmodus“, die „Kanalart“ und die „Programm Art“ aus. 4. -
Seite 15: Funktion
FUNKTION: Mit der Taste [MENU] öffnen Sie das Funktions- Menü für folgende Optionen: Löschen: Löschen Sie einen Markierten Satelliten / Transponder. Bearbeiten: Bearbeiten Sie einen Markierten Satelliten / Transponder. Hinzufügen: Erstellen Sie einen neuen Satelliten / Transponder. ... -
Seite 16: Dvb-C Modus
DVB-C MODUS Drücken Sie die Taste [INPUT] und wählen Sie die Eingangsquelle „DVB-C“ aus, um in den DVB-C Modus zu wechseln. Haben Sie das erste Mal den DVB-T Modus ausgewählt stehen folgende Einstellungen zu Auswahl: Land oder Region: Wählen Sie das Land oder die Region aus. ... -
Seite 17: Menü
MENÜ 1. Drücken Sie die Menü Taste um Zugriff auf die Menüeinstellungen zu erhalten. 2. Mit den Tasten [▲▼◄►] navigieren Sie in dem Menü 3. In dem Menü haben Sie Zugriff auf diverse Einstellungsmöglichkeiten. 4. Das Menü unterteilt sich in drei folgende Menü spalten Kanal Menü... -
Seite 18: Untertitelsprache
Timeshift Einstellungen: Aus / Ein Aufnahme starten / beenden: Startet / beendet eine Aufnahme. Timer Liste: Öffnet die Timer Liste. Aufnahmeliste: Öffnet die Aufnahmeliste. Untertitel Sprache: Wählen Sie die Untertitel Sprache aus. Die Auswahl hängt vom Sender ab. Multi Audio: Wählen Sie die Audio Sprache aus. -
Seite 19: Konfiguration
DNR: Mittel / Hoch / Aus Seitenverhältnis: 16:9 / 4:3 / Zoom 1 / Zoom 2 / Panorama / Auto Ton: Passen Sie die Toneinstellungen an Ihre Vorlieben an. Die Folgenden Einstellungsmöglichkeiten stehen zur Auswahl: Klangmodus: Standard / Kino / Musik / Persönlich ... -
Seite 20: Hdmi Einstellungen
Standardeinstellungen: Stellt die Standardeinstellungen wieder her. Gerät startet anschließend neu. HDMI Einstellungen: In diesem Menü stellen Sie die HDMI Einstellungen ein. HDMI CEC Einstellungen: Aus / Ein Ausschaltautomatik: Aus / Ein (Schaltet kompatible Geräte beim Ausschalten mit „aus“). -
Seite 21: Netzwerkeinstellung
Netzwerkeinstellung: LAN (Kabel): Führen Sie eine Manuelle Einrichtung der LAN Verbindung aus. WLAN (Drahtlos): Schalten Sie die WLAN Funktion „Ein“ oder „Aus“. WLAN (Ein/Aus): Stellen Sie die „IP“, den „Gateway“ und die „DNS“ manuelle Manuelle Einstellung: ein. Netzwerk Hinzufügen: Suchen Sie Spezifisch nach nicht sichtbaren Netzwerken. -
Seite 22: Systeminfo
Konfiguration: Spracheinstellungen: Stellen Sie die Menüsprache für den Smart TV Modus und den TV Modus ein. Eingabe Methode: Ändern Sie die Eingeblendete Tastatur. Nur wenn andere Designs verfügbar. Wallpaper verwalten: Stellen Sie die Hintergrundgrafik des Smart TV Home Bildschirms ein. Anwendung verwalten: In diesem Menü... -
Seite 23: Smartphone Display Spiegeln
SMARTPHONE DISPLAY SPIEGELN Sie können Ihr Smart Phone Display auf das TV Display Spiegeln. Folgenden Sie dazu den Anweisungen. Android: 1. Starten Sie am TV die Vorinstallierte APP „Bildschirmspiegelung“. 2. Aktivieren Sie an Ihrem Smartphone die Display Spiegelungsfunktion. 3. Wählen Sie das TV Gerät aus der Geräteliste aus. 4. -
Seite 24: Hotel Modus
Bedienung Medienwiedergabe: Wiedergabe / Pause: Vorheriges Kapitel: Stopp: USB Untertitel: [SUBTITLE] Schneller Vorlauf: Bedienleiste: [DISP] Schneller Rücklauf: Media Player Verlassen: [EXIT] Nächstes Kapitel: HOTEL MODUS Im Hotelmodus können Sie diverse Einstellungen vornehmen um die Gerätefunktion zu beschränken oder fest einzustellen. 1. -
Seite 25: Einstellung Exportieren
Start Kanal: Wählen Sie den Sender bzw. Programmnummer aus mit dem das Gerät starten soll. Die Funktion ist nur verfügbar, wenn bei „Startquelle“ ATV, DVB-S / T / C ausgewählt wurde. Max. Lautstärke: Stellen Sie den Wert für die Maximale Lautstärke ein. Haben Sie einen Wert ausgewählt kann das Gerät im Betrieb nicht lauter als dieser Wert gestellt werden. -
Seite 26: Pin Ändern
PIN ändern: Wählen Sie den Menüpunkt um den Standard-Pin „0000“ zu ändern. 1. Betätigen Sie den Menüpunkt mit der [OK] Taste und geben Sie das neue Passwort ein. Solange Sie das neue Passwort noch nicht eingeben wurde wird dieses als Platzhalter angezeigt. 2. -
Seite 27: Einfache Problembehebung
EINFACHE PROBLEMBEHEBUNG Wenn der Bildschirm ausfällt, oder die Leistung stark nachlässt, überprüfen Sie den Bildschirm unter der Berücksichtigung folgender Anweisungen: Überprüfen Sie außerdem angeschlossene Geräte, um die Fehlerquelle auszumachen. Wenn der Bildschirm trotzdem nicht wie erwartet funktioniert, kontaktieren Sie den Kundensupport. Kein Strom Überprüfen Sie die Anschlüsse am TV und an den externen Geräten. -
Seite 28: Datenblatt Gtv2224
DATENBLATT GTV2224 Gerätetyp GTV2224 Hersteller Gelhard Energieeffizienzklasse (Standard SD) Leistungsaufnahme „Ein“ (Standard SD) Leistungsaufnahme „Aus“ Leistungsaufnahme „Standby“ 0,4W Leistungsaufnahme im „vernetzten Standby“ Modus 0,5W Art des elektrischen Displays / Panel Technologie TV / LCD/LED (Pixel Class 1) Seitenverhältnis 16:9 Bildschirmauflösung (Pixel) -
Seite 29: Informationen Zur Lagerung Und Betrieb
-10°C bis +60°C Nutzungstemperatur 0°C bis 40°C VEREINFACHTE EU- KONFORMITÄTSERKLÄRUNG Hiermit erklärt die TV Grawe Service GmbH, dass der Funkanlagentyp GTV2224 der Richtlinie 2014/53/EU entspricht. Der vollständige Text der EU Konformitätserklärung ist unter der folgenden Internetadresse verfügbar. http://www.tv-grawe.com/CE-Konformitaetserklaerung:_:10000.html Wir wünschen Ihnen viel Freude mit dem Gerät. -
Seite 30: Gewährleistung
GEWÄHRLEISTUNG Sehr geehrte Kundin, sehr geehrter Kunde, vielen Dank, dass Sie sich für eines unserer Produkte entschieden haben. Unsere Produkte unterlaufen im Zuge der Produktion eine genaue Endkontrolle. Sollte eines unserer Geräte Ihnen dennoch Anlass zur Reklamation geben oder Sie haben Fragen zu einem unserer Geräte, rufen Sie gerne unseren kostenfreien Kunden Support an. -
Seite 31: Entsorgungshinweise
ENTSORGUNGSHINWEISE Elektronische und elektrische Geräte sowie Batterien enthalten Materialien, Komponenten und Substanzen, welche für Sie und Ihre Umwelt schädlich sein können, sofern die Abfallmaterialien (entsorgte und elektronische Altgeräte sowie Batterien) nicht korrekt gehandhabt werden. Elektrische und elektronische Geräte sowie Batterien sind mit der durchgestrichenen Mülltonne, wie abgebildet, kenntlich gemacht. - Seite 32 User Manual 22“ (55cm) TFT-LED-TV with DVB-T/T2HD, DVB-S/S2, DVB-C & CI+ SLOT Model Nr.: GTV2224 Read the entire instructions for the TV carefully before using the device. Keep the manual for further use.
-
Seite 33: Important Safety Instructions
SAFETY INSTRUCTIONS IMPORTANT SAFETY INSTRUCTIONS - PLEASE READ CAREFULLY BEFORE USE. Follow the safety instructions on the back of the TV. Warning to Prevent Electric Shock. Do not remove the covers. No user- serviceable parts in the device. Have the device serviced by qualified personnel. - Seite 34 SAFETY INSTRUCTIONS The mains plug or device plug is used to disconnect the device from the mains and should be easily accessible at any time. The device may only be connected to a power supply that corresponds to the power supply specified on the rating plate located on the back of the device.
- Seite 35 Headphone Warning Loud music listening can lead to permanent hearing loss. Therefore, do not set too loud a volume level when listening to music with headphones, especially when listening to music for a long time. About the installation site Place the TV in a location away from direct sunlight or strong light sources. For a comfortable look, soft, indirect light is recommended.
- Seite 36 CONNECTIONS Rear view of the device Rear connections: Input for the 12V / 24V power supply. COAX: Digital audio output. Video output (Cinch / only in combination with audio output). L / R: Audio output (Cinch / only in combination with video output) Earphone: Headphone output (3,5mm).
-
Seite 37: Remote Control
REMOTE CONTROL The remote uses infrared (IR). Hold the remote control in the direction of the front of the LED TV. If the remote control is out of reach or angle, the remote control may not operate properly. Power: On / Off- switching ... -
Seite 38: Navigation Keys
REMOTE CONTROL DISP: Displays display information INPUT: Open input sources NAVIGATION KEYS: ▲ UP ▼ DOWN ◄ LEFT ► RIGHT OK: Confirm menu entries MENÜ: Open the Settings menu. EXIT: Close the Settings menu ... -
Seite 39: Common Interface / Ci - Slot
COMMON INTERFACE / CI - SLOT This TV is equipped with a CI + slot and supports the following digital standards: DVB-T / T2HD, DVB-S / S2 and DVB-C Common Interface / Slot The CI slot (CI +) is designed to accept conditional access modules (CAM) and smart cards to access pay-TV and other services. -
Seite 40: General Operation
TURN TV ON / OFF Make sure that the power cord is plugged in and the toggle switch is activated. Switch on the device using the [POWER] button on the device or the remote control. Note: The device has a toggle switch with which the device can be completely de-energized. GENERAL OPERATION 1. - Seite 41 Time zone Select the time zone. 1. Use the [▲ ▼] buttons to navigate in the menu and select the desired time zone. Use the [►] button to go to the next menu item "Network". 3. Use the [◄] key to go to the previous menu item "Country or Region". Network In order to be able to access the SMART TV content after the initial installation, it is necessary to connect the device to the Internet via WLAN or LAN.
-
Seite 42: Automatic Station Search
CHOOSE IMPUT SOURCE In the Input Source menu, you can select the various inputs and connections of the Smart TV. 1. Use the [INPUT] key to open the reception source menu. 2. Use the [▲ ▼] buttons to select the desired source. 3. -
Seite 43: Manual Station Search
Manual station search: 1. Navigate to a satellite and then press the [►] button to access the transponder list. 2. Select a transponder on which the station search is to be carried out. 3. Press the [MENU] button and select “SCAN”. 4. -
Seite 44: Auto Tuning
DVB-T/T2HD MODE Press the [INPUT] button and select the input source "DVB-T" to switch to DVB-T mode. If you have selected the DVB-T mode for the first time, the following settings are available: Country or Region: Select the country or region. ... -
Seite 45: Digital Auto Tuning
Digital Auto Tuning: 1. Select "Digital Auto Tuning”. 2. Navigate to "OK" to start the search or to "Cancel" not to start the search. 3. Once you have confirmed the search, you have the following setting options: Search mode: Quick Scan / Full Scan ... - Seite 46 Channel Edit: Edit and customize the channel list according to your preferences. Red: Deletes the selected channel. Green: Skip "On" / "Off" Selected station to Mark skip. Yellow: Move the selected channel. Press again to enter a program number.
- Seite 47 Primary Audio: Set the primary audio. Secondary Audio: Set the primary audio. On / Off (settings for active DVB-T antennas). USB Import Channel List: Import the channel list onto a USB stick. USB Export Channel List: Export the channel list to a USB stick.
-
Seite 48: System Lock
System lock: 1. Enter the standard password to access the “System lock” menu item. 2. The following menu items are available in the menu: System lock: Off / On Source Lock: Lock input sources (only available if system lock "On"). ... -
Seite 49: Network Setting
SMART TV In Smart TV mode you have access to various APPs and internet functions. Press the [ HOME] button on the remote control to switch to the Smart TV area. Home screen: 1. Press the [HOME] button on the remote control to switch to Smart TV mode. 2. - Seite 50 Set time: Set the time manually. The menu item is only active if the menu item “Autom. Date / Time Setting ”is set to“ Off ”. Set date: Set the date manually. The menu item is only active if the menu item “Autom. Date / Time Setting ”is set to“...
- Seite 51 About TV The menu item "Systeminfo" provides information about the installed hardware: CPU: Shows the name of the CPU. GPU: Displays the name of the GPU. RAM: Shows the installed RAM. ROM: Displays the maximum installed memory. ...
-
Seite 52: Usb Playback
USB PLAYBACK 1. Press the [ HOME] button to go to the "SMART TV interface". 2. Navigate to the “My Applications” category and select “Media Player” 3. You can play “Photos”, “Music” and “Videos” with the media player. 4. Choose between “Photos” / “Music” / “Video”. 5. - Seite 53 Lock Menu key: On / Off Activate the menu item to lock the device menu. On: Device menu is locked. Off: Device menu is not locked. Keypad Lock: On / Off Activate the menu item to deactivate the control panel on the device On: Control panel is locked Off: Control panel is no longer locked.
-
Seite 54: Change Pin
Import Config: Select the menu item to import the settings exported by this device from a USB stick. 1. Insert the USB stick with the exported file into the USB socket and press the [OK] button. 2. Confirm the query with the [OK] button. 3. - Seite 55 SPECIFICATIONS USB INPUT USB output voltage: 5V / 500mA / Smartphones and devices that need to be installed are not detected. USB Stick: max. 1TB External hard drive (HDD): max. 1TB Formatting: FAT and NTSF Supported USB formats: Codec Media Format Anmerkung Video...
-
Seite 56: Easy Troubleshooting
EASY TROUBLESHOOTING If the screen goes down or the power goes down greatly, check the screen according to the following instructions: Also, check connected equipment to identify the source of the problem. If the screen still does not work as expected, contact Customer Support. No electricity Check the connections on the TV and on the external devices. - Seite 57 TECHNICAL GTV2224 Model GTV2224 Manufacture Gelhard Energy efficiency (default SD) Power consumption „On“ (default SD) Power consumption „Off“ Power consumption „Standby“ 0,4W Power consumption in “networked standby” mode 0,5W Type of electrical display / panel technology TV / LCD/LED (Pixel Class 1)
-
Seite 58: Simplified Eu Declaration Of Conformity
0°C to +40°C SIMPLIFIED EU DECLARATION OF CONFORMITY Hereby the TV Grawe Service GmbH declares that the radio equipment type GTV2224 Directive 2014/53 / EU. The full text of the EU Declaration of Conformity is available at the following Internet address. - Seite 59 WARRANTY Dear Customer, Thank you for choosing one of our products. Our products undergo a thorough final inspection during production. Should one of our devices still give you a reason to complain or you have questions about one of our devices, please call our free customer support. On this device we give 24 months warranty from the date of purchase.
- Seite 60 DISPOSAL Electronic and electrical equipment as well as batteries contain materials, components and substances that may be detrimental to you and your environment if the waste materials (discarded and waste electronic equipment and batteries) are not handled correctly. Electrical and electronic equipment as well as batteries are marked with the crossed-out wheelie bin, as shown.