Werbung
Quicklinks
EN
Read the safety instructions before starting the installation.
DE
Lesen Sie die Sicherheitshinweise, bevor Sie mit der Installation beginnen.
FR
Lisez les instructions de sécurité avant de commencer l'installation.
EN
ACCESSORIES
1x Set
115x/1200/1700/2066/2011
Bracket/Halterung
4x
2066/2011
Bolt/Bolzen
4x
Pressure spring/Druckfeder/
Ressorts
4x
M4 Knurled nuts/Rändelmuttern/
Ècrous moletès
1x Set
4189
Bracket/Halterung
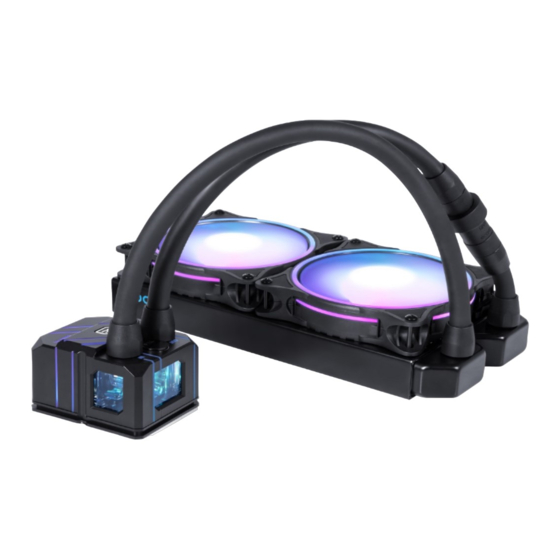
ALPHACOOL EISBAER PRO AURORA CPU AIO
ZUBEHÖR
1x Set
3647 Narrow
Bracket/Halterung
1x Set
3647 Square
Bracket/Halterung
4x
3647
Screws/Schrauben/Vis
4x
6,5mm Spacers/Abstandshalter/
L'entretoise
1x
Tool/Outil
DE
1x Set
TR4/SP3/sTRX4
Bracket/Halterung
4x
TR4/SP3/sTRX4
Bolt/Bolzen
4x
0,5mm Washer/Unterlegscheibe/
Rondelle
4x
4189 Knurled nuts/
Rändelmuttern/Ècrous moletès
4x
LGA 115x/1200/1700
Screws/Schrauben/Vis
!
!
!
FR
ACCESSOIRES
1x Set
AMD AM4/AM5
Bracket/Halterung
4x
AM4/AM5
Screws/Schrauben/Vis
4x
2mm Washer/Unterlegscheibe/
Rondelle
1x
Thermal paste/Wärmeleitpaste/
Composé thermique
1x
Backplate/Plaque arrière
Werbung

Verwandte Anleitungen für Alphacool EISBAER PRO AURORA CPU AIO


Inhaltszusammenfassung für Alphacool EISBAER PRO AURORA CPU AIO
- Seite 1 ALPHACOOL EISBAER PRO AURORA CPU AIO Read the safety instructions before starting the installation. Lesen Sie die Sicherheitshinweise, bevor Sie mit der Installation beginnen. Lisez les instructions de sécurité avant de commencer l‘installation. ACCESSORIES ZUBEHÖR ACCESSOIRES 1x Set 1x Set...
- Seite 2 2x 120mm Rise Aurora 1x 240x30mm Fan/Lüfter/Fan Radiator/Radiateur M3x5mm M3x30mm Aurora 240/280 CPU AIO Aurora 240/280 CPU AIO Aurora 240 CPU AIO Aurora 240 CPU AIO 2x 140mm Rise Aurora 1x 280x30mm Fan/Lüfter/Fan Radiator/Radiateur M3x5mm M3x30mm Aurora 280 CPU AIO Aurora 280 CPU AIO Aurora 360/420 CPU AIO Aurora 360/420 CPU AIO...
- Seite 3 SIZE IN MM MAßE IN MM MENSURE EN MM...
- Seite 4 INTEL LGA 115X/1200/1700/2011/2011-3/2066 INTEL LGA 3647 SQUARE INTEL LGA 3647 NARROW...
- Seite 5 AMD TR4/sTRX4/sWRX8/SP3 AMD AM4/AM5 INTEL 4189...
- Seite 6 CPU COOLER PREPARATION VORBEREITUNG CPU KÜHLER CPU RADIATEUR PRÈPARATION Remove the protective film from the radiator Entfernen Sie die Schutzfolie von dem Retirez le film de protection du fond du bottom. Kühlerboden. radiateur. FILLPORT FILLPORT PORT DE REMPLISSAGE The fillport can be used to refill the Eisbaer Der Fillport kann bei Bedarf zum Nachfüllen L'orifice de remplissage peut être utilisé...
- Seite 7 CPU PREPARATION VORBEREITUNG CPU CPU PRÈPARATION 1. / 2. After you have disassembled your old cooler, Nachdem Sie Ihren alten Kühler demontiert Une fois que vous avez démonté votre first clean the Hardware: haben, reinigen Sie zunächst die Hardware: ancienne refroidisseur, nettoyez d’abord le matériel: 1.
- Seite 8 SOCKET ASSEMBLY SOCKELMONTAGE INSTALLATION DU SOCLE Do not use tools, only tighten up hand-tight! Kein Werkzeug benutzen, nur handfest anziehen! Ne pas utiliser d’outils, ne serrez que la main! 4x M4 Knurled nuts/ Rändelmuttern/Ècrous moletès 4x Pressure spring/Druckfeder/ Ressorts 4x 2066/2011 Bolzen/Bolt 2011/2066 Screw the bolt into the base, place 2011/2066 Bolzen in den Sockel eindrehen.
- Seite 9 SOCKET ASSEMBLY SOCKELMONTAGE INSTALLATION DU SOCLE 4x 3647 Screws/Schrauben/Vis Place the cooler with the holder on the Socket. Den Kühler mit der Halterung auf den Sockel Placez le refroidisseur avec le support sur la setzen. Mit den 3647 Schrauben fixieren. .
- Seite 10 SOCKET ASSEMBLY SOCKELMONTAGE INSTALLATION DU SOCLE Do not use tools, only tighten up hand-tight! Kein Werkzeug benutzen, nur handfest anziehen! Ne pas utiliser d’outils, ne serrez que la main! 4x M4 Knurled nuts/ Rändelmuttern/Ècrous moletès 4x Pressure spring/Druckfeder/ Ressorts 4x TR4/sTRX4/sWRX8/ SP3 Bolzen/Bolt The TR4/sTRX4/sWRX8/SP3 Screw the bolt Die TR4/sTRX4/sWRX8/SP3 Bolzen in den...
- Seite 11 SOCKET ASSEMBLY SOCKELMONTAGE INSTALLATION DU SOCLE Do not use tools, only tighten up hand-tight! Kein Werkzeug benutzen, nur handfest anziehen! Ne pas utiliser d’outils, ne serrez que la main! 4x AM4 Screws/Schrauben/Vis 4x Pressure spring/Druckfeder/ Ressorts 4x 0,5mm Washer/ Unterlegscheibe/Rondelle 4x 2mm Washer/ Unterlegscheibe/Rondelle The AM4 screws are put through the springs,...
- Seite 12 SOCKET ASSEMBLY SOCKELMONTAGE INSTALLATION DU SOCLE 4x 4189 Knurled nuts/ Rändelmuttern/Ècrous moletès 4x 6,5mm Spachers/ Abstandshalter/l‘entretoise Place the spacers on the threaded bolts. Platzieren Sie die Abstandshalter auf die Placez les entretoises sur les boulons filetés. Place the cooler with the holder on the base. Gewindebolzen.
-
Seite 13: Installation Du Socle
SOCKET ASSEMBLY SOCKELMONTAGE INSTALLATION DU SOCLE Remove the protective film from the Entfernen Sie die Schutzfolie von der Retirez le film de protection de la plaque backplate. Backplate. arrière. INTEL LGA 115X/1200 Do not use tools, only tighten up hand-tight! Kein Werkzeug benutzen, nur handfest anziehen! Ne pas utiliser d’outils, ne serrez que la main! 4x LGA 115x/1200/1700... - Seite 14 INTEL LGA 1700 Do not use tools, only tighten up hand-tight! Kein Werkzeug benutzen, nur handfest anziehen! Ne pas utiliser d’outils, ne serrez que la main! 4x LGA 115x/1200/1700 Screws/Schrauben/Vis 4x Pressure spring/Druckfeder/ Ressorts 4x 2mm Washer/ Unterlegscheibe/Rondelle The backplate is fixed to the back of the Die Backplate wird mit den Klebestreifen auf La plaque arrière est fixée à...
- Seite 15 VENTILATEUR - RADIATEUR FAN - RADIATOR ASSEMBLY LÜFTER - RADIATOR MONTAGE MONTAGE Example / Beispiel / Exemple Fan: Pushing airflow Lüfter: drückender Luftstrom M3x5 Ventilateur: flux d’air pressant M3x30 Usually the radiator is mounted in the top or in Üblicherweise wird der Radiator im Deckel En général, le radiateur est monté...
- Seite 16 3-pin or 4-pin. Mainboard an. Entweder an einen 3-Pin oder mère, soit sur un 3-pin ou 4-pin. 4-Pin Anschluss. V.1.00-02.2022 Alphacool International GmbH Marienberger Str. 1 D-38122 Braunschweig Germany Support: +49 (0) 531 28874 - 0 Fax: +49 (0) 531 28874 - 22 E-Mail: info@alphacool.com...