Werbung
Quicklinks
Ripmax Ltd.
241 Green Street,
Enfield, EN3 7SJ
United Kingdom
Tel: +44 (0) 20 82827500
Email: mail@ripmax.com
Website: www.ripmax.com
This manual my be subject to errors, omissions
and technical changes.
Copyright Ripmax 2017
Copying or reproduction, even in parts require
written permission of Ripmax Ltd.
Ersatzteile sind für den Wot Trainer in allen Ripmax Modellfachgeschäften verfügbar. Sollten Sie
irgendwelche Schwierigkeiten mit Ihrem Produkt haben, oder den örtlichen Ripmax Fachhändler nicht
finden, dann schreiben Sie bitte an oben angegebene Adresse, oder besuchen Sie unsere Webseite unter
www.ripmax.de
Made in China
Manufactured for and distributed to your local model shop by: Ripmax Ltd., 241 Green Street, Enfield, EN3 7SJ. United Kingdom.
Ripmax GmbH
Futaba RC - Service
Stuttgarter Straße 20/22
75179 Pforzheim
Tel: +49(0)7231 46 94 10
Email: info@ripmax.de
Website: www.ripmax.de
Irrtum und technische Änderungen vorbehalten.
Copyright Ripmax 2017
Kopie und Nachdruck, auch auszugsweise, nur mit
schriftlicher Genehmigung der Ripmax Ltd.
A-CF001A
Werbung

Verwandte Anleitungen für Ripmax WOT trainer


Inhaltszusammenfassung für Ripmax WOT trainer
- Seite 1 Sie bitte an oben angegebene Adresse, oder besuchen Sie unsere Webseite unter www.ripmax.de Made in China Manufactured for and distributed to your local model shop by: Ripmax Ltd., 241 Green Street, Enfield, EN3 7SJ. United Kingdom. A-CF001A...
-
Seite 2: General Notices
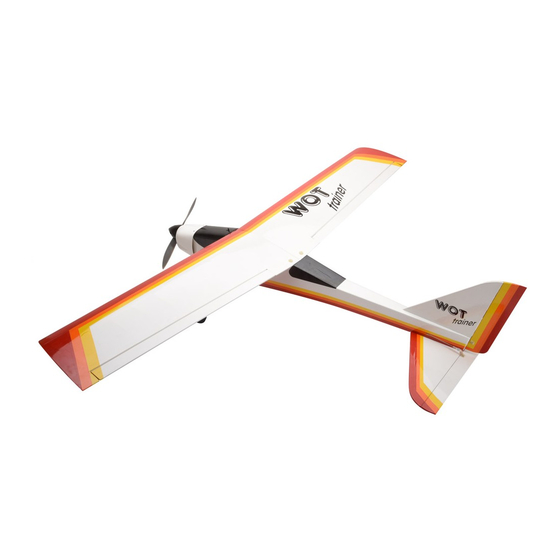
Teilen in Berührung kommen! Denken Sie level directly in line with other people/animals as this Ripmax shall not be liable for any loss, consequential loss, damage auch an Ihre Haustiere! Ripmax Produkte sind häufig nur ein Teil einer ganzen will increase the risk of injury. - Seite 3 The Designer / Der Designer Congratulations on your purchase of the Wot Trainer EP/GP ARTF! This Wot Trainer is suitable for both electric and I/C power depending on the optional power pack you choose. Take care to read these instructions through carefully before The fascination of flight captured you start your build to familiarise yourself with the build process.
- Seite 4 Wot Trainer Instructions | Wot Trainer Anleitung Wot Trainer Instructions | Wot Trainer Anleitung Stage 1 / Schritt 1 Stage 6 / Schritt 6 Prepare your aileron servo by fitting the rubber grommets Locate the aileron pushrods, plastic clevises and silicon and brass ferrules supplied with the servo.
- Seite 5 Flügels gerutscht ist, wie gezeigt. Stage 13 / Schritt 13 The Wot Trainer can be built as a tail dragger (Steps 18-19) or a trike (Steps 20-28). We recommend the trike layout for beginners due to its better ground handling.
- Seite 6 Wot Trainer Instructions | Wot Trainer Anleitung Wot Trainer Instructions | Wot Trainer Anleitung Stage 24 / Schritt 24 Installing the undercarriage in trike format Montage des Fahrwerk für die Dreibein Version Slide a nose leg mounting block into the short straight...
- Seite 7 Please note that if you are going Using this and the diagram (shown right) as a guide, position to fly the Wot Trainer electric the throttle servo is not required. the horn and drill the two mounting holes through the elevator.
- Seite 8 Wot Trainer Instructions | Wot Trainer Anleitung Wot Trainer Instructions | Wot Trainer Anleitung Stage 39 / Schritt 39 Stage 44 / Schritt 44 Now install the servo arm screw. Bolt the horn through the elevator into the retaining plate in other side.
- Seite 9 Wot Trainer Instructions | Wot Trainer Anleitung Stage 53 / Schritt 53 The Wot Trainer can be built for electric power (using steps 49-59) and the option EP installation pack, or I/C power (using steps 60-77) and the option I/C installation pack.
- Seite 10 Finden Sie das Gasgestänge und schrauben einen Gabelkopf auf das Gewindeende, so dass das Gewinde 2mm The engine mount supplied with the Wot Trainer I/C pack aus der Öffnung des Gabelkopfs herausragen. Schieben Sie is a two part design. Offer the engine up to one of the mounts,...
- Seite 11 Wot Trainer Instructions | Wot Trainer Anleitung Wot Trainer Instructions | Wot Trainer Anleitung Stage 68 / Schritt 68 Stage 73 / Schritt 73 Tighten the screw in the connector at mid throttle position Secure the fuel tank to the battery tray with hook and loop then screw the arm to the throttle servo.
- Seite 12 Dadurch kann es zu Schäden am Modell, oder zu Verletzungen von Ihnen oder anderen with plenty of shock absorbing foam or thick double sided kommen. Lassen Sie diesen Schritt nicht bei der Fertigstellung Ihres Wot Trainer aus! foam tape. Temporarily install your radio battery in the radio bay with plenty of shock absorbing foam.
- Seite 13 In trike format the Wot trainer is easier to manoeuvre on the ground so we suggest this format first, when you have more instructor who will help you to progress your skills until you can fly safely solo. Always fly the Wot Trainer in a safe location experience then a change into the tail dragger format will help you gain the experience to progress onto future models.
- Seite 14 Wot Trainer Instructions | Wot Trainer Anleitung Wot Trainer Instructions | Wot Trainer Anleitung Notes / Notize n...