Inhaltsverzeichnis

Verwandte Anleitungen für Megasat Shipman WSTA-VM250P


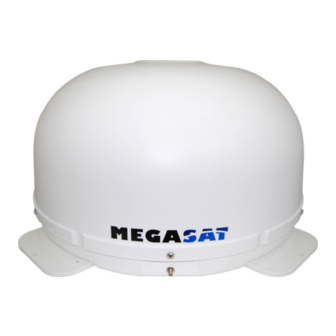
Inhaltszusammenfassung für Megasat Shipman WSTA-VM250P
- Seite 1 Shipman WSTA-VM250P Bedienungsanleitung Achtung! Bitte lesen Sie diese Bedienungsanleitung, bevor Sie die Antenne installieren und in Betrieb nehmen, um Fehler bei der Montage und Handhabung zu vermeiden.
-
Seite 2: Lieferumfang
Die Megasat VM250P ist eine automatische, selbst ausrichtende und nachführende Satellitenantenne für die Satelliten Astra 1 (19,2°O), Eutelsat/Hotbird (13°O), Astra2 (28,2°O), Astra3 (23,5°O), Astra4/Sirius (4,8°O), Thor5/6 (0,8° W), Hispasat (30° W) und Türksat (42°O). Diese digitale Antenne ist somit die ideale Empfangslösung für Wohnmobil, Bus, LKW, Schiff und PKW. - Seite 3 2. Prüfen Sie, ob alle Teile vorhanden sind 3. Setzen Sie die Antenne auf den späteren Einbauplatz und richten Sie sie aus. Achten Sie darauf, dass der Einbauplatz eben ist und keine Dachaufbauten im Weg sind, die den Satellitenempfang stören können. Aufbauten bis zu 8cm Höhe spielen keine Rolle, höhere Aufbauten sollten einen entsprechender Abstand zur Antenne haben, damit kein Hindernis zwischen Antenne und Satellit (minimale Elevation 16°...
-
Seite 4: Anschluss
3. Setzen Sie nun sofort (max. innerhalb von 5 Minuten nach Kleberauftrag) die Antenne auf die angezeichneten Felder. Drücken Sie die Füße leicht und gleichmäßig an und fixieren Sie die Antenne gegen Verrutschen, z.B. durch Klebeband. Es müssen sich nach dem Andrücken noch mindestens 2mm Kleber zwischen Antennenfuß... -
Seite 5: Systemkomponenten
Systemkomponenten Antenneneinheit Unter der außen Einheit (Kuppel) befindet sich eine 45cm Hochleistungsantenne. Die elegante Kunstoffhaube schütz die Antenne bestens gegen äußere Witterungseinflüsse. IDU (Steuergerät) Mit der IDU wird das Antennensystem gesteuert und mit Strom über das Antennenkabel versorgt. Das Steuergerät wird zwischen Antenne und Receiver geschaltet und wird nur zur Satellitenwahl und Ausrichtung benötigt. - Seite 6 Anschluss Montieren Sie die Steuerbox und den Satellitenreceiver im Fahrzeuginneren nicht im Bereich eines Airbags! Achten Sie auf eine sorgfältige Verlegung der Kabel, um Kurzschlüsse zu vermeiden! Achten Sie hierbei auch auf schon vorhandene Kabel! Antenne Antenne 12VDC~24VDC oder Netzteil 230VAC/12VDC 5A Satelliten Receiver Receiver...
- Seite 7 4. Inbetriebnahme und Bedienung 1. Schalten Sie den Monitor/TV-Gerät und den Satellitenreceiver ein. 2. Schalten Sie die Steuerbox ein. Die IDU Überprüft die Kommunikation zur Außeneinheit und die Anzeige des voreingestellten Satelliten wird im Display angezeigt. Nun startet der Suchvorgang. 3.
- Seite 8 Versorgung der Satellitenanlage erfolgt durch den Receiver und wird durch die IDU geschliffen. Bei fahrendem Betrieb, darf die IDU nicht abgeschaltet werden. Funktion LCD Display Drücken bis die ge- wünschte Satelliten- Power S/W LCD Display anzeige leuchtet. MEGASAT SATELLITE SELECT SLEEP POWER Standby...
- Seite 9 Erklärung der LCD Anzeige - INIT : Initialisierung der Antenne. - INIT-SCH : Anfangssuchmodus. - SAT-MOVE: Wechselt zu einem anderen Satelliten. - S:xxx : Intensität des Signala. - ID:xxx : ID des Satelliten. - GYRO-CAL : Kalibrierung Gyro Sensor. Allgemein Gerät Einschalten.
- Seite 10 ASTRA1 ASTRA1 ASTRA1 ASTRA1 IDU startet. START !!! START !!! START !!! START !!! ASTRA1 ASTRA1 ASTRA1 ASTRA1 Die Antenne wird initialisiert. INIT INIT INIT INIT ASTRA1 ASTRA1 GYRO- - - - GYRO ASTRA1 ASTRA1 GYRO GYRO Gyroskopsensor wird kalibriert. ASTRA1 ASTRA1 ASTRA1...
- Seite 11 Im Falle einer fehlerhaften Suche ASTRA1 ASTRA1 Die Antenne sucht den gewünschten Satelliten. ASTRA1 ASTRA1 SEARCH SEARCH… SEARCH SEARCH Wenn der Satellit innerhalb von 2 Minuten ASTRA1 ASTRA1 ASTRA1 ASTRA1 nicht gefunden wird, beginnt die Suche von vorne.. INIT- - - - SLP INIT INIT INIT...
-
Seite 12: Falls Es Probleme Gibt
6. Falls es Probleme gibt Sind Hindernisse (Bäume Gebäude usw.) in Richtung des Satelliten? • Wählen Sie einen anderen Standort. Sind Gebäude in unmittelbarer Nähe kann es zu Reflektionen kommen • und die Antenne richtet sich nicht korrekt aus (Standort wechseln) Sind die Antennenkabel korrekt angeschlossen oder defekt •... - Seite 13 Skew Anpassung Um die korrekte Skew Einstellung vorzunehmen, entfernen Sie die Kuppel der Antenne und lösen beide Schrauben der LNB Halterung so weit, dass das LNB sich drehen lässt. Bewegen Sie jetzt das LNB entsprechend der Tabelle auf die richtige Position und befestigen Sie die Schrauben der LNB Halterung.
- Seite 14 LNB Center Line Satelliten Signal (+) Direction (-) Direction LNB Signal Die Signale Vertikal (rot) und Horizontal (blau) werden in einem genauen Winkel von 90° gesendet. Die Signale des Satelliten werden im selben Kreuzmuster gesendet. Um einen optimalen Empfang zu erreichen müssen beide Elemente im gleichen Winkel zueinander stehen.
-
Seite 15: Technische Daten
Gain/Verstärkung: 33dBi Elevation (Neigung): 17° 60° Suchwinkel (Azimut): 360° Stromversorgung: 12-24V / 5A Temperaturbereich: -22° C bis +55° C Antennenkabel: Koaxialkabel 100dB (10m) Megasat Durchmesser: ca. 68cm Industriestrasse 4a D- 97618 Niederlauer Höhe: ca. 40cm Tel. +49 (0) 9776 63567-100 Fax. - Seite 16 Verarbeitungshinweise...
- Seite 24 Shipman WSTA-VM250P User Manual...
-
Seite 25: Receiving Satellite Tv Signal
Introduction Specification………………….……………………………………………………. Antenna System Overview……………………………………………………. Direct Broadcast Satellite Overview………………………….………….. System Components…………………………………………………………… Installation Unpacking the Unit………………………………..……………………..Preparing for the installation………………………………………………. Selecting the location………….……………………………………….……... Equipment and cable installation…………..……………………………. Setting the LNB Skew Angle(Manual Skew version only)……….. Operation Receiving Satellite TV Signals…………….………………………………. Turning the System On/Off…………..………………..………………….. Changing Channels………………………….…………………...…..……….. - Seite 26 Notes, Cautions, and Warnnings Caution – Improper handling by unqualified personnel can cause serious damage to this equipment. Unqualified personnel who tamper with this equipment may be held liable for any resultant damage to the equipment. Install under DRY condition ONLY! Do not install this system in the rain, or under any wet conditions.
- Seite 27 The satellite antenna system is the innovative and a technologically advanced satellite In- Motion system. The antenna has a unique combination of state-of-the art components with the most sophisticated satellite acquisition and tracking programs to provide the following features: ■ Fast satellite acquisition ■...
-
Seite 28: Antenna System Overview
Antenna System Overview Antenna System Overview Antenna System Overview Antenna System Overview A complete satellite TV system, illustrated in Figure 1-1, includes the antenna connected to a IDU, a satellite TV receiver, and a television set. Antenne Antenne Vehicle power 12VDC~24VDC or power supply 230VAC/12VDC 5A... - Seite 29 Direct Broadcast Satellite Overview Direct Broadcast Satellite Overview Direct Broadcast Satellite Overview Direct Broadcast Satellite Overview Direct Broadcast Service (DBS) satellites broadcast audio, video and data information from satellites located 22,000 miles in space. A receiving station, such as the antenna, should include a dish and satellite receiver to receive the signals and process them for use by the consumer audio and video equipment.
- Seite 30 Objects such as tall lighthouse, bridges and big ship that block this view will cause a loss of signal. The signal will be quickly restored once the antenna has a clear line of sight again. Heavy rain, cloud, snow or ice may also interfere with the signal reception quality. If the satellite signal is lost due to blockage or severe weather condition, services from the receiver will be lost (picture will freeze frame and may disappear).
-
Seite 31: Unpacking The Unit
This section offers a general explanation of how properly to install the antenna. Installation of the antenna must be accomplished by or under the supervision of an authorized dealer for the Limited Warranty to be valid and in force. The steps in the installation and setup process are as follows: Unpacking the unit Unpacking the unit... -
Seite 32: Preparing For The Installation
Preparing for the installation Preparing for the installation Preparing for the installation Preparing for the installation Install Tools and Materials The antenna system is designed for simple installation and setup. However, the following list of equipment or items should be available during installation of the antenna. ■... - Seite 33 Selecting the Selecting the Selecting the Selecting the location location location location Determine the optimum mounting location for the antenna radome assembly. It should be installed where: 1. The antenna has a clear line-of-sight view to as much of the sky as is practical. Choose a location where masts or other structures do not block the satellite signal from the dish as the vessel turns.
-
Seite 34: Equipment And Cable Installation
Equipment and cable installation Equipment and cable installation Equipment and cable installation Equipment and cable installation This offers a general explanation of how to install the IDU and satellite receiver properly to the inside of vessel connecting with coaxial cable. 1. -
Seite 35: Inhaltsverzeichnis
The correct skew setting varies depending on your geographic location, since the orientation of your antenna to the satellite changes as you move. For complete details about adjusting the LNB’s skew angle, see “Appendix A – How to Set the Skew Angle” The antenna system is easy to use. -
Seite 36: Changing Channels
3. Apply operating power to the IDU. 4. Wait one minute for system startup. The IDU will display the Tracking Satellite screen after system testing is complete. Turning off the System Follow the steps below to turn off your antenna System. 1. -
Seite 37: Operating The Idu
Operating the IDU Operating the IDU Operating the IDU Operating the IDU Appearance Power S/W LCD Display MEGASAT SATELLITE SELECT SLEEP POWER Satellite select button Sleep button Figure 3-2 Appearance of IDU Functions of LCD Display MEGASAT SATELLITE SELECT SLEEP... - Seite 38 Explanation of words in LCD - INIT : It shows condition of initializing the antenna. - INIT-SCH : It shows condition of initial search mode. - SAT-MOVE: It shows condition of moving to another satellite. - S:xxx : It shows intensity of signal. - ID:xxx : It shows ID of acquired satellite.
- Seite 39 HOTBIRD HOTBIRD HOTBIRD HOTBIRD It notice the start. START !!! START !!! START !!! START !!! HOTBIRD HOTBIRD HOTBIRD HOTBIRD The antenna is being initialized. INIT INIT INIT INIT HOTBIRD HOTBIRD GYRO- - - - GYRO HOTBIRD HOTBIRD GYRO GYRO Gyro sensor is being calibrated.
- Seite 40 In case of search failure HOTBIRD HOTBIRD HOTBIRD HOTBIRD The antenna is searching the selected satellite. SEARCH SEARCH… SEARCH SEARCH If the antenna cannot search the signal, it stops HOTBIRD HOTBIRD HOTBIRD HOTBIRD to search during 2 minutes and repeat INIT- - - - SLP INIT INIT...
-
Seite 41: Simple Check
There are a number of common issues that can affect the signal quality or the operation of the antenna system. The following sections address these issues and potential solutions. S i m p l e c h e c k … … … … … … … . … . … … … … … … … … … … … … … … … … . Causes and Remedies…..………………..…………………………………. -
Seite 42: Causes And Remedies
Causes and Remedies Causes and Remedies Causes and Remedies Causes and Remedies Receiver Fault Your satellite TV receiver might be set up incorrectly or defective. First check the receiver’s configuration to ensure it is set up for the desired programming. In the case of a faulty receiver, refer to your selected receiver’s user manual for service and warranty information. - Seite 43 How to Set up the Skew Angle Signals transmitted in vertical and horizontal wave offset exactly 90º from each other. Since linear satellite signals are oriented in a precise cross pattern, the antenna’s receiving element, called an LNB (low-noise block) must be oriented in the same way to optimize reception. This orientation adjustment is referred to as the LNB’s “skew angle.”...
- Seite 44 If you wish to set the correct skew, see “TableA-1 Regional Skew angle”. The correct skew setting varies depending on your geographic location, since the orientation of your antenna to the satellite changes as you move. Raster TURKSA ASTRA2 ASTRA3 ASTRA1 HOTBIR Astra4...
- Seite 45 1. Turn off the antenna and disconnect power to all wired components. 2. Using the screwdriver, remove the screws securing the radome. Then remove and set it aside in a safe place. Figure A-2 The Back of the Reflector 4. Loosen the four screws fastening the LNB. 5.
- Seite 46 Satellite Coverage Map Television satellites are located in fixed positions above the Earth’s equator and beam TV signals down to certain regions of the planet (not worldwide). To receive TV signals from a satellite, you must be located within that satellite’s unique coverage area.
- Seite 47 Astra 1 Hotbird 49dBW 49dBW Figure B-3 Astra 1 Coverage Map Figure B-4 Hotbird Coverage Map Astra 4 Thor 2/3 49dBW 49dBW Figure B-5 Sirius Coverage Map Figure B-6 Thor 2/3 Coverage Map...
- Seite 48 Atlantic Bird 3 Hispasat 49dBW 49dBW Figure B-7 Atlantic bird 3 Figure B-8 Astra 2S Coverage Map ASTRA 3 TURKSAT...
-
Seite 49: Firmware Upgrade
Firmware Upgrade If satellite beam is changed or eliminated, you have to upgrade firmware of IDU. Firmware Upgrade If antenna cannot search the selected satellite or move incorrectly, you need to change the firmware of IDU. To upgrade the firmware, follow the steps below. 1. - Seite 50 3. After formatting your SD card, copy the new software file . 4. Turn off the IDU. 5. Put your SD memory card into the SD slot of back side of the IDU. Memory Card Slot SD_CARD RS-232 RECEIVER ANTENNA Figure C-3 The back of the IDU 12VDC 12VDC...
- Seite 51 Antenna Drawing Figura C-1 Megasat Industriestrasse 4a D- 97618 Niederlauer Tel. +49 (0) 9776 63567-100 Fax. +49 (0) 9776 63567-144 www.megasat.tv...