
Verwandte Anleitungen für KKT KOLBE HERMES INSEL


Inhaltszusammenfassung für KKT KOLBE HERMES INSEL
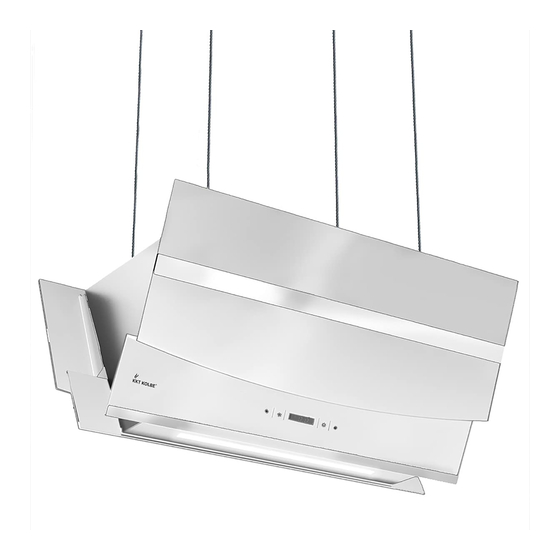
- Seite 1 → Benutzerhandbuch für Ihre Design-Inselhaube Modell: HERMES INSEL Version: 2.0 / 200403...
-
Seite 2: Konformitätserklärung
Das Beachten der mit diesem Symbol versehenen Hinweise erspart Ihnen manches Problem. Konformitätserklärung Hiermit erklärt KKT KOLBE Küchentechnik GmbH & Co. KG, dass sich das Gerät mit Home Connect -Funktionalität in Übereinstimmung mit den grundlegenden Anforderungen und den übrigen einschlägigen Bestimmungen der Richtlinie 2014/53/EU befindet. -
Seite 3: Sicherheitshinweise
Sicherheitshinweise • Halten Sie Kleinkinder vom Gerät fern. Die Bedienung des Gerätes durch Kinder ist nur unter Aufsicht von Erwachsenen erlaubt. • Das Gerät ist nur für den Betrieb im Haushalt ausgelegt und ist aus- schließlich dafür zu verwenden. • Lesen Sie dieses Handbuch vor der Installation und Benutzung des Geräts gründlich durch. - Seite 4 Im Hinblick auf die ständige Weiterentwicklung behalten wir uns technische Änderungen, Abweichungen oder Fehler ohne Bekanntmachung vor. Dies gilt insbesondere auch hinsichtlich Maßangaben bzw. Ausschnittmaße. Benutzerhandbuch Dunstabzugshaube HERMES INSEL Version 2.0 © 2018 KKT KOLBE Küchentechnik. KKT KOLBE is a registred trademark.
-
Seite 5: Inhaltsverzeichnis
Inhaltsverzeichnis Übersicht 1. Allgemeine Hinweise ............1.1 Hinweise zu Umweltschutz und Verpackung 1.2 Bestimmungsgemäße Verwendung 1.3 Allgemeine Hinweise zum Gebrauch... -
Seite 6: Allgemeine Hinweise
Allgemeine Hinweise 1. Allgemeine Hinweise 1.1 Hinweise zu Umweltschutz 1.2 Bestimmungsgemäße und Verpackung Verwendung Das Verpackungsmaterial (Plastikbeutel, Wenn Sie die Dunstabzugshaube im Ab- Styroporteile usw.) stellt eine Gefahren- luftbetrieb nutzen, achten Sie vor dem quelle für Kinder dar. Bewahren Sie das Einschalten des Gerätes darauf, dass Verpackungsmaterial deshalb außerhalb kein offenes Kaminfeuer brennt! -
Seite 7: Allgemeine Hinweise Zum Gebrauch
Benutzung der Dunstabzugshaube 2. Vor Benutzung der Dunstabzugshaube 1.3 Allgemeine Hinweise zum Gebrauch Versichern Sie sich, dass die Dunstab- zugshaube während des Transports • Wird die Dunstabzugshaube zusam- nicht beschädigt wurde. men mit anderen nicht elektrischen Die Installation und der elektrische Geräten betrieben, darf der Luftdruck Anschluss muss unter Beachtung der im Raum einen Wert von 4 Pa... -
Seite 8: Abluftbetrieb
Benutzung der Dunstabzugshaube 3.3 Umluftbetrieb • Bei Gasherden ist darauf zu achten, Die angesaugte Luft wird durch einen dass die Kochstellen nicht ohne Koch- Kohlefilter (auch Aktiv-Kohlefilter geschirr betrieben werden. genannt) gefiltert und im Raum um- Die aufsteigende Hitze offener gewälzt. -
Seite 9: Bedienung Der Dunstabzugshaube
Bedienung der Dunstabzugshaube 4. Bedienung der Dunstabzugshaube 4.1 Aufbau des Bedienfeldes An / Aus Beleuchtung Drücken Sie die Taste im Standby- Durch jeweiliges Drücken der Taste modus 0,5 Sek. lang, um das Gerät einzu- können Sie zwischen den folgenenden schalten. Beleuchtungsarten wechseln: Arbeitslicht + RGB-Beleuchtung >... -
Seite 10: Zeiteinstellung
Bedienung der Dunstabzugshaube Zeiteinstellung Einstellen der Uhzeit Um die Uhrzeit einzustellen, halten Um den Off-Timer / Quick-off-Timer zu Sie die Taste ohne Ventilatorbetrieb deaktivieren, drücken Sie die Taste gedrückt. Daraufhin blinkt zuerst die erneut während des Countdowns. Stundenanzeige. Stellen Sie die Stunde Filterwechsel mit den Tasten ein und drü-... -
Seite 11: Bedienungsanleitung Für Den Wi-Fi-Modus
Bedienung der Dunstabzugshaube 4.2 Bedienungsanleitung für den WI-FI-Modus Um die Dunstabzugshaube über Ihr • Stellen Sie sicher, dass der WLAN- Smartphone bedienen zu können, Einstellungnsmodus Ihrer Dunstab- müssen Sie die App (Software) zugshaube durch 5 Sekunden langes „Wisen“ herunterladen. Gedrückthalten der Tasten aktiviert wurde. - Seite 12 Bedienung der Dunstabzugshaube Wählen Sie die Haube aus und tippen • Das Passwort des Routers muss kor- Sie auf „Freigabeberechtigung“. Der rekt sein und es werden keine Sonder- QR-Code zur Autorisierung erscheint. zeichen erkannt. Der Router-Account und das Passwort dürfen nicht länger •...
-
Seite 13: Reinigung Und Pflege
Reinigung und Pflege 5. Reinigung und Pflege Besondere Hinweise für Geräte mit Vor Installations-, Wartungs- oder Reini- Edelstahlgehäuse: gungsarbeiten ist die Dunstabzugshau- be von der Stromzufuhr trennen, indem Zur Reinigung der Edelstahlflächen Sie den Netzstecker des Gerätes ziehen eignet sich ein handelsübliches, nicht oder die Sicherung der Hausinstallation scheuerndes Edelstahl-Reinigungsmit- ausschalten bzw. -
Seite 14: Aktivkohlefilter
Reinigung und Pflege 5.2 Aktivkohlefilter Der Aktivkohlefilter neutralisiert unan- • Die Metallfettfilter in heißem Spül- genehme Gerüche aus der Raumluft. wasser gut einweichen, dann mit Diesen benötigen Sie bei Umluftbetrieb einer weichen Bürste reinigen und der Dunstabzugshaube. anschließend mit heißem Wasser gut abbrausen. -
Seite 15: Problembehandlung
Problembehandlung 7. Problembehandlung 7.1 Probleme, mögliche Ursachen und Lösungen Problem Mögliche Ursache Lösung Beleuchtung Kein Strom / Stromversorgung und Sicherung funktioniert nicht, Gerätekabel nicht richtig kontrollieren, Motor läuft nicht angeschlossen Kabel richtig anschließen Beleuchtung ist an, Lüftungsklappe blockiert Blockierung beheben aber Motor läuft nicht Motor defekt Motor ersetzen... -
Seite 16: Kundendienst
Bei technischen Fragen zu Ihrem Gerät Sollten die genannten Lösungsmöglich- wenden Sie sich bitte an: keiten keine Abhilfe schaffen, liegt mög- licherweise eine größeres technisches KKT KOLBE Kundendienst Problem vor. Tel. 09502 667930 Mail: info@kolbe.de www: www.kolbe.de Machen Sie auf keinen Fall Reparatur- versuche an elektrischen/elektronischen →... -
Seite 17: Wichtige Hinweise Vor Der Installation Des Geräts
Installation 8.2 Wichtige Hinweise vor der Bei Ausführung mit Abluft nach außen werden die Dämpfe über einen am Ver- Installation des Geräts: bindungsring angeschlossenen Abluft- • Reinigen Sie die Umgebung vor und schlauch nach außen abgesaugt. nach der Installation gründlich, damit •... -
Seite 18: Verwendung Als Abzugshaube
Installation 8.3 Verwendung als Ablufthaube 8.6 Elektrischer Anschluss (mit Luftabstoß in Freie) Sollte die Dunstabzugshaube werkseitig mit einem Kohlefilter ausgestattet sein, Schließen Sie das Gerät erst dann an müssen Sie diesen für den Abluftbetrieb das Stromnetz an, wenn es ordnungs- (Abluft ins Freie) entfernen. -
Seite 19: Montage Der Dunstabzugshaube
Montage 9. Montage der Dunstabzugshaube • Positionieren Sie die Hängeplatten an der gewünschten Position und markieren Sie die Montagelöcher an der Decke. • Der Abstand zwischen den Aufhänge- platten sollte 530mm betragen. • Benutzen Sie drei Ankerbolzen, um die Auf- hängplatten an der Decke zu montieren. - Seite 20 Montage Seil einführen / Drücken Nach unten ziehen • Befestigen Sie das Seil an der Dunstabzugshaube: Drücken Sie leicht auf die Spitzen der Seilhalter und schieben Sie das Seil direkt ein. Dieses wird automatisch blockiert. Stellen Sie die Länge des Seils nach Ihren individuellen Anforderungen ein. Hinweis: Die Seile können nur dann verschoben werden, während Sie die Spitzen der Seilhal- terungen gedrückt halten.
- Seite 21 Montage • Heben Sie die Dunstabzugshaube an und verwenden Sie die 8 × ST4 × 8 Schrauben, um die Plattenabde- ckungen an den Aufhängeplatten zu befestigen.
-
Seite 22: Informationen Zur Abluftleitung
Abluftleitung muss ein Mindestgefälle von 1 cm je Meter bzw. ein Neigungs- winkel von 2° eingehalten werden. (Abb. 3) Es könnte sonst Kondens- KKT KOLBE ist nicht verantwortlich für wasser in den Motor der Abzugshaube eventuelle Störungen, die durch Nicht- laufen. -
Seite 23: Kkt Kolbe Gewährleistung
KKT KOLBE nach Ermessen. Soweit nicht anders vereinbart, ist unsere Kundendienstzentrale zu benachrichtigen. Die Reparatur erfolgt ausschließlich in unserer Kundendienstwerkstatt. Während der ersten 6 Monate trägt KKT KOLBE die Kosten für Rückholung, Reparatur und Rückversand. Ab dem 7. Monat liegt dies im Ermessen von KKT KOLBE. - Seite 25 User‘s manual for your design cooker hood Model: HERMES INSEL Version: 2.0 / 200403...
- Seite 26 The observance of the notes marked with this icon may save you many problems. Declaration of comformity KKT KOLBE Küchentechnik GmbH & Co. KG hereby declares that the appliance with home connect functionality complies with the basic requirements and other relevant provisions of directive 2014/53/EU.
-
Seite 27: Safety Informations
Safety informations • Keep children away from the appliance. The operation of the device by children is permitted only under adult supervision. • The appliance is designed for household operation and is to be used exclusively for that. • Read this manual thoroughly before installing and using the unit. •... - Seite 28 Due to continuous development, we reserve the right to make technical changes including errors or other aberrations without notice. This also applies in particular to dimensional data or cut-out dimensions. User’s guide Cooker hood HERMES INSEL Version 2.0 © 2018 KKT KOLBE Küchentechnik. KKT KOLBE is a registred trademark.
- Seite 29 Table of content Overview 1. General notes ..............1.1Protection of the environment 1.2 Intended use 1.3 Hints for use...
-
Seite 30: General Notes
General notes 1. General notes 1.1 Protection of the 1.2 Intended use environment If you use the cooker hood in exhaust The packing materials (plastic bags, mode, make sure that no open fire is polystyrene moulded parts etc) are dan- burning before switching on the appli- gerous for children. -
Seite 31: Hints For Use
Using the hood 2. Before using the hood 1.3 Hints for use Ensure that the hood has not been da- maged during transport. Installation and connection of the electri- • If the hood is used together with other cal supply must be carried out by profes- nonelectrically operated appliances, sionals according to the manufacturer’s the air pressure in the room must not... -
Seite 32: Exhaust Air Mode
Using the hood 3.3 Recirculation mode The extracted air is filtered through • Due to the fire risk, frying or cooking a carbon filter (also known as active with oils and fats under the hood carbon filter) and circulated in the room. has only to take place under durable The carbon filter retains the odours pro- surveillance. -
Seite 33: Operating The Hood
Operating the hood 4. Operating the hood 4.1 Control panel On / Off Lighting In standby mode, press the key for By briefly pressing the key each time 0.5 seconds to switch on the appliance. you can switch between the following lighting modes: Operation starts at level 1 (low). -
Seite 34: Time Setting
Operating the hood Time setting Filter replacement After a total of 14 hours of operation, Setting the clock the filter should be changed, which is Press and hold the key without fan indicated by the icon. operation to start the time setting. To reset the display, hold down the and The hour display will flash first. -
Seite 35: Operating Instructions For Wi-Fi Mode
Operating the hood 4.2 Operating instructions for WI-FI mode To operate the cooker hood from your • Make sure that the Wi-Fi setting mode smartphone, you must download the of your cooker hood has been activa- app (software) „Wisen“. ted by holding down the keys for 5 seconds. - Seite 36 Operating the hood • Now use the smartphone you want to • If the router is already connected to authorize, tap „+ Add device“ in the too many appliances (including mobi- upper right corner of the main display le phone or PC), first disconnect some window of the Wisen app and select devices, then turn off and restart the „Scan and authorize“.
-
Seite 37: Care And Cleaning
Care and cleaning 5. Care and cleaning Special information for appliances Before installation, maintenance or with a stainless steel casing cleaning work is carried out, the cooker hood must be disconnected from the A commercially available non-abrasive power supply by pulling the mains plug stainless steel cleaning agent should of the appliance or by switching off or be used for cleaning stainless steel... -
Seite 38: Carbon Filters
Care and cleaning 5.2 Carbon filters The carbon filter neutralises unpleasant • Soak the metal grease filters well in odours from the room air, which is nee- hot rinse water, then clean them with ded when operating the extractor hood a soft brush and then rinse well with in recirculation mode. -
Seite 39: Troubleshooting
Troubleshooting 7. Troubleshooting 7.1 Problems, possible causes and solutions Problem Possible cause Solution Both light and fan No power / device cable not Check power supply and fuse, do not work connected properly connect cable correctly Light on, Ventilation flap blocked Eliminate blockage but fan does not work Motor is demaged... -
Seite 40: Customer Service
If all the above checks fail to remedy the appliance please contact: fault, it is possible you have a more seri- ous problem. KKT KOLBE Customer service Tel. 0049 9502 667930 Under no circumstances try to repair the Mail: info@kolbe.de electronic/electrical components in the www: www.kolbe.de... -
Seite 41: Important Informations Before Installing
Installation 8.2 Important informations In the execution with air exhausted out- doors, the vapours are extracted via an before installing: air exhaust hose fixed to the connector • Clean the environment thoroughly ring. before and after installation so that • The diameter of the exhaust air hose no dust or construction debris can be must conform to that of the connector sucked in during initial operation. -
Seite 42: Using The Extractor Hood As An Exhaust Air Hood
Installation 8.3 Using the extractor hood as 8.6 Electrical connection an exhaust air hood (with air extracted to outdoors) If the extractor hood has been fitted at Only connect the appliance to the po- the factory with a carbon filter, this must wer supply once it is properly installed. -
Seite 43: Mounting The Cooker Hood
Mounting the hood 9. Mounting the cooker hood • Position the suspension plates in the desi- red position and mark the mounting holes on the ceiling. • The distance between the suspension should be 530mm. • Use three anchor bolts to mount the suspension plates to the ceiling. - Seite 44 Mounting the hood Seil einführen / Drücken Nach unten ziehen • Attach the rope to the cooker hood: Slightly press the tips of the rope holders and insert the rope directly. The rope is automatically blocked. Adjust the length of the rope according to your individual requirements. Note: The ropes can only be moved while holding down the tips of the rope holders.
- Seite 45 Mounting the hood • Lift the cooker hood and use the 8 × ST4 × 8 screws to attach the plate covers to the suspension plates.
-
Seite 46: Informations On Air Flow
Informations on air flow 10. Informations on air flow Note: Images are for illustration purpo- ses only and may vary. Fig. 1: Abluft ins Freie Fig. 3: inclination angle of the exhaust Fig. 2: Abluft über Luftschacht/Kamin air pipeline • The exhaust air line should be as short •... - Seite 48 Vielen Dank fürs Lesen. Wir wünschen Ihnen viel Spaß beim Kochen. Thanks for reading. We wish you a lot of fun cooking. Version: 2.0 / 200403...