Inhaltsverzeichnis
Werbung
Verfügbare Sprachen
Verfügbare Sprachen
Quicklinks
Werbung
Inhaltsverzeichnis

Verwandte Anleitungen für Skandika Wildland


Inhaltszusammenfassung für Skandika Wildland
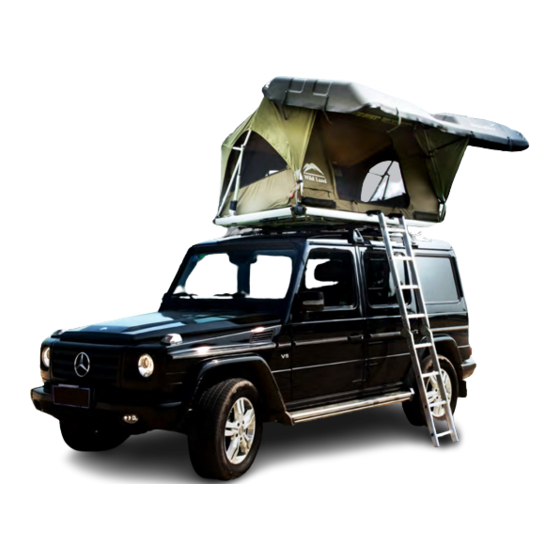
- Seite 1 Dachzelt / Roof tent Skandika Modell:Wildland Art.Nr. 80030...
- Seite 2 Inhalt Sicherheitshinweise Lieferumfang Aufbauanleitung Abbauanleitung Fehlerbehebung Produktspezifikationen Garantiebedingungen Die Videos zum Auf- und Abbau sowie FAQ und die Anleitungen zum Down- loaden findest Du auf unserer Skandika Service Seite. Für weitere Informa- tionen kannst Du einfach unsere Website besuchen www.skandika.com...
-
Seite 3: Sicherheitshinweise
SICHERHEITSHINWEISE WICHTIGE INFORMATIONEN Der Hersteller haftet nicht für Schäden oder Unfälle, die durch Nichtbeachtung dieser Gebrauchsan- weisung, durch Veränderungen an Teilen oder durch die Verwendung von anderen als den Originalteilen des Herstellers entstehen können. Die Warnungen, Vorsichtshinweise und Anweisungen in diesem Dokument kön- nen nicht alle möglichen Situationen abdecken - daher versteht der Betreiber, dass gesunder Menschenver- stand und Vorsicht angewendet werden müssen. - Seite 4 LIEFERUMFANG Notfall- Ladeadapter KFZ-Batterie- Powerbank 1 Stück Ladekabel 1 Stück 1 Stück Koffer mit Elektrozubehör 1 Stück Anschlusskabel für das Stromkabel USB-Ladekabel Solarmodul für Dachzelt 1 Stück 1 Stück 1 Stück Kreuzschlitz-Schrauben- dreher 6 x L100 1 Stück Werkzeugbeutel Montagematerial Maulschlüssel 8 / 10 1 Stück U-Schelle...
- Seite 5 AUFBAU- ANLEITUNG...
-
Seite 6: Aufstellen Ihres Dachzeltes
AUFBAUANLEITUNG Installation des Dachzelts Bevor Sie das Dachzelt montieren, müssen Sie Dachträger korrekt an Ihrem Fahrzeug montiert haben. Sie sollten Dachträger auswählen, die optimal auf Ihr Fahrzeug passen und das Dachzelt tragen können. Die Trägerfüße sind besonders wichtig für eine stabile Verbindung zwischen Dachzelt, Dach- trägersystem und Auto. - Seite 7 AUFBAUANLEITUNG 12V- USB 5V- Ein/ Ausgang Ausgang Lichtfunktion Lade- Solarpanel- Anschluss für anschluss Anschluss KFZ-Batterie WICHTIG! Lösen Sie alle Schnallen um den Rahmen. 3. Lösen Sie die Schnalle an der Leiter. 4. Drücken Sie auf Ihrer Fernbedienung, um das Zelt aufzurichten (Hinweis: Die DOWN-Taste funk- tioniert erst, wenn das Zelt vollständig aufgerichtet ist.
- Seite 8 ABBAUANLEITUNG / FEHLERBEHEBUNG Abbauen Ihres Dachzeltes Drücken Sie das Hardtop herunter. 2. Schieben Sie die Leiterhaken nach oben. 3. Klappen Sie die Leiter ein. 4. Schieben Sie die Leiter langsam nach oben. 5. Platzieren Sie die Leiter auf dem Hardtop. 6.
- Seite 9 FEHLERBEHEBUNG AUSTAUSCH DES ZELTMOTORS Öffnen Sie die Kunststoffabdeckung an der Rahmenseite. Ziehen Sie das weiße Kabel vorsichtig heraus. Lösen Sie die wasserdichte Verbindung. Ziehen Sie die Kabelteile auseinander. Ziehen Sie das verbleibende Kabel aus dem Rahmenloch. Ziehen Sie auch die wasserdichte Verbindung aus dem Rahmen.
-
Seite 10: Produktspezifikationen
PRODUKTSPEZIFIKATIONEN Produktspezifikationen Außenzelt 210D rip-stop Polyoxford PU 3000mm mit Silberbeschichtung UPF50+ Innenzelt 90g Polycotton PU 2000 mm Boden 210D Polyoxford PU 2000 mm Rahmen Alu-Legierung Motor , 28W/einzeln; 56W/Set Abdeckung Polymer-Verbundwerkstoffe ABS Struktur Personenzahl Innenzeltabmessungen ca. 200 (L) × 120 (B) × 110/85 (H) cm Packmaß... -
Seite 11: Garantiebedingungen
Bitte prüfen Sie Möglichkeiten, eine Batterie anstatt der Entsorgung einer Wiederverwendung zuzuführen, beispielsweise durch die Rekonditionierung oder die Instandsetzung der Batterie. Im Zuge ständiger Für Ersatzteile kontaktieren Sie bitte folgende E-Mail-Adresse: service@skandika.de Produktverbesse- Der Service erfolgt durch: MAX Trader GmbH, Wilhelm-Beckmann-Straße 19, 45307 Essen,... -
Seite 12: Inhaltsverzeichnis
Safety information Scope of supply Assembly instructions Dismantling instructions Troubleshooting Product specifications Guarantee conditions Please visit the Skandika Service portal on our website for setup & help videos, FAQs and downloa- dable instructions. For more information about Skandika, simply visit our main page... -
Seite 13: Safety Information
SAFETY INFORMATION IMPORTANT INFORMATION The manufacturer is not liable for any damage or accident that may occur as a result of non-compliance with these instructions for use, modifications made to parts or the usage of any parts other than the manufacturer’s original parts. -
Seite 14: Scope Of Supply
SCOPE OF SUPPLY Emergency Charger Vehicle Battery power bank 1 Pc Charging Connection 1 Pc Line 1 Pc Case with electrical accessories 1 Pc Connection cable for Roof tent USB Output the solar panel power cord Power Wire 1 Pc 1 Pc 1 Pc Cross screwdriver... -
Seite 15: Assembly Instructions
AUFBAUANLEITUNG ASSEMBLY INSTRUCTIONS... - Seite 16 ASSEMBLY INSTRUCTIONS Installing the roof tent Before you mount the roof tent, you must have roof racks correctly mounted on your vehicle. You should choose roof racks that fit optimally on your vehicle and can support the roof tent. The carrier feet are particularly important for a stable connection between the roof tent, roof rack system and car.
- Seite 17 ASSEMBLY INSTRUCTIONS USB 5V Output Output Light function Charging Connection Connection for port for solar panel car battery IMPORTANT! Loosen all the buckles around the frame. 3. Loosen the buckle on the ladder. 4. Press on your remote control to erect the tent (Note: The DOWN button will not work until the...
-
Seite 18: Dismantling Instructions
DISMANTLING INSTRUCTIONS / TROUBLESHOOTING Dismantling your roof tent Press down the hardtop. 2. Push the ladder hooks upwards. 3. Fold in the ladder. 4. Slowly push the ladder upwards. 5. Place the ladder on the hardtop. 6. Press DOWN on your remote control to retract the tent (Note: The button will not work until STOP... - Seite 19 TROUBLESHOOTING REPLACING THE TENT MOTOR Open the plastic cover on the frame side. Carefully pull out the white cable. Loosen the waterproof connection. Separte the cable parts. Pull the remaining cable out of the frame hole. Also pull the waterproof connection out of the frame.
-
Seite 20: Product Specifications
PRODUCT SPECIFICATIONS Product specifications Flysheet 210D rip-stop Polyoxford PU 3000mm with silver coating UPF50+ Inner tent 90g Polycotton PU 2000 mm Floor 210D Polyoxford PU 2000 mm Frame Aluminium alloy Motor , 28W/single; 56W/set Cover Polymer Composites ABS Structure Number of persons Inner tent dimensions approx. -
Seite 21: Guarantee Conditions
Please consider ways to reuse a battery instead of disposing of it, for example by reconditioning or repairing the battery. In accordance with our policy of continual product impro- For spare parts please contact: service@skandika.de vement, we reserve the right Service centre: MAX Trader GmbH, Wilhelm-Beckmann-Straße 19, 45307 Essen, to make technical and visual Germany changes without notice. - Seite 22 NOTIZEN / NOTES _____________________________________________________ _____________________________________________________ _____________________________________________________ _____________________________________________________ _____________________________________________________ _____________________________________________________ _____________________________________________________ _____________________________________________________ _____________________________________________________ _____________________________________________________ _____________________________________________________ _____________________________________________________ _____________________________________________________ _____________________________________________________...
- Seite 23 NOTIZEN / NOTES _____________________________________________________ _____________________________________________________ _____________________________________________________ _____________________________________________________ _____________________________________________________ _____________________________________________________ _____________________________________________________ _____________________________________________________ _____________________________________________________ _____________________________________________________ _____________________________________________________ _____________________________________________________ _____________________________________________________ _____________________________________________________...
- Seite 24 Vertrieb & Service durch / Sales & Service by MAX Trader GmbH Wilhelm-Beckmann-Straße 19 45307 Essen Deutschland / Germany Art. 80030 Wildland DE_GB Ver. 1.1...