Inhaltsverzeichnis
Werbung
Verfügbare Sprachen
Verfügbare Sprachen
Werbung
Kapitel
Inhaltsverzeichnis

Verwandte Anleitungen für Megasat SAT to IP Server 2

Inhaltszusammenfassung für Megasat SAT to IP Server 2
- Seite 1 SAT>IP Server 2 Bedienungsanleitung...
-
Seite 2: Inhaltsverzeichnis
Inhaltsverzeichnis Sicherheitshinweise Bitte lesen Sie die Bedienungsanleitung sorgfältig vor Inbetriebnahme des Gerätes. Sicherheitshinweise ....................03 Bei falscher oder unsachgemäßer Handhabung erlischt der Gewährleistungsanspruch. 1. Einleitung ....................... 04 Netzanschluss: Vor der Inbetriebnahme überprüfen Sie bitte die richtige Betriebs- 2. Anschluss & Zugang zum Server ............05 spannung Ihres Stromanschlusses. -
Seite 3: Einleitung
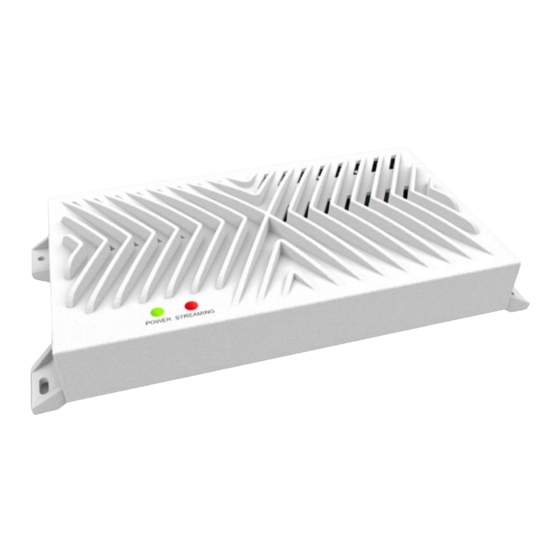
1. Einleitung 2. Anschluss & Zugang zum Server Der SAT>IP Server 2 wandelt die Satellitensignale der TV- und Radio Programme in IP Si- gnale um, und leitet sie kabelgebunden via LAN oder drahtlos via WLAN weiter an einen SAT>IP Clienten (Receiver). Des Weiteren können kompatible Geräte wie z.B. Smartpho- nes, Tablet-PCs oder Notebooks die Ton- und Bildsignale drahtlos mit einer geeigneten App empfangen. -
Seite 4: Konfiguration
2. Anschluss & Zugang zum Server Ermitteln der IP Adresse • Wählen Sie in der Liste der “UPnP Devices” den “Megasat SAT>IP Server 2” aus, und Schalten Sie den Server ein. Der Server verbindet sich mit dem Netzwerk und erhält lesen die entsprechende “Base URL”... -
Seite 5: Login / Logout
3. Login / Logout 4. Systemeinstellungen Login Der Server unterstützt zwei verschiedene Verbindungen: • Kabelgebundenes Netzwerk Nachdem sich der Internet-Brows- • Drahtloses Netzwerk er erfolgreich mit dem Server ver- bunden hat, wird die „Login“-Seite angezeigt. Der Standardbenutzer- name für den Server ist „admin“, das Passwort lautet: „admin“. -
Seite 6: Netzwerkeinstellungen
4. Systemeinstellungen 4. Systemeinstellungen Klicken Sie im Bildschirmmenü auf „Systemeinstellungen“. 4.1.1 Kabelgebunden (empfohlen) Folgende Untermenüs stehen zur Auswahl: • Netzwerkeinstellungen Standardmäßig befindet sich der Server im DHCP-Modus. • LNB Einstellungen • Importeinstellungen Der Server übernimmt die IP-Ad- resse vom DHCP-Server und listet •... -
Seite 7: Drahtlos
4. Systemeinstellungen 4. Systemeinstellungen Wenn Sie ein verschlüsseltes 4.1.2 Drahtlos (optional) Netzwerk auswählen, erscheint ein Fenster in dem Sie ein Pass- wort eingeben müssen. Geben Optional kann eine Drahtlosver- Sie mit der Tastatur den gültigen bindung durch einen sepparat WPA-Schlüssel ein. erhältlichen Wi-Fi USB Stick aufge- baut werden. -
Seite 8: Lnb Einstellungen
4. Systemeinstellungen 4. Systemeinstellungen Das grüne Häckchen-Symbol wird 4.2 LNB Einstellungen angezeigt, wenn die Verbindung zum WLAN Netzwerk erfolgreich Wählen Sie den LNB Typ, den Sie an Ihrer Anlage verwenden. Die jeweiligen Einstellun- ist. Alle WLAN Netzwerkeinstel- gen zu Ihrem LNB Typ wird Ihnen hier gezeigt: lungen werden im Systemspei- cher gespeichert. -
Seite 9: Lnb Einstellung
4. Systemeinstellungen 4. Systemeinstellungen 4.2.1 LNB Einstellung 4.2.2 Quad Konfiguration Ihrer LNB Einstellungen: Ein Quad LNB besitzt 4 Ausgänge. Verbinden Sie 4 Leitungen mit den Eingängen 1-4 auf der Rückseite des Severs mit geeigneten Koaxialkabeln. • LNB - Quad / Quattro / Unicable / Jess •... -
Seite 10: Quattro
4. Systemeinstellungen 4. Systemeinstellungen 4.2.3 Quattro 4.2.4 Unicable Ein Quattro LNB besitzt 4 Ausgänge. Verbinden Sie 4 Leitungen mit den Eingängen 1-4 Unicable ist eine Verteilung von Fernseh- und Radioprogrammen an mehrere Teilneh- auf der Rückseite des Severs mit geeigneten Koaxialkabeln. Achten Sie auf die richtige mer über eine Koaxialleitung. -
Seite 11: Jess
4. Systemeinstellungen 4. Systemeinstellungen 4.2.5 Jess 4.2.6 DiSEqC 32 Teilnehmer können bis zu 8 verschiedene Satelliten empfangen. DiSEqC 1.2 Motor wird benutzt, um den Spiegel manuel zu bewegen. Folgende Optio- nen stehen Ihnen zur Verfügung um den Motor zu bewegen: •... - Seite 12 4. Systemeinstellungen 4. Systemeinstellungen Stellen Sie die Spiegelbewegung auf INSTALLER. Drücken Sie die links/rechts Taste (Ost/ Stellen Sie die Spiegelbewegung auf BENUTZER. Drücken Sie die links/rechts Taste (Ost/ West) um den Motor zu bewegen (grobe Bewegung). Der Motor bewegt sich solange, West) um den Motor zu bewegen.
- Seite 13 4. Systemeinstellungen 4. Systemeinstellungen Unter dem Bewegungstyp ERWEITERT können Sie weitere motorspezifische Einstellun- gen vornehmen: • Enable/Disable Limit - Aktivieren oder Deaktivieren Sie ein Limit für die Motordrehung • Drehung Ost/West - Sie können den Motor nach Osten/Westen durch Drücken der links/rechts Taste drehen.
-
Seite 14: Usals
4. Systemeinstellungen 4. Systemeinstellungen 4.2.7 USALS Das Bild zeigt, wenn sich der Motor bewegt. USALS bedeutet Universal Satellite Automatic Location System. Dieser Typ wird verwen- det, um den Spiegel automatisch auf eine Satelliten-Position zu bewegen. Geben Sie den Satellitenwinkel, den Breiten- und Längegrad ein und der Motor wird sich automatisch zu den ausgewählten Satelliten bewegen. -
Seite 15: Importeinstellungen
4. Systemeinstellungen 4. Systemeinstellungen 4.3 Import Einstellungen 4.4 Export Einstellungen Import Einstellung: Sie können zuvor gesicherte Einstellungen importieren. Alle Daten Export Einstellung: Sie können Ihre Einstellungen, die Sie am Server vorgenommen ha- werden hierbei überschrieben. Die zu importierenden Dateien müssen die Endung XML ben, exportieren. -
Seite 16: Systemstatus
5. Systemstatus 6. Tuner Das Systemstatus Menü beinhaltet folgende Informationen: Wählen Sie Tuner im Bildschirmmenü aus. Es stehen Ihnen folgende Untermenüs zur Verfügung: • Tuner Informationen • Tuner Parameter Tuner Einstellungen • Streaming Informationen • Wählen Sie „Dynamisch“ damit der Server die benötigten Parameter automatisch ermittelt. -
Seite 17: Tunereinstellung
6. Tuner 6. Tuner 6.1 Tuner Einstellungen • Standardmäßig befindet sich der Server im dynamischen Modus. • Der Server ermittelt die erforderlichen Parameter automatisch aus dem Clienten Wählen einen Tuner aus und wechseln Sie zu „Statisch“ um die einzelnen Parameter ma- (z.B. -
Seite 18: Tunertest
6. Tuner 7. Software Update Um ein Firmwareupdate durchzuführen gibt es verschiedene Wege: 6.2 Tuner Test • S/W Download via USB • S/W Download via OND • S/W Download via WEB UI 7.1 USB Geben Sie gültige Parameter ein, um den Tunerstatus zu überprüfen. Um die Firmware via USB zu aktualisieren, müssen Sie sie auf einen USB Stick kopieren. - Seite 19 7. Software Update 7. Software Update Wenn Sie einen USB Stick eingesteckt haben und die Option USB wählen, wird eine Hin- Wählen Sie JA um den Upgradevorgang zu starten, oder NEIN um abzubrechen. weisfenster im Bildschirmmenü erscheinen. DEUTSCH DEUTSCH...
- Seite 20 7. Software Update 7. Software Update Sollte sich mehr als eine Datei in dem Ordner „Update“ befinden, erscheint ein Fenster, Wählen Sie die richtige Firmware aus und bestätigen Sie mit OK. indem Sie die richtige Firmware auswählen müssen. Befindet sich nur eine Datei in dem Ordner „Update“, wird dieser Schritt übersprungen.
- Seite 21 7. Software Update 7. Software Update Die Upgradevorgang beginnt. Schalten Sie niemals das Gerät aus, bevor der Upgrade- Nach erfolgreichem Upgrade startet der Server neu. vorgang abgeschlossen ist. DEUTSCH DEUTSCH...
-
Seite 22: Ond
7. Software Update 7. Software Update 7.2 OND Sie können ein Update auch über ein TCP/IP Netzwerk vornehmen. Klicken Sie auf „Suche“ um nach der Firmware im Netzwerk zu suchen. Wählen Sie eine Netzwerkschnittstelle (Ethernet oder Wi-Fi) und geben Sie die IP Adres- se unter OND Server ein. - Seite 23 7. Software Update 7. Software Update Sollte die Firmware auf dem aktuellen Stand sein, erscheint ein Hinweisfenster. Ist eine neuere Firmwareversion verfügbar, erscheint ein Hinweisfenster. Bestätigen Sie mit JA um den Upgradevorgang zu starten, oder NEIN um abzubrechen. DEUTSCH DEUTSCH...
- Seite 24 7. Software Update 7. Software Update Die Upgradevorgang beginnt. Schalten Sie niemals das Gerät aus, bevor der Upgrade- Nach erfolgreichem Upgrade startet der Server neu. vorgang abgeschlossen ist. DEUTSCH DEUTSCH...
-
Seite 25: Webui
7. Software Update 7. Software Update 7.3 WebUI Sie können den Upgradevorgang abbrechen, indem Sie „Abbrechen“ drücken. Hier können Sie ein Upgrade über einen PC vornehmen, der sich im gleichen Netzwerk befidet. Die PC Firmware sollte die Endung *.nig haben. DEUTSCH DEUTSCH... -
Seite 26: Admin
7. Software Update 8. Admin 8.1 Softwareversion Hier sehen Sie alle Softwareinformati- onen des SAT>IP Servers: • Seriennummer • Loader Version • H/W Version • S/W Version • Upgrader Version • Geräte ID • UUID • MAC Adresse • Datum und Zeit 8.2 Bevorzugte Sprache Wählen Sie hier die Sprache des Menüs aus (deutsch, englisch) Bitte warten Sie bis der Server neu gebootet hat. -
Seite 27: Technische Daten
9. Technische Daten Notizen • Prozessor ............STi7108 • Flash ..............1 MB NOR / 128 MB NAND • RAM ..............512 MB / DDR3-1066 • Ethernet ............RJ45 10/100/1000 • Spezifikation..........SAT> IP 1.2 kompatibel • Video/Audio Unterstützung ..... MPEG2 / MPEG4 / TS & PS •... - Seite 28 SAT>IP Server 2 user manual Stand: 1.0 November 2014 // Technical changes, misprints and errors reserved. Megasat Werke GmbH | Industriestraße 4a | D-97618 Niederlauer | www.megasat.tv | info@megasat.tv...
-
Seite 29: Safety Instructions
Content Safety Instructions Please read the manual thoroughly before operating the equipment. In case of incorrect Safety Instructions...................... 03 or improper handling, the warranty becomes void. 1. Introduction ......................04 Power supply: Before start please check the correct operation voltage of the 2. -
Seite 30: Introduction
1. Introduction 2. Connection & How to access SAT>IP Server 2 allows free satellite live TV/Radio programs to be received & distributed to SAT>IP Client compliant devices like smart phones, tablet pc‘s and notebook pc‘s & other client devices over Wired/Wireless home network in both unicast/multicast mode of transmission. -
Seite 31: Configuration
2. Connection & How to access Identify the IP address • Select in the list of „UPnP Devices“ to „Megasat SAT> IP Server 2“, and read the corre- Turn on the server. The server connects to the network and receives sponding „Base URL“... -
Seite 32: Login / Logout
3. Login / Logout 4. System Settings Login Server box supports the below network mode of interfaces. • Wired Network Once the browser was successful- • Wireless Network ly connected to Server, then the „Login“ page will be displayed. The default user name for server is „admin“... -
Seite 33: Network Settings
4. System Settings 4. System Settings Click „System Setting“ from the Server page. 4.1.1 Wired Topics covered under Admin are listed below: • Network Settings By default the Server box is in DHCP mode. • LNB Settings • Import Settings Server acquires IP address from DHCP server &... -
Seite 34: Wireless
4. System Settings 4. System Settings Password request screen will be 4.1.2 Wireless displayed if user select WPA se- cure system available WiFi router. Using keypad user should enter Wireless option can be configure the valid WPA key. by Auto (or) Manual. A warning pop-up is displayed if the password is invalid or the Receiver is unable to connect to... -
Seite 35: Lnb Settings
4. System Settings 4. System Settings The Green color tick icon is dis- 4.2 LNB Settings played if WiFi Router is connec- ted without any problem. All WiFi Select the type of LNB that is connected to Satellite input of your box based on your network settings are stored in the satellite installation. -
Seite 36: Quad
4. System Settings 4. System Settings 4.2.1 LNB Settings 4.2.2 Quad To configure the below settings from the LNB settings menu. Satellite reception system consists of a Quad LNB. Connect the 4 outputs of the LNB to the inputs 1... 4 of the Server box via suitable SAT antenna cables. •... -
Seite 37: Quattro
4. System Settings 4. System Settings 4.2.3 Quattro 4.2.4 Unicable Satellite reception system consists of a Quattro LNB. Connect the 4 outputs of the Unicable distribution is a satellite TV technology that enables delivery of broadcast pro- Quattro LNB to the inputs 1... 4 of the Server via suitable SAT antenna cables & and ensu- gramming to multiple users over a single coaxial cable. -
Seite 38: Jess
4. System Settings 4. System Settings 4.2.5 Jess 4.2.6 DiSEqC 32 users can able to view the 8 different satellites via user band frequency. DiSEqC 1.2 is used to move the motor manually. Using this option user can move the motor with the following moving controls. - Seite 39 4. System Settings 4. System Settings Set the Dish moving type as INSTALLER. Press Left/Right key in Drive East/West option Set the Dish moving type as USER. Press Left/Right key in Drive East/West option to to move the motor. Now motor will be move continuously[coarse movement]. Motor move the motor.
- Seite 40 4. System Settings 4. System Settings The above picture which shows the Advanced setup, through this setup user can per- form the below listed Motor related settings, • Enable / Disable limit - Enable or Disable the motor rotation to the restricted direc- tion angle.
-
Seite 41: Usals
4. System Settings 4. System Settings 4.2.7 USALS The above picture shows the Motor moving in-progress. USALS means Universal Satellite Automatic Location System. This type is used to move the dish towards the satellite position automatically. USALS is used to position the dish automatically without user stress. By giving the input of satellite angle, user latitude &... -
Seite 42: Import Settings
4. System Settings 4. System Settings 4.3 Import Settings 4.4 Export Settings Import Settings: User can import the configuration information which was available Using export settings user can retrieve the user configured details of the Server & stored from the receiver (can be extracted using export settings). it as separate XML file. -
Seite 43: System Status
5. System Status 6. Tuner System status menu gives the informations about: Select the type of Tuner of your box based on your satellite installation. Topics covered under are listed below: • Tuner details • Tuner parameters Tuner Settings • Streaming details •... - Seite 44 6. Tuner 6. Tuner 6.1 Tuner Settings • By default the Server box is in Dynamic mode. • Server box tuned the client requested carrier in Dynamic mode. Select „Static“ for configure the tuner to the particular frequency where the client can only tune that carrier.
-
Seite 45: Tuner Test
6. Tuner 7. Software Update In order to support S/W upgrading, we have supported the below upgrading modes, 6.2 Tuner Test • S/W download via USB • S/W download via OND • S/W download via WEB UI 7.1 USB Enter the below valid parameters to check the tuner lock sattus. The S/W Upgrade via USB option used to download the latest software by USB memory •... - Seite 46 7. Software Update 7. Software Update If USB media is inserted with S/W image and when user select „Software Upgrade via System switch to Upgrader mode when select Yes from the confirmation. USB“ then above message will be displayed. ENGLISH ENGLISH...
- Seite 47 7. Software Update 7. Software Update System boot the upgrader mode and if the „Update“ folder in USB contains more than Select the correct image and press the ok key, downloading will start. one file the above screen will be displayed. User need to select the correct image. Other- wise it directly start the S/W fusing.
- Seite 48 7. Software Update 7. Software Update The above slide indicated downloading in-progres. After complete the downloading, box booted with new S/W. Warning - Don‘t power off the STB during software downloading/erasing/fusing. ENGLISH ENGLISH...
-
Seite 49: Ond
7. Software Update 7. Software Update 7.2 OND Upgrade the software from anywhere in the network world through TCP/IP mode of When select „Search“ Button, STB will search new S/W in the Network. connection in a secure manner. Select the Network Interface mode and enter the OND server IP address for search the S/W availability. - Seite 50 7. Software Update 7. Software Update If new S/W is not available then STB shows the above message. If new S/W is available then STB shows the above confirmation message. ENGLISH ENGLISH...
- Seite 51 7. Software Update 7. Software Update Once user press OK STB starts to connect the server. Once successfully connected with After complete the downloading, box booted with new S/W. server then downloading will be started. ENGLISH ENGLISH...
-
Seite 52: Webui
7. Software Update 7. Software Update 7.3 WebUI User can able to cancel the upgrade mode with confirmation via press the cancel button. This is simple file based upgrading process by this user can able to upgrade the s/w image from the local PC or from USB device connected to the PC. The s/w image should be of format .nig ENGLISH ENGLISH... -
Seite 53: Admin
7. Software Update 8. Admin Server box supports S/W version display and Password setup mechanism to change the server configuration. • S/W Version • Change Password 8.1 SW Version The Version menu displays below informations about the application. • Serial Mumber •... -
Seite 54: Specificatons
9. Specifications Notes • Processor ............STi7108 • Flash ..............1 MB NOR / 128 MB NAND • RAM ..............512 MB / DDR3-1066 • Ethernet ............RJ45 10/100/1000 • Specification ..........SAT>IP 1.2 compatible • Video / Audio Unterstützung ... MPEG2 / MPEG4 / TS & PS •... - Seite 55 Status: 1.0 November 2014 // Technical changes, misprints and errors reserved. Megasat Werke GmbH | Industriestraße 4a | D-97618 Niederlauer | www.megasat.tv | info@megasat.tv...