
Verwandte Anleitungen für Livox AVIA


Inhaltszusammenfassung für Livox AVIA
- Seite 1 LIVOX AVIA Quick Start Guide Betriebsanleitung (Kurzfassung) 快速入门指南 クイックスタートガイド 퀵 스타트 가이드 v1.0...
- Seite 2 物品清单 同梱物 구성품 설명서 ×1 ×1 ×1 ×1 ×2 Screws Package* Schraubensatz* 螺钉包* ねじパッケージ* 나사 패키지* Livox Avia Livox Converter 2.0 Optical Window L-Shape Hex ×1 Cleaning Cloth Screwdriver Livox Avia Livox Konverterbox 2.0 Reinigungstuch Sechskant- Cables Package** Livox Avia für Sensorscheibe...
- Seite 3 Livox product, or damage to other objects in the vicinity. By using this product, you hereby signify that you have read this disclaimer carefully and that you understand and agree to abide by the terms and conditions herein.
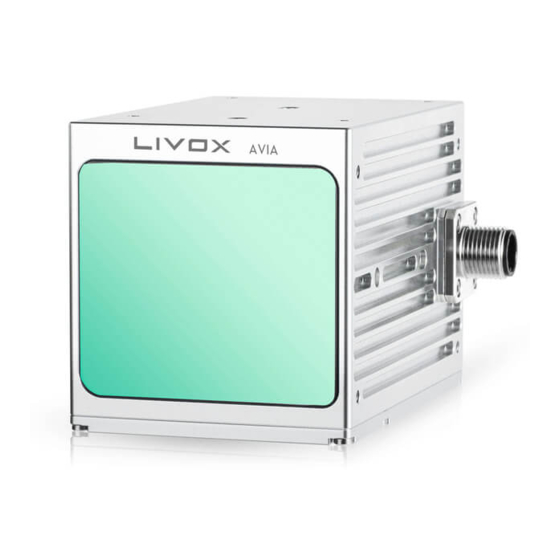
- Seite 4 In such conditions, the detection range may be reduced. 2. DO NOT touch the optical window of the Livox Avia. Dust and stains on the optical window can negatively affect the performance. Use compressed air, isopropyl alcohol, or a lens cloth to clean the optical window correctly.
-
Seite 5: Installation And Connection
2. Power Port 4. Sync Port Installation and Connection FOV Range As shown below, the Avia has a FOV of 70.4° horizontally and 77.2° vertically. When mounting the sensor, make sure that the FOV is not blocked by any objects. Horizontal Vertical... - Seite 6 Refer to the dimensions and the mounting holes in the diagrams below to mount or embed the Livox Avia to or in an appropriate place on the target base using M3 screws. The optical axis is symmetrical and located 32.4 mm from the bottom of the Avia. Location holes are found on the top, bottom, left, and right sides of the Avia and all are rotationally symmetric to the optical axis.
- Seite 7 Livox Avia uses the high-reliability M12 aviation connector (male). 12 11 Conversion Cable The Livox Avia includes a conversion cable. To connect the Livox Avia to the Livox Converter 2.0, users can use this cable or a cable of their own. M12 Aviation Connector (Female)
- Seite 8 Livox Avia Quick Start Guide Below is more information on the Livox Avia M12 aviation connector and the conversion cable. LiDAR M12 Aviation Connector Connectors Signal Type Description Color POWER+ Power DC10V-15V Blue/white Ground Power Ground Silver bare wire Ethernet-TX+ Output 100BASE-TX, TX+...
- Seite 9 Connect the computer and the Livox Converter 2.0 using an Ethernet cable. c. Connect the Livox Converter 2.0 to an external power source. • Refer to the Livox Avia User Manual on how to connect the Livox Avia to a router supporting the Dynamic Host Configuration Protocol (DHCP).
-
Seite 10: Specifications
Livox Viewer. Low-Temperature Start-Up The working temperature of the Livox Avia is from -40° to 65° C (-40° to 149° F ) with the self- dissipation module attached. In a low-temperature environment, the Livox Avia may enter self- heating mode when connecting to a power supply. The self-heating mode may last at least 3 min with a maximum power of 31 W. - Seite 11 ② Livox Avia cannot precisely detect objects which are less than 1 m away. In this situation, the serial number of the Livox Avia displayed on Livox Viewer will change color to warn users. If in use at the time, the SDK can be checked for more information about the warning.
- Seite 12 The figure listed is for reference only. The point cloud may distort to a varying extent when the target object is within the range of 1 to 3 m. Contact Livox for support if you require to detect objects within this range.
-
Seite 13: Haftungsausschluss
Produkt für den Betrieb ordnungsgemäß einrichten zu können. Wenn Sie die Anweisungen und Warnungen in diesem Dokument nicht lesen und beachten, kann dies zu ernsthaften Verletzungen, Schäden oder zum Verlust Ihres Livox Produkts oder anderer Objekte führen, die sich in der Nähe befinden. - Seite 14 Weitere Informationen zum Reinigen von Sensorscheiben finden Sie im Livox Avia Benutzerhandbuch. 3. Achten Sie bei der Verkabelung des Livox Avia darauf, dass Sie Kabel mit einer ausreichenden Strombelastbarkeit verwenden. Andernfalls kann das Produkt zu einem erheblichen Brandrisiko werden oder dauerhaft beschädigt werden.
- Seite 15 Erkennungsreichweite bei Objekten mit geringer Remission (z. B. Betonstahl, Beton, Gestein oder Boden). Leichtes Gewicht: Der kompakte und tragbare Avia wiegt nur 498 g und ist dadurch ideal zur Drohnenkartierung und für kleine Roboter geeignet. Dreifaches Rücksignal: Eine speziell angepasste Firmware unterstützt das dreifache Rücksignal in der Kartierung, um besser den Anforderungen der Forstkartierung gerecht zu...
-
Seite 16: Montage Und Anschluss
Montage und Anschluss Sichtfeld Wie unten Dargestellt hat der Avia ein horizontales Sichtfeld (FOV) von 70,4° und ein vertikales Sichtfeld von 77,2°. Achten Sie bei der Montage des Sensors darauf, dass der Sichtfeldbereich nicht durch andere Anbauten oder Gegenstände verdeckt ist. - Seite 17 Achten Sie bei der Verwendung immer auf den tatsächlichen Erfassungsbereich. Befestigung des Livox Avia Zur Montage oder zum Einbau des Livox Avia an der Lösung verwenden Sie bitte die unten angegebenen Maße des Sensors und M3-Schrauben. Die optische Achse ist symmetrisch und 32,4 mm von der Unterseite des Avia entfernt.
- Seite 18 Der Livox Avia verwendet den besonders zuverlässigen M12 Anschlussstecker (männlich). 12 11 Konvertierungskabel Der Livox Avia beinhaltet ein Konvertierungskabel. Zur Verbindung des Livox Avia mit dem Livox Converter 2.0, können Anwender dieses Kabel oder ein bereits vorhandenes Kabel verwenden. M12 Anschlussstecker (weiblich)
- Seite 19 Seriennummer des jeweiligen Livox Avia LiDAR-Sensors.) Ab Werk sind die Subnetzmaske des Livox Avia LiDAR-Sensors auf 255.255.255.0 und der Gateway auf 192.168.1.1 gesetzt. Verbinden Sie den Livox Avia bei der ersten Verwendung direkt mit einem Computer. 1. Stellen Sie vor dem Herstellen der Verbindung die IP-Adresse des Computers auf den statischen IP-Adressmodus ein.
-
Seite 20: Herunterladen Und Verwenden Des Livox Viewers
Spannungsbereich der externen Stromquelle jedoch von 9 bis 30 V. Die Arbeitsspannung des Livox Avia liegt jedoch bei 10 bis 15 V. Wenn ein Livox Avia direkt an eine externe Stromquelle angeschlossen ist, stellen Sie sicher, dass der Spannungsbereich der Stromquelle innerhalb des zulässigen Bereichs liegt. -
Seite 21: Start Bei Niedriger Temperatur
Livox Avia Kurzanleitung 4. Klicken Sie oben im Geräte-Manager-Fenster auf „LiDAR“. 5. Wählen Sie den Livox Avia aus, den Sie sich anzeigen lassen möchten, und klicken Sie dann auf , um die Verbindung herzustellen. Wählen Sie alternativ den Livox Avia aus, den Sie sich anzeigen lassen wollen, klicken Sie auf diesen mit der rechten Maustaste und dann auf „Connect“. - Seite 22 Zerlegen Sie den Livox Avia NIEMALS, um Verletzungen durch den Laser zu vermeiden. ② Der Livox Avia ist nicht in der Lage Objekte zu erkennen, die weniger als 1 m entfernt sind. In diesem Fall ändert die Seriennummer des entsprechenden Livox Avia im Livox Viewer die Farbe, um den Anwender zu warnen.
- Seite 23 相关政策或者准则。 Livox 不承担因用户未按本文档、《用户手册》使用产品所引发的一切损失。在遵从法律法规的 情况下,Livox 享有对本文档的最终解释权。Livox 有权在不事先通知的情况下,对本条款进行 更新,改版或终止。 警 告 1. 在空气能见度较差的情况下(例如雾霾、暴雨天气),Livox Avia 的有效检测范围将会减小, 使用时请格外小心。空气能见度较好情况下,Livox Avia 的有效检测范围请查看参数列表。 2. 切勿用手触摸 Livox Avia 窗口。若 Livox Avia 窗口上有污点或灰尘等杂质,请使用压缩空气 除尘罐,酒精以及镜头清洁布进行清洁(具体清洁方式,请查看《Livox Avia 用户手册》), 以免污点灰尘等影响产品性能。 3. 如使用线材包配件自行定制电源线,请确认所使用的线材负载能力达到产品功耗需求,否则 可能导致产品损坏,甚至引发火灾。 4. 为减少触电危险以及防止可能存在的光辐射危险,请勿私自拆开或改装本产品。本产品不包 含用户可维修零件,需售后服务请联系 Livox。 5. Livox Avia 满足 Class 1 激光产品安全要求(IEC/EN 60825-1:2014),可于正常情况下安全...
- Seite 24 Livox Avia 快速入门指南 远量程:相比 Livox Horizon,Avia 显著优化了低反射率物体(例如钢筋、混凝土、岩石、泥土等) 的量程,提升幅度达 70%。 重量轻:Avia 整机小巧轻便,重量 498g,适合无人机测绘以及小型机器人场景等。 三回波:在测绘方面,定制化固件支持最多三回波,更好地适应林业测绘需求。 可切换扫描模式:支持传统非重复扫描与重复扫描两种扫描模式。非重复扫描用于提高静态扫 描效果和飞行测绘中对于竖直面的扫描效果;重复扫描用于提高点云密度均匀性。 二次开发:用户可通过 Livox Viewer 软件实时获取三维图像,更能基于 Livox SDK 进行开发, 轻松获取 3D 点云数据,满足个性化的应用需求。 Livox Avia 窗口 安装孔 电源转接插座 2.0 1. 激光探测测距仪连接头接口 3. 以太网线接口 2. 电源接口 4. 同步信号线接口...
- Seite 25 Livox Avia 快速入门指南 安装连线 有效视场角(FOV)范围 Livox Avia 的 FOV 为水平 70.4°,竖直 77.2°,如下图所示。安装时请注意 FOV 的有效范围, 避免遮挡 FOV 区域。 水平方向 竖直方向 单位:mm 请注意,Livox Avia 的有效量程在不同的 FOV 区域内有所区别,越靠近 FOV 边缘的时候有效量 程越短,越靠近 FOV 的中间位置,有效量程越接近最大值,可参考下图 : 90° 0° 105° 15° 75° -15° 120° 30° 60°...
- Seite 26 2.00 20.00 20.00 34.00 2.00 65.00 65.00 +0.05 4.00 +0.05 4.00 20.00 65.00 20.00 65.00 单位:mm 安装电源转接插座 2.0 请根据下图所示的电源转接插座 2.0 尺寸大小及安装孔位尺寸,将其安装至合适位置。 22.90 37.00 52.00 4-M2 2.5 单位:mm 接口定义 Livox Avia 端 M12 航空插头(公头) Livox Avia 使用高可靠性 M12 航空插头。 12 11...
- Seite 27 Livox Avia 快速入门指南 航插电源网口线 航插电源网口线是 Livox Avia 的可选配件,线长 1.5m。用户可以通过航插电源网口线和电源转 接插座 2.0 连接 Livox Avia。 M12 航空插头(母头) 激光探测测距仪连接头 Livox Avia 的 M12 航空插头和航插电源网口线的线序及其定义如下: M12 航空插头 激光探测测距仪 信号 属性 描述 线束颜色 ( 公 / 母头 ) 管脚 连接头管脚 POWER+ Power DC10V-15V 蓝 / 白...
- Seite 28 黑色(地线);蓝色(PPS);白色(NC) 无效信号 Lvox 电源转接插座 2.0 的同步信号接口仅支持 LVTTL 电平同步,更多详细信息请参见 《Livox Avia 用户手册》。 连 接 Livox Avia 支持 2 种 IP 模式:动态 IP 地址模式以及静态 IP 地址模式。Livox Avia 出厂默认设 置为静态 IP。IP 地址为 192.168.1.1XX(XX 为 Livox Avia SN 码最后两位数字),子网掩码为 255.255.255.0,默认网关为 192.168.1.1。首次使用 Livox Avia 时,无需通过路由器,可直接 与电脑连接。...
- Seite 29 可选择电压为 9-30V 的直流电流进行供电。若不使用电源转接插座 2.0,而是将 Livox Avia 直接连接至外部电源,由于 Livox Avia 的工作电压为 10-15V,因此请确保所连接 的外部电源电压在允许范围内。连接时,请注意电源接口按照正负极正确连接。 下载并安装 Livox Viewer 用 户 可 前 往 Livox 官 网 www.livoxtech.com 下 载 最 新 的 Livox Viewer, 查 看 点 云 图。Livox Viewer 目前支持 Windows ® 7/8/10(64 位)和 Ubuntu 16.04(64 位)。...
- Seite 30 ⑥ 防护级别 重复扫描模式:9 W ( 启动 16 W ) ⑦ 功率 非重复扫描模式:8 W(启动 16W) Livox Avia: 10 ~ 15 V DC(推荐 12 V 大于 30W 的直流电源) 供电电压范围⑧ 电源转接插座 2.0:9 ~ 30 V DC 40cm 全方向 <45 dBA 噪音 91×61.2×64.8 mm 尺寸...
- Seite 31 ① 激光探测测距仪中内置激光器辐射光的发散角为 25.2° ( 水平 )×8° ( 竖直 )( 半高宽,FWHM),最大激 光功率可能超过 70W。切勿拆开 Livox Avia,以免造成危险。 ② 当被测物体距离 Livox Avia 小于 1 m 时,Livox Avia 无法对其进行测量。此时,Livox Avia 将会输出 遮挡预警,Livox Viewer 中相应的测距仪 SN 码将变换颜色,用户也可通过 SDK 得到预警数据包。 ③ 在大多数使用场合 ( 太阳光照度为 0~100klx),Avia 的量程一般介于 320 m 与 450 m 之间。在环境光...
- Seite 32 Company Limited (「Livox」) の公式ウェブサイト(www.livoxtech.com)からも入手できます。 本書では、ユーザーの安全および法的権利と責任に関する情報を取り扱っています。ご使用の 前に、本書の内容をよくお読みいただき、確実に適切な設定を行うようにしてください。本書 に記載されている指示と警告に従わなかった場合、ご自身や他人の深刻な怪我、または Livox 製品の損傷、あるいは周辺の他の物の破損につながる恐れがあります。 本製品を使用することにより、お客様は本書の免責事項をよく読み、記載されている利用規 約を理解し、順守することに同意したとみなされます。LIVOX アフターサービス ポリシー (www.livoxtech.com に掲載)に明確な規定がない限り、製品およびすべての資料、製品を通 して得られるコンテンツは「現状のまま」および「提供されているまま」で提供され、明示的 または黙示的に問わず、いかなる種類の保証も条件も伴いません。明示的または黙示的に問わ ず、LIVOX アフターサービス ポリシーに明確に規定されない限り、製品、製品アクセサリー、 すべての資料に関し、 LIVOX は以下を含む、 いかなる種類の保証も一切行いません。 (A) 商品性、 特定目的の適切性、権限、平和享有権、非侵害に対する黙示的保証、および(B)取引の過程、 使用、商慣習から生ずる保証。LIVOX での保証において明確に規定されない限り、製品、製品 のアクセサリー、製品の一部や資料が、中断されることなく、安全で、エラー、ウイルス、そ の他有害な部品がないこと、ならびに問題があった場合にそれらが是正されることを、LIVOX は保証しません。 本規約に明確に記載されない限り、口頭であれ書面であれ、製品、製品のアクセサリー、資 料から得られる助言や情報により、LIVOX または製品に関する保証は発生しません。 本製品、製品アクセサリー、資料の使用またはアクセスに起因するあらゆる損害に対するす べてのリスクは、お客様が負担するものとします。お客様の裁量とリスクにおいて本製品を 使用し、怪我、死亡、お客様の財産への損害(本製品と接続して使用したパソコンシステム、 モバイル端末、LIVOX ハードウェアを含む)、サードパーティの財産への損害、本製品の使用...
- Seite 33 ウのお手入れの詳細については、Livox Avia のユーザーマニュアルを参照してください。 3. Livox Avia 電源ケーブルをカスタマイズするときは、ケーブルの電流容量が Livox Avia の電 源要件に従っていることを確認してください。確認を怠ると、製品が火災の危険を招いた り恒久的に損傷したりする可能性があります。 4. 感電や放射線曝露をすることがないように、Livox Avia は絶対に解体しないでください。ア クセサリーや製品部分を交換する必要がある場合は、Livox のサポートを受けてください。 5. Livox Avia は、クラス 1 レーザー製品(IEC/EN 60825-1: 2014)に等級分けされており、通 常条件で使用するかぎり安全です。 6. 液体による損傷は保証の対象外です。 7. Livox Avia を落下させないでください。 8. Livox Avia クイックスタートガイドには重要な情報が記載されています。初回利用前に必ず クイックスタートガイドをお読みください。 また、 常に参照できるように保管してください。...
- Seite 34 Livox Avia クイックスタートガイド Livox Avia 光学ウィンドウ 取り付け穴 Livox コンバーター 2.0 1. LiDAR コネクターポート 3. イーサネットポート 2. 電源ポート 4. 同期ポート 取り付けと接続 FOV 範囲 以下で示すように、Avia の FOV は水平で 70.4°、垂直で 77.2° です。センサーを取り付ける際、 FOV を妨げる物がないようにしてください。 水平 垂直 単位:mm...
- Seite 35 反射率 80% 反射率 10% 水平 垂直 太陽光照度:100 klx 使用中は常に有効検知範囲に注意してください。 Livox Avia の取り付け サイズと取り付け穴については以下の図を参照の上、対象のベース上やベース内の適切な位 置に M3 ねじを使用して Livox Avia の取り付けや組み込みを行ってください。光学軸は対称で、 Avia の底部から 32.4 mm の位置にあります。位置決め穴は Avia の最上部、底部、左側、右側 にあり、それらすべては光学軸に対して回転的対称です。Avia はどの面を使用しても取り付 けられます。 Livox Avia は取り付けブラケット (別売) の適切な場所に取り付けるか組み込むこともできます。 6.00 79.00 16-M3 6.00 79.00 16-M3 75.55...
- Seite 36 52.00 37.00 4-M2 2.5 単位:mm コネクター M12 航空コネクター Livox Avia は高信頼性 M12 航空コネクター(オス)を使用しています。 12 11 変換ケーブル Livox Avia には変換ケーブルが同梱されています。Livox Avia を Livox コンバーター 2.0 に接続 するには、このケーブルまたはお手持ちのケーブルを使用できます。 M12 航空コネクター(メス) LiDAR コネクター Livox Avia M12 航空コネクターと変換ケーブルの詳細を以下に示します。 LiDAR コネ M12 航空コ 信号 種類...
- Seite 37 Livox コンバーター 2.0 の同期ポートは PPS(LVTTL 信号)同期のみをサポートしていま すが。詳細は、Livox Avia のユーザーマニュアルを参照してください。 Livox Avia との接続 Livox Avia は、動的 IP アドレスモードと静的 IP アドレスモードの 2 つの IP モードに対応し ています。すべての Livox Avia LiDAR センサーは、デフォルトで静的 IP アドレスモード(IP アドレス 192.168.1.1XX)に設定されます(XX は、Livox Avia LiDAR センサーのシリアル番 号の末尾 2 桁です)。Livox Avia LiDAR センサーのデフォルトのサブネットマスクはすべて...
- Seite 38 いることを確認してください。各 LiDAR センサーの IP アドレスの設定方法の詳細は、 Livox Avia ユーザーマニュアルを参照してください。 ・ Livox コンバーター 2.0 の動作電圧は 9 ~ 30 V です。したがって、Livox コンバーター 2.0 を使用して Livox Avia を外部電源に接続する場合、外部電源の対応電圧範囲は 9 ~ 30 V です。ただし、Livox Avia の動作電圧は 10 ~ 15 V です。Livox Avia が外部電源に 直接接続されている場合は、電源の電圧範囲が許容範囲内であることを確認してくだ さい。電源ケーブルのプラス端子とマイナス端子が正しく接続されていることを確認 してください。...
- Seite 39 Livox Avia クイックスタートガイド 3. Livox ビューワーを起動し、 をクリックします。 ポップアップウィンドウが表示されます。 ローカルネットワーク(LAN)上の Livox LiDAR センサーは、このポップアップウィンドウ ですべて確認できます。 4. デバイス マネージャーウィンドウの上部にある「LiDAR」をクリックします。 5. 確認する Livox Avia を選択し、 をクリックして接続します。または、確認する Livox Avia を選択して右クリックし、「接続」をクリックします。 6. 接続後、点群データを表示するにはクリックします。 ・ Windows ユーザーは、Windows ファイアウォールが有効になっていると、Livox ビュ ーワーが LiDAR センサーを検知できない場合があります。この場合、コントロールパ ネルを開き、Windows ファイアウォールを無効にしてから、Livox ビューワーを再起 動してください。 ・ Livox ビューワーの使用方法の詳細は、Livox ビューワー ユーザーマニュアルをダウン...
- Seite 40 対象物が 1 ~ 3 m の範囲内にある場合、点群はさまざまな度合いで歪む可能性があります。この範 囲内の対象物を検知する必要がある場合は、Livox にお問い合わせください。 ⑤ ノイズの誤警報率は、25℃の温度で、0 ~ 100 klx の試験環境で迷光により発生したものです。 ⑥ Livox Avia の総合 IP 等級は IP67 です(Livox コンバーター 2.0 とケーブルは除く)。 ⑦ 低温環境下では、Livox Avia は最初に自己発熱モードに入り、その電力は最大で 31 W に達する可能 性があります。 Livox Avia n のピーク出力値に基づき、 電源供給が適切であることを確認してください。 詳細は、Livox Avia のユーザーマニュアルを参照してください。...
- Seite 41 서를 주의 깊게 읽고 구성이 올바른지 확인하십시오. 본 문서의 지침 및 경고 사항을 읽고 따르지 않을 경우 자 신 또는 다른 사람이 심각한 부상을 입거나, Livox 제품에 대한 손상 또는 손실, 또는 근처에 있는 다른 물체 에 심각한 손상이 발생할 수 있습니다.
- Seite 42 삼중 반사: 맞춤화된 펌웨어는 최대 삼중 반사를 지원하여 삼림 매핑의 요구를 더 잘 충족시킬 수 있습니다. 대체 스캔 패턴: Avia는 반복적 및 비반복적 스캔 패턴을 둘 다 지원합니다. 비반복적 스캔 기술은 정지 스캔 효 과와 비행중 매핑을 하는 동안 수직면에 대한 효과를 개선하는 데 사용합니다. 반복적 스캔 기술은 포인트 클...
- Seite 43 에 의해 FOV가 차단되지 않도록 하십시오. 수평 수직 단위: mm Livox Avia의 유효 탐지 거리는 물체가 FOV 내에 있는 위치에 따라 달라진다는 점을 유의하십시오. 유효 탐 지 거리는 FOV의 가장자리로 갈수록 거리가 짧아지고, FOV의 중심으로 가까워질수록 늘어납니다. 아래 그 림을 참조하십시오. 90°...
- Seite 44 아래 그림의 치수와 장착 구멍을 참조하여 Livox Avia를 대상 베이스의 적절한 위치에 M3 나사를 이용하 여 장착하거나 내장합니다. 광학적 축은 대칭이며 Avia의 하단에서 32.4mm의 위치에 있습니다. 고정용 구 멍이 Avia의 상단, 하단, 좌측 및 우측에 있으며 광축과 모두 회전 대칭입니다. 아무 면이나 사용하여 Avia 를 장착할 수 있습니다.
- Seite 45 Livox Avia 퀵 스타트 가이드 12 11 변환 케이블 Livox Avia에는 변환 케이블이 포함됩니다. 이 케이블을 사용하거나 사용자의 자체 제작 케이블을 사용하여 사 용자는 Livox Avia를 Livox 변환기 2.0에 연결할 수 있습니다. M12 항공 커넥터(암컷) LiDAR 커넥터 아래는 Livox Avia M12 항공 커넥터 및 변환 케이블에 대한 상세 정보입니다.
- Seite 46 Avia 사용자 매뉴얼을 참조하십시오. Livox Avia 연결하기 Livox Avia는 유동 IP 주소 모드와 고정 IP 주소 모드라는 두 가지 IP 모드를 지원합니다. 모든 Livox Avia LiDAR 센서는 IP 주소가 192.168.1.1XX인 고정 IP 주소 모드로 기본 설정됩니다(XX는 Livox Avia LiDAR 센서 시리얼 넘버의 마지막 두 숫자입니다). Livox Avia LiDAR 센서의 기본 서브넷 마스크는 모두...
- Seite 47 • 컴퓨터의 IP 주소를 설정하는 방법은 Livox Avia 사용자 매뉴얼을 참조하십시오. • 여러 Livox Avia 센서가 고정 IP 주소 모드로 하나의 컴퓨터에 연결된 경우, 연결된 모든 센서의 고정 IP 주소가 서로 다른지 확인하십시오. 각 LiDAR 센서의 IP 주소를 설정하는 법에 대한 자세한 정보는...
- Seite 48 ⑥ 반복 스캔 패턴: 9W(시작: 16W) 전력 ⑦ 비반복 스캔 패턴: 8W(시작: 16W) Livox Avia: DC 10~15 V (권장: 12V DC 및 30W 이상) 전원 공급 전압 범위 ⑧ Livox 변환기 2.0: 9~30 V DC 40cm 모든방향 < 45 dBA 소음...
- Seite 49 다. 레이저로 인한 부상을 방지하려면 Livox Avia를 분해하지 마십시오. ② Livox Avia는 1m 이내에 있는 물체를 정밀하게 감지할 수 없습니다. 이런 경우, Livox 뷰어에 표시된 Livox Avia의 일 련번호 색이 변하며 사용자에게 경고합니다. 사용 중이라면, 경고에 대한 자세한 정보를 SDK로 확인할 수 있습니다.
- Seite 50 Niederlauer, Germany authority to operate the equipment. Déclaration de conformité UE : Par la présente, Livox Supplier’s Declaration of Conformity Technology Co., Ltd. déclare que cet appareil est conforme Product name: LIVOX AVIA...
- Seite 51 Directivei 2014/30/UE. Niederlauer, Germany Un exemplar al Declarației UE de conformitate este disponibil AB Uygunluk Beyanı: Livox Technology Co., Ltd. bu belge ile online, la adresa www.livoxtech.com/euro-compliance bu cihazın temel gerekliliklere ve 2014/30/EU sayılı Direktifin Adresa de contact pentru UE: Industriestrasse 12, 97618, diğer ilgili hükümlerine uygun olduğunu beyan eder.
- Seite 52 Livox Avia 快速入门指南 Environmentally friendly disposal Eliminação ecológica Old electrical appliances must not be disposed Os aparelhos elétricos antigos não podem ser eliminados of together with the residual waste, but have to juntamente com os materiais residuais. Têm de ser be disposed of separately.
- Seite 53 Livox Avia 快速入门指南 prietaisus privalo priduoti į atitinkamus arba analogiškus komunalnom sabirnom mjestu od strane privatnih osoba je atliekų surinkimo punktus. Tokiu būdu, įdėdami nedaug besplatno. Vlasnik starih uređaja dužan je donijeti uređaje pastangų, prisidėsite prie vertingų medžiagų perdirbimo ir do tih sabirnih mjesta ili sličnih sabirnih mjesta.
- Seite 54 CLASS 1 LASER PRODUCT IEC/EN 60825-1:2014 The label is affixed to one side of the Livox Avia CLASSE 1 PRODUIT LASER IEC/EN 60825-1:2014. Conformément aux normes 21 CFR 1040.10 et 1040.11, à l'exception de la conformité...
- Seite 55 Copyright © 2020 Livox Tech. All Rights Reserved. Livox is a trademark of Livox Technology Company Limited. Windows is a registered trademark of Microsoft Corporation in United States and other countries. Ubuntu is a registered trademark of Canonical Ltd. Printed In China...