
Verwandte Anleitungen für golden interstar ALPHA X

Inhaltszusammenfassung für golden interstar ALPHA X
- Seite 1 Bedienungsanleitung Digital DVB-S / S2 HDTV H.265 Receiver / IPTV / OTT Mediaplayer GOLDEN INTERSTAR ALPHA X www.golden-interstar.de...
-
Seite 2: Sicherheitshinweise
SICHERHEITSHINWEISE! Dieses Gerät wurde unter Einhaltung internationaler Sicherheitsstandards gefertigt. Lesen Sie die folgenden Sicherheitshinweise sorgfältig durch. Um Unfälle durch Elektroschock zu vermeiden, öffnen Sie das Gehäuse nicht. Überlassen Sie die Wartung ausschließlich qualifiziertem Fachpersonal. Wichtige Sicherheitshinweise und Schutzmaßnahmen: - Das Gerät ist nur für Netzanschluss 100- 250 V AC / 50 Hz vorgesehen. •... -
Seite 3: Digital Audio Out
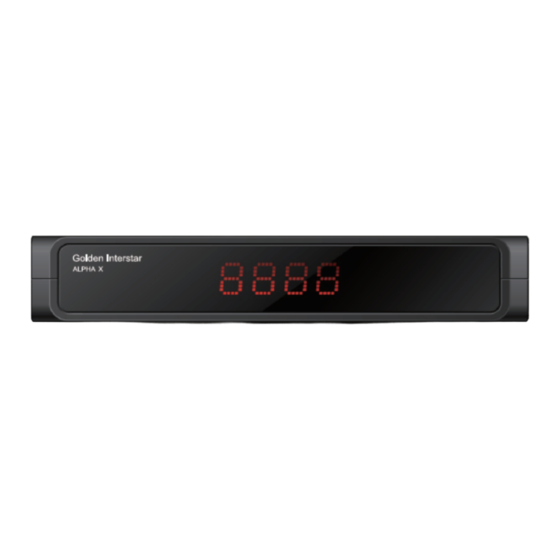
- FRONTBLENDE (VORDERSEITE): Frontblende / Anzeige Uhrzeit Anzeige des aktuellen Programms oder der Uhrzeit LED Status Anzeige Zeigt Betrieb oder Standby an (grün/ rot) Infrarot Empfänger IR Sensor befindet sich auf der rechten Seite - Geräte Rück- und Seitenansicht: ... - Seite 4 FERNBEDIENUNG...
- Seite 5 TASTE FUNKTION TASTE FUNKTION SAT-Receiver Ein- Sender auf/ab wechseln + PAGE - /Ausschalten Zahlentasten: Direkte Eingabe Mute: Stummschaltung 0 ~ 9 von Sendernummern und Zahlen Audio: Tonspur einstellen Satellit aufrufen AUDIO Hauptmenü anzeigen Zurück in vorheriges Menü MENU EXIT Zeigt die Senderliste an. Cursor nach links &...
- Seite 6 - INSTALLATION Anschluss der Satelliten-Antenne Antennenkabel mit LNB IN verbinden. Anschluss an das TV-Gerät HDMI Kabel mit dem TV-Gerät verbinden. RCA Kabel verwenden: Wenn kein HDMI Eingang an Ihrem TV-Gerät vorhanden ist können Sie den Receiver mit dem RCA Kabel verbinden. - START: Schalten Sie die STB ein Verbinden Sie Stromkabel mit dem Netz und schalten Sie den Receiver mit derFernbedienung ein.
- Seite 7 Gewünschten Satellit auswählen und Einstellungen wie DiSEqC vornehmen. Mit der roten Taste können Sie Programmsuchlauf starten. Unicable Für Unicable Einstellungen klicken Sie auf LNB Freq. und wählen Unicable LNB aus. Nach dem Suchlauf können Sie die gefundenen Programme editieren Gehe zu Menü Kanal Editor: Programm Editor Mit den, im Bild unten angezeigten Funktionstasten, können Sie die Editierung vornehmen.
- Seite 8 - Passwort (Kindersicherung) Das Werksseitige Passwort ist 0000. - EPG - Elektronischer Programmführer Drücken Sie die EPG Taste während Sie einen TV Kanal schauen. Das EPG Menü wird nun angezeigt. Das EPG Menü besteht aus Kanalinformationen, Informationen zu den Sendungen sowie einem Symbol für gegebenfalls verfügbare Zusatzinformationen zur Sendung.
- Seite 9 - Software update (Firmware update) Software updates finden Sie auf unserer Homepage: http://www.golden-interstar.de oder direkt im Menü des Receiver unter „Online update“. Service Golden Media GmbH Stuttgarter Strasse 36 D-73635 Rudersberg Tel: 0049-(0)7183-30750-0 Fax: 0049-(0)7183-30750-20 E-Mail: info@golden-media.net Internet: www.golden-media.net WEEE-Reg.-Nr. DE 59863460...
-
Seite 10: Technische Daten
TECHNISCHE DATEN Frequenzbereich 950 ~ 2400MHz Eingangs Pegel -80 ~ -20dBm Tuner Modulation DVB-S: 1/2, 2/3, 3/4, 5/6, 7/8 DVB-S2: 1/2, 3/5, 2/3, 3/4, 4/5, 5/6, 8/9, 9/10, (QPSK) 3/5, 2/3, 3/4, 5/6, 8/9, 9/10 (8PSK), 16APSK, 32APSK Decoder Formate MPEG2/4, H.264, H265, AVS, AVS plus, JPEG/MJPEG HD Auflösungen... - Seite 11 User manual Digital DVB-S / S2 HDTV H.265 Receiver / IPTV / OTT Mediaplayer GOLDEN INTERSTAR ALPHA X www.golden-interstar.de...
- Seite 12 CAUTION! To avoid the risk of electric shock, do not disassemble the receiver. There are no user-serviceable parts inside. Refer servicing to qualified service personnel only. This receiver was manufactured in accordance with international safety standards. Please read the following precautions carefully. Safety Instructions and Precautions: - Power supply network connection (100-240V ~ 50/60Hz) •...
- Seite 13 - FRONT PANEL: Digital channel / time display Displays the current channel number or time (depending on the menu setting) LED status indicator Displays the current status of the receiver (red / green) Receiver of IR signals The sensor of the IR signals from remote control - REAR AND SIDES PANELS: ...
- Seite 14 REMOTE CONTROL...
- Seite 15 Button Function Button Function On/Off STB power supply Change channel + or - + PAGE - Mute Direct input channel number 0 ~ 9 Choose audio Call satellites list AUDIO Show Main menu Exit to last menu MENU EXIT Perform action ←...
- Seite 16 - INSTALLATION Connection antenna Connect your satellite antenna to LNB IN Using HDTV cable For digital television, it is recommended to connect the receiver with an HDMI cable. In case the TV has an HDMI input it is advisable to use it to get best image quality. Using RCA cable If your TV has no HDMI input you can connect the receiver to the TV using the RCA cable.
- Seite 17 When the search is over, you will see a list of the channels found. Unicable The Alpha X supports Unicable LNBs. Please go to the Installtion menu for the settings if you connect the receiver to a Unicable LNB. Channels editor After searching, you can edit the channel list if you want.
- Seite 18 The Alpha X allows you to play high-quality media files from a USB drive or your local network using DLNA. - DLNA The Alpha X allows you to work with DLNA. There is no need to make any special settings: The DLNA function is enabled and works constantly when the receiver is on.
- Seite 19 - Connecting to the Internet To connect to the network, the Alpha X is equipped with an Ethernet/LAN-port and also supports the connection of external USB-WiFi or USB-3G adaptors. - Software update Software updates for the Alpha X can be found on the Internet at: www.golden-interstar.de...
-
Seite 20: Technical Specifications
TECHNICAL SPECIFICATIONS Frequency range 950 ~ 2400MHz Input level -80 ~ -20dBm Tuner Modulation DVB-S: 1/2, 2/3, 3/4, 5/6, 7/8 DVB-S2: 1/2, 3/5, 2/3, 3/4, 4/5, 5/6, 8/9, 9/10, (QPSK) 3/5, 2/3, 3/4, 5/6, 8/9, 9/10 (8PSK), 16APSK, 32APSK Decoder format MPEG2/4, H.264, H265, AVS, AVS plus, JPEG/MJPEG HD Picture resolutions...