Inhaltsverzeichnis
Werbung
Verfügbare Sprachen
Verfügbare Sprachen
Quicklinks
In deze gebruiksaanwijzing vindt u stap-voor-stap instructies voor de installatie van de Conceptronic
draadloze router.
Als u meer informatie of ondersteuning voor uw product nodig heeft, kunt u het beste naar onze Service &
Support website op www.conceptronic.net gaan en een van de volgende mogelijkheden kiezen:
FAQ
: Database met veel gestelde vragen
Downloads
: Gebruiksaanwijzingen, stuurprogramma's, firmware en overige downloads
Contact
: Contact opnemen met Conceptronic Support
Voor algemene informatie over Conceptronic producten gaat u naar de Conceptronic website op
www.conceptronic.net.
De informatie in deze snelstart installatiegids is gebaseerd op Windows 7 en Windows Vista en kan dus
afwijken van het gebruik op uw computer als deze een ander besturingssysteem heeft.
NB: In deze snelstartgids vindt u alleen de basisstappen om de draadloze router in gebruik te
nemen. Zie voor meer informatie over de functies en mogelijkheden van de draadloze router
de Engelstalige gebruiksaanwijzing (User's Manual) op de product-cd.
Conceptronic C300BRS4A versie 2.0
Gebruiksaanwijzing
Gefeliciteerd met uw nieuwe
Conceptronic draadloze router
Inhoud
5.3. Geavanceerde instellingen
NEDERLANDS
1
Werbung
Kapitel
Inhaltsverzeichnis

Verwandte Anleitungen für Conceptronic C300BRS4A


Inhaltszusammenfassung für Conceptronic C300BRS4A
-
Seite 1: Inhaltsverzeichnis
Gefeliciteerd met uw nieuwe Conceptronic draadloze router In deze gebruiksaanwijzing vindt u stap-voor-stap instructies voor de installatie van de Conceptronic draadloze router. Als u meer informatie of ondersteuning voor uw product nodig heeft, kunt u het beste naar onze Service &... -
Seite 2: Inhoud Verpakking
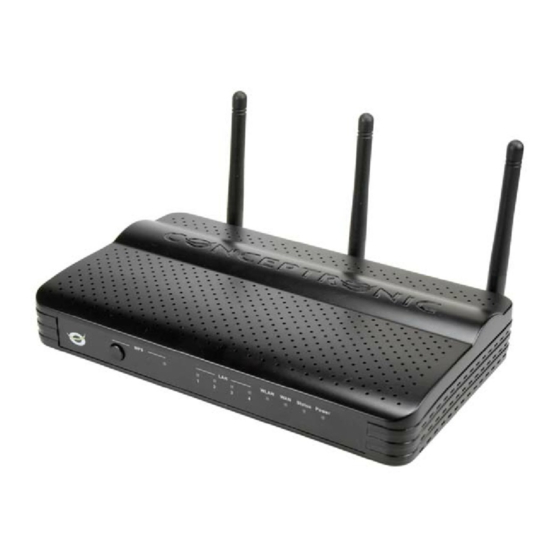
NEDERLANDS 1. Inhoud verpakking U vindt de volgende items in de verpakking van de Conceptronic draadloze router: Conceptronic draadloze router (C300BRS4A v2.0) 2x antenne voor de draadloze router Netvoeding 9V gelijkstroom, 1A LAN-netwerkkabel Product-cd Deze meertalige snelstart installatiegids ... -
Seite 3: Achterpaneel
NEDERLANDS 2.2 Achterpaneel Item Beschrijving Betekenis Antennes (2x) Twee vaste antennes voor draadloze verbindingen Aansluiting netvoeding Hier sluit u de netvoeding aan op de router WAN-poort Hier sluit u uw breedband internetmodem aan op de router LAN-poorten (1 – 4) Hier sluit u computer(s)/netwerkapparatuur aan op de router Reset/WPS WPS-functie aanzetten (kort indrukken) -
Seite 4: Computer Configureren
NEDERLANDS 4. Computer configureren 4.1 IP-adres instellen De draadloze router heeft een ingebouwde DHCP-server. De DHCP-server kent automatisch een IP-adres toe aan iedere aangesloten computer als de netwerkverbinding van de betreffende computer is ingesteld om automatisch een IP-adres te laten toewijzen. De meeste computers zijn standaard zo geconfigureerd dat ze zich automatisch een IP-adres laten toewijzen. - Seite 5 NEDERLANDS Het eigenschappenvenster van de gekozen netwerkaansluiting (LAN of draadloos) wordt getoond. Selecteer „Internet Protocol versie 4 (TCP/IPv4)‟ en klik op „Eigenschappen‟. Het eigenschappenvenster van Internet Protocol versie 4 (TCP/IPv4) wordt getoond. Kies in het eigenschappenvenster voor „Automatisch een IP-adres laten toewijzen‟ en klik op „OK‟...
-
Seite 6: Verbinding Controleren
NEDERLANDS 4.2 Verbinding controleren Met de „Opdrachtprompt‟ van Windows kunt u nagaan of uw netwerkaansluiting (via kabel of draadloos) een correct IP-adres heeft gekregen. Het volgende voorbeeld is gebaseerd op Windows 7 en op Vista met Service Pack 1. Om de onderstaande stappen te kunnen uitvoeren, moet u onder Windows 7 en Vista over administrator-toegangsrechten beschikken. - Seite 7 NEDERLANDS Vernieuw het IP-adres van uw computer door middel van de volgende opdrachten in de Opdrachtprompt: - „IPCONFIG /RELEASE‟ : om een incorrect IP-adres weer vrij te geven. - „IPCONFIG /RENEW‟ : om het IP-adres te vernieuwen. Als u het probleem met het IP-adres niet kunt oplossen met de bovenstaande stappen, kunt u de standaard fabrieksinstellingen herstellen met behulp van de WPS/reset-knop aan de achterkant van het apparaat.
-
Seite 8: Draadloze Router Instellen
NEDERLANDS 5. Draadloze router instellen In dit hoofdstuk leest u hoe u de draadloze router kunt configureren met de ingebouwde installatiewizard. Wanneer de stappen uit dit hoofdstuk zijn uitgevoerd, zijn de belangrijkste functies van uw router ingesteld. 5.1 Aanmelden De configuratie van de draadloze router is webgebaseerd. Dit betekent dat u de instellingen van de draadloze router kunt veranderen vanaf iedere ermee verbonden computer die over een internetbrowser beschikt. - Seite 9 NEDERLANDS Wanneer de gebruikersnaam en het wachtwoord correct zijn, toont de router de hoofdpagina met de status van de router: Op de hoofdpagina ziet u de status van de internetaansluiting, de systeemstatus, firmwareversie en geactiveerde services. De draadloze router is standaard geconfigureerd om te werken met een door de internetprovider toegewezen dynamisch IP-adres.
-
Seite 10: Installatiewizard
NEDERLANDS 5.2 Installatiewizard U kunt de draadloze router instellen met de ingebouwde wizard. Deze wizard helpt u om de basisinstellingen van de draadloze router stap voor stap te configureren. Voordat u de wizard start, moet u zorgen dat u alle informatie over uw internetverbinding bij de hand heeft. - Seite 11 NEDERLANDS Voor goed systeembeheer is het belangrijk dat de juiste datum/tijd wordt aangegeven bij de gebeurtenissen in het logbestand. In deze stap stelt u de juiste tijdzone in. Klik vervolgens op “Next” (Volgende). Selecteer de internetverbindingmethode die overeenkomt met de gegevens van uw provider.
- Seite 12 NEDERLANDS Verbinding - dynamisch IP-adres H. Wanneer uw provider heeft aangegeven dat u een dynamisch IP-adres moet gebruiken, selecteert u de optie “Dynamic IP”. Sommige providers hebben een specifieke Host Name voor hun verbindingen. Als uw provider gebruik maakt van een bepaalde Host Name, moet u deze naam ingeven in het betreffende veld.
- Seite 13 NEDERLANDS Verbinding – L2TP Wanneer uw provider heeft aangegeven dat u een L2TP-verbinding moet gebruiken, selecteert u de optie “L2TP”. Geef de gevraagde informatie in: Server IP (IP-adres server) L2TP Account (L2TP gebruikersnaam) L2TP Password (wachtwoord) Retype Password (herhaal wachtwoord) Klik vervolgens op “Next”...
- Seite 14 NEDERLANDS M. Selecteer een beveiligingsniveau voor uw draadloze netwerk. Nadat u een beveiligingsniveau heeft gekozen, toont de wizard de bijbehorende velden voor de benodigde informatie. Beveiliging – WEP-encryptie N. Als u uw netwerk wilt beveiligen met WEP- encryptie, selecteert u “WEP” in het afrolmenu.
- Seite 15 NEDERLANDS Q. De installatiewizard is nu voltooid. Als u uw instellingen wilt opslaan en in gebruik nemen, klikt u op “Save & Take Effect” (Opslaan en in gebruik nemen). Als u een instelling wilt aanpassen, klikt u op “Back” (Terug) om naar het vorige venster terug te gaan.
-
Seite 16: Verbinden Met Draadloos Netwerk
Windows 7. Klik op het „Netwerk‟ pictogram in het Windows systeemvak voor een lijst met beschikbare draadloze netwerken. Selecteer het netwerk “C300BRS4A” in de lijst en klik op „Verbinding maken‟. Standaard is de optie “Automatisch verbinding maken” geselecteerd. Dit... - Seite 17 NEDERLANDS Geef in het veld “Beveiligingssleutel of wachtwoordzin” de standaard WPA passphrase in (zoals aangegeven op de onderkant van uw draadloze router) en klik op „OK‟. De cliënt maakt nu verbinding met het draadloze netwerk. Om de status van de draadloze verbinding te controleren, kunt u op het „Netwerk‟...
-
Seite 18: Handmatig Verbinden In Windows Vista
Klik op het „Netwerk‟ pictogram in het systeemvak en klik op “Er zijn draadloze netwerken beschikbaar”. Selecteer het netwerk “C300BRS4A” in de lijst en klik op „Verbinding maken‟. Geef in het veld “Beveiligingssleutel of wachtwoordzin” de standaard WPA passphrase in (zoals... - Seite 19 NEDERLANDS Nadat verbinding is gemaakt, kunt u ervoor kiezen om dit netwerk vast te leggen en er voortaan automatisch verbinding mee te maken zodra uw computer wordt aangezet. Klik op „Sluiten‟ om de verbindingwizard af te sluiten. Om de status van de draadloze verbinding te controleren, kunt u op het „Netwerk‟...
-
Seite 20: Automatisch Verbinden Met Behulp Van Wps
NEDERLANDS 6.3 Automatisch verbinden met behulp van WPS De Conceptronic draadloze router ondersteunt WPS (Wi-Fi Protected Setup, beveiligde instelling draadloos netwerk). WPS is een standaard waarmee u in enkele eenvoudige stappen veilig een draadloos netwerk kunt opzetten. Om op de draadloze router gebruik te kunnen maken van WPS, moeten uw draadloze cliënten (zoals pc's) zelf ook WPS ondersteunen. -
Seite 21: Port Forwarding (Poorten Doorgeven)
NEDERLANDS 7. Port forwarding (Poorten doorgeven) De Conceptronic draadloze router heeft een ingebouwde firewall om internetaanvallen op uw netwerk af te weren. Deze firewall blokkeert automatisch al het inkomende verkeer op ongebruikte poorten. Wanneer u een geblokkeerde poort nodig heeft voor een toepassing (zoals een FTP-server of webserver) kunt u op de configuratiepagina's een doorschakelregel aanmaken om het verkeer aan deze toepassing door te geven. - Seite 22 NEDERLANDS Single Port forwarding (één poort doorgeven) Selecteer „Single Port Forwarding‟ in het Advanced menu links op het scherm. De „Single Port Forwarding‟ configuratiepagina wordt op uw scherm weergegeven: In de bovenstaande afbeelding ziet u een voorbeeld met enkele regels voor poortdoorschakeling. U kunt in de draadloze router maximaal 10 doorschakelregels voor afzonderlijke poorten definiëren.
- Seite 23 NEDERLANDS Port Range Forwarding (reeks poorten doorgeven) Selecteer „Port Range Forwarding‟ in het Advanced menu links op het scherm. De „Port Range Forwarding‟ configuratiepagina wordt op uw scherm weergegeven: In de bovenstaande afbeelding ziet u een voorbeeld met enkele regels voor poortdoorschakeling. U kunt in de draadloze router maximaal 10 doorschakelregels voor poortreeksen definiëren.
- Seite 24 Wanneer de router is herstart, worden alle instellingen in gebruik genomen en worden de doorschakelregels toegepast. De door u gedefinieerde regels voor poortdoorschakeling zijn nu klaar voor gebruik Zie voor een gedetailleerde beschrijving van de mogelijkheden en instellingen van de C300BRS4A de gebruiksaanwijzing (User Manual, uitsluitend in het Engels) op de meegeleverde product-cd.
- Seite 25 Congratulations on the purchase of your Conceptronic wireless router This user manual gives you a step-by-step explanation of how to install and use the Conceptronic wireless router. When you need more information or support for your product, we advise you to visit our Service &...
-
Seite 26: Package Contents
ENGLISH 1. Package contents The following items are present in the package of the Conceptronic wireless router: Conceptronic wireless router (C300BRS4A v2.0) 2x antenna for the wireless router Power supply 9V DC, 1A Network (LAN) cable ... -
Seite 27: Back Panel
ENGLISH 2.2 Back panel Description Explanation Wireless antennas (2x) Two fixed antennas for wireless broadcasting Power connection Connect the power supply to the router WAN port Connect your broadband connection to the router LAN ports (1 – 4) Connect your computer(s)/network device(s) to the router Reset/WPS button Activate WPS function (short press) or perform a reset (hold) 3. -
Seite 28: Configuring The Computer
ENGLISH 4. Configuring the computer 4.1 Configuring the IP address The wireless router is equipped with a built-in DHCP server. The DHCP server will automatically assign an IP address to each connected computer if the connected computer is configured to automatically obtain an IP address. - Seite 29 ENGLISH The properties window of your Local Area Connection or Wireless Network Connection will appear. Select „Internet Protocol Version 4 (TCP/IPv4)‟ and click on „Properties‟. The properties window of Internet Protocol Version 4 (TCP/IPv4) will appear. Set the properties to „Obtain an IP address automatically‟...
-
Seite 30: Checking The Connection
ENGLISH 4.2 Checking the connection With the „Command Prompt‟ of Windows you can verify if you have received a correct IP address on your Local Area Connection or Wireless Network Connection. This example is based on Windows 7 and Vista with Service Pack 1. - Seite 31 ENGLISH Renew the IP address of your computer with the following commands: - „IPCONFIG /RELEASE‟ : this will release the incorrect IP address - „IPCONFIG /RENEW‟ : this will renew the IP address If above steps do not solve the IP address issue, you can reset the device to the factory default settings with the WPS/reset button on the back of the device.
-
Seite 32: Configuring The Wireless Router
ENGLISH 5. Configuring the wireless router This chapter describes how to configure the wireless router using the built-in setup wizard. After completing the steps in this chapter your router has been set up for its primary functions. 5.1 Logging in For configuration of the wireless router a web based interface is being used. - Seite 33 ENGLISH When the user name and password are correct the wireless router will show the main page with the status of the wireless router: On the main page, you can see the status of the internet connection, the system status, firmware version and activated services.
- Seite 34 ENGLISH 5.2 Wizard You can setup the wireless router through the built-in Wizard. This Wizard will help you configuring the basic settings of the wireless router step by step. Note: Before starting the Wizard, make sure you have all information about your internet connection available.
- Seite 35 ENGLISH For system management purpose, a correct time setting is critical to have accurate time stamps on the system logs. Set an appropriate Time Zone in this step. When completed, click “Next”. Select the Internet Connection method which corresponds with your provider settings.
- Seite 36 ENGLISH Connection – Dynamic IP H. When your provider requires a Dynamic IP connection, select the “Dynamic IP” option. Some providers require a specific Hostname for their connections. If your provider requires a specific Hostname, enter the Host Name in the field. Some providers only allow 1 specific MAC address to connect to the internet.
- Seite 37 ENGLISH Connection – L2TP When your provider requires a L2TP connection, select the “L2TP” option. Enter the requested information: Server IP L2TP Account L2TP Password Retype Password When completed, click “Next”. When the WAN configuration is complete, the Wizard will continue with the Wireless configuration: You can change the SSID of the router.
- Seite 38 ENGLISH M. Select a security level for your Wireless Network. When a security level is chosen, the Wizard will show fields for the required information. Security – WEP Encryption N. If you want to secure your network with WEP encryption, select “WEP” from the drop- down list.
- Seite 39 ENGLISH Q. The Setup Wizard is now complete. If you want to apply your settings, click “Save & Take Effect”. If you want to change any setting, click “Back” to return to the previous screen. If you want to close the Setup Wizard without any changes, click “Exit”.
-
Seite 40: Connecting To The Wireless Network
In the following example the integrated “Connect to a Network” option from Windows 7 is used. Click on the „Network‟ icon in the taskbar to view the list of available wireless network connections. Select the network “C300BRS4A” from the list and click on „Connect‟. By default the option “Connect automatically” is selected. This makes... - Seite 41 ENGLISH Enter the default WPA passphrase (which is mentioned on the bottom of the wireless router) in the “Security key” field and click on „OK‟. The client will now start connecting to the wireless network. To check the status of the wireless connection, you can click on the „Network‟...
-
Seite 42: Connecting Manually In Windows Vista
“Wireless networks are available”. Select the network “C300BRS4A” from the list and click on „Connect‟. Enter the default WPA passphrase (which is mentioned on the bottom of the C300BRS4A) in the “Security key or passphrase” field and click on „Connect‟. - Seite 43 ENGLISH When the connection has been established, you can choose to save the network and have it start automatically each time your computer is turned on. Click on „Close‟ to exit the connection wizard. To check the status of the wireless connection, you can click on the „Network‟...
-
Seite 44: Connecting Automatically Using Wps
ENGLISH 6.3 Connecting automatically using WPS The Conceptronic wireless router supports WPS (Wi-Fi Protected Setup). WPS is a standard for easy and secure establishment of a wireless network. With WPS you can setup and protect your wireless network in just a few easy steps. -
Seite 45: Port Forwarding
ENGLISH 7. Port forwarding The Conceptronic wireless router is equipped with a built-in firewall to prevent attacks from the internet on your network. This firewall automatically blocks all incoming traffic on unused ports. When a blocked port is needed for a service or application (for example: a FTP or Web server) you can create a Virtual Server Rule in the configuration pages to forward the traffic. - Seite 46 ENGLISH Single Port Forwarding Select „Single Port Forwarding‟ in the advanced menu bar at the left. The „Single Port Forwarding‟ configuration will be shown on your screen: Note: In the picture above, you will see an example of some port forwarding rules. You can define up to 10 single port forwarding rules in the wireless router.
- Seite 47 ENGLISH Port Range Forwarding Select „Port Range Forwarding‟ in the advanced menu bar at the left. The „Port Range Forwarding‟ configuration will be shown on your screen: Note: In the picture above, you will see an example of some port forwarding rules. You can define up to 10 port range forwarding rules in the wireless router.
- Seite 48 After the router has been restarted, all settings are taken into affect and the virtual server rules will be applied. The defined port forwarding rules are ready to use. Note: For a more detailed explanation of the features and settings available for the C300BRS4A, please refer to the extended user manual (English only) on the product CD-ROM.
- Seite 49 Contactar : Contactar con el servicio técnico de Conceptronic Para información general sobre los productos de Conceptronic, visite la página web de Conceptronic: www.conceptronic.net. La información de este manual está basada en Windows 7 y Vista, y las indicaciones podrían no coincidir exactamente con su caso si utiliza un sistema operativo diferente.
-
Seite 50: Contenido Del Paquete
ESPAÑOL 1. Contenido del paquete El paquete del Router inalámbrico de Conceptronic incluye los siguientes componentes: Router inalámbrico de Conceptronic (C300BRS4A v2.0) 2 antenas para el Router inalámbrico Fuente de alimentación 9V DC, 1A Cable de red (LAN) ... -
Seite 51: Panel Posterior
ESPAÑOL 2.2 Panel posterior N.º Descripción Explicación Antenas inalámbricas (2) Dos antenas fijas para envío de datos de forma inalámbrica Conexión de alimentación Para enchufar el router a la fuente de alimentación Puerto WAN Para conectar el router a la conexión de banda ancha Puertos LAN (1-4) Para conectar el o los ordenadores o dispositivos de red al router... -
Seite 52: Configuración Del Ordenador
ESPAÑOL 4. Configuración del ordenador 4.1 Configurar la dirección IP El Router inalámbrico está equipado con un servidor DHCP incorporado, que asignará automáticamente una dirección IP a cada ordenador conectado que esté configurado para obtener una dirección IP de forma automática. - Seite 53 ESPAÑOL Aparecerá la ventana de propiedades de la conexión de área local o de la conexión de red inalámbrica. Seleccione la “Versión 4 del protocolo de Internet (TCP/IPv4)” y haga clic en “Propiedades”. Aparecerá la ventana de Propiedades de la Versión 4 del Protocolo de Internet (TCP/IPv4).
-
Seite 54: Comprobar La Conexión
ESPAÑOL 4.2 Comprobar la conexión Haciendo uso de la línea de comandos de Windows puede verificar si ha recibido una dirección de IP correcta en su conexión de área local o conexión de red inalámbrica. Este ejemplo está basado en Windows 7 y Windows Vista con Service Pack 1. - Seite 55 ESPAÑOL Renueve la dirección IP de su ordenador con los comandos siguientes: - “IPCONFIG /RELEASE” : para prescindir de la dirección IP incorrecta. - “IPCONFIG /RENEW” : para volver a obtener una dirección IP. Si los pasos indicados arriba no solucionan el problema con la dirección IP, puede hacer un reset para que el dispositivo vuelva a la configuración predeterminada pulsando el botón “Reset”/WPS de la parte posterior del dispositivo.
-
Seite 56: Configurar El Router Inalámbrico
ESPAÑOL 5. Configurar el Router inalámbrico Este apartado describe cómo configurar el Router inalámbrico mediante el asistente de configuración incorporado. Cuando haya completado los pasos de este apartado, su router estará listo para sus funciones básicas. 5.1 Iniciar sesión Para configurar el Router inalámbrico se utiliza una interfaz basada en web. Esto significa que podrá configurar el Router inalámbrico en cualquier ordenador con un navegador web que esté... - Seite 57 ESPAÑOL Si el nombre de usuario y la contraseña introducidos son correctos, el Router inalámbrico mostrará la página principal y el estado del dispositivo: En la página principal podrá ver el estado de la conexión de Internet, el estado del sistema, la versión del firmware y los servicios activados.
-
Seite 58: Asistente De Configuración Rápida
ESPAÑOL 5.2 Asistente de configuración Puede configurar el Router inalámbrico utilizando el asistente incorporado, que le ayudará a configurar paso a paso los parámetros básicos del Router inalámbrico. Nota: Antes de iniciar el asistente de configuración rápida, asegúrese de que tiene a mano toda la información acerca de su conexión a Internet. - Seite 59 ESPAÑOL A efectos de gestión del sistema, es muy importante que la configuración horaria sea la correcta para que las entradas en el registro del sistema sean también correctas. Indique aquí su zona horaria. Al finalizar, haga clic en “Siguiente”. Seleccione el tipo de conexión a Internet que le proporciona su proveedor.
- Seite 60 ESPAÑOL Conexión con IP dinámica H. Si su proveedor requiere una conexión con IP dinámica, seleccione la opción “IP dinámica”. Algunos proveedores requieren un nombre de host específico para sus conexiones. Si su proveedor requiere un nombre de host específico, introduzca dicho nombre en el campo “Nombre de host”.
- Seite 61 ESPAÑOL Conexión con PPTP Si su proveedor requiere una conexión PPTP, seleccione la opción “PPTP”. Introduzca la información requerida: IP del servidor Cuenta PPTP Contraseña PPTP Vuelva a introducir la contraseña Al finalizar, haga clic en “Siguiente”. Conexión con L2TP Si su proveedor requiere una conexión L2TP, seleccione la opción “L2TP”.
- Seite 62 ESPAÑOL Puede cambiar el SSID del router. El SSID es el nombre que se publicará en la parte inalámbrica. Puede cambiar de canal y seleccionar un canal del 1 al 13. Si obtiene conexiones lentas o sufre interrupciones, puede que otro punto de acceso de su zona esté...
- Seite 63 ESPAÑOL Seguridad con cifrado WEP N. Si desea proteger su red con un cifrado WEP, seleccione “WEP” en la lista desplegable. Introduzca la clave WEP en formato ASCII (caracteres válidos: A-Z, 0-9). Nota: Con el asistente sólo se puede configurar un cifrado WEP de 16 bits. Seguridad con cifrado WPA-PSK o WPA2-PSK O.
-
Seite 64: Conexión A La Red Inalámbrica
Haga clic en el icono “Red” de la barra de tareas para ver la lista de conexiones a redes inalámbricas disponibles. Seleccione la red “C300BRS4A” de la lista y haga clic en “Conectar”. De forma predeterminada estará seleccionada la opción "Conectarse automáticamente". - Seite 65 ESPAÑOL Introduzca la frase secreta WPA predeterminada (que encontrará en la parte inferior del Router inalámbrico) en el campo “Clave de seguridad” y haga clic en “Conectar”. El cliente iniciará ahora su conexión a la red inalámbrica. Para comprobar el estado de la conexión inalámbrica, puede hacer clic en el icono “Red”...
-
Seite 66: Conexión Manual Con Windows Vista
Seleccione la red “C300BRS4A” de la lista y haga clic en “Conectar”. Introduzca la frase secreta WPA predeterminada (que encontrará en la parte inferior del C300BRS4A) en el campo “Clave o frase de seguridad” y haga clic en “Conectar”. - Seite 67 ESPAÑOL Una vez se ha establecido la conexión, puede guardar la red y hacer que se inicie automáticamente cada vez que encienda el ordenador. Haga clic en “Cerrar” para salir del asistente de conexión. Para comprobar el estado de la conexión inalámbrica, puede hacer clic en el icono “Red”...
-
Seite 68: Conexión Automática Utilizando Wps
ESPAÑOL 6.3 Conexión automática utilizando WPS El Router inalámbrico de Conceptronic es compatible con la función WPS (configuración Wi-Fi protegida). La función WPS es un procedimiento para establecer una red inalámbrica de forma fácil y segura. Con esta función podrá configurar y proteger su red inalámbrica siguiendo tan sólo unos pasos muy sencillos. - Seite 69 ESPAÑOL 7. Habilitación de puertos El Router inalámbrico de Conceptronic está equipado con un cortafuegos para impedir ataques a su red desde Internet. Este cortafuegos bloqueará automáticamente todo tráfico entrante por puertos no utilizados. Cuando un puerto bloqueado se necesita para algún servicio o aplicación (por ejemplo: un servidor FTP o un servidor web), puede crear una regla de servidor virtual en la página de configuración...
- Seite 70 ESPAÑOL Habilitación de Puerto Único Seleccione la opción “Habilitación de Puerto Único” en la barra del menú de opciones avanzadas en la izquierda. En pantalla aparecerá la configuración de “Habilitación de Puerto Único”: Nota: En la imagen anterior, verá un ejemplo de algunas reglas de habilitación de puertos. Puede definir hasta 10 reglas de habilitación de puerto único en el Router inalámbrico.
- Seite 71 ESPAÑOL Habilitación de Múltiples Puertos Seleccione la opción “Habilitación de Múltiples Puertos” en la barra del menú de opciones avanzadas en la izquierda. En pantalla aparecerá la configuración de “Habilitación de Múltiples Puertos”: Nota: En la imagen anterior, verá un ejemplo de algunas reglas de habilitación de puertos. Puede definir hasta 10 reglas de habilitación de múltiples puertos en el Router inalámbrico.
- Seite 72 Ya se pueden utilizar las reglas de servidor virtual definidas. Nota: Para información más detallada acerca de las funciones y las configuraciones disponibles del C300BRS4A, consulte el Manual de Usuario (sólo en inglés) que encontrará en el CR-ROM del producto.
-
Seite 73: Wir Gratulieren Ihnen Zum Kauf Ihres Wireless-Routers Von Conceptronic
: Handbücher, Treiber, Firmware und weitere Downloads Kontakt : Kontakt für den Conceptronic-Support Allgemeine Informationen über Conceptronic-Produkte finden Sie auf der Conceptronic-Webseite unter www.conceptronic.net. Die Informationen in dieser Schnellinstallationsanleitung basieren auf Windows 7 und Vista und treffen möglicherweise nicht vollständig zu, wenn Sie ein anderes Betriebssystem auf Ihrem Computer verwenden. -
Seite 74: Packungsinhalt
DEUTSCH 1. Packungsinhalt In der Verpackung des Wireless-Routers von Conceptronic ist Folgendes enthalten: Wireless-Router von Conceptronic (C300BRS4A V2.0) 2x Antennen für den Wireless-Router Netzteil 9V Gleichstrom 1A Netzwerk (LAN)-Kabel Produkt-CD-ROM Diese mehrsprachige Schnellinstallationsanleitung Garantiekarte und Broschüre mit CE-Erklärung 2. -
Seite 75: Rückseite
DEUTSCH 2.2 Rückseite Beschreibung Erklärung Drahtlosantennen (2x) Zwei feste Antennen für Drahtlosübertragung Stromanschluss Anschluss des Routers an die Stromversorgung WAN-Port Anschluss Ihrer Breitbandverbindung an den Router LAN-Ports (1 – 4) Anschluss von Computernetzwerkgeräten an den Router Reset-/WPS-Taste Aktivieren der WPS-Funktion (kurz drücken) oder Ausführen eines Resets (gedrückt halten) 3. -
Seite 76: Konfiguration Des Computers
DEUTSCH 4. Konfiguration des Computers 4.1 Konfiguration der IP-Adresse Der Wireless-Router ist mit einem eingebauten DHCP-Server ausgerüstet. Der DHCP-Server weist automatisch jedem angeschlossenen Computer eine IP-Adresse zu, wenn dieser darauf eingestellt ist, die IP-Adresse automatisch zu beziehen. Die meisten Computer sind so konfiguriert, dass sie automatisch eine IP-Adresse beziehen. Sollte dies bei Ihnen nicht der Fall sein, müssen Sie Ihren Computer so konfigurieren, dass er automatisch eine IP-Adresse bezieht. - Seite 77 DEUTSCH Es erscheint das Fenster mit den Eigenschaften Ihrer LAN-Verbindung bzw. drahtlosen Netzwerkverbindung. Wählen Sie das ‚Internetprotokoll Version 4 (TCP/IPv4)‟ aus und klicken Sie auf ‚Eigenschaften‟. Es erscheint das Fenster mit den Eigenschaften von Internetprotokoll Version 4 (TCP/IPv4). Aktivieren Sie das Feld ‚IP-Adresse automatisch beziehen‟...
-
Seite 78: Überprüfen Der Verbindung
DEUTSCH 4.2 Überprüfen der Verbindung Über die ‚Eingabeaufforderung‟ von Windows können Sie überprüfen, ob Sie für Ihre LAN-Verbindung oder drahtlose Netzwerkverbindung eine korrekte IP-Adresse erhalten haben. Dieses Beispiel basiert auf Windows 7 und Vista mit Service Pack 1. Bei Windows 7 und Vista müssen Sie Administratorrechte haben, um die im Folgenden erklärten Schritte durchführen zu können. - Seite 79 DEUTSCH Trennen Sie das Netzwerkkabel zwischen dem Router und Ihrem Computer und schließen Sie es wieder an. Erneuern Sie die IP-Adresse Ihres Computers mit den folgenden Befehlen: - „IPCONFIG /RELEASE‟ : Damit wird die falsche IP-Adresse gelöscht. - „IPCONFIG /RENEW‟ : Damit wird die IP-Adresse erneuert.
-
Seite 80: Konfiguration Des Wireless-Routers
DEUTSCH 5. Konfiguration des Wireless-Routers In diesem Kapitel wird die Konfiguration des Wireless-Routers mit dem integrierten Einrichtungsassistenten beschrieben. Nachdem Sie die in diesem Kapitel beschriebenen Schritte durchgeführt haben, ist Ihr Router für seine primären Funktionen eingestellt. 5.1 Anmelden Für die Konfiguration des Wireless-Routers wird eine webbasierte Benutzeroberfläche verwendet. Das bedeutet, dass Sie den Wireless-Router auf einem beliebigen Computer mit Webbrowser, der an den Wireless-Router angeschlossen ist, konfigurieren können. - Seite 81 DEUTSCH Wenn der Benutzername und das Passwort korrekt sind, wird die Hauptseite mit dem Status des Wireless- Routers angezeigt: Auf der Hauptseite sehen Sie den Status der Internetverbindung, den Systemstatus, die Firmwareversion und die aktivierten Dienste. Hinweis: Standardmäßig ist der Wireless-Router für den Betrieb mit dynamischen IP-Adressen der Internetdienstanbieter konfiguriert.
- Seite 82 DEUTSCH 5.2 Assistent Sie können den Wireless-Router mit dem integrierten Assistenten einrichten. Der Assistent führt Sie Schritt für Schritt durch die Konfiguration der Grundeinstellungen des Wireless-Routers. Hinweis: Bevor Sie den Assistenten starten, stellen Sie sicher, dass Sie alle Informationen über Ihre Internetverbindung zur Hand haben.
- Seite 83 DEUTSCH Eine korrekte Zeiteinstellung ist aus Systemverwaltungsgründen unerlässlich, damit die Systemprotokolle die korrekten Zeitstempel enthalten. Stellen Sie die korrekte Zeitzone ein. Klicken Sie danach auf „Next [Weiter]". Wählen Sie die Methode der Internetverbindung, die den Einstellungen Ihres Anbieters entspricht. Wenn Sie nicht wissen, welche Option Sie für Ihre Internetverbindung benötigen, sehen Sie bitte in der Dokumentation Ihres Anbieters nach oder kontaktieren Sie das...
- Seite 84 DEUTSCH Verbindung – dynamische IP H. Wenn Ihr Anbieter eine dynamische IP- Verbindung erfordert, wählen Sie die Option „Dynamic IP [Dynamische IP]“. Bei einigen Anbietern ist ein bestimmter Hostname für die Verbindung erforderlich. Wenn bei Ihrem Anbieter ein bestimmter Hostname erforderlich ist, geben Sie diesen in das entsprechende Feld ein.
- Seite 85 DEUTSCH Verbindung - PPTP Wenn Ihr Anbieter eine PPTP-Verbindung erfordert, wählen Sie die Option „PPTP“. Geben Sie die erforderlichen Informationen ein: Server IP PPTP Konto PPTP Passwort Passwort erneut eingeben Klicken Sie danach auf „Next [Weiter]". Verbindung –...
- Seite 86 DEUTSCH Sie können die SSID des Routers ändern. Die SSID ist der Name, der über die Wireless- Verbindung ausgestrahlt wird. Sie können den Kanal ändern (zwischen 1 und 13). Wenn die Verbindung langsam ist oder unterbrochen wird, befindet sich möglicherweise ein anderer Access Point in Ihrem Gebiet, der Störungen in Ihrem Wireless-Kanal verursacht.
- Seite 87 DEUTSCH Sicherheit – WEP-Verschlüsselung N. Wenn Sie Ihr Netzwerk mit WEP- Verschlüsselung sichern möchten, wählen Sie „WEP“ aus der Dropdown-Liste. Geben Sie den WEP-Schlüssel im ASCII-Format ein (Eingabe: A-Z, 0-9). Hinweis: Mit dem Assistenten können Sie nur WEP 64Bits konfigurieren. Sicherheit - WPA-PSK-/WPA2-PSK O.
-
Seite 88: Verbindung Mit Dem Drahtlosnetzwerk
Netzwerk]” aus Windows 7 verwendet. Klicken Sie auf das „Netzwerk‟-Symbol in der Kontrollleiste. Daraufhin wird die Liste der verfügbaren drahtlosen Netzwerkverbindungen angezeigt. Wählen Sie das Netzwerk „C300BRS4A” aus der Liste und klicken Sie auf ‚Connect [Verbinden]‟. Standardmäßig ist die Option „Connect automatically [Automatisch verbinden]”... - Seite 89 DEUTSCH Geben Sie die Standard-WPA-Passphrase (diese findet sich auf der Unterseite des Wireless-Routers) im Feld „Security key [Sicherheitsschlüssel]” ein und klicken Sie auf „OK”. Daraufhin beginnt der Client, die Verbindung mit dem Drahtlosnetzwerk herzustellen. Zur Überprüfung des Status der drahtlosen Verbindung können Sie auf das ‚Netzwerk‟-Symbol in der Kontrollleiste klicken.
-
Seite 90: Manuelle Verbindung Unter Windows Vista
Symbol in der Kontrollleiste und dann auf „Wireless networks are available [Verfügbare Drahtlosnetzwerke]”. Wählen Sie das Netzwerk „C300BRS4A” aus der Liste aus und klicken Sie auf ‚Connect [Verbinden]‟. Geben Sie die Standard-WPA- Passphrase (diese findet sich auf der Unterseite des C300BRS4A) im Feld „Security key or... - Seite 91 DEUTSCH Sobald die Verbindung hergestellt wurde, können Sie die Optionen „Save this network [Dieses Netzwerk speichern]“ und „Start this connection automatically [Diese Verbindung automatisch starten]“ aktivieren. Klicken Sie auf „Close [Schließen]“, um den Verbindungsassistenten zu schließen. Zur Überprüfung des Status der drahtlosen Verbindung können Sie auf das ‚Netzwerk‟-Symbol in der Kontrollleiste klicken.
-
Seite 92: Automatische Verbindung Mit Wps
DEUTSCH 6.3 Automatische Verbindung mit WPS Der Wireless-Router von Conceptronic unterstützt WPS (Wi-Fi-geschützte Einstellung). WPS ist ein Standard für die einfache und sichere Einrichtung eines drahtlosen Netzwerks. Mit WPS können Sie mit ein paar wenigen, einfachen Schritten Ihr drahtloses Netzwerk einrichten und schützen. -
Seite 93: Portweiterleitung
DEUTSCH 7. Portweiterleitung Der Conceptronic Wireless-Router ist mit einer eingebauten Firewall ausgerüstet, um Angriffe aus dem Internet auf Ihr Netzwerk zu verhindern. Diese Firewall blockiert automatisch den gesamten eingehenden Verkehr auf nicht benutzten Ports. Wenn ein blockierter Port für einen Dienst oder eine Anwendung benötigt wird (zum Beispiel für einen FTP- oder Web-Server), können Sie auf den Konfigurationsseiten eine... - Seite 94 DEUTSCH Single Port Forwarding [einzelne Portweiterleitung] Wählen Sie in der links angezeigten Leiste des erweiterten Menüs ‚Single Port Forwarding [einzelne Portweiterleitung]‟ aus. Daraufhin wird die Konfiguration für ‚Single Port Forwarding [einzelne Portweiterleitung]‟ auf Ihrem Bildschirm angezeigt: Hinweis: In obiger Abbildung sehen Sie ein Beispiel mit einigen Portweiterleitungsregeln. Sie können bis zu 10 einzelne Portweiterleitungsregeln im Wireless-Router definieren.
- Seite 95 DEUTSCH Nachdem Sie die Regeln konfiguriert haben, klicken Sie auf „Apply [Übernehmen]”, um die Portweiterleitungskonfiguration zu speichern. Hinweis: Um sicherzustellen, dass die konfigurierten Regeln korrekt funktionieren, empfehlen wir, den Router neu zu starten, nachdem Sie die Portweiterleitungsregeln konfiguriert haben. Port Range Forwarding [Portbereichweiterleitung] ...
- Seite 96 Nachdem der Router neu gestartet wurde, sind alle vorgenommenen Einstellungen aktiviert und die Virtual Server-Regeln werden angewendet. Die definierten Portweiterleitungsregeln können jetzt verwendet werden. Hinweis: Detaillierte Erklärungen zu den für den C300BRS4A verfügbaren Funktionen und Einstellungen finden Sie im erweiterten Benutzerhandbuch auf der Produkt-CD-ROM (nur Englisch).
- Seite 97 Conceptronic. Pour plus d'informations ou pour obtenir de l'aide concernant votre produit, nous vous conseillons de visiter notre site web de Service & Support surwww.conceptronic.net/supportet de sélectionner l'une des options suivantes : Foire aux Questions : Base de Données de Questions les plus Fréquemment Posées ...
-
Seite 98: Contenu Du Coffret
FRANÇAIS 1. Contenu du Coffret Les éléments suivants sont fournis dans le paquet avec le routeur sans fil de Conceptronic : Routeur sans fil de Conceptronic (C300BRS4A v2.0) 2 antennes pour le routeur sans fil Alimentation électrique 9V CC, 1A ... -
Seite 99: Façade Arrière
FRANCAIS 2.2 Façade arrière Nº Description Explication Antennes sans fil (2x) Deux antennes fixes pour la diffusion sans fil Connexion électrique Brancher l'alimentation électrique sur le routeur Port WAN Branchez votre connexion bande large sur le routeur Ports LAN (1 – 4) Connectez votre(vos) ordinateur(s) / dispositif(s) de réseau sur le routeur. -
Seite 100: Configuration De L'ordinateur
FRANÇAIS 4. Configuration de l'ordinateur 4.1 Configuration de l'adresse IP. Le routeur sans fil est équipé d‟un serveur DHCP intégré. Le serveur DHCP affectera automatiquement une adresse IP à chaque ordinateur connecté si l‟ordinateur connecté est réglé sur l‟option «Obtenir automatiquement une adresse IP». - Seite 101 FRANCAIS La fenêtre Propriétés de votre Connexion de Réseau Local ou de votre Connexion de Réseau Sans Fil s‟affiche. Sélectionnez "Protocole Internet Version 4(TCP/IPv4)" et cliquez sur "Propriétés". La fenêtre propriétés du Protocole Internet Version 4(TCP/IPv4) s'affiche. Réglez les propriétés sur "Obtenir une adresse IP automatiquement"...
-
Seite 102: Vérification De La Connexion
FRANÇAIS 4.2 Vérification de la connexion Avec l'"Invite de Commandes" de Windows, vous pouvez vérifier si vous avez reçu une adresse IP correcte sur votre Connexion de Réseau Local ou votre Connexion de Réseau Sans Fil. Cet exemple est basé sur Windows 7 et Vista avec Service Pack 1. - Seite 103 FRANCAIS Débranchez et rebranchez le câble LAN sur l‟appareil et sur votre ordinateur. Récrivez l‟adresse IP de votre ordinateur avec les commandes suivantes : - "IPCONFIG/RELEASE" pour éditer l‟adresse IP incorrecte. - "IPCONFIG/RENEW" pour renouveler l‟adresse IP. Si les actions ci-dessus ne suffisent pas à résoudre votre problème d‟adresse IP, vous pouvez réinitialiser l‟appareil sur les paramètres par défaut avec le bouton WEP/Reset situé...
-
Seite 104: Configuration Du Routeur Sans Fil
FRANÇAIS 5. Configuration du routeur sans fil Ce chapitre décrit les opérations nécessaires pour configurer le routeur sans fil avec l'assistant de configuration intégré. Une fois les opérations de ce chapitre réalisées, votre routeur est bien paramétré pour ses fonctions primaires. 5.1 Connexion Une interface basée sur Internet est utilisée pour configurer le routeur sans fil. - Seite 105 FRANCAIS Lorsque le nom d'utilisateur et le mot de passe sont corrects, le routeur sans fil affiche la page principale avec l'état du routeur sans fil : Sur la page principale vous verrez l'état de la connexion Internet, l'état du système, la version de microprogramme et les services activés.
- Seite 106 FRANÇAIS 5.2 Assistant Vous pouvez configurer le routeur sans fil grâce à l'Assistant intégré. Cet Assistant vous aidera à configurer les paramètres de base du routeur sans fil pas à pas. Remarque : Avant de commencer avec l'Assistant de Configuration, vérifiez que vous disposez bien de toutes les informations disponibles sur votre connexion Internet.
- Seite 107 FRANCAIS Pour gérer le système, il est essentiel que l'heure du système soit bien à jour pour obtenir l'heure précise sur les fichiers journaux du système. Déterminez la Zone Horaire correspondante dans cette étape. Lorsque vous avez terminé, cliquez sur "Next".
- Seite 108 FRANÇAIS Connexion - IP Dynamique H. Si votre fournisseur a besoin d'une connexion IP Dynamique, sélectionnez l'option "Dynamic IP". Certains fournisseurs ont besoin d'un nom d'hôte particulier pour leurs connexions. Si votre fournisseur a besoin d'un nom d'hôte particulier, entrez le nom d'hôte dans ce champ.
- Seite 109 FRANCAIS Connexion - PPTP Si votre fournisseur a besoin d'une connexion PPTP, sélectionnez l'option "PPTP". Entrez les informations demandées : Server IP [IP Serveur] PPTP Account [Compte PPTP] PPTP Password [Mot de Passe PPTP] Indiquez à nouveau votre mot de passe Lorsque vous avez terminé, cliquez sur "Next".
- Seite 110 FRANÇAIS Vous pouvez changer le SSID du routeur. Le SSID est le nom qui sera diffusé dans la partie Sans fils. Vous pouvez modifier le canal, de 1 à 13. Si la vitesse de votre connexion est lente ou a des coupures, il se peut qu'un autre point d'accès dans votre zone interfère avec votre canal sans fils.
- Seite 111 FRANCAIS Sécurité - Cryptage WEP N. Si vous souhaitez sécuriser votre réseau avec le cryptage WEP, sélectionnez "WEP" dans la liste déroulante. Entez le code WEP en format ASCII (entrée : A-Z, 0-9). Remarque : Avec l'Assistant, vous ne pouvez que configurer WEP 64 Bits.
-
Seite 112: Connexion À Un Réseau Sans Fil
FRANÇAIS 6. Connexion à un réseau sans fil Il existe deux manières différentes de vous connecter sans fil à votre routeur sans fil : Manuellement. En utilisant automatiquement la fonction WPS. ! REMARQUE IMPORTANTE ! Le routeur sans fil est protégé par le cryptage WPA-PSK/WPA2-PSK Mixed mode par défaut. Le mot de passe exclusif de WPA est indiqué... - Seite 113 FRANCAIS Entrez la phrase code WPA par défaut (indiquée sous le routeur sans fil) dans le champ "Clé de Sécurité" et cliquez sur "Connexion". Le client commencera alors à vous connecter au réseau sans fil. Pour vérifier l'état de la connexion sans fil, vous pouvez cliquer sur l'Icône "Réseau"...
-
Seite 114: Connexion Manuelle Sur Windows Vista
"Des réseaux sans fil sont disponibles". Sélectionnez le réseau "C300GBRS4" dans la liste et cliquez sur "Connexion". Entrez la phrase code WPA par défaut (indiquée sous le C300BRS4A) dans le champ "Clé de sécurité ou mot de passe" et cliquez sur "Connexion". - Seite 115 FRANCAIS Lorsque la connexion est établie, vous pouvez choisir d'enregistrer le réseau et de le faire démarrer automatiquement chaque fois que votre ordinateur est allumé. Cliquez sur "Fermer" pour sortir de l'assistant de configuration. Pour vérifier l'état de la connexion sans fil, vous pouvez cliquer sur l'icône de Réseau dans le plateau système.
-
Seite 116: Connexion Automatique Avec Wps
FRANÇAIS 6.3 Connexion automatique avec WPS Le routeur sans fil de Conceptronic supporte WPS (Configuration de Wi-Fi Protégée). WPS est une norme pour paramétrer facilement et sécuriser un réseau sans fil. Avec WPS vous pouvez paramétrer et protéger votre réseau sans fil en quelques petits clics seulement. -
Seite 117: Redirection De Port
FRANCAIS 7. Redirection de Port Le routeur sans fil de Conceptronic est équipé d‟un pare-feu intégré pour empêcher les attaques d‟Internet dans votre réseau. Ce pare-feu bloque automatiquement tout le trafic entrant de ports non utilisés. Si vous avez besoin d'un port bloqué pour un service ou une application (par exemple : un site FTP ou un serveur Web), vous pouvez créer une Règle de Serveur Virtuel sur les pages de configuration pour... - Seite 118 FRANÇAIS Redirection de Port Unique Sélectionnez "Single Port Forwarding" dans la barre de menu avancé à gauche. La configuration "Single Port Forwarding" s'affiche à l'écran : Remarque : L'image ci-après vous présente un exemple de quelques règles de redirection de ports. Vous pouvez définir jusqu'à...
- Seite 119 FRANCAIS Lorsque vous avez défini les règles, cliquez sur "Apply" pour enregistrer la configuration de redirection de ports. Remarque : Pour vous assurer que les règles configurées fonctionneront correctement, nous vous conseillons de redémarrer votre routeur après avoir configuré les règles de redirection de ports.
- Seite 120 FRANÇAIS Remarque : Si vous ne savez pas de quel protocole ("Type") vous avez besoin pour votre règle de serveur virtuel, sélectionnez "Both". Cette option passera les deux trafics, TCP et UDP à l'adresse IP configurée. Lorsque vous avez défini les règles, cliquez sur "Apply" pour enregistrer la configuration de redirection de ports.
- Seite 121 Contact : Contatta il servizio di assistenza Conceptronic Per ricevere informazioni generali sui prodotti Conceptronic, visitare il sito Web di Conceptronic all‟indirizzo www.conceptronic.net. Le informazioni contenute in questo manuale si riferiscono a Windows 7 e Vista, e possono variare in maniera significativa in computer in cui sia installato un sistema operativo differente.
-
Seite 122: Contenuto Della Confezione
ITALIANO 1. Contenuto della confezione La confezione del router wireless di Conceptronic contiene le seguenti unità: Router wireless di Conceptronic (C300BRS4A v2.0) 2 antenne per router wireless Alimentazione elettrica da 9V DC, 1A Cavo di rete (LAN) ... -
Seite 123: Pannello Posteriore
ITALIANO 2.2 Pannello posteriore Descrizione Illustrazione Antenne wireless (2) Due antenne fisse per trasmissione radio wireless Connessione elettrica Collega l‟alimentazione elettrica al router Porta WAN Collega la connessione a banda larga al router Porte LAN (1 – 4) Collega uno o più computer o dispositivi di rete al router Tasto ripristino/WPS Attiva la funzione WPS (premendo brevemente) o esegue un ripristino (se tenuto premuto) -
Seite 124: Configurazione Del Computer
ITALIANO 4. Configurazione del computer 4.1 Configurazione dell‟indirizzo IP Il router wireless è dotato di un server interno DHCP. Il server DHCP assegnerà automaticamente un indirizzo IP a ogni computer connesso se il computer collegato è configurato per rilevare automaticamente un indirizzo IP. - Seite 125 ITALIANO Verrà visualizzata la finestra delle proprietà della connessione alla rete locale o della connessione alla rete wireless. Selezionare “Protocollo Internet Versione 4 (TCP/IPv4) („Internet Protocol Version 4 (TCP/IPv4)‟) e fare clic su “Proprietà” („Properties‟). Verrà visualizzata la finestra delle proprietà del protocollo Internet versione 4 (TCP/IPv4). Impostare le proprietà...
- Seite 126 ITALIANO 4.2 Verifica della connessione Il “Prompt dei comandi” („Command Prompt‟) di Windows consente di verificare se è stato ottenuto un indirizzo IP corretto nella connessione alla rete locale o nella connessione alla rete wireless. L‟esempio sotto riportato si riferisce a Windows 7 e Vista con Service Pack 1. Per eseguire le istruzioni sotto riportate in Windows 7 e Vista, è...
- Seite 127 ITALIANO Scollegare e ricollegare il cavo di rete al router e al computer. Aggiornare l‟indirizzo IP del computer eseguendo i comandi sotto riportati: - „IPCONFIG /RELEASE‟ : verrà rilasciato l‟indirizzo IP scorretto - „IPCONFIG /RENEW‟ : verrà aggiornato l‟indirizzo IP Se le istruzioni sopra riportate non consentono di risolvere il problema dell‟indirizzo IP, è...
-
Seite 128: Configurazione Del Router Wireless
ITALIANO 5. Configurazione del router wireless Questo capitolo descrive come configurare il router wireless utilizzando la procedura d‟installazione prevista. Dopo aver eseguito le operazioni riportate in questa sezione, il router sarà pronto per svolgere le funzioni di base. 5.1 Registrazione Per configurare il router wireless si utilizza un‟interfaccia Web. - Seite 129 ITALIANO Se il nome utente e la password sono corretti, il router wireless visualizzerà la pagina principale che mostra lo stato del router wireless: Dalla pagina principale, è possibile controllare lo stato della connessione Internet, lo stato del sistema, la versione firmware e i servizi attivati.
- Seite 130 ITALIANO 5.2 Procedura d‟installazione guidata É possibile configurare il router wireless mediante la procedura di installazione guidata prevista. Tale procedura consentirà di configurare le impostazioni basilari del router wireless illustrando passo dopo passo ciascun‟operazione. Note: Prima di avviare la procedura guidata, accertarsi di disporre di tutte le informazioni sulla connessione Internet a disposizione.
- Seite 131 ITALIANO Per esigenze di gestione del sistema, è indispensabile impostare correttamente l‟ora per ottenere orari e date corrette nei log di sistema. Selezionare il fuso orario corretto nel prossimo step. Ultimata l‟operazione, fare clic su “Avanti”. Selezionare la modalità di connessione Internet che corrisponde alle impostazioni del provider.
- Seite 132 ITALIANO Connessione – IP dinamico H. Se il provider richiede una connessione IP dinamica, selezionare l‟opzione “IP dinamico” (“Dynamic IP”). Alcuni provider richiedono un nome utente specifico per le connessioni. In tal caso, inserire il nome utente in questo campo. Alcuni provider consentono a un solo indirizzo MAC specifico di connettersi ad Internet.
- Seite 133 ITALIANO Connessione - PPTP Se il provider richiede una connessione PPTP, selezionare l‟opzione “PPTP”. Inserire le informazioni richieste: IP Server Account PPTP Password PPTP Immettere nuovamente la password Ultimata l‟operazione, fare clic su “Avanti”. Connessione – L2TP Se il provider richiede una connessione L2TP, selezionare l‟opzione “L2TP”.
- Seite 134 ITALIANO É possibile cambiare il SSID del router. Il SSID corrisponde al nome che sarà trasmesso attraverso la parte wireless. È possibile modificare i canali, scegliendo dall‟1 al 13. In caso di connessione lenta o interruzioni, è possibile che vi sia un altro punto di accesso nell‟area che interferisce con il canale wireless.
- Seite 135 ITALIANO Sicurezza – Criptaggio WEP N. Se s‟intende proteggere la propria rete con il sistema di criptaggio WEP, selezionare “WEP” dal menu a tendina. Inserire la chiave WEP in formato ASCII (ingresso: A-Z, 0-9). Nota: La procedura guidata consente di configurare unicamente WEP 64Bits.
-
Seite 136: Connessione Alla Rete Wireless
(“Connect to a Network”). Cliccare sull‟icona „Rete‟ („Network‟) sulla barra delle applicazioni per visualizzare l‟elenco delle connessioni di rete senza fili disponibili. Selezionare la rete “C300BRS4A” dall‟elenco e fare clic su „Connetti‟. In maniera predefinita, viene selezionata l‟opzione “Connetti automaticamente” (“Connect automatically”). Ciò... - Seite 137 ITALIANO Inserire la password WPA predefinita (presente sul retro del router wireless) nel campo “Chiave di sicurezza” (“Security key”) e fare clic su „OK‟. Il client inizierà a connettersi alla rete wireless. Per verificare lo stato della connessione senza fili, è possibile cliccare sull‟icona „Rete‟...
- Seite 138 Network”) di Windows Vista con Service Pack 1. Cliccare sull‟icona „rete‟ sulla barra delle applicazioni e su “Elenco reti senza fili disponibili”. Selezionare la rete “C300BRS4A” dall‟elenco e cliccare su „Connetti‟. Inserire la password WPA predefinita (presente sul retro del C300BRS4A) nel campo “Chiave di sicurezza”...
- Seite 139 ITALIANO Una volta stabilita la connessione, è possibile salvare la rete come predefinita e consentire che si avvii automaticamente all'accensione del computer. Cliccare su „Chiudi‟ („Close‟) per uscire dalla procedura guidata. Per verificare lo stato della connessione senza fili, è possibile cliccare sull‟icona „Rete‟...
- Seite 140 ITALIANO 6.3 Connessione automatica con WPS Il router wireless di Conceptronic supporta il sistema d‟installazione protetta WPS (Wi-Fi Protected Setup). Il sistema WPS è uno standard per l‟installazione facile e sicura di reti senza fili. Con il sistema WPS è...
- Seite 141 ITALIANO 7. Inoltro delle porte Il router wireless Conceptronic è dotato di un firewall integrato per prevenire attacchi da Internet verso la rete. Detto firewall blocca automaticamente tutto il traffico in entrata su porte non utilizzate. Quando una porta bloccata è richiesta per un servizio o un‟applicazione (per esempio: un FTP o un server Web) è...
- Seite 142 ITALIANO Inoltro porta singola Selezionare l‟opzione „Inoltro porta singola‟ nella barra del menu avanzato a sinistra. La configurazione “Inoltro porta singola” („Single Port Forwarding‟) sarà visualizzata a schermo: Nota: Nell‟immagine soprastante, è riportato solo un esempio di alcune regole di inoltro di porte. É...
- Seite 143 ITALIANO Una volta configurate le regole, cliccare su “Applica” (“Apply”) per salvare la configurazione di inoltro della porta. Nota: Per accertarsi che le regole configurate siano eseguite correttamente, si consiglia di riavviare il router una volta configurate le regole di inoltro delle porte. Inoltro di una serie di porte ...
- Seite 144 Una volta riavviato il router, tutte le impostazioni sono salvate e le regole del server virtuale saranno applicate. Le regole di inoltro delle porte definite sono pronte per essere utilizzate. Nota: Per una spiegazione più esaustiva delle caratteristiche e delle impostazioni del C300BRS4A, si rinvia al manuale d‟uso dettagliato (solo in inglese) sul CD-ROM del prodotto.
- Seite 145 Contact : Contacte o suporte da Conceptronic Para informações gerais sobre os produtos da Conceptronic visite a página Web da Conceptronic em www.conceptronic.net. A informação contida neste manual baseia-se no Windows 7 e no Windows Vista, mas pode ser diferente do seu computador se estiver a usar um sistema operativo diferente.
-
Seite 146: Conteúdo Da Embalagem
PORTUGUÊS 1. Conteúdo da embalagem Existem os seguintes elementos na embalagem do router sem fios da Conceptronic: Router sem fios da Conceptronic (C300BRS4A v2.0) 2 antenas para o router sem fios Fonte de alimentação 9V CC, 1 A ... -
Seite 147: Painel Traseiro
PORTUGUÊS 2.2 Painel traseiro Nº Descrição Explicação Antenas sem fios (2) Duas antenas fixas para transmissão sem fios Ficha de alimentação Para ligar a fonte de alimentação ao router Porta WAN Para ligar a sua ligação de banda larga ao router Portas LAN (1 a 4) Para ligar os/s seu/s dispositivo/s de rede ao router Botão Reset / WPS... - Seite 148 PORTUGUÊS 4. Configuração do computador 4.1 Configurar o endereço IP O router sem fios está equipado com um servidor DHCP incorporado. O servidor DHCP atribui automaticamente um endereço IP a cada computador ligado se esse computador estiver configurado para obter um endereço IP automaticamente. A maioria dos computadores está...
- Seite 149 PORTUGUÊS A janela das propriedades da sua Ligação de Área Local ou da Ligação de Rede em Fios aparece. Seleccione „Internet Protocol Version 4 (TCP/IPv4)‟ (Protocolo de Internet versão 4 (TCP/IPv4)) e clique em „Properties‟ (Propriedades). A janela de propriedades do Protocolo de Internet Versão 4 (TCP/IPv4) aparece. Configure as propriedades para „Obtain an IP address automatically‟...
- Seite 150 PORTUGUÊS 4.2 Verificar a ligação Com a „Command Prompt‟ (Linha de Comandos) do Windows pode verificar se recebeu um endereço IP correcto na sua Ligação de Área Local ou Ligação de Rede Sem Fios. Este exemplo baseia-se no Windows 7 e no Windows Vista com o Service Pack 1.
- Seite 151 PORTUGUÊS Desligue e volte a ligar o cabo de rede ligado ao router e ao seu computador. Renove o endereço IP do seu computador com os seguintes comandos: - „IPCONFIG /RELEASE‟ : isto vai libertar o endereço IP incorrecto - „IPCONFIG /RENEW‟ : isto vai renovar o endereço IP Se os passos anteriores não resolverem o problema do endereço IP, pode repor as configurações predefinidas de fábrica no aparelho com o botão WPS/Reset na parte de trás do aparelho.
-
Seite 152: Configuração Do Router Sem Fios
PORTUGUÊS 5. Configuração do router sem fios Este capítulo descreve a configuração do router sem fios através do assistente de configuração incorporado. Depois de levar a cabo os passos descritos neste capítulo, o seu router está configurado para as suas funções principais. 5.1 Início de sessão Usa-se uma interface com base na web para configurar o router sem fios. - Seite 153 PORTUGUÊS Quando o nome de utilizador e a palavra-passe estiverem correctos, o router sem fios vai mostrar a página principal com o estado do mesmo: Na página principal, pode ver o estado da ligação à internet, o estado do sistema, a versão de firmware e os serviços activados.
- Seite 154 PORTUGUÊS 5.2 Assistente Pode configurar o router sem fios através do Assistente incorporado. Este Assistente vai ajudá-lo a configurar as definições básicas do router sem fios passo a passo. Nota: Antes de iniciar o Assistente, assegure-se de que tem todas as informações sobre a sua ligação à Internet à...
- Seite 155 PORTUGUÊS Por motivos de gestão do sistema, é muito importante uma correcta definição da hora nos registos do sistema. Defina neste passo o Fuso Horário apropriado. Quando terminar, prima “Next” (Seguinte). Seleccione o método de Ligação à Internet que corresponde às configurações do seu fornecedor.
- Seite 156 PORTUGUÊS Ligação – IP Dinâmico H. Quando o seu fornecedor necessitar de uma ligação com IP Dinâmico, seleccione a opção “Dynamic IP” (IP dinâmico). Alguns fornecedores precisam de um Nome do sistema anfitrião específico para as suas ligações. Se o seu fornecedor necessitar de um Nome de sistema anfitrião específico, introduza-o no campo.
- Seite 157 PORTUGUÊS Ligação - PPTP Quando o seu fornecedor necessitar de uma ligação PPTP, seleccione a opção “PPTP”. Introduza a informação pedida: IP Servidor Conta PPTP Palavra-passe PPTP Confirmar palavra-passe Quando terminar, prima “Next” (Seguinte). Ligação – L2TP Quando o seu fornecedor necessitar de uma ligação L2TP, seleccione a opção “L2TP”.
- Seite 158 PORTUGUÊS Pode alterar o SSID do router. O SSID é o nome que é transmitido através da parte Sem Fios. Pode alterar o canal entre o canal 1 e o 13. Se sentir que a ligação está lenta ou a falhar, pode existir outro ponto de acesso na sua área que pode estar a interferir com o seu canal sem fios.
- Seite 159 PORTUGUÊS Segurança – Encriptação WEP N. Se quiser proteger a sua rede com encriptação WEP, seleccione “WEP” na lista desdobrável. Introduza a chave WEP em formato ASCII (introduza: A-Z, 0-9). Nota: Através do Assistente só pode configurar a WEP de 64 Bits. Segurança –...
- Seite 160 No exemplo seguinte, usa-se a opção integrada “Connect to a Network” (Ligar a uma rede) do Windows 7. Clique no ìcone „Network‟ (Rede) na barra de tarefas para ver a lista de ligações de rede sem fios disponíveis. Seleccione a rede “C300BRS4A” na lista e clique em „Connect‟ (Ligar). Por defeito, a opção “Connect automatically” (Ligar automaticamente) já...
- Seite 161 PORTUGUÊS Introduza a frase-chave WPA predefinida (que pode encontrar na base do router sem fios) no campo “Security key” (Chave de segurança) e prima “Ok”. O cliente vai agora iniciar a ligação à rede sem fios. Para verificar o estado da ligação sem fios, pode clicar no ìcone „Network‟...
- Seite 162 Seleccione a rede “C300BRS4A” na lista e clique em „Connect‟ (Ligar). Introduza a frase chave WPA predefinida (que pode encontrar na base do C300BRS4A) no campo “Security key or passphrase” (Chave de segurança ou frase chave) e clique em “Connect” (Ligar).
- Seite 163 PORTUGUÊS Depois de a ligação ser estabelecida, pode escolher guardar a rede e iniciá-la automaticamente sempre que ligar o computador. Clique em „Close‟ (Fechar) para sair do assistente de ligação. Para verificar o estado da ligação sem fios, pode clicar no ícone „Network‟...
- Seite 164 6.3 Ligar automaticamente com WPS O router sem fios da Conceptronic suporta a especificação WPS (Wi-Fi Protected Setup). O WPS é um standard para montar uma rede sem fios de forma fácil e segura. Com o WPS pode configurar e proteger a sua rede sem fios em apenas alguns passos.
- Seite 165 PORTUGUÊS 7. Reencaminhamento de Portas O router sem fios da Conceptronic está equipado com um firewall incorporado para prevenir ataques à sua rede vindos da internet. Este firewall bloqueia automaticamente todo o tráfego de entrada nas portas não usadas. Quando uma porta bloqueada é necessária para um serviço ou aplicação (por exemplo: um servidor FTP ou um servidor WEB), pode criar uma Regra para o Servidor Virtual nas páginas de...
- Seite 166 PORTUGUÊS Reencaminhamento de porta única Seleccione „Single Port Forwarding‟ (Reencaminhamento de porta única) na barra de menus avançados à esquerda. A configuração do „Single Port Forwarding‟ (Reencaminhamento de porta única) vai aparecer no ecrã: Nota: Na imagem anterior, pode ver um exemplo de algumas regras de reencaminhamento de portas. Pode definir até...
- Seite 167 PORTUGUÊS Depois de configurar as regras, prima “Apply” (Aplicar) para guardar a configuração de reencaminhamento de portas. Nota: Para se assegurar que as regras configuradas funcionam correctamente, recomenda-se reiniciar o seu router depois de configurar as regras de reencaminhamento de portas. Reencaminhamento de gama de portas ...
- Seite 168 Depois do router ter reiniciado, todas as configurações são assumidas e as regras de servidor virtual serão aplicadas. As regras de reencaminhamento de portas definidas estão prontas a usar. Nota: Para uma explicação mais detalhada sobre as características e configurações disponíveis no C300BRS4A, consulte o manual do utilizador alargado (só em inglês) no CD-ROM do produto.
- Seite 169 Availability of source code Conceptronic. has exposed the full source code of the GPL licensed software, including any scripts to control compilation and installation of the object code. All future firmware updates will also be accompanied with their respective source code.
- Seite 170 LICENSING INFORMATION GNU GENERAL PUBLIC LICENSE TERMS AND CONDITIONS FOR COPYING, DISTRIBUTION AND MODIFICATION 0. This License applies to any program or other work which contains a notice placed by the copyright holder saying it may be distributed under the terms of this General Public License. The "Program", below, refers to any such program or work, and a "work based on the Program"...
- Seite 171 LICENSING INFORMATION b) Accompany it with a written offer, valid for at least three years, to give any third party, for a charge no more than your cost of physically performing source distribution, a complete machine-readable copy of the corresponding source code, to be distributed under the terms of Sections 1 and 2 above on a medium customarily used for software interchange;...
- Seite 172 LICENSING INFORMATION 9. The Free Software Foundation may publish revised and/or new versions of the General Public License from time to time. Such new versions will be similar in spirit to the present version, but may differ in detail to address new problems or concerns.
- Seite 173 LICENSING INFORMATION GNU LESSER GENERAL PUBLIC LICENSE Version 2.1, February 1999 Copyright (C) 1991, 1999 Free Software Foundation, Inc. 51 Franklin Street, Fifth Floor, Boston, MA 02110-1301 USA Everyone is permitted to copy and distribute verbatim copies of this license document, but changing it is not allowed. [This is the first released version of the Lesser GPL.
- Seite 174 LICENSING INFORMATION For example, on rare occasions, there may be a special need to encourage the widest possible use of a certain library, so that it becomes a de-facto standard. To achieve this, non-free programs must be allowed to use the library. A more frequent case is that a free library does the same job as widely used non-free libraries.
- Seite 175 LICENSING INFORMATION d) If a facility in the modified Library refers to a function or a table of data to be supplied by an application program that uses the facility, other than as an argument passed when the facility is invoked, then you must make a good faith effort to ensure that, in the event an application does not supply such function or table, the facility still operates, and performs whatever part of its purpose remains meaningful.
- Seite 176 LICENSING INFORMATION Otherwise, if the work is a derivative of the Library, you may distribute the object code for the work under the terms of Section 6. Any executables containing that work also fall under Section 6, whether or not they are linked directly with the Library itself.
- Seite 177 LICENSING INFORMATION 9. You are not required to accept this License, since you have not signed it. However, nothing else grants you permission to modify or distribute the Library or its derivative works. These actions are prohibited by law if you do not accept this License.
- Seite 178 Redistributions in binary form must reproduce the above copyright notice, this list of conditions and the following disclaimer in the documentation and/or other materials provided with the distribution. Neither the name of Conceptronic nor the names of its contributors may be used to endorse or promote products derived from this software without specific prior written permission.