Werbung
Verfügbare Sprachen
Verfügbare Sprachen
Inhaltsverzeichnis
Werbung
Inhaltsverzeichnis

Verwandte Anleitungen für BEARWARE 304697


Inhaltszusammenfassung für BEARWARE 304697
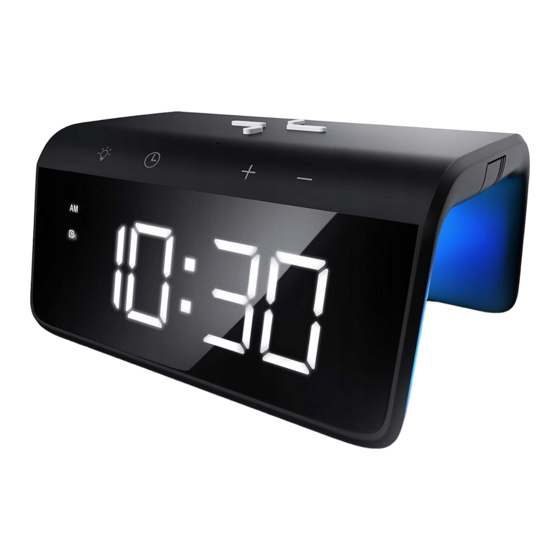
- Seite 1 Wecker mit Wireless Charger Mod.-Nr.: 304697...
-
Seite 2: Inhaltsverzeichnis
Table of contents 1. Deutsch ....................... 3 2. English ....................... 11 3. Français ......................19 4. Italiano ......................27 5. Español ......................35... -
Seite 3: Deutsch
Vielen Dank, dass Sie sich für ein Produkt von Bearware entschieden haben. Damit Sie auch Freude mit dem erworbenen Gerät haben werden, lesen Sie sich bitte die nachfolgende Bedienungsanleitung aufmerksam durch. Prüfen Sie vor Inbetrieb- nahme der gelieferten Ware, ob diese vollständig, fehlerfrei und unbeschädigt ist. - Seite 4 3. Produktdetails Deutsch...
- Seite 5 Nummer Bezeichnung Kabellose Ladefläche Bedienelemente Display USB-Ladeausgang USB Typ-C Stromanschluss Backup-Batteriefach Display und Bedienelemente Nummer Bezeichnung Alarmanzeige 1 und 2 Beleuchtungs-Taste SET-Taste “+”-Taste “-”-Taste Uhrzeit-Anzeige Deutsch...
- Seite 6 4. Inbetriebnahme Entnehmen Sie das Gerät aus der Verpackung und entfernen Sie jegliches Verpa- ckungsmaterial. Legen Sie eine “CR2032”-Batterie (nicht im Lieferumfang enthal- ten) in das Batteriefach (6) an der Seite ein. Achten Sie auf die richtige Polung der Kontakte. Diese Batterie dient zum Speichern eines Backups für die Uhrzeit und des Alarms.
- Seite 7 7. Alarm Einschalten des Alarms Alarm 1 einschalten: Halten Sie die „+“ (10)-Taste gedrückt, bis im Display das Alarmsymbol 1 erscheint. Alarm 2 einschalten: Halten Sie die „-“ (11)-Taste gedrückt, bis im Display das Alarmsymbol 2 erscheint. Ausschalten des Alarms Der Alarm schaltet sich nach 3 Minuten automatisch ab und ertönt am nächsten Tag erneut.
- Seite 8 10. Ladeausgang An der Rückseite des Weckers befindet sich neben dem USB-Typ-C-Stroman- schluss ein USB Typ-A-Ladeausgang. An diesem Ladeausgang können Sie z.B. das Ladekabel Ihres Smartphones an- schließen und Ihr Smartphone daran aufladen. Beachten Sie, dass nur der USB-Typ-A-Ausgang als Ladeausgang gedacht ist und der USB-Typ-C-Anschluss ausschließlich zur Stromversorgung des Weckers dient.
- Seite 9 oder in sonstiger Form beschädigt wurde. Beachten Sie bitte die nationalen Be- stimmungen und Beschränkungen. Nutzen Sie das Gerät nicht für andere Zwecke als die, die in der Anleitung beschrieben sind. Dieses Produkt ist kein Spielzeug. Bewahren Sie es außerhalb der Reichweite von Kindern oder geistig beeinträch- tigten Personen auf.
- Seite 10 WEEE Richtlinie 2012/19/EU WEEE Register-Nr: DE 67896761 Hiermit erklärt die Firma WD Plus GmbH, dass sich das Gerät 304697 in Übereinstimmung mit den grundlegenden Anforderungen und den übrigen einschlägigen Bestimmungen der Richtlinie 2014/53/EU befindet. Eine vollständige Konformitätserklärung erhalten Sie bei: WD Plus GmbH, Wohlenbergstraße 16, 30179 Hannover;...
-
Seite 11: English
Thank you for choosing a Bearware product. Please read the following user man- ual carefully so as to get the most from the product you have purchased. Before using the product, first check that the delivered item is complete, accurate and undamaged. - Seite 12 3. Product details English...
- Seite 13 Number Name Wireless charging area Operating controls Display USB charging output USB Type C power port Backup battery compartment Display and Controls Number Name Alarm display 1 and 2 Light button SET button “+” button “-” button Time display English...
- Seite 14 4. Initial use Take the device out of the package and remove all the packaging material. Insert a "CR2032" battery (not included in the scope of supply) into the battery com- partment (6) at the side. Pay attention to the correct polarity of the contacts. This battery is used for saving a backup of the time and alarm.
- Seite 15 7. Alarm Turning on the alarm Turning on alarm 1: Press and hold the "+" (10) button until the alarm symbol 1 appears in the display. Turning on alarm 2: Press and hold the "-" (11) button until the alarm symbol 2 appears in the display.
- Seite 16 10. Charging port A Type-A USB charging port is provided at the back of the clock next to the USB type C port. You can use this charging port, for example, to connect the charging cable of your smartphone and charge it. Please note that only the Type-A USB port is intended as a charging port and the USB type C port is used only to supply power to the alarm clock.
- Seite 17 The device should only be used by those who have read and understood this user manual. The specifications of the device may be changed without any special prior notification. 13. Disposal instructions In line with the European WEEE directive, electrical and electronic devices should not be disposed of along with domestic waste.
- Seite 18 WEEE directive 2012/19/EU WEEE Register no.: DE 67896761 The company WD Plus GmbH hereby certifies that the device 304697 complies with the fun- damental requirements and all other relevant stipulations of the directive 2014/53/EU. A complete conformity statement can be obtained from: WD Plus GmbH, Wohlenbergstraße 16, 30179 Hannover;...
-
Seite 19: Français
Nous vous remercions d'avoir choisi un produit Bearware. Pour que vous puissiez profiter longtemps de l'appareil acquis, veuillez lire attentivement le mode d'em- ploi suivant. Avant la mise en service du produit livré, vérifiez s'il est complet, sans défauts et intact. - Seite 20 3. Détails du produit Français...
- Seite 21 Numéro Désignation Surface de charge sans fil Éléments de commande Écran d’affichage Port de charge USB Câble d’alimentation USB type C Compartiment de batterie de sauvegarde Affichage et éléments de commande Numéro Désignation Affichage d’alarme 1 et 2 Touche d'éclairage Touche SET Touche «...
- Seite 22 4. Mise en service Sortez l'appareil de l'emballage et retirez tout matériau d'emballage. Placez une batterie « CR2032 » (non comprise dans le contenu de la livraison) dans le compar- timent de batterie (6) sur le côté. Veillez ce faisant à la polarité correcte des raccor- dements.
- Seite 23 7. Alarme Activation de l’alarme Activer l’alarme 1 : Maintenez la touche « + » (10) enfoncée jusqu’à ce que le sym- bole d’alarme 1 apparaisse sur l'écran. Activer l’alarme 2 : Maintenez la touche « - » (11) enfoncée jusqu’à ce que le sym- bole d’alarme 2 apparaisse sur l'écran.
- Seite 24 10. Sortie de charge Une sortie de charge USB de type A se trouve à côté de la prise de courant USB de type C à l'arrière du réveil. Vous pouvez connecter par exemple le câble de charge de votre smartphone à cette sortie de charge et charger votre smartphone.
- Seite 25 pas le produit à d'autres fins que celles décrites dans le mode d'emploi. Ce produit n'est pas un jouet. Maintenez-le hors de la portée des enfants ou des personnes handicapées sur le plan mental. Toute réparation ou modification qui n'est pas effectuée par le fournisseur initial entraîne l'annulation de la garantie.
- Seite 26 Directive DEEE 2012/19/UE Numéro de registre DEEE : DE 67896761 Par la présente, WD Plus GmbH déclare que l'appareil 304697 est conforme aux exigences essentielles et aux autres dispositions pertinentes de la directive 2014/53/UE. Pour obtenir une déclaration de conformité complète, adressez-vous à : WD Plus GmbH, Wohlenbergstraße 16, 30179 Hanovre ;...
-
Seite 27: Italiano
Grazie per aver scelto un prodotto di Bearware. Per utilizzare con soddisfazione il prodotto acquistato, si prega di leggere attentamente le seguenti istruzioni per l'uso. Prima della messa in funzione della merce consegnata, verificare che sia in- tegra, esente da difetti e non danneggiata. - Seite 28 3. Dettagli del prodotto Italiano...
- Seite 29 Numero Descrizione Superficie di ricarica wireless Elementi di comando Display Uscita di carica USB Connessione elettrica USB tipo C Vano della batteria di backup Display ed elementi di controllo Numero Descrizione Visualizzazione allarme 1 e 2 Tasto illuminazione Tasto SET Tasto "+"...
- Seite 30 4. Messa in funzione Rimuovere il prodotto dall'imballaggio e togliere qualsiasi materiale d'imballaggio. Inserire una batteria "CR2032" (non inclusa nel volume di fornitura) nel vano bat- terie (6) sul retro. Prestare attenzione alla corretta polarità dei contatti. La batteria viene utilizzata per salvare il backup dell’orario e dell'allarme. Collegare la sveglia tramite il cavo USB-A fino a USB tipo C in dotazione, a una fon- te di alimentazione adatta, per esempio all’adattatore dello Smartphone.
- Seite 31 7. Allarme Attivazione dell'allarme Attivare l’allarme 1: tenere premuto il tasto "+” (10) fino a che sul display viene visualizzato il simbolo allarme 1. Attivare l’allarme 2: tenere premuto il tasto "-” (11), fino a che sul display viene visualizzato il simbolo allarme 2. Disattivazione dell'allarme L'allarme si interrompe automaticamente dopo 3 minuti e suona di nuovo il giorno dopo alla stessa ora.
- Seite 32 10. Uscita carica Sul retro della sveglia accanto al collegamento elettrico USB tipo C, si trova una uscita di carica di tipo A. Mediante questa uscita di carica è possibile, per esempio, ricaricare lo smart- phone tramite il cavo di ricarica. Tenere presente che solo l’uscita USB di tipo A è...
- Seite 33 per gli scopi descritti nelle istruzioni. Questo prodotto non è un giocattolo. Conser- varlo fuori dalla portata di bambini o persone con capacità mentali limitate. Ogni riparazione o modifica al prodotto non effettuata dal fornitore originale comporta l'estinzione dei diritti di garanzia. Il dispositivo può...
- Seite 34 Direttiva RAEE 2012/19/UE Numero reg. RAEE: DE 67896761 Con la presente la ditta WD Plus GmbH dichiara che il dispositivo 304697 è conforme ai requi- siti essenziali e alle rimanenti disposizioni in materia come stabilito dalla direttiva 2014/53/ UE. Una dichiarazione di conformità completa è disponibile presso: WD Plus GmbH, Woh- lenbergstraße 16, 30179 Hannover;...
-
Seite 35: Español
Muchas gracias por escoger un producto de Bearware. Para que pueda disfrutar de su adquisición, le rogamos que lea atentamente las siguientes instrucciones de uso. Antes de ponerlo en marcha, compruebe que el producto suministrado no presenta defectos ni daños. - Seite 36 3. Detalles del producto Español...
- Seite 37 Número Denominación Superficie de carga inalámbrica Elementos de mando Pantalla Salida de carga USB Conexión a red USB Tipo C Compartimento para las pilas Pantalla y controladores Número Denominación Señal de alarma 1 y 2 Botón de iluminación Botón SET Botón «+»...
- Seite 38 4. Puesta en marcha Saque el aparato del embalaje y retire todo el material de embalaje. Coloque una pila «CR2032» (no incluida) en el compartimento para pilas (6) situado en el lateral. Preste atención a la colocación correcta de la pila. Esta pila sirve para guardar una copia de seguridad de la hora y la alarma.
- Seite 39 7. Alarma Conectar la alarma Conectar la alarma 1: Mantenga el botón «+»(10) pulsado, hasta que aparezca el símbolo de alarma 1 en la pantalla. Conectar la alarma 2: Mantenga el botón«-» (11) pulsado, hasta que aparezca el símbolo de alarma 2 en la pantalla. Desconectar la alarma La alarma se detiene de forma automática transcurridos 3 minutos y vuelve a sonar a la misma hora del día siguiente.
- Seite 40 10. Salida de carga En la parte posterior del despertador hay, junto a la conexión de red USB-tipo C-, una salida de carga USB de tipo A. En este podrá, por ejemplo, conectar el cable de carga de su teléfono inteligente para cargarlo.
- Seite 41 que no haya sido llevada a cabo por el proveedor da lugar a la rescisión de los derechos de garantía. El dispositivo solo debe ser utilizado por personas que han leído y entendido este manual. Las especificaciones del dispositivo pueden cambiarse sin que sea necesa- rio realizar un aviso previo.
- Seite 42 Directiva WEEE 2012/19/UE Número de registro WEEE: DE 67896761 La empresa WD Plus GmbH declara por la presente que el aparato 304697 satisface los re- quisitos esenciales y el resto de disposiciones pertinentes según lo establecido en la directiva 2014/53/UE. Solicite una declaración de conformidad completa en: WD Plus GmbH, Wo- hlenbergstraße 16, 30179 Hannover, (Alemania);...
- Seite 43 Notes...
- Seite 44 DOWNLOADS & MANUALS WD Plus GmbH • Wohlenbergstraße 16 • D-30179 Hannover V1.0...